
Related Manuals for Trane SCIH


Summary of Contents for Trane SCIH
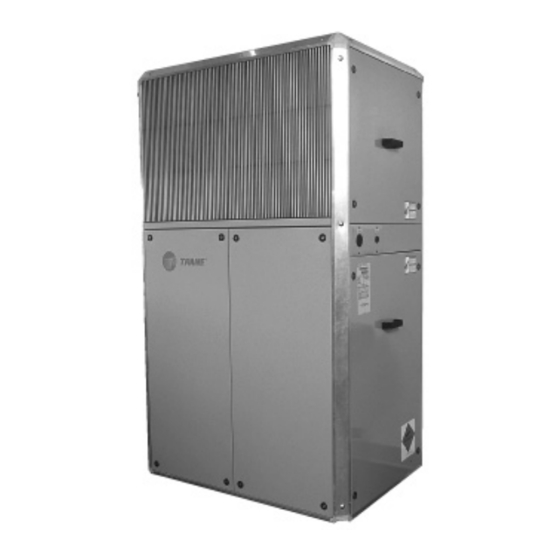
- Page 1 Installation, Operation, and Maintenance Integral Air-Cooled Self-Contained Unit Model SCIH “ AO” and later design sequence SXIH-SVX01B-EN September 2007...
-
Page 2: Installation
_ _ _ _ _ _ _ _ _ _ _ _ _ _ _ _ _ _ _ _ _ _ _ _ _ _ _ _ _ _ _ _ _ _ _ _ _ _ _ _ _ _ _ _ _ _ _ _ _ _ _ _ _ _ _ _ _ units, model SCIH. This is the second... -
Page 3: Table Of Contents
contents Cross reference to related publications: • Integral Air-Cooled Self-Contained Product Catalog, PKG-PRC009-EN Installation ……………………………………………………………2 general information ……………………………………………2 pre-installation considerations ………………………………7 dimensions and weights ……………………………………8 mechanical requirements ……………………………………12 electrical requirements ………………………………………13 installation procedure ………………………………………15 pre-startup requirements ……………………………………19 startup …………………………………………………………20 Operation ……………………………………………………………21 sequence of operation ………………………………………21 Maintenance…………………………………………………………22 general information …………………………………………22... -
Page 4: General Information
general Installation information Integral Air-Cooled Model Number Description Following is a complete description of the integral air-cooled unit model number. Each digit in the model number has a corresponding code that identifies specific unit options. S C I 0 7 5 3 1 A 0 1 2 3 4 5 6 7 8 9 10 11... - Page 5 general Installation information Accessory Model Number Description Following is a complete description of the integral air-cooled accessory model number. Each digit in the model number has a corresponding code that identifies specific unit options. P V I H A A 1 1 1 A0 1 2 3 4 9 10...
- Page 6 General Information Control box access is from the front of the unit to ease electrical hook-up. The integral air-cooled unit, model SCIH, is a high efficiency, vertical air cooled air conditioner. Units have either front or top Controls discharge configuration options and easy The standard control panel consists of a service access.
-
Page 7: Pre-Installation Considerations
Allow adequate space for service and and consignee. Installation Preparation operating clearances. Reference Notify your Trane representative of “Service Access” section on this page. Before installing the unit, perform the the damage and arrange for repair. Make provisions for correct supply... -
Page 8: Dimensions And Weights
CONDENSER DISCHARGE SIDE CONDENSER ACCESS RETURN CONDENSER COIL FORKLIFT ACCESS 2.76 2.76 back view side view front view SCIH Unit Dimensions & Weights, in-lbs. Ship. Oper. Unit Size Wgt. Wgt. 5 ton 42.72 9.29 17.99 8.15 15.70 Model SCIH 7 .5 ton 56.69 20.63 20.63 18.92 18.92... - Page 9 Installation and weights supply airflow SCIH Component water coil outlet Overview vent airflow supply airflow inlet filter frame airflow low ambient damper airflow back of unit SXIH-SVX01B-EN...
-
Page 10: Dimensions And Weights
7 .5 ton x 12 10 & 15 ton x 12 Low Ambient Damper Note: Low ambient damper is field-installed. SCIH Low Ambient Damper Dimensions & Weight, in-lbs. Unit Size Weight 5 & 7.5 ton 10 & 15 ton SXIH-SVX01B-EN... -
Page 11: Hot Water Coil
Hot Water Coil 2. Coil connections are mirror-image and can be 3.239 mounted with either left or right-hand connections. CONNECTION CONNECTION SCIH Hot Water Coil Dimensions & Weight, in-lbs. Unit Wet Coil Dry Coil Size Weight Weight Notes: 1. -
Page 12: Mechanical Requirements
90B). absorbing devices. Make duct connections with a flexible material such as heavy canvas. If a fire hazard exists, Trane recommends using WARNING Flexweave 1000, type FW30 or equiva- Hazardous voltage! lent canvas. Use three inches for the... -
Page 13: Electrical Requirements
electrical Installation requirements MFS = 2.25 x largest motor amps (FLA or Supply Power Wiring RLA) + the sum of the remaining motor It is the installer’s responsibility to WARNING amps. provide power supply wiring to the unit. Ground Wire! Wiring should conform to NEC and all If the rating value determined does not All field-installed wiring must be... - Page 14 electrical Installation requirements Table I-ER-1. Integral Air-Cooled Standard Motor Electrical Data Condenser Evaporator Unit Compressor Fan Motor Fan Motor Size Voltage MCA MFS 208-230/60/3 19.3 135.0 4.42 3.15 31.7 460/60/3 61.8 2.00 1.42 13.7 575/60/3 49.4 1.60 1.14 11.0 7 .5 208-230/60/3 25.0 179.0 5.81...
-
Page 15: Installation Procedure
Installation Installation Procedure Installation Checklist Electrical Requirements 3. Remove the bolts holding the fan scroll Verify that the electrical power supply to support channels. Lift fan out through The checklist listed below is a summary characteristics comply with the unit the front of the unit. - Page 16 Installation Installation Procedure Low Ambient Damper 2. Apply the soft gasket material provided provided. Be sure the damper actuator Installation around the damper as shown. is in the closed position when installing. 3. Place the damper over the discharge 5. Connect the capillary tube to the Reference Figure I-IP-2 and follow the opening using the screws ( ”)
- Page 17 Installation Installation Procedure Hydronic Coil Installation removing the upper and lower filter support brackets. Reference Figure I-IP-3 and follow the 6. The hydronic coil can be installed for procedure below to install the hydronic either right or left-hand connections. coil. However, steam coils must have the 1.
- Page 18 Installation Installation Procedure Plenum Installation 3. Tighten the screws provided as shown. Use screws on the rear, right, and left Reference Figure I-IP-4 and follow the sides through the pilot holes on the procedure below to install the plenum. plenum panels. 1.
-
Page 19: Pre-Startup Requirements
Pre-Startup Installation Requirements Pre-Startup Checklist Unit Location Ensure the unit location is adequate for Complete this checklist after installing the unit dimensions, ductwork, piping, and unit to verify all recommended electrical connections. installation procedures are complete Ensure access and maintenance before unit startup. -
Page 20: Startup
Installation Startup Unit Startup Procedures Note: These units are equipped with high efficiency scroll compressors. Check for proper scroll rotation prior to operating WARNING this unit. Hazardous voltage! Disconnect all electric power, including remote disconnects before WARNING servicing. Follow proper lockout/ Rotating Components! tagout procedures to ensure the During installation, testing, servicing... -
Page 21: Operation
Sequence of Operation Operation Sequence of Operation the condensing unit from running, regardless of the thermostat tempera- The thermostat controls the unit ture setting. The evaporator fan may operation. It has both manual and circulate air if the fan switch is in the On automatic switches so the thermostat position. -
Page 22: Maintenance
general Maintenance information Table M-GI-1. Integral Air-Cooled General Data Nominal Tons ARI capacity - btu/h 60,600 91,000 121,900 177,200 (S)EER 10.47 10.36 10.38 9.76 R22 charge/circuit (lbs.) 14.3 11.7 Shipping weight – lbs. 1087 1495 1897 Operating weight – lbs. 1027 1445 1767... -
Page 23: Maintenance Procedures
maintenance Maintenance procedures Maintenance Procedures manufacturer instructions as closely as and debris form both sides of the coil. possible to avoid potential damage to the 4. Straighten coil fins with fin comb as Before beginning any maintenance coil. required. procedures heed all warnings and 5. - Page 24 Refrigerant System • To assist in reducing power generation In the event of required system repair, emissions, always attempt to improve Follow the Trane recommended leak test the liquid line, evaporator coil, equipment performance with improved procedures on operation, maintenance,...
-
Page 25: Maintenance Procedures
maintenance Maintenance procedures CAUTION CAUTION Compressor damage! Compressor damage! Do not use a Meg ohm meter or apply Do not allow liquid refrigerant to enter power to the winding of a compressor the suction line. Excessive liquid may while it is under a deep vacuum. This damage the compressor. -
Page 26: Periodic Checklists
periodic Maintenance checklists Periodic Checklists Note: Perform this procedure monthly if the unit is in a coastal or corrosive Monthly Checklist environment. The following checklist provides the recommended maintenance schedule to Annual Maintenance keep the unit running efficiently. Check and tighten all set screws, bolts, locking collars and sheaves. -
Page 27: Troubleshooting
maintenance Maintenance procedures Troubleshooting Use the following steps and procedures to help correct these common problems. WARNING Hazardous voltage! Disconnect all electric power, including remote disconnects before servicing. Follow proper lockout/tagout procedures to ensure the power can not be inadvertently energized. Failure to disconnect power before servicing could result in death or serious injury. - Page 28 maintenance Maintenance procedures WARNING Hazardous voltage! Disconnect all electric power, including remote disconnects before servicing. Follow proper lockout/tagout procedures to ensure the power can not be inadvertently energized. Failure to disconnect power before servicing could result in death or serious injury. Problem Remedy Insufficient cooling...
- Page 29 Trane A business of American Standard Companies www.trane.com Trane has a policy of continuous product and product data improvement and reserves the right to change design and specifications without notice. For more information, contact your local Trane office or e-mail us at comfort@trane.com...