Table of Contents
Advertisement
Quick Links
Advertisement
Table of Contents

Related Manuals for BenQ Joybook S33 Series


Summary of Contents for BenQ Joybook S33 Series
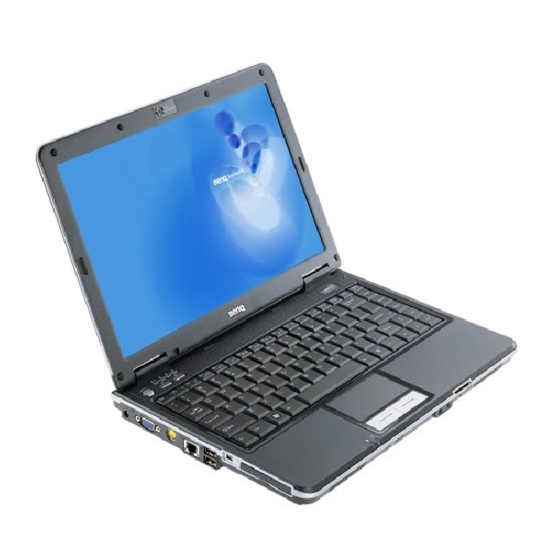
- Page 1 Joybook S33 Series User Manual Welcome...
- Page 2 Copyright Joybook models covered by this manual Copyright 2008 by BenQ Corporation. All rights reserved. No part of this publication may be reproduced, transmitted, This manual contains the information about the following transcribed, stored in a retrieval system or translated into any...
-
Page 3: Table Of Contents
Using QShot in WebCam Companion ......39 Turning off your Joybook properly ......... 18 Using QShot in CyberLink PowerDVD ......39 Using Windows Mobility Center ..........19 Using BenQ Surround.............. 40 Using your Joybook..............20 Using BIOS setup ................. 41 Using the touchpad..............20 When and how to use BIOS setup........... - Page 4 Cleaning your Joybook............. 66 Backing up your system into a disc......46 Service and support..............67 Creating a restore point..........47 BenQ Joybook Global Online Service........67 Restoring your system............47 Joybook Overseas Regional Warranty (ORW) online Restoring your system to factory default settings ..47 registration ................
-
Page 5: Overview
Overview About this book Connecting to Information about how to external display connect your Joybook to This book provides you the main information about various devices external display devices. components in your Joybook and demonstrates how to use them. The following are the major chapters of this book. Installing additional Information about how to add memory... -
Page 6: Typographics
Typographics The usage of notes, tips, and warnings in this manual is specifically for different purposes, which are described as follows: Icon/ Item Meaning Symbol Warning Information mainly to prevent the damage to components, data, or personal injury caused by misuse and improper operation or behavior. -
Page 7: Getting Started
Getting started Getting your Joybook ready Depending on the model of your Joybook, the appearance may be different from the illustrations shown in this manual. for use Package contents 1. Installing the battery pack Before using your Joybook for the first time, please check if you Battery retainer A have all the items with you. -
Page 8: Connecting The Power
2. Connecting the power • Power systems and plug types may vary depending on your country/region. • When the battery is charging, the battery indicator lights up in amber. When the battery is fully charged, the light goes off. Connect the power cord to the power adapter. •... - Page 9 Press the Power button to start up your Joybook, and then follow the on-screen instructions to complete the initial Windows Vista setup. • Your Joybook S33 Series works best with Windows Vista® Home Basic, Windows Vista® Home Premium, Windows Vista® Business, or Windows Vista® Ultimate. Installing other...
-
Page 10: Expanding The Capabilities Of Your Joybook
Expanding the capabilities of your Joybook Access local area network (LAN) by connecting a network cable Connect an external display device (such as a monitor or to the LAN port of your Joybook. projector) to the 15-pin D-sub video socket of your Joybook. Insert an ExpressCard/34 module or ExpressCard/54 module to Connect a telephone line to the modem port of your Joybook further expand the capabilities of your Joybook. - Page 11 Connect a microphone to the microphone input socket to Use the optical drive to access data on various kinds of discs and record sounds. enjoy movies or music. Insert a Memory Stick, Memory Stick Pro, SD, or MMC Connect an earphone to the audio output socket to output memory card following the direction indicated on the card to sounds.
- Page 12 Connect digital camcorders and high-speed storage equipment Output video images on your Joybook to a TV or A/V device to this IEEE 1394 (FireWire) Port. that has an S-Video Input socket by connecting it to the S-Video Out socket on your Joybook. Unless you intend to use the sound reproduction output of the built-in Joybook speakers, you will also need to separately connect the Joybook audio output socket to an appropriate...
-
Page 13: Touring Your Joybook
QEye, (12) with one touch. For details, refer to "Using QShot" on page BenQ Surround Allows you to turn on or turn off SRS TruSurround XT in your Sound Manager with one touch. Keyboard Touchpad Refer to "Using the touchpad"... - Page 14 Indicators (10) Four-in-One memory card slot Refer to "Indicators" on page 16 for details. For a Memory Stick, Memory Stick Pro, SD, or MMC memory card. Wireless button (11) LCD (Liquid Crystal Display) panel Press this button to activate/deactivate wireless devices like Bluetooth and WLAN.
-
Page 15: Left Side View
Left side view Left-side components S-Video Out socket Allows the Joybook to output video signals to S- Power socket Video capable devices, such as a television set or For connecting AC power supply to power the VCR. Joybook and charge the battery. For details, refer to "S-Video output"... - Page 16 ExpressCard slot LAN (Local Area Network) port (RJ-45 This ExpressCard slot accepts two formats of the connector) standard ExpressCard modules: ExpressCard/34 Allows the Joybook to connect to a 10/100/ and ExpressCard/54. The ExpressCard/34 1000Mbps fast Ethernet 1000BASE-T network. module is characterized by its 34 mm width, and Please be careful to avoid plugging a RJ-11 phone the ExpressCard/54 module is characterized by its cable connector in the RJ-45 port.
-
Page 17: Right Side View
Right side view (3) (4) Right-side components DVD/CD-RW Combo/DVD Super-Multi drive (available on selected models) The type of the optical drive varies by model, and the Modem port (RJ-11 connector) support of disc types depends on the optical drive that Accepts an analog telephone line for use with the comes with your Joybook. -
Page 18: Rear View
Rear view Optical drive ejection button Discs can be inserted/ejected by pressing this ejection button. Manual tray opening If you wish to open the disc tray when your Joybook power is off, or it can't be opened using the ejection button, insert a pointed object (like an opened paper clip) into the tray ejection hole next to the ejection button to release the disc tray. -
Page 19: Bottom View
Battery retainer B • For more information about adding additional Secures the battery in place. memory, the limit of maximum memory, or the types of BenQ certified memory modules for your Joybook, refer to "Installing additional memory" on page Touring your Joybook... -
Page 20: Indicators
Indicators (2) (3) (4) Indicators Scroll Lock indicator Lights up in blue when the <Scr Lk> key is Power button indicator enabled. • When the system is on, it lights up in blue. • When the system is in Sleep mode, it lights up in amber. - Page 21 (1) (2) Indicators Wireless button indicator • When the wireless LAN is turned on, it lights up Battery indicator in blue. • When the system is on and the battery is in use, • When Bluetooth is turned on, it lights up in it lights up in blue.
-
Page 22: Getting Started With Windows Vista
Getting started with Windows Vista Depending on your purchased model, your Joybook may come • How to setup scheduled events for system maintenance. pre-installed with the latest Microsoft operating system: Turning off your Joybook Windows Vista® Home Basic, Windows Vista® Home Premium, Windows Vista®... -
Page 23: Using Windows Mobility Center
Using Windows Mobility 4. On the Advanced settings tab, double-click Power buttons and lid to expand this category. Center 5. Then, double-click Start menu power button to expand this item. Windows Mobility Center is a convenient location where you 6. To specify the action to take when you press the Start menu can quickly access your Joybook's settings, such as brightness, power button, click On battery or Plugged in, and then select volume, battery status, and wireless network, etc. -
Page 24: Using Your Joybook
Using your Joybook Using the touchpad Component Function Touchpad Moves the pointer, selects or activates items on the screen. Left touchpad Equivalent to the left button of button an optional external mouse. Right touchpad Equivalent to the right button button of an optional external mouse. -
Page 25: Using The Wireless Button
Using the Wireless button Function Left Right Touchpad The Wireless button allows you to turn on or turn off the touchpad touchpad wireless radio. By default, the button is "OFF" when your button button Joybook starts up. Select Click once. Tap once. -
Page 26: Using The Keyboard
Using the keyboard Function hotkeys You can use the function hotkeys to access commonly used functions or make quick settings. To use the hotkeys, press and hold the <Fn> (Function) key at the lower left corner of the keyboard, and then press the desired hotkey. The appearance of the keyboard legend may vary depending on the country/region of your purchase. - Page 27 Function hotkey Description Function hotkey Description <Fn> + <F1> Opens function hotkeys online help. <Fn> + <F8> Decreases volume. <Fn> + <F2> Puts your Joybook into sleep mode. <Fn> + <F9> Increases volume. <Fn> + <F3> Switches display between the screen <Fn>...
-
Page 28: Windows Keys And Lock Keys
Windows keys and lock keys Using your Joybook... - Page 29 Function hotkey Description Function hotkey Description Windows key Activates the Run dialog box. Functionally equivalent to clicking the Start button on the Windows desktop. Press and hold the Windows key, and Num Lk Activates or deactivates the numeric + Tab then press Tab to switch between keypad integrated in the keyboard windows.
-
Page 30: Using Built-In Wireless Connectivity (Available On Selected Models)
Using built-in wireless connectivity (available on selected models) With the built-in wireless connectivity of your Joybook, you can 2. Press the Wireless button on your Joybook to enable access other wireless network enabled devices (such as Access the WLAN. Point network stations, Notebook computers, Personal Digital Assistants, or digital projectors) wirelessly without the constraints of network cables. - Page 31 There are other ways for the Joybook to connect with a network. 6. Click Wireless in the Show list. A list of available wireless "LAN (Local Area Network) port (RJ-45 connector)" on page networks will be displayed. "Modem port (RJ-11 connector)" on page 7.
-
Page 32: Using Bluetooth (Available On Selected Models)
Using Bluetooth (available on selected models) • The maximum effective range of connection between your The Bluetooth function allows you to get connected to various Joybook and the Bluetooth device is 10 meters. devices and services that support Bluetooth transmission. You can connect wirelessly without the need for data cables when 4. - Page 33 5. If your Bluetooth device is already turned on and 6. Please wait while Windows is searching for available discoverable, place a check mark in the My device is set up Bluetooth devices. and ready to be found checkbox, and then click Next. Using your Joybook...
- Page 34 7. Select the Bluetooth device that you want to add, and then 8. Refer to the documentation that came with your Bluetooth click Next. device to determine if there is a pre-defined passkey. If not, you can select Choose a passkey for me. Using your Joybook...
- Page 35 9. Windows will generate a passkey. When you are prompted to 10.The Bluetooth device is now connected to your Joybook. enter a passkey on your Bluetooth device, follow the on- Click Finish to complete. screen instructions to enter the passkey. Using your Joybook...
-
Page 36: Sending A File To A Bluetooth Device
Sending a file to a Bluetooth device 2. Click Browse to select the location to which you want to send the file, and then click Next to continue. If your Bluetooth device is capable of sending and receiving data, such as a mobile handset, you can use the Bluetooth connectivity to transfer data wirelessly between your Bluetooth device and Joybook. - Page 37 3. The file will be sent to the location you specified. 4. Click Finish to complete. The example shown above is specifically for connecting to a mobile handset. To connect to other types of Bluetooth devices, refer to the online Help for details. Using your Joybook...
-
Page 38: Using The Built-In Webcam (Qeye)
Using the built-in webcam (QEye) Main screen Your Joybook comes with a built-in 2.0 megapixel webcam on the inside top of the lid, above the screen. With the webcam, you The Main screen in any module contains the following icons can capture still images, record videos, and chat online. -
Page 39: Capturing Still Images Or Recording Videos
Capturing still images or recording videos Settings Adjusts the capture 1. Launch 'WebCam Companion 2' by clicking Start, All settings, such as file Programs, the ArcSoft WebCam Companion 2 folder, and format, resolution, then click WebCam Companion 2. audio devices, video 2. -
Page 40: Monitoring
Monitoring Main features The Monitor module detects any movement that is visible to the • Face Tracking : This feature can detect and place focus on webcam and records it automatically. An e-mail or text message the face, which effectively recognize and track the human face alert will be sent at the same time. -
Page 41: Adjusting Resolution
Adjusting resolution format. Files are saved to a QShot folder on the desktop by default. For details, refer to "Using the main features of QShot" When the CPU performance is low, the message below may on page 37 "Capturing desktop images" on page appear on the screen. - Page 42 • Medium: saves your captured image/video files in • Stop Recording: Press the QShot button again or medium quality. press the <ESC> key to stop recording. • Low: saves your captured image/video files in low • Target On: quality. • Desktop: captures the entire desktop. A higher quality setting increases the file size.
-
Page 43: Capturing Desktop Images
• Shutter Sound: plays a shutter sound once you activate 4. The captured image file will be saved to the QShot folder. • Captured image files are saved in the BMP file format. the capturing. • The size of the captured image depends on the window size. Capturing desktop images •... -
Page 44: Using Benq Surround
Using BenQ Surround BenQ Surround is a quick access button on your Joybook that allows you to turn on or turn off SRS TruSurround XT in your Sound Manager with one touch. To adjust the advanced settings, double-click the icon... -
Page 45: Using Bios Setup
To run BIOS setup, press the <F2> key immediately when the features. BenQ logo appears on the screen during system startup. The logo shows up on the screen for only a few seconds, so you must BIOS settings are specific to your Joybook hardware. Do NOT press the <F2>... -
Page 46: Navigating The Bios Setup Screen
There are 2 items arrow keys (!, ") included as follows. a. Quiet Boot: This item controls the display of BenQ logo during system boot. • When enabled, BenQ logo will be displayed during system boot. -
Page 47: Security Menu
• To select a boot device manually, press the <F9> key when the supports enhanced C-state, which determines the BenQ logo appears on the screen during system startup. The power management of CPU. Boot Menu will appear. Use the up and down arrow keys (!, If you are not familiar with the items in Advanced menu, you are ") to select a boot device, and then press <Enter>... -
Page 48: Boot From Lan
Boot from LAN During system startup, pressing <F12> will activate Boot from LAN feature, enabling your Joybook to boot from an OS image via the network. Using BIOS setup... -
Page 49: Recovering Your System Using Qdatatrove
1. Start your Joybook and boot into Windows Vista. and drivers into a disc. For details, refer to "Creating recovery 2. Click Start, All Programs, and then find the BenQ and discs or Application and Driver DVD" on page QDataTrove folders. In the QDataTrove folder, click •... -
Page 50: Using Qdatatrove In Windows Vista
Select a disc type from the Disc Category drop-down • By default, backup files will be placed under "D:\BenQ menu. User\System Drive", so make sure your D: drive has sufficient b. -
Page 51: Creating A Restore Point
Creating a restore point Restoring your system to factory default settings Restore Points are the earlier states of your Joybook's system QDataTrove allows you to restore your system drive (C: drive) to drive created by System Protection featured in Windows Vista the factory default configuration. -
Page 52: Restoring Your System From A Restore Point
4. A confirmation message appears. To proceed with the 3. Follow the remaining on-screen instructions to complete the operation, click Yes. operation. 5. Follow the remaining on-screen instructions to complete the Creating recovery discs or Application operation. and Driver DVD Restoring your system from a restore point To use this function, your Joybook must come with a CD/DVD QDataTrove allows you to restore your system drive (C: drive) to... -
Page 53: Creating A User Recovery Cd/Dvd
2. Select a disc type from the Disc Category drop-down menu. 5. The disc burning process starts. A Create User Recovery CD/ Click OK to proceed. DVD window appears on the screen and displays the current 3. Insert a blank disc when prompted to do so, and then click status. -
Page 54: Protecting Your Joybook From Viruses And Other Security Threats
For more information about how to use QDataTrove, refer to the online help. Protecting your Joybook from viruses and other security threats Your Joybook may come pre-installed with an anti-virus software, which can help you avoid unexpected destruction of your precious data in the Joybook and keeps your privacy against any unauthorized access from other computers. -
Page 55: Connecting To External Display Devices
Connecting to external display devices Connecting to a VGA display device You can output your Joybook's video signal to an external display device, such as a projector or monitor. Once the VGA cable is connected properly, simultaneous display will be available on your Joybook and the external display device automatically. Pressing the <Fn>... -
Page 56: S-Video Output
S-Video output The S-Video Out socket on your Joybook allows you to output display signals to S-Video capable devices, such as a television set or VCR for viewing or recording. When you output display signals on your Joybook to an S-Video capable device, such as a TV set, the resolution on your Joybook will be adjusted automatically. -
Page 57: Adjusting Video Standards Manually
Adjusting video standards manually 2. Click Display Settings, and then select the Television tab. The graphics card determines the signal format from the Regional and Language Options selections in Control Panel, Clock, Language, and Region. However, when you travel to another country/region, you might need to re-adjust TV format selections manually. - Page 58 3. Select the appropriate standard from the drop-down list next to Video Standard. The required settings of Video Standard may vary by country/ region. For details about which standard is used in your country/region, check with your local authorities. Connecting to external display devices...
-
Page 59: Installing Additional Memory
Before you upgrade or replace memory, please adapter and turn over your Joybook. check on the BenQ web site to determine the module which can be used, or contact BenQ distributor or customer service center. It is recommended that you take your Joybook to the BenQ distributor or customer service center for the upgrade or memory replacement. - Page 60 5. Open the cover. 3. Slide the battery retainer B to the unlock position (1) and, while still holding the retainer, pull the battery away from its compartment (2). • Ground yourself to your Joybook with professional grounding equipment like an anti-static wristband, or touch the metal surface on the inside of your Joybook to discharge any static Battery retainer B electricity.
- Page 61 7. Gently push the free edge downwards until the module locks 9. Use a screwdriver to secure it with the screws. into place. 10.Place the battery on its original position (1) and then slide If the memory module is not installed properly, your Joybook may not boot properly.
-
Page 62: Faq And Troubleshooting
The chapter describes situations that you may encounter during use of the Joybook, along with basic troubleshooting steps. If you are not able to resolve the issue, contact a nearest BenQ service center for assistance immediately. How long should I charge the battery for the first time? General The length of the charging time may vary. - Page 63 Joybook, or the AC power cord may be defective. Consult your BenQ dealer for help and maintenance. Why does the battery on my Joybook seem to last shorter and...
-
Page 64: Connection
Connection I have a problem setting up wireless network. Please follow the instructions below to resolve the problem: My modem does not connect at 56K speed. Why? • Have you enabled the WLAN function of the Joybook? Please Several factors can affect connection speed, such as line noise, press to enable WLAN. - Page 65 How do I update the driver? from running when Windows starts up. To do so, follow the steps below: Please visit BenQ Online Service and Support 1. Right-click anywhere in the open area on the desktop and (http://Support.BenQ.com) to search for driver updates.
- Page 66 2. Click the Start button and select All Programs, Accessories, 2. Click Properties. System Tools, and then Disk Cleanup. 3. Click Device Manager. 3. Check the types of files you want to delete (temporary files 4. Double-click the Universal Serial Bus controllers branch to are safe to delete).
- Page 67 • The volume may have been set too low. Use the <Fn> + <F9> hard disk capacity in different ways. As a result, the nominated hotkey combination to increase the volume. capacity is different from the exact capacity displayed by the OS. •...
-
Page 68: Display
I hear noise when connecting an earphone to the Joybook. Why does my Joybook seem to turn off itself after a certain period of inactivity? Verify the following: This is the default setting of the Joybook to conserve battery • Connect the earphone to other devices, such as a radio to see if power. - Page 69 I do if this happens? If your Joybook cannot display images at the default resolution, please visit the BenQ web site to download and update the latest Joybook display drivers. Contact your BenQ dealer if you encounter the following...
-
Page 70: Cleaning And Battery Maintenance
Cleaning and battery maintenance Battery maintenance Cleaning your Joybook 1. Fully charge/discharge battery up to 4 cycles before achieving When cleaning the Joybook, follow the steps below: full capacity of a new battery. 1. Turn off the Joybook, disconnect the power adapter, and 2. -
Page 71: Service And Support
• Knowledge Base: Contains answers to frequently asked questions about the Joybook as well as additional tips. • Contact Us: Here you can directly contact BenQ Customer Service for answers and advice to your questions. You can also obtain the information about the BenQ service stations in your country. -
Page 72: Appendix
1. Keep this manual in a safe place for easy reference when attempt to repair it yourself. Should it become damaged, needed. please contact an authorized BenQ distributor or service 2. Make sure you follow all instructions and warnings related to center. -
Page 73: Safety Information About The Power Adapter
Safety information about the Disposal of Waste Electrical power adapter and Electronic Equipment by users in private households in • Use only the power adapter supplied with your Joybook. Use of another type of power adapter will result in malfunction and/ the European Union. -
Page 74: Declaration Of Conformity
IEC 60950-1 and/or EN 60950-1:2001+A11:2004, First Edition BenQ EN 301489-1 V1.6.1:2002 Model designation(s)/Model no(s): EN 301489-17 V1.2.1:2002 Joybook S33 Series; DHT300 ETSI EN 300328 (V1.7.1:2006-10) ETSI EN 301893 (V1.4.1:2007-07) Company name, address, telephone & fax no. Name: BenQ Europe B.V. -
Page 75: Safety Instructions For Poland, Romania, Slovenia, Bulgaria, Latvia, And Croatia
Safety instructions for Poland, Romania, Slovenia, Bulgaria, Latvia, and Croatia Polski România 1. Należy upewnić się, że zastosowano się do wszystkich 1. Asiguraţi-vă că respectaţi toate instrucţiunile şi instrukcji i ostrzeżeń dotyczących systemu. avertismentele privitoare la sistem. 2. Nie należy umieszczać komputera w miejscach 2. - Page 76 Български Slovensko 1. Следвайте всички инструкции и предупреждения 1. Glede sistema sledite navodilom in opozorilom. относно системата. 2. Raèunalnika ne postavljajte na mesta z moènim magnetnim 2. Не слагайте компютъра на място със силно магнитно poljem. поле. 3. V primeru nepravilne namestitve akumulatorja obstaja 3.
- Page 77 Latviski Hrvatski 1. Sekojiet visām sistēmai atbilstošajām norādēm un 1. Pridržavajte se svih uputa i upozorenja u vezi sa sustavom. brīdinājumiem. 2. Ne postavljajte računalo u područje jakih magnetskih polja. 2. Nenovietojiet datoru tuvu spēcīgiem magnētiskajiem 3. Nepravilna zamjena baterije izazvat će opasnost od laukiem.
- Page 78 <Memo> Appendix...