Table of Contents
Advertisement
Quick Links
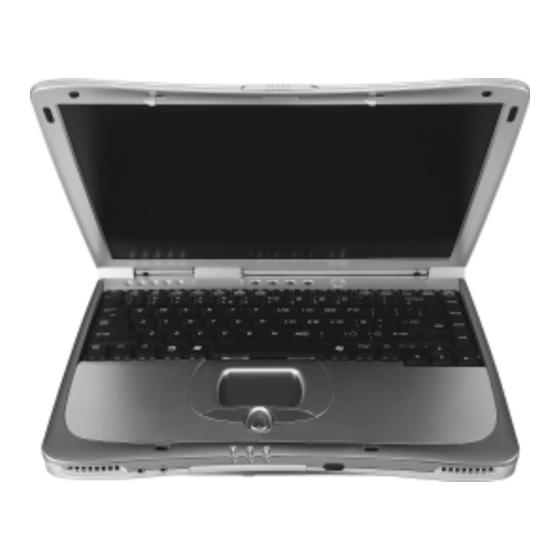
Joybook 5000 User Manual
Before using your Joybook, please read the Quick Start Guide to get your Joybook 5000 up and running.
Read this manual for more detailed information that can help you use all of your Joybook's capabilities more effectively and enjoyably.
Table of Contents
Joybook 5000 .............................................................................................1
Function Hotkeys ......................................................................................6
Getting Started with Windows XP and QMedia Bar ...............................8
Using the Q-Media Bar .............................................................................10
Your Digital Entertainment Center - BenQ Joybook 5000 .....................11
Getting Online ..................................................................................................12
Sending and Receiving E-mail .........................................................................13
QMusic - Making Music Mobile ......................................................................14
Making Music Mobile ......................................................................................15
Watching Movies ..............................................................................................17
Making Your Own Movies ...............................................................................18
Viewing Digital Photographs and Creating Slideshows .................................19
Creating a Slide Show ......................................................................................20
Burning CDs ......................................................................................................21
Wireless Magic - Built-In WLAN Card (Optional) ................................23
Wireless Fun ..............................................................................................26
Attaching External Display Devices ..........................................................27
Installing Additional Memory ..................................................................29
Recommendations and Troubleshooting ................................................31
Recovery CD Instructions .........................................................................33
Information on Safety, Cleaning, and Battery Maintenance .................34
Warranty Information ..............................................................................36
Advertisement
Table of Contents

Related Manuals for BenQ Joybook 5000


Summary of Contents for BenQ Joybook 5000
-
Page 1: Table Of Contents
Joybook 5000 User Manual Before using your Joybook, please read the Quick Start Guide to get your Joybook 5000 up and running. Read this manual for more detailed information that can help you use all of your Joybook's capabilities more effectively and enjoyably. - Page 2 Copyright Copyright 2003 by BENQ Corporation. All rights reserved. No part of this publication may be reproduced, transmitted, transcribed, stored in a retrieval system or translated into any language or computer language, in any form or by any means, electronic, mechanical, magnetic, optical, chemi- cal, manual or otherwise, without the prior written permission of this company.
-
Page 3: Joybook 5000
Can be set to open the same application as the fourth icon on the Q-Media bar. Power Switch Turns Joybook 5000 on or off. Touch Pad For controlling the on-screen cursor. Can be activated and deactivated by pressing the Fn + F6 hotkey combination. - Page 4 You can also con- nect Firewire hard disk, printer, and more. Joybook 5000 LAN (Ethernet) Port Allows Joybook 5000 to connect to a 10/ 100Mbps Ethernet network. VGA Port For connecting external display devices, such as monitors and projectors.
- Page 5 PC cards as mice, digital cameras and MP3 on the market to further expand players that use the USB inter- the capabilities of Joybook 5000. face. Insert the PC card into the slots following the direction indicated...
- Page 6 Supports multi-functional optical module for reading music CD, VCD Attach a lock and cable to prevent theft. and DVD or burning CD-R/CD-RW (optional). Discs can be inserted/ ejected by pressing the small eject button at the center of the Drive. Joybook 5000...
- Page 7 Power Indicator Wireless LAN Indicator When connected to a wireless LAN network, this indicator will light up. Infrared port You can connect Joybook 5000 to your PDA, mobile phone or other Infrared compatible devices using this port. Joybook 5000...
-
Page 8: Function Hotkeys
Fn + F1 Opens function keys online help. Fn + F2 Puts Joybook 5000 into sleep mode. Fn + F3 Switches display between the LCD screen and an external monitor/projector, or allows simultaneous display. - Page 9 Windows Key Functionally equivalent to clicking the Start button on the Windows desktop. + Tab Makes the next item on the Windows task bar active. Opens the My Computer window for brows- ing disks and files. Minimizes all windows. Shift + Cancels minimization of all windows.
-
Page 10: Getting Started With Windows Xp And Qmedia Bar
After you are done answering the questions, Joybook 5000 will restart and then you will enter Windows XP for the first time. Click Start and select Help and Support in the menu that appears. - Page 11 Next, please follow the steps below to setup the languge for non-unicode programs settings in Windows XP. Click Start and then Control Panel. Click Date, Time, Language, and Regional Options. Click Regional and Language Options in the window that appears. Click the Advanced tab.
-
Page 12: Using The Q-Media Bar
Using the Q-Media Bar On the Q-Media Bar, you can: Click to start up Internet Explorer and surf the Internet. Click to open Outlook Express for accessing e-mail. Click to open QMusic. You can use QMusic to listen to MP3 or CD music, burn MP3 music onto a CD (needs optional CD burner), con- vert and save CD music into MP3 format, or create your personal favorite music album. -
Page 13: Your Digital Entertainment Center - Benq Joybook 5000
Your Digital Entertainment Center - BenQ Joybook 5000 Send and receive e-mail. Browse the Web. Listen to music and create your own custom music collection. Convert music into MP3 format and take your tunes wherever you Watch video. Create your own movies. -
Page 14: Getting Online
In order to access the Internet, you must have an account with an ISP (Internet service provider) and perform needed software configuration. For detailed information on accounts, passwords and other settings, please consult your sys- tem administrator or ISP. Your Digital Entertainment Center - BenQ Joybook 5000... -
Page 15: Sending And Receiving E-Mail
In order to send and receive e-mail, you must have an account with an ISP (Internet service provider) and perform needed software configuration. For detailed information on accounts, passwords, e-mail server and other settings, please consult your system administrator or ISP. Your Digital Entertainment Center - BenQ Joybook 5000... -
Page 16: Qmusic - Making Music Mobile
Songs. My Play Lists You can select your favorite songs in My Play Lists and give it an album name. Previous song Your Digital Entertainment Center - BenQ Joybook 5000 Play Stop Volume Eject Next song Please refer to the Joybee user manual for further information about QMusic. -
Page 17: Making Music Mobile
Insert an audio CD into the DVD drive. The list of tracks will appear in the list on the right column. Select and check the tracks you want. You can rearrange the order of songs here. Click Your Digital Entertainment Center - BenQ Joybook 5000... - Page 18 Click New Album. Click and drag the converted files to the MP3 folder under Joybee. You need to have a MP3 folder under Joybee first. If not, create one. Your Digital Entertainment Center - BenQ Joybook 5000...
-
Page 19: Watching Movies
Watching Movies You can use the integrated DVD player in your Joybook 5000 to watch VCD or DVD video. Insert the disc, Power DVD will automatically start up and begin playback. If you wish, select full-screen mode for more comfortable viewing. -
Page 20: Making Your Own Movies
Making Your Own Movies Joybook 5000 can help you edit video files to create a movie that you can share with family and friends. With a digital video camera or other source of digital video capture, you can take advantage of the Power Director software included with your Joybook 5000 to produce your very own cinematic... -
Page 21: Viewing Digital Photographs And Creating Slideshows
Files in the directory you selected will be shown as thumbnails or in a list in the Browse Pane. Select the image you wish to view. Your Digital Entertainment Center - BenQ Joybook 5000 Location Browse Pane Slide Show Storyboard The image you selected will appear in the Preview Pane. -
Page 22: Creating A Slide Show
Select Tools, Slide Show to open the Slide Show Storyboard and create a new project. Your Digital Entertainment Center - BenQ Joybook 5000 Select the image, video, and sound files you wish to use in your slide show, and drag them to the Slide Show Storyboard. -
Page 23: Burning Cds
Burning CDs If your Joybook 5000 is equipped with a built-in CD burner, you can use it with the included CD-Maker software to burn different types of data to CD. Toolbar CD type Steps Windows Explorer Help CD Layout File Size Bar... - Page 24 Mixed-Mode CD and CD Extra CD, as they have both data and audio track on the same disk, which are two different types. Your Digital Entertainment Center - BenQ Joybook 5000 in the CD Layout area and Click the Step 2 button and make the...
-
Page 25: Wireless Magic - Built-In Wlan Card (Optional)
Wireless Magic - Built-In WLAN Card (Optional) KNOW-HOW 1 2 3 Depending on the model you pur- chased, your Joybook 5000 may have already been equipped with a built-in WLAN Card. To connect to the wireless LAN network: Make sure that you are located... - Page 26 Select a wireless network. Fill in the blank with your network key and click Con- nect. Wireless Magic - Built-In WLAN Card (Optional)
- Page 27 After you are connected to the wireless network, the network status will appear on the screen. To access Internet, you may have to undergo another authorization process and enter username and password. For details, please con- sult your ISP. Wireless Magic - Built-In WLAN Card (Optional)
-
Page 28: Wireless Fun
If you are not to use the WLAN Card in your Joybook 5000, 56k dial-up connection using the modem port, ADSL and broadband transmission using the LAN port would also do. Please contact your local ISP to get more information. -
Page 29: Attaching External Display Devices
Attaching a VGA display device When giving a presentation, you can output Joybook 5000's video signal to an external display device, such as a projector or monitor. Press the Fn + F3 hotkey combination to switch between Joybook 5000's own LCD panel and the attached display device, or use simultaneous display. - Page 30 S-Video Out The S-Video Out port allows you to output display signals to a television set or VCR for viewing or recording. Television Set Attaching External Display Devices...
-
Page 31: Installing Additional Memory
Installing Additional Memory You can replace the existing memory module with a higher-capacity one. Before you upgrade or replace memory, please check on the BenQ web site to determine the module which can be used, or contact BenQ distributor or customer service center. It is recommended that you take your Joybook 5000 to the BenQ distributor or customer service center for the upgrade or memory replacement. - Page 32 Align the memory module with the slot, and then insert it. When insert- ing, pay attention to the direction of the memory module. Installing Additional Memory Gently push the free edge downwards until the module locks into place. Replace the cover, and use a screw- driver to secure it with the screws.
-
Page 33: Recommendations And Troubleshooting
Recommendations and Troubleshooting The following are descriptions of situations that you may encounter during use of Joybook 5000, along with basic troubleshooting steps. If you are not able to resolve the issue, immediately contact a BenQ service center for assistance. - Page 34 CD or DVD drive does not function. Please verify the following: • Joybook 5000 is turned on, and the CD or DVD discs are properly inserted in the center of the disk tray in the optical drive. • The DVD disk tray is closed.
-
Page 35: Recovery Cd Instructions
You should receive a Recovery CD pack containing CDs that you can use to rebuild your system. These Recovery CDs will help you to restore the hard disk with the original content that was installed when you purchased your Joybook 5000. Follow the steps below to rebuild your hard disk. -
Page 36: Information On Safety, Cleaning, And Battery Maintenance
3. Place Joybook 5000 on stable, level surface, and ensure that the venti- lation holes are not obstructed. 4. Do not expose Joybook 5000 to rain or excess humidity, and keep it away from liquids (such as beverages, faucets, and so on). -
Page 37: Cleaning Your Joybook
1. Turn off Joybook 5000, disconnect the AC adapter, and remove the battery. 2. Use a damp cloth to wipe the outer surface of Joybook 5000. Do not apply liquid or spray cleaners directly on Joybook 5000. 3. Do not use cleaners containing alcohol or acetone. Instead, use clean- ing fluids specially formulated for LCD screens. -
Page 38: Warranty Information
BenQ Overseas Regional Warranty Service offers a one-year guarantee against defects from the date of purchase of this Joybook*. A BenQ Joybook global service center will take care of your Joybook wherever you may be. For more details and the latest information, please check the BenQ website (www.BenQ.com). - Page 39 "Regional Warranty Card". - If the country you are in does not have a BenQ ORW authorized service center, or the service center is unable to support the model in question, you can look to other regions for technical support.
- Page 40 BenQ Joybook Global Service Center China Tel: +86-512-68092520 Hong Kong Tel: +852-23306188 Taiwan Tel: 0800-027-427 Asia Pacific Singapore Tel: +65-6777-2229 Thailand Tel: +66-2-6700310-1 Malaysia Tel: +603-7954-8660 Australia Australia Tel: +61-1300-130-336 Europe HQ Netherlands Europe Tel: 0900-2021-021 Middle East Middle East...