Panasonic KX-NCP500 Getting Started
Pure ip-pbx
Hide thumbs
Also See for KX-NCP500:
- Programming manual (1016 pages) ,
- Pc programming manual (892 pages) ,
- Features manual (504 pages)
Table of Contents
Advertisement
Advertisement
Table of Contents

Related Manuals for Panasonic KX-NCP500


Summary of Contents for Panasonic KX-NCP500
-
Page 1: Getting Started
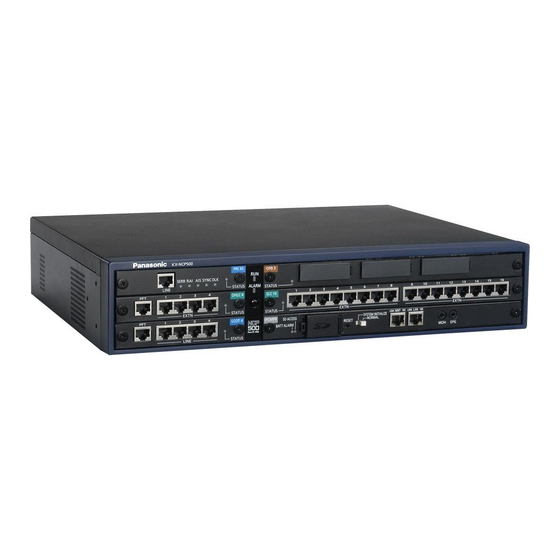
Getting Started Pure IP-PBX KX-NCP500 Model No. KX-NCP1000 Thank you for purchasing a Panasonic Pure IP-PBX. Please read this manual carefully before using this product and save this manual for future use. KX-NCP500/KX-NCP1000: PBMPR Software File Version 2.0000 or later... -
Page 2: Table Of Contents
Table of Contents Table of Contents 1 Before Installation ..................3 Safety Notices ........................4 Unpacking ..........................4 2 Installation ....................5 Installing the DSP Card ....................6 Inserting the SD Memory Card to the IPCMPR Card ............9 Frame Earth Connection ....................9 Connecting to the LAN ....................10 2.4.1 Connecting the IPCMPR Card to the LAN ..............10 2.4.2... -
Page 3: Before Installation
Section 1 Before Installation Getting Started... -
Page 4: Safety Notices
1.2 Unpacking 1.1 Safety Notices Please observe the safety notices in this manual in order to avoid danger to users or other people, and prevent damage to property. The notices are classified as follows, according to the severity of injury or damage: WARNING This notice means that misuse could result in death or serious injury. -
Page 5: Installation
Section 2 Installation Getting Started... -
Page 6: Installing The Dsp Card
2.1 Installing the DSP Card 2.1 Installing the DSP Card Removing the IPCMPR Card from the PBX Turn the 2 screws anticlockwise to loosen them. Screws Pull the card from the cabinet to remove it. Getting Started... - Page 7 2.1 Installing the DSP Card Installing the DSP Card Depending on the number and the type of IP trunks and IP telephones you wish to use, required activation keys are determined, and one of the DSP4, DSP16, or DSP64 card is selected to be installed. DSP4: 4-channel DSP (Digital Signal Processor) card with a 4-Channel IP Trunk activation key and an 8-Channel IP Proprietary Telephone activation key preinstalled.
- Page 8 Installing the IPCMPR Card in the PBX Install the IPCMPR card in the IPCMPR card slot of the PBX. Note The illustrations of the PBX shown in the installation procedure are based on the KX-NCP500. Insert the card along the guide rails. Guide Rail Turn the 2 screws clockwise to fix the card in place.
-
Page 9: Inserting The Sd Memory Card To The Ipcmpr Card
2.2 Inserting the SD Memory Card to the IPCMPR Card The SD Memory Card contains software for all the processes of the PBX and all the customer data. The SD Memory Card must be inserted before startup. Example: KX-NCP500 IPCMPR Card SD Memory Card CAUTION Do not remove the SD Memory Card while power is supplied to the PBX. -
Page 10: Connecting To The Lan
2.4.1 Connecting the IPCMPR Card to the LAN CAUTION For earthing wire, green-and-yellow insulation is required, and the cross-sectional area of the conductor must be more than 0.75 mm or 18 AWG. 2.4 Connecting to the LAN 2.4.1 Connecting the IPCMPR Card to the LAN Refer to the following procedure to connect the IPCMPR card to the LAN. - Page 11 2.4.1 Connecting the IPCMPR Card to the LAN Connecting the IPCMPR card to a switching hub Connect the cable to the LAN port of the IPCMPR card. Connect the other end of the cable to the switching hub. Router Switching Hub LAN Port Switching Hub Ethernet Straight Cable...
-
Page 12: Connecting The Ip Telephones To The Lan
2.4.2 Connecting the IP Telephones to the LAN 2.4.2 Connecting the IP Telephones to the LAN When an IP telephone is connected to the LAN and power is supplied for the first time, you will be prompted to set network parameters. The network parameters must be set for the IP telephone before it can be used. Refer to "4.3 Programming the Virtual Extension Card and IP Telephones"... - Page 13 2.4.2 Connecting the IP Telephones to the LAN Connecting an AC Adaptor to an IP Telephone IP-PTs and some SIP Extensions comply with the IEEE 802.3af Power-over-Ethernet (PoE) standard. If PoE is available on your network, these IP telephones can receive the necessary power supply from the network through the network cable.
- Page 14 2.4.2 Connecting the IP Telephones to the LAN Getting Started...
-
Page 15: Before Programming
Section 3 Before Programming Getting Started... -
Page 16: Starting The Pbx
3.1 Starting the PBX 3.1 Starting the PBX WARNING • Use only the AC power cord included with the PBX. • Make sure that the AC outlet is properly earthed, then securely connect the 3-pin AC plug including the earthed pin. CAUTION •... - Page 17 3.1 Starting the PBX Plug the AC power cord into the PBX and pass the cord through the hook clip as indicated. Push the hook clip in the direction of the arrow until it clicks. Note For safety reasons, do not stretch or pinch the AC power cord. To earthed AC Outlet Plug the other end of the cord into an AC outlet and turn on the PBX.
-
Page 18: Connecting The Pc
3.2 Connecting the PC 3.2 Connecting the PC The Maintenance Console serves as an overall system programming tool for the PBX. The Maintenance Console’s Quick Setup lets you easily configure the PBX to apply basic settings such as time and date. To programme the PBX, connect it to the PC via the MNT or RS-232C port. - Page 19 3.2 Connecting the PC Notice When connecting a PC to the PBX via the MNT port, a fixed IP address must be assigned to the PC. For information about fixed IP addresses, ask your network administrator. Getting Started...
-
Page 20: Installing The Maintenance Console
3.3 Installing the Maintenance Console 3.3 Installing the Maintenance Console For the system requirements of the PC (e.g., operating system, hardware specifications), refer to "4.3.1 Installing and Starting the Maintenance Console" in the Installation Manual. Note • Make sure to install and use the latest version of the Maintenance Console. •... -
Page 21: Programming
Section 4 Programming Getting Started... -
Page 22: Programming The Pbx
Click OK to close this window. Enter the Installer Level Programmer Code (default: INSTALLER). Click OK. Click Connect. Select KX-NCP500/1000 from PBX Model. Select the LAN or RS-232C tab, depending on the type of PC connection with the PBX. Specify the settings as required. Note When connecting to the PBX for the first time selecting LAN, the IP Address and Port Number must be set to 192.168.0.101 and 35300 respectively. - Page 23 4.1.1 Starting the Maintenance Console and Assigning the Basic Items (Quick Setup) When using a DHCP server: Select Enable for the DHCP Client setting. Click Apply. Note The boxes will turn grey and the IP addresses will be assigned automatically after the PBX is reset. When not using a DHCP server: Select Disable for the DHCP Client setting.
-
Page 24: Installing The Virtual Ip Cards To The Pbx
4.1.2 Installing the Virtual IP Cards to the PBX 4.1.2 Installing the Virtual IP Cards to the PBX Under Configuration, click Slot. Move the mouse pointer over the PBX image of IPCMPR Virtual Slot at the top of the screen. Click Select Shelf. -
Page 25: Installing Additional Activation Keys
4.1.3 Installing Additional Activation Keys 4.1.3 Installing Additional Activation Keys If the preinstalled activation keys on the DSP cards are not enough for the desired configuration, it is necessary to obtain additional activation keys in the form of activation key files and install them in the SD Memory Card. Activation Key Code and Key Management System To obtain additional activation keys, you need to purchase the appropriate activation key codes and access the Key Management System. - Page 26 4.1.3 Installing Additional Activation Keys Model No. Activation Key Type Description KX-NCS3704 4 SIP Extension Provides the activation key number and registration ID to download the activation key that enables the use of 4 SIP Extensions. KX-NCS3708 8 SIP Extension Provides the activation key number and registration ID to download the activation key that enables the use of 8 SIP Extensions.
-
Page 27: Configuration Of The Activation Keys
4.1.3 Installing Additional Activation Keys Installing the Activation Key File in the SD Memory Card Start the Maintenance Console from the Start menu. From the Utility menu, select File Transfer PC to PBX (SD Card). A dialogue box will be displayed. Select the file to upload. -
Page 28: Programming The Virtual 16-Channel Voip Gateway Card
4.2.1 Assigning the Hunt Pattern 4.2 Programming the Virtual 16-Channel VoIP Gateway Card There are 2 methods to programme the V-IPGW16 card (Virtual 16-Channel VoIP Gateway Card) to establish VoIP communications between PBXs at different locations, as follows: PBX code method The caller dials the unique PBX code of the PBX to which the called party is connected, in addition to the destination number. -
Page 29: Programming The Address Translation Table
4.2.2 Programming the Address Translation Table 4.2.2 Programming the Address Translation Table The function of an address translation table in a VoIP network is to provide 2-way translation of telephone numbers and IP addresses . Therefore, a caller can reach the destination by dialling the number without knowing the destination IP address. - Page 30 4.2.2 Programming the Address Translation Table Click DN2IP. When using the PBX code method: In the Leading Number box, type the remote PBX code and starting digit of destination extension. When using the extension number method: In the Leading Number box, type the remote PBX code and starting digit of destination extension.
-
Page 31: Programming The Network Settings
4.2.3 Programming the Network Settings 4.2.3 Programming the Network Settings For successful operation of a VoIP network using the V-IPGW16 card, network settings for the PBX at each location must be programmed appropriately. For a detailed discussion of related features, refer to the Feature Guide. - Page 32 4.2.3 Programming the Network Settings From the system menu, click Private Network. Click TIE Table. In the Own PBX Code box, type the PBX code of the local PBX in the network. In the first unused Leading Number box, type the PBX code of the remote PBX in the network.
- Page 33 4.2.3 Programming the Network Settings Move the mouse pointer over the installed V-IPGW16 card to display the menu of options. Click INS. When "En-bloc" is selected, you need to press "#" after dialling the phone number. Programming for the Extension Number Method Under Configuration, click Slot.
- Page 34 4.2.3 Programming the Network Settings From the system menu, click Private Network. Click TIE Table. In the Leading Number box, type the starting digit of destination extension. Click OK. From the system menu, click Configuration. Click Slot. Move the mouse pointer over the installed V-IPGW16 card to display the menu of options.
- Page 35 4.2.3 Programming the Network Settings Note For details about network parameter settings, refer to the relevant sections of the PC Programming Manual. Getting Started...
-
Page 36: Programming The Virtual Extension Card And Ip Telephones
4.3.1 Assigning the IP Addressing Information 4.3 Programming the Virtual Extension Card and IP Telephones 4.3.1 Assigning the IP Addressing Information The IP address of an IP telephone, the subnet mask address, the default gateway address, and the IP address of the IPCMPR card (PBX IP address) must be assigned to the IP telephone before it can be used on the network. - Page 37 4.3.1 Assigning the IP Addressing Information KX-NT300 series (except KX-NT321) To start programming SETUP Supply power to the IP-PT. Press "SETUP" when it is displayed. To enter the IP address of the IPCMPR card (PBX IP Address) Software version 2.00 or later only Select "PBX".
- Page 38 4.3.1 Assigning the IP Addressing Information KX-NT321 To start programming Supply power to the IP-PT. Press PROGRAM while "Searching" is displayed. To enter the IP address of the IPCMPR card in the Primary PBX (PBX IP Address) Select "PBX IP Press SP-PHONE.
- Page 39 4.3.1 Assigning the IP Addressing Information KX-NT265 (Software version 2.00 or later only) To start programming PROG. Supply power to the IP-PT. Press PROGRAM while "Searching" is displayed. To enter the IP address of the IPCMPR card (PBX IP Address) PBX IP HOLD Address...
- Page 40 4.3.1 Assigning the IP Addressing Information Not using a DHCP server when the IP-PT is on the same LAN with the PBX Only the PBX IP address can be assigned automatically to the IP-PT in process of being registered to the PBX.
- Page 41 4.3.1 Assigning the IP Addressing Information KX-NT300 series (except KX-NT321) To start programming SETUP Supply power to the IP-PT. Press "SETUP" when it is displayed. To set the IP address of the IP-PT Select "Network". ENTER Select "Disable" Select "IP Address". ENTER for DHCP setting.
- Page 42 4.3.1 Assigning the IP Addressing Information KX-NT321 To start programming Supply power to the IP-PT. Press PROGRAM while "Searching" is displayed. To set the IP address of the IP-PT Select "Network". Press SP-PHONE. Select "DHCP (Disable)". Press SP-PHONE twice. IP Address* Press SP-PHONE.
- Page 43 4.3.1 Assigning the IP Addressing Information Note To confirm the connection to the secondary PBX after programming, (1) turn the IP-PT’s power off, and (2) hold the STORE button and 2 key while turning the power on. KX-NT265 (Software version 2.00 or later only) To start programming PROG.
- Page 44 4.3.1 Assigning the IP Addressing Information Not using a DHCP server when the IP-PT is on the remote office LAN All the IP addressing information must be assigned manually. Follow the procedure below to assign the IP addressing information. KX-NT300 series (except KX-NT321) To start programming SETUP Supply power to the IP-PT.
- Page 45 4.3.1 Assigning the IP Addressing Information Continued from previous page To enter the IP address of the Secondary PBX (optional for software version 2.00 or later only) PBX IP Address Select "Secondary PBX". ENTER ENTER To end programming The IP-PT will reboot STORE and can then be registered to the PBX.
- Page 46 4.3.1 Assigning the IP Addressing Information KX-NT321 To start programming Supply power to the IP-PT. Press PROGRAM while "Searching" is displayed. To set the IP address of the IP-PT Select "Network". Press SP-PHONE. Select "DHCP (Disable)". Press SP-PHONE twice. IP Address* Press SP-PHONE.
- Page 47 4.3.1 Assigning the IP Addressing Information Continued from previous page To end programming The IP-PT will reboot and can then be registered to the PBX. Press HOLD twice to return Press STORE. to the Menu screen. Valid IP address range: "1.0.0.0" to "223.255.255.255" Valid subnet mask address range: "0–255.0–255.0–255.0–255"...
- Page 48 4.3.1 Assigning the IP Addressing Information KX-NT265 (Software version 2.00 or later only) To start programming PROG. Supply power to the IP-PT. Press PROGRAM while "Searching" is displayed. To set the IP address of the IP-PT Press VOLUME to Press SP-PHONE. Press VOLUME to Press SP-PHONE select "Network".
- Page 49 4.3.1 Assigning the IP Addressing Information For KX-HGT100 SIP Telephones Using a DHCP server to automate the assignment of IP addressing information The DHCP server automatically assigns the IP address of the KX-HGT100, the subnet mask address, and the default gateway address to the KX-HGT100. The PBX IP address can be assigned to the KX-HGT100 through Web Programming.
- Page 50 4.3.1 Assigning the IP Addressing Information Follow the procedure below to assign IP addressing information manually. To start programming Supply power to the KX-HGT100. Press PROGRAM . To set the IP addressing information Select "Set network". Press OK. Select "STATIC". Press OK.
- Page 51 4.3.1 Assigning the IP Addressing Information For SIP Extensions (except KX-HGT100) Using a DHCP server to automate the assignment of IP addressing information The IP address of the SIP Extension, the subnet mask address, and the default gateway address can be assigned to the SIP Extension automatically by the DHCP server.
-
Page 52: Registering Ip Telephones
4.3.2 Registering IP Telephones 4.3.2 Registering IP Telephones After the programming of the IPCMPR card and IP telephone is finished, the IP telephone must be registered to the PBX. This is done using the Maintenance Console. Registration of IP-PTs Under Configuration, click Slot. Move the mouse pointer over the PBX image of IPCMPR Virtual Slot at the top of the screen. - Page 53 4.3.2 Registering IP Telephones Registration of SIP Extensions Under Configuration, click Slot. Move the mouse pointer over the PBX image of IPCMPR Virtual Slot at the top of the screen. Click Select Shelf. Move the mouse pointer over the V-SIPEXT32 card (Virtual 32-Channel SIP Extension Card).
- Page 54 4.3.2 Registering IP Telephones Set passwords for the SIP Extensions. Click the cell in the Connection column for each SIP Extension you wish to register. The Command Connection screen appears. Click OUS. Enter a password in the Password box for each SIP Extension.
- Page 55 4.3.2 Registering IP Telephones Programme the SIP Extension you wish to register. [For SIP Extensions (except KX-HGT100)] Set the IP address of the IPCMPR card, extension number, and password in the corresponding fields for your SIP Extension. Send a request from the SIP Extension to the PBX for registration.
- Page 56 4.3.2 Registering IP Telephones Double-click Network Connections. Double-click Local Area Connection. Click Properties. Confirm that Internet Protocol (TCP/IP) is listed. Note If Internet Protocol (TCP/IP) is not listed, you must install TCP/IP. For details about installation, refer to the documentation for Windows XP.
- Page 57 4.3.2 Registering IP Telephones Click the Connections tab. Select Never dial a connection if necessary. Click LAN Settings. When Not Using a Proxy Server Note If you will use a proxy server, see When Using a Proxy Server. Clear all check boxes. Click OK.
- Page 58 4.3.2 Registering IP Telephones Under Do not use proxy server for addresses beginning with:, type the IP address of the LAN port of the card. Click OK. Your PC is now ready for programming the KX-HGT100 through an IP network. Programming the KX-HGT100 Start Internet Explorer from the Start menu.
-
Page 59: Confirming The Connection
Section 5 Confirming the Connection Getting Started... -
Page 60: Making And Receiving Calls
5.1 Making and Receiving Calls 5.1 Making and Receiving Calls Making Calls You can call another extension registered with the PBX by simply dialling the extension number. extension no. Dial extension number. You can also call an extension of another PBX through the VoIP network. When using the PBX code method TIE line Destination... -
Page 61: Appendix
Section 6 Appendix Getting Started... -
Page 62: Revision History
6.1.1 PBMPR Software File Version 2.0xxx 6.1 Revision History 6.1.1 PBMPR Software File Version 2.0xxx Changed Contents • 4.1.1 Starting the Maintenance Console and Assigning the Basic Items (Quick Setup) • 4.1.3 Installing Additional Activation Keys • 4.3.1 Assigning the IP Addressing Information •... - Page 63 Panasonic Communications Co., Ltd./Panasonic Communications Company (U.K.) Ltd. declares that this equipment is in compliance with the essential requirements and other relevant provisions of Radio & Telecommunications Terminal Equipment (R&TTE) Directive 1999/5/EC. Declarations of Conformity for the relevant Panasonic products described in this manual are available for download by visiting: http://www.doc.panasonic.de...
- Page 64 Copyright: This material is copyrighted by Panasonic Communications Co., Ltd., and may be reproduced for internal use only. All other reproduction, in whole or in part, is prohibited without the written consent of Panasonic Communications Co., Ltd. Panasonic Communications Co., Ltd. 2008...