Table of Contents
Advertisement
Vespa would like to thank you
for choosing one of its products. We have prepared this manual to help you to get the very best from your scooter. Please read it carefully before riding
the scooter for the first time. It contains information, tips and precautions for using your scooter. It also describes features, details and devices to assure
you that you have made the right choice. We believe that if you follow our suggestions, you will soon get to know your new vehicle and it will serve you
well for a long time to come. This booklet forms an integral part of the scooter; should the scooter be sold, it must be transferred to the new owner.
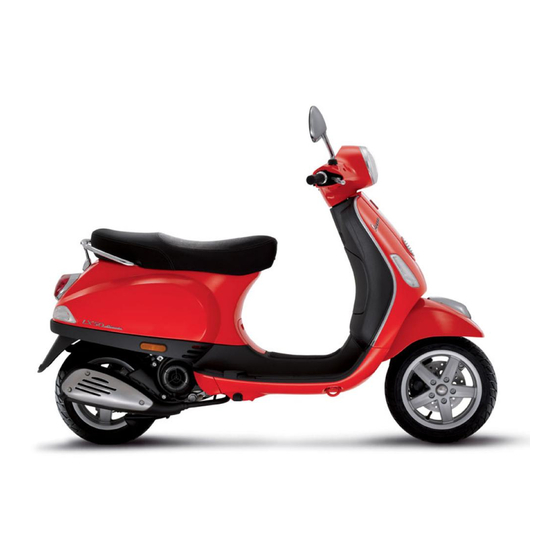
VESPA Vespa LX 50 4T
Advertisement
Table of Contents

Related Manuals for VESPA LX 50 4T


Summary of Contents for VESPA LX 50 4T
- Page 1 Vespa would like to thank you for choosing one of its products. We have prepared this manual to help you to get the very best from your scooter. Please read it carefully before riding the scooter for the first time. It contains information, tips and precautions for using your scooter. It also describes features, details and devices to assure you that you have made the right choice.
- Page 2 The instructions given in this manual are intended to provide a clear, simple guide to using your scooter; this booklet also details routine maintenance procedures and regular checks that should be carried out on the vehicle at an authorised Dealer or Service Centre. The booklet also contains instructions for simple repairs.
- Page 3 Personal safety Failure to completely observe these instructions will result in serious risk of personal injury. Safeguarding the environment Sections marked with this symbol indicate the correct use of the vehicle to prevent dam- aging the environment. Vehicle intactness The incomplete or non-observance of these regulations leads to the risk of serious damage to the vehicle and sometimes even the invalidity of the guarantee.
-
Page 5: Table Of Contents
INDEX VEHICLE..................Spark plug dismantlement............30 Dashboard................Removing the air filter............... 31 Clock..................Secondary air system............... 32 Key switch................. 10 Checking the brake oil level............33 Locking the steering wheel............ 10 Battery..................34 Releasing the steering wheel..........10 Checking the electrolyte level..........35 Switch direction indicators............ -
Page 7: Vehicle
VESPA Vespa LX 50 4T Chap. 01 Vehicle... -
Page 8: Dashboard
01_01 Dashboard (01_01) A = Speedometer B = Odometer C = Fuel gauge D = Front brake control lever... -
Page 9: Clock
E = Turn indicator warning light F = Preset light G = High-beam warning light H = Low fuel warning light I = Low-beam/position light warning light L = High/low beam switch M = Turn indicator switch N = Horn button P = Starter button Q = Throttle grip R = Digital clock... -
Page 10: Key Switch
WARNING DEAD BATTERIES ARE HARMFUL TO THE ENVIRONMENT. THEY MUST DIS- POSED OF IN SUITABLE CONTAINERS AS PRESCRIBED BY THE REGULA- TIONS IN FORCE. Key switch (01_03) LOCK = Ignition disabled, extractable key, steering lock engaged front glove-box locked. OFF = Ignition disabled, extractable key, steering lock disengaged, front glove-box unlocked. -
Page 11: Switch Direction Indicators
CAUTION DO NOT TURN THE KEY TO «LOCK» OR «OFF» WHILE RIDING. Switch direction indicators (01_04) To set the left turn indicators flashing, move lever «B» to the left; to set the right turn indicators flashing, move it to the right. The lever automatically returns to the central position and the indicators remain on. -
Page 12: Light Switch
Light switch (01_06) 0 = Dipped beam and position light 1 = High beam and position light 01_06 Start-up button (01_07) To start the engine, press the starter button, «P», after pulling either one of the two brake levers. 01_07 Opening the saddle (01_08) Insert the key into the saddle lock «A», turn it anticlockwise and tip the saddle forward. -
Page 13: Keys
Keys (01_09) The vehicle is supplied with two keys (one spare) which serve to start the engine and unlock the saddle compartment. The keys are accompanied by a tag marked with the identification code to be quoted when ordering duplicates. WARNING WE RECOMMEND KEEPING THE DUPLICATE KEY TOGETHER WITH ITS CODE IN A SAFE PLACE AND NOT ON THE VEHICLE... -
Page 14: Rear Top Box Opening
Rear top box opening (01_12) Turn the key to the position«OFF». Then press it. With the key is in «LOCK» the glove- box is locked. 01_12 Bag clip (01_13) To use the retractable bag hook «B» located at the front end of the saddle, pull it forward lightly. -
Page 15: Use
VESPA Vespa LX 50 4T Chap. 02... -
Page 16: Checks
Checks Before using the vehicle, check: 1. that the fuel tank is full. 2. The oil level in the rear hub. 3. engine oil level (see section «Engine oil level»). 4. That tyres are properly inflated. 5. correct functioning of headlights, rear taillight and turn indicators. 6. -
Page 17: Tyre Pressure
CAUTION USING OILS OTHER THAN THOSE RECOMMENDED CAN SHORTEN THE LIFE OF THE ENGINE. Characteristic Fuel tank capacity ~ 8.5 l (2 l of which is reserve) Tyre pressure CAUTION TYRE PRESSURE SHOULD BE CHECKED WHEN TYRES ARE COLD.INCOR- RECT TYRE PRESSURE CAUSES ABNORMAL TYRE WEAR AND MAKES RID- ING DANGEROUS. -
Page 18: Running In
Running in (02_02) WARNING DURING THE FIRST 1000 KM DO NOT RIDE THE VEHICLE OVER 80% OF ITS MAXIMUM SPEED. AVOID TWISTING THE THROTTLE GRIP FULLY OR KEEP- ING A CONSTANT SPEED ALONG LONG SECTIONS OF ROAD. AFTER THE FIRST 1000 KM, GRADUALLY INCREASE SPEED UNTIL REACHING THE MAX- IMUM PERFORMANCE. -
Page 19: Precautions
CAUTION DO NOT CARRY OUT THESE OPERATIONS IN CLOSED AREAS SINCE EX- HAUST GASES ARE TOXIC. CAUTION ALWAYS PLACE THE VEHICLE ON ITS STAND BEFORE KICK STARTING. Precautions CAUTION NEVER STRESS THE ENGINE AT LOW TEMPERATURES IN ORDER TO AVOID POSSIBLE DAMAGE. -
Page 20: Difficult Start Up
Difficult start up (02_04) If there is a problem you can follow the instructions below: 1.Carburettor flooded. Place the vehicle on the centre stand and check that the rear tyre is off the ground. Open the throttle fully and press the starter button for five sec- onds and then stop for five seconds. -
Page 21: Stopping The Engine
Stopping the engine (02_05) Stop acceleration, then turn the key switch "D" to "OFF " to turn off the engine (ex- tractable key). CAUTION DUE TO THE HIGH TEMPERATURES THE CATALYTIC CONVERTER CAN REACH, ALWAYS TAKE CARE, WHEN PARKING THE SCOOTER, THAT THE 02_05 EXHAUST DOES NOT COME INTO CONTACT WITH FLAMMABLE MATERIALS, TO AVOID SERIOUS BURNS. -
Page 22: Safe Driving
Safe driving WARNING SOME SIMPLE TIPS ARE PROVIDED BELOW THAT WILL ENABLE YOU TO USE YOUR SCOOTER ON A DAILY BASIS IN GREATER SAFETY AND WITH MORE PEACE OF MIND. < Your ability and your knowledge of the vehicle form the basis of safe riding. We rec- ommend trying out the vehicle in traffic-free zones to get to know your vehicle completely. - Page 23 8. Any elaboration that modifies the vehicle's performances, such as tampering with original structural parts is strictly forbidden by law, and renders the vehicle not con- forming to the approved type and therefor dangerous to ride. CAUTION DO NOT FORGET THAT DRIVING IN A STATE OF DRUNKENNESS, OR WHEN UNDER THE EFFECT OF DRUGS OR CERTAIN MEDICINES, CAN BE EXTREME- LY DANGEROUS FOR ONESELF AND FOR OTHERS.
-
Page 25: Maintenance
VESPA Vespa LX 50 4T Chap. 03 Maintenance... -
Page 26: Engine Oil Level
Engine oil level In 4T engines, the engine oil is used to lubricate the distribution elements, the bench bearings and the thermal group. An insufficient quantity of oil can cause serious damage to the engine itself. In all 4T engines the decay of oil characteristics as well as some consumption is normal. -
Page 27: Engine Oil Top-Up
Engine oil top-up Always check oil level before carrying out top-ups and add oil without exceeding the MAX level. An engine oil check-up and top-up should be carried out every 3,000 km at an Authorised Piaggio Service Centre. Engine oil change (03_03) Change oil and clean the filter after every 6,000 km at an Authorised Piaggio Service Centre. -
Page 28: Hub Oil Level
Hub oil level (03_04, 03_05, 03_06) To check the hub oil level, proceed as follows: 1. Place the scooter on its stand on a level surface; 2. Unscrew the dipstick «A», dry it with a clean rag and then reinsert it, screw- ing it tightly into place;... -
Page 29: Tyres
SAE 80W/90 Oil that exceeds the requirements of API GL3 specifications Characteristic Rear hub oil Quantity: approx. 85 cc Tyres (03_07) Periodically check the inflation pressure of each tyre (when cold). The tyres are fitted with a wear indicator and must be replaced as soon as such indicator appears on the tread. -
Page 30: Spark Plug Dismantlement
Spark plug dismantlement (03_08, 03_09, 03_10, 03_11) The engine must be cold to inspect the sparkplug, proceed as follows: 1. Lift the saddle and remove the helmet compartment "A"; 2. Remove the sparkplug inspection door "B"; 3. Remove plug cap "C"; 4. -
Page 31: Removing The Air Filter
NGK CR 8EB 03_11 Removing the air filter (03_12, 03_13) Remove the side fairing unscrewing the 2 screws marked A. Remove the air cleaner cap «D» after unscrewing the 6 fixing screws «C», then remove the filtering element. Clean with water and shampoo, afterwards dry with compressed air and submerge in a recommended oil and petrol mixture in ratio of 50%. -
Page 32: Secondary Air System
Secondary air system (03_14, 03_15, 03_16, 03_17) Use the two screws "A" on the right side panel and remove it. Use the three screws "B" to remove the cover of the secondary air box. Move the cover of the box away and remove the sponge filter "C". -
Page 33: Checking The Brake Oil Level
03_17 Checking the brake oil level (03_18, 03_19) The brake fluid reservoir is equipped with a sight glass «A» made of transparent ma- terial; the quantity of liquid contained in the sight glass indicates the level of liquid in the reservoir. When the sight glass «A»... -
Page 34: Battery
WARNING IN NORMAL CLIMATIC CONDITIONS IT IS ADVISABLE TO REPLACE THE ABOVE-MENTIONED FLUID EVERY 2 YEAR. NEVER USE BRAKE FLUID CON- TAINED IN CONTAINERS WHICH ARE ALREADY OPEN OR PARTIALLY USED. CAUTION THE BRAKING CIRCUIT FLUID IS HIGHLY CORROSIVE. THEREFORE, WHEN TOPPING IT UP, AVOID LETTING IT COME INTO CONTACT WITH THE PAINTED PARTS OF THE VEHICLE. -
Page 35: Checking The Electrolyte Level
CAUTION ELECTROLYTE CONTAINS SULPHURIC ACID: AVOID CONTACT WITH EYES, SKIN AND CLOTHES. IN THE CASE OF ACCIDENTAL CONTACT, RINSE WITH ABUNDANT OF WATER AND CONSULT A DOCTOR. CAUTION IN ORDER TO AVOID DAMAGING THE ELECTRICAL SYSTEM, NEVER DISCON- NECT THE WIRING WHILE THE ENGINE IS RUNNING. DO NOT TIP THE SCOOT- ER TOO MUCH IN ORDER TO AVOID DANGEROUS LEAKAGE OF BATTERY ELECTROLYTE Checking the electrolyte level... -
Page 36: Long Periods Of Inactivity
Long periods of inactivity Battery performance will decrease if the vehicle is not used for a long time. This is the result of the natural phenomenon of battery discharging plus residual absorption by vehicle components with constant power consumption. Poor battery performance may also be due to environmental conditions and the cleanness of the poles. -
Page 37: Fuses
WARNING SPENT BATTERIES ARE HARMFUL FOR THE ENVIRONMENT. COLLECTION AND DISPOSAL SHOULD BE CARRIED OUT IN COMPLIANCE WITH CURRENT REGULATIONS. Fuses (03_21) The electrical system is protected by a 10A fuse valve «B» located next to the battery. Before replacing a blown fuse, find and solve the problem that caused it to blow. Do not substitute the fuse with any alternative form of conductor CAUTION IN ORDER TO AVOID DAMAGING THE ELECTRICAL SYSTEM, NEVER DISCON-... - Page 38 Power: 12V 5W Quantity: 1 Instrument panel light bulbs Type: All glass Power: 12V 1.2W Quantity: 3 Front turn indicator bulb Type: Spherical Power: 12V - 10W Quantity: 1 RHS + 1 LHS Rear turn indicator light bulb Type: Spherical Power: 12V - 10W Quantity: 1 RHS + 1 LHS Stop and tail light bulb...
-
Page 39: Front Light Group
Front light group (03_22, 03_23) To access the headlight bulbs, remove the front of the handlebar cover, as follows: 1) Remove the rear-view mirrors; for this operation follow the instructions described and illustrated in «Rear-view mirrors» section. 2) Unscrew the 3 screws holding the handlebar cover. The front central one «B» and the rear 2 «C». -
Page 40: Front Direction Indicators
2. Turn on the headlight and check that the borderline of the projected light beam on the screen is not lower than 9/10 of the distance from the ground to the centre of vehicle headlamp and higher than 7/10; 3. If otherwise, adjust the right headlight with screw «A». N.B. -
Page 41: Rear Turn Indicators
THE PHENOMENON SHOULD QUICKLY DISAPPEAR WHEN THE LIGHT IS SWITCHED ON. THE PRESENCE OF DROPS OF WATER, ON THE OTHER HAND, COULD INDI- CATE THAT WATER IS INFILTRATING. CONTACT THE PIAGGIO AFTER-SALES SERVICE NETWORK. Rear turn indicators (03_28) To gain access to the turn indicator bulbs, remove the fastening screws «E». The bulbs have a bayonet coupling, to remove them press gently and twist anticlock- wise about 30°. -
Page 42: Idle Adjustment
Idle adjustment (03_30) Proceed as follows: 1. Rest the scooter on its centre stand and lift the saddle (as described in the «Saddle opening to reach helmet compartment» section). 2. Remove the helmet compartment. 3. To adjust the idle speed, start the engine, then loose or tighten the screw «B»... -
Page 43: Front Disc Brake
Front disc brake (03_31) The brake disc and pad wear is automatically compensated, therefore it has no effect on the functioning of the front and rear brakes. For this reason it is not necessary to adjust the brakes. An excessively elastic brake lever stroke may indicate the presence of air in the braking circuit or an irregular brake operation. -
Page 44: Rear Drum Brake
Rear drum brake (03_32) Operate adjustment nut «B» and loosen lock nut «A» shown in the figure. Note that when the throttle is in idle the wheel should rotate free. After the adjustment, screw lock nut «A». CAUTION THE BRAKING ACTION SHOULD BEGIN AFTER ABOUT 1/3 OF THE BRAKE 03_32 LEVER STROKE. -
Page 45: Cleaning The Vehicle
4 - For the battery, follow the procedures described in the «Battery» section. 5 - Drain the petrol from the carburettor tank. 6 - Replace engine oil. Recommended products AGIP CITY HI TEC 4T Oil to lubricate flexible transmissions (brakes, throttle control and odometer) Oil for 4-stroke engines Cleaning the vehicle Use a low pressure jet of water to soften the caked dirt and mud deposited on the... - Page 46 PLASTIC SURFACES, TO PREVENT THEM LOSING THEIR SHINE AND ME- CHANICAL CHARACTERISTICS. WARNING WHEN WASHING THE ENGINE WITH A HIGH-PRESSURE WATER JET: • ONLY USE FAN SPRAY JETS. • DO NOT PLACE THE WATER JET NOZZLE CLOSER THAN 60 CM. •...
- Page 47 there are any cracks or breakage, replace the spark plug. If the spark plug is in good condition, contact an Authorised Piaggio Service Centre. LACK OF COMPRESSION Spark plug adapter "worn", valve Contact an Authorised Service clearance not adequate; worn Centre.
- Page 48 IRREGULAR AUTOMATIC TRANSMISSION Deteriorated roller container or Contact an Authorised Service belt. Centre. INCREASED EXHAUST NOISE Deterioration of the SAS system Contact an Authorised Service and/or of the tab Centre. STAND DOES NOT RETURN TO POSITION Presence of dirt Clean and grease STARTER LEVER DOES NOT RETURN TO CORRECT POSITION Presence of dirt...
-
Page 49: Technical Data
VESPA Vespa LX 50 4T Chap. 04 Technical data... - Page 50 04_01...
- Page 51 TECHNICAL SPECIFICATIONS Engine type Single cylinder 4-stroke Piaggio Hi- PER4 Cubic capacity 49.9 cc Bore x stroke 39 X 41.8 mm Compression ratio 11.5 :1 Length 1755 mm Width 740 mm Overall height 1140 mm Wheel base 1290 mm. Fuel Unleaded petrol Chassis Unitised body made of stamped...
-
Page 52: Kit Equipment
Steering and suspensions Fulcrum steering tube on the front wheel-holder hub; helicoidal spring suspension and double-acting hydraulic shock absorber; rear with single chamber hydraulic shock absorber and coaxial spring not adjustable at preloading Rear tyre Tubeless; 120/70-10" Front tyre Tubeless; 110/70-11" Rear wheel rim Die-cast aluminium alloy;... -
Page 53: Spare Parts And Accessories
VESPA Vespa LX 50 4T Chap. 05 Spare parts and accessories... -
Page 54: Warnings
Warnings (05_01, 05_02) WARNING IT IS ALSO RECOMMENDED THAT "ORIGINAL PIAGGIO SPARE PARTS" BE USED, AS THESE ARE THE ONLY ONES OFFERING YOU THE SAME QUALITY ASSURANCE AS THOSE INITIALLY FITTED ON THE VEHICLE. IT SHOULD BE REMEMBERED THAT USING NON-ORIGINAL SPARE PARTS CAUSES YOUR WARRANTY RIGHTS TO EXPIRE. -
Page 55: Programmed Maintenance
VESPA Vespa LX 50 4T Chap. 06 Programmed maintenance... -
Page 56: Scheduled Maintenance Table
Scheduled maintenance table Adequate maintenance is fundamental to ensuring long-lasting, optimum operation and performance of your vehicle. To this end, a series of checks and maintenance operations (at the owner's expense) have been suggested, which are included in the summary table on the following page. Any minor faults should be reported without delay to an Authorised Service Centre or Dealer without waiting until the next scheduled service to solve it. - Page 57 Steering - adjustment Brake control levers - greasing Brake pads - check condition and wear Brake fluid level - check Safety locks - check Electrical system and battery - check Tyre pressure - check Vehicle and brake test - road test (*) See instructions in «Idle speed adjustment»...
- Page 58 AT 12000 KM OR 24 MONTHS AND 60000 KM Engine oil - replacement Hub oil level - check Spark plug/electrode gap - replacement Air filter - clean Oil filter (net filter) - clean Idle speed (*) - adjustment Throttle lever - adjustment Variable speed rollers - check or replacement Driving belt - replacement Odometer cable - greasing...
- Page 59 Vehicle and brake test - road test (*) See instructions in «Idle speed adjustment» section (**) See regulations in the «Secondary air system» section A 24000 KM AND 48000 KM Engine oil - replacement Hub oil level - replacement Spark plug/electrode gap - replacement Air filter - clean Oil filter (net filter) - clean Valve clearance - check...
- Page 60 Safety locks - check Suspensions - check Electrical system and battery - check Headlight - adjustment Tyre inflation and wear - Check Vehicle and brake test - road test AT 36000 KM Engine oil - replacement Hub oil level - check Spark plug/electrode gap - replacement Air filter - clean Oil filter (net filter) - clean...
- Page 61 Brake fluid level - check Transmission elements - lubrication Safety locks - check Suspensions - check Electrical system and battery - check Headlight - adjustment Tyre inflation and wear - Check SAS box (sponge) (**) - cleaning Vehicle and brake test - road test (*) See instructions in «Idle speed adjustment»...
- Page 62 Driving belt - replacement Cylinder ventilation system - check Odometer cable - greasing Steering - adjustment Brake control levers - greasing Brake pads - check condition and wear Flexible brake tubes - replacement Brake fluid level - check Transmission elements - lubrication Safety locks - check Suspensions - check Electrical system and battery - check...
- Page 63 RECOMMENDED PRODUCTS TABLE Product Description Specifications AGIP ROTRA 80W-90 Rear hub oil SAE 80W/90 Oil that exceeds the requirements of API GL3 specifications AGIP BRAKE 4 Brake fluid FMVSS DOT 4 Synthetic fluid AGIP CITY HI TEC 4T Oil to lubricate flexible transmissions (brakes, Oil for 4-stroke engines throttle control and odometer) AGIP FILTER OIL...
- Page 65 TABLE OF CONTENTS Air filter: 31 Headlight: 39 Saddle: 12 Horn: 11 Scheduled maintenance: 56 Hub oil: 28 Spark plug: 30 Start-up: 12 Battery: 34 Brake: 33, 43, 44 Identification: 13 Technical Data: 49 Top box: 14 Transmission: 21 Clock: 9 Turn indicators: 41 Key switch: 10 Tyre pressure: 17...
- Page 66 The descriptions and illustrations given in this publication are not binding. While the basic features as described and illustrated in this manual remain unchanged, PIAGGIO - GILERA reserves the right, at any time and without being required to update this publication beforehand, to make any changes to components, parts or accessory supplies, which it considers necessary to improve the product or which are required for manufacturing or construction reasons.