
Related Manuals for JVC HM-HDS4EK


Summary of Contents for JVC HM-HDS4EK
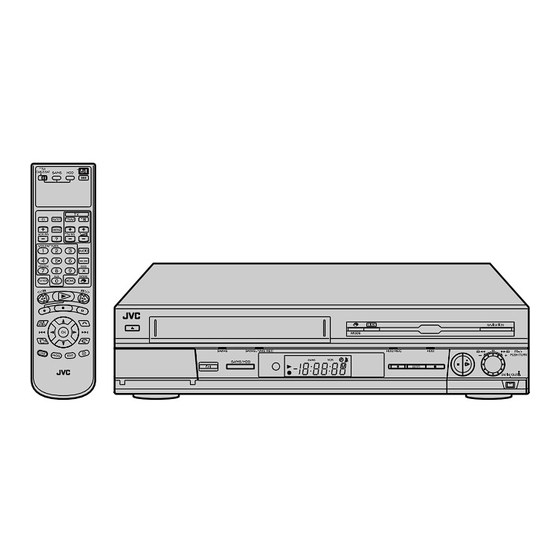
- Page 1 ATTENTION ! Check all accessories listed on page 101. HDD & S-VHS VIDEO RECORDER HM-HDS4EK INSTRUCTIONS LPT0737-001A...
-
Page 2: Safety First
If the fuse fails again consult your nearest JVC dealer. If nonetheless the mains plug is cut off remove the fuse and dispose of the plug immediately, to avoid a possible shock hazard by inadvertent connection to the mains supply. - Page 3 MOISTURE CONDENSATION Moisture in the air will condense on the recorder when you move it from a cold place to a warm place, or under extremely humid conditions—just as water droplets form in the surface of a glass filled with cold liquid. Moisture condensation on the head drum will cause damage to the tape.
-
Page 4: Some Do's And Don'ts On The Safe Use Of Equipment
Some Do’s And Don’ts On The Safe Use Of Equipment This equipment has been designed and manufactured to meet international safety standards but, like any electrical equipment, care must be taken if you are to obtain the best results and safety is to be assured. DO read the operating instructions before you attempt to use the equipment. -
Page 5: Table Of Contents
CONTENTS SAFETY FIRST Safety Precautions ... 2 Some Do’s And Don’ts On The Safe Use Of Equipment ... 4 INDEX INSTALLING YOUR NEW RECORDER Basic Connection ... 12 S-VIDEO Connection ... 13 INITIAL SETTINGS Auto Set Up ... 14 Preset Download ... 16 SAT CONTROL SET Satellite Receiver Control Setting ... -
Page 6: Index
FRONT VIEW S-VHS A Eject Button pg. 34 B Cassette Loading Slot C S-VHS mode Indicator pg. 34 D S-VHS/VHS Recording Mode Indicator (S-VHS/ VHS REC) pg. 34 E MODE Button pg. 9, 22 HDD Capacity Check Button F LIVE Button* pg. -
Page 7: Rear View
REAR VIEW A Mains Power Cord pg. 12 B Cooling Fan This prevents the temperature from rising inside the recorder. Do not remove it. Install the recorder so as not to block the area around the fan. The fan may be activated even if the recorder is turned off. C L-1 IN/OUT Connector pg. - Page 8 ON-SCREEN DISPLAY (for HDD deck) When “O.S.D.” is set to “ON” ( You can show or clear the following operational information by pressing appears and disappears alternately. When playing back a recorded programme When watching a programme on air When using Live Memory playback When recording pg.
- Page 9 ON-SCREEN DISPLAY (for HDD deck) When “O.S.D.” is set to “ON” ( When pressing MODE ( (Appears for eight seconds.) When pressing during recording ON-SCREEN DISPLAY (for DV dubbing) When “O.S.D.” is set to “ON” ( You can show or clear the following operational information by pressing appears and disappears alternately.
- Page 10 ON-SCREEN DISPLAY (for VHS deck) When “O.S.D.” is set to “ON” ( A Operation Mode Indicators B Tape Speed SP/LP C Tape Direction D Counter Display E Tape Remaining Time Indicator F Audio Mode Display pg. 41 G Tape Position Indicator The tape position indicator appears on the TV screen when you press...
-
Page 11: Remote Control
The remote control can operate most of your video recorder’s functions, as well as basic functions of TV sets and satellite receivers of JVC and other brands. ( Point the remote control toward the receiving window. The maximum operating distance of the remote control is about 8 m. -
Page 12: Installing Your New Recorder
Basic Connection Aerial connector Back of TV TV aerial cable 21-pin SCART connector RF cable 21-pin SCART (provided) cable (provided) Mains outlet Mains power cord Back of recorder L-1 IN/OUT ATTENTION: Your TV must have a 21-pin AV input connector (SCART) for the connection to the recorder. -
Page 13: S-Video Connection
S-VIDEO Connection Mains outlet Mains power cord S VIDEO OUT Back of recorder S-Video cable (not provided) Audio cable (not provided) S-VIDEO IN connector Back of TV AUDIO IN connectors To connect to a TV with S-VIDEO/AUDIO IN connectors . . . A Connect the aerial, recorder and TV as per “Basic Connection”... -
Page 14: Initial Settings
Auto Set Up Auto Channel Set/Auto Clock Set/ Auto Guide Program Number Set Slide TV/CABLE/SAT switch to the right. INITIAL SETTINGS Before starting, make sure of the following: ● The TV aerial cable should be connected to the recorder. ● The recorder’s mains power cord should be connected to a mains outlet. - Page 15 If you are using the on-screen display, the AUTO SET screen will appear. As Auto Set Up progresses, the “ ” mark on the TV screen moves from left to right. When the Auto Set Up is completed, “SCAN COMPLETED” appears for about 5 seconds, then the Beginning normal screen appears.
-
Page 16: Preset Download
Preset Download Auto Channel Set by Downloading from TV/Auto Clock Set/Auto Guide Program Number Set ATTENTION You can use this function only with a TV offering T-V Link, etc.* Be sure to use a fully-wired 21-pin SCART cable. * Compatible with TVs offering T-V Link, EasyLink, Megalogic, SMARTLINK, Q-Link or DATA LOGIC via fully-wired 21-pin SCART cable. - Page 17 PDC signal. If you want to take advantage of this function, simply set it to “ON” pg. 84, “Just Clock”). If you have any difficulty with the above procedures call the JVC Customer Service Hot Line on 0870 330 5000 pg.
-
Page 18: Sat Control Set
Satellite Receiver Control Setting Your recorder Satellite Controller Satellite receiver 21-pin SCART cable (provided) Back of recorder L-2 IN/DECODER SAT CONTROL The following procedure is required if you receive satellite channels through a satellite receiver. Approximately 20 seconds before the VIDEO P programming ( pg. - Page 19 Setting satellite receiver’s brand and channel After installation, set the satellite receiver’s brand and channel correctly; otherwise, the Satellite Controller cannot work correctly. Turn on the TV and select the AV mode. Slide TV/CABLE/SAT switch to the right. Turn on the satellite receiver. Turn on the satellite receiver’s power.
-
Page 20: Sat Control Set (Cont.)
Select the satellite receiver’s channel for testing. Press the appropriate number keys to enter one of the channel positions on the satellite receiver, then press You can select the channel position between 1 to 999. After pressing OK, the recorder enters the Test mode. -
Page 21: T-V Link
T-V LINK T-V Link Functions When you connect the recorder to your TV via a fully-wired 21-pin SCART cable ( pg. 12), the following functions are available. You can use these functions only with a TV offering T-V Link, etc.* For details, refer to the instruction manual of your TV. -
Page 22: Recording/Playback On Hdd Deck
Basic Recording Turn on the TV and select the AV mode. Slide TV/CABLE/SAT switch to the right. If the recorder is turned on with HDD deck selected, there may be about 30 seconds’ delay in starting to show pictures on the screen. RECORDING/PLAYBACK ON HDD DECK Turn on the recorder. -
Page 23: Basic Playback
Basic Playback Turn on the TV and select the AV mode. Slide TV/CABLE/SAT switch to the right. If the recorder is turned on with HDD deck selected, there may be about 30 seconds’ delay in starting to show pictures on the screen. Turn on the recorder. -
Page 24: Playback With Hdd Navigation
Playback with HDD Navigation The HDD Navigation enables you to search and select the desired programmes recorded on the HDD deck very easily. There is a 80 Gbyte hard disk drive on this recorder. You can record up to 100 programmes for the HDD deck. Each time a programme is recorded on the HDD deck, the information of the programme are registered for the HDD Navigation automatically. -
Page 25: Play List
Scan for Beginning of Programme (or Play List) You can scan the beginning of the programme (or play list) easily with the HDD Navigation. For details of the play list, refer to “Play List Features” ( pg. 60). Turn on the TV and select the AV mode. Slide TV/CABLE/SAT switch to the right. - Page 26 Playing Two or More Programmes (or Play Lists) Continuously in Desired Order You can select up to eight programmes (or play lists) for continuous programme play. Perform steps A to C of “Scan for Beginning of Programme (or Play List)” ( pg.
- Page 27 Family Option Preset You can easily search for a desired programme (or play list) using this option. (“Sort Recorded Programmes (or Play Lists) by Category and Playback” ( pg. 26)) Before using this feature, it is recommended to disengage the unnecessary options using the following procedure to eliminate the labor of selection among many options.
-
Page 28: Live Memory Features
Live Memory Features Equipped with a hard disk drive, this recorder allows information to be written to and read from the hard disk at high speeds. Taking advantage of this feature, you can temporarily record programmes received with the tuner or from an externally connected equipment, and can watch them only a few seconds behind actual air time. - Page 29 Turn on the recorder. Press 1. Select the HDD deck. Press HDD. Choose a programme. Press VCR PR +/– or the number keys to select the channel you wish to record. The temporary recording begins. Locate the point to start playback from. Press to search for the previous part of the currently viewing programme (temporary recorded on the...
-
Page 30: Playback Features
Playback Features Turn on the TV and select the AV mode. Slide TV/CABLE/SAT switch to the right. If the recorder is turned on with HDD deck selected, there may be about 30 seconds’ delay in starting to show pictures on the screen. Still Picture/Frame-By-Frame Playback Pause during playback. - Page 31 Jump search You can locate a scene ahead or behind the current one by jumping scenes according to selected time intervals ( during playback (or Live Memory Playback). This feature is also available during recording (or Live Memory Recording) or when watching a TV received programme.
-
Page 32: Repeat Playback
RECORDING/PLAYBACK ON HDD DECK (cont.) Repeat Playback Your recorder can automatically play back the desired programme(s) repeatedly. Select the desired programme. Perform steps A to D of “Scan for Beginning of Programme (or pg. 25 Play List)” ( ) before continuing. Start Repeat Playback. -
Page 33: Recording Features
Recording Features Turn on the TV and select the AV mode. Slide TV/CABLE/SAT switch to the right. If the recorder is turned on with HDD deck selected, there may be about 30 seconds’ delay in starting to show pictures on the screen. Pausing During Recording While you are recording a TV programme and watching it, you can pause Live Memory Playback to answer a phone call or so... -
Page 34: Recording/Playback On Vhs Deck
Basic Recording Turn on the TV and select the AV mode. Slide TV/CABLE/SAT switch to the right. If the recorder is turned on with HDD deck selected, there may be about 30 seconds’ delay in starting to show pictures on the screen. NOTES: It is not possible to record a TV programme on both the HDD deck and the VHS deck simultaneously. -
Page 35: Basic Playback
Basic Playback Turn on the TV and select the AV mode. Slide TV/CABLE/SAT switch to the right. If the recorder is turned on with HDD deck selected, there may be about 30 seconds’ delay in starting to show pictures on the screen. Load a cassette. -
Page 36: Playback With Vcr Navigation
Playback with VCR Navigation The VCR Navigation enables you to search and select the desired programmes recorded on the VHS deck very easily. When you record a programme with the VHS deck for more than 8 minutes in SP mode for more than 15 minutes in LP mode) with “NAVIGATION”... - Page 37 Turn on the recorder. Press 1. Select the VHS deck. Press S-VHS. Load the cassette. Insert a cassette with the record safety tab intact. Access the Index screen. On the recorder Press NAVIGATION. On the remote control A Press NAVIGATION. The VCR Navigation screen appears.
- Page 38 Sort Recorded Programmes by Category and Playback You can easily search for a desired programme in the Index screen by sorting according to the category option registered during recording (or after recording). Perform steps A and B of “Scan for Beginning of Programme”( pg.
-
Page 39: Playback Features
Playback Features ATTENTION Picture may not appear during variable speed search with an LP-recorded tape. In the variable speed search, still, slow motion or frame-by-frame playback mode, the picture will be distorted, and there will be a loss of colour. When normal playback resumes from search, still, slow motion or frame-by-frame playback, the picture may jitter vertically momentarily depending on the type of TV being... -
Page 40: Index Search
Repeat Playback Your recorder can automatically play back the whole tape 100 times repeatedly. Start playback. Press Activate Repeat Playback. Press and hold for over 5 seconds, then release. The Play indicator ( ) on the front display panel blinks slowly. After playing back a tape 100 times, the recorder stops automatically. -
Page 41: Manual Tracking
Manual Tracking Your recorder is equipped with automatic tracking control. During playback, you can override this and adjust the tracking manually by pressing the VCR PR buttons. Override automatic tracking. Press LIVE on the remote control. Adjust the tracking manually. Press VCR PR + or –. -
Page 42: Recording Features
Recording Features Turn on the TV and select the AV mode. Slide TV/CABLE/SAT switch to the right. If the recorder is turned on with HDD deck selected, there may be about 30 seconds’ delay in starting to show pictures on the screen. Recording Resume Function If there is a power outage during recording, Instant Timer Recording (in the right column) or timer recording... - Page 43 Elapsed Recording Time Indication Set the counter display. Press – –:– – so that a counter reading appears on the TV screen and the front display panel. The front display panel shows the counter reading with “:” lit. Reset the counter. Press 0000 before starting recording or playback.
- Page 44 RECORDING/PLAYBACK ON VHS DECK (cont.) Receiving Stereo and Bilingual Programmes Your recorder is equipped with a Digital stereo sound decoder (NICAM) making reception of stereo and bilingual broadcasts possible. When the channel is changed, the type of broadcast being received will be displayed on the TV screen for a few seconds. Type of Broadcast Being Received Regular Monaural...
-
Page 45: Picture System
B.E.S.T. Picture System The B.E.S.T. (Biconditional Equalised Signal Tracking) system checks the condition of the tape in use during playback and recording, and compensates to provide the highest-possible playback and recording pictures. You can set “B.E.S.T.” to “ON” or “OFF” to your preference pg. -
Page 46: Timer Recording
VIDEO P Programming You can programme this recorder to timer-record as many as 16 programmes. With the VIDEO P + system, timer programming is greatly simplified because each TV programme has a corresponding code number which your recorder is able to recognize. Before performing the VIDEO P Programming: Make sure that the recorder’s built-in clock is set properly. - Page 47 Set the PDC mode. A Press to move the arrow to “VPS/PDC”. B Press PDC to select “ON” or “OFF”. A Press to move the arrow to “VPS/PDC”, then press OK. B Press to select the desired setting, then press OK. If “VPS/PDC ON”...
-
Page 48: Express Timer Programming
Express Timer Programming You can programme this recorder to timer-record as many as 16 programmes. If you do not know the P number for the programme you wish to record, use the following procedure to set your recorder to timer-record the programme. Before performing Express Timer Programming: Make sure that the recorder’s built-in clock is set properly. - Page 49 Set the PDC mode. A Press to move the arrow to “VPS/PDC”. B Press PDC to select “ON” or “OFF”. A Press to move the arrow to “VPS/PDC”, then press OK. B Press to select the desired setting, then press OK. If “VPS/PDC ON”...
- Page 50 Check, cancel and change programmes Disengage the timer mode. (VHS deck only) Press (TIMER), then press Access the Programme Check screen, then select the date. A Press PROG. B Press to move the arrow to “PROGRAMME w r e t LIST”, then press OK.
-
Page 51: Automatic Satellite Programme Recording
Automatic Satellite Programme Recording NOTE: This function is available for the HDD deck only. This function allows you to automatically record a satellite programme which is timer-programmed on your external satellite receiver. Connect a satellite receiver to the recorder’s L-2 IN/DECODER connector and programme the timer on the satellite receiver. -
Page 52: Remote Control Functions
Remote A/B/C/D Code Switching The remote control is capable of controlling four JVC video recorders independently. Each of recorders can respond to one of four codes (A, B, C or D). The remote control is preset to send A code signals because your video recorder is initially set to respond to A code signals. - Page 53 TV Multi-Brand Remote Control Your remote control can operate the basic functions of your TV set. In addition to JVC TVs, other manufacturer’s TVs can also be controlled. Before performing the following steps: Turn off the TV using its remote control.
- Page 54 Turn off the satellite receiver using its remote control. IMPORTANT Although the provided remote control unit is compatible with JVC satellite receivers, as well as many other models, it may not work with your satellite receiver, or in some instances, may have limited function capability.
-
Page 55: Editing
EDITING About Hybrid Navigation In the sections “Playback with HDD Navigation” ( and “Playback with VCR Navigation” ( described how to search for the beginning of each recorded programme using the Navigation functions. More detailed explanations are provided in this section using HDD Navigation by way of example. -
Page 56: Modify Information
Modify Information NOTE: The Navigation systems cannot work during recording on the HDD deck or in SAT mode ( pg. 51). Modify Index Turn on the recorder. Press Select the deck. Slide TV/CABLE/SAT to the right, then press HDD or S-VHS. -
Page 57: Modify Category
Modify Category Perform steps A to D of “Modify Index” ( continuing. Access the modify screen. Press to move the arrow to “CATEGORY”, then press Select new category. w r e t Press to move the arrow to the desired category, then press OK. - Page 58 Delete Programme Information For HDD Navigation: When you delete the registered information of a programme, the recorder delete the programme itself on the hard disk drive. The deleted programme is never resumed. For VCR Navigation: When you delete the registered information of a programme, the recorder delete only the information on the hard disk drive.
- Page 59 Locate the divide point. A Confirm the arrow is on “DIVIDE”. Playback starts in the left large window. B Press the appropriate buttons ( search for the divide point. You can also search for the divide point by turning and pressing the JOG dial. C Press OK at the divide point.
-
Page 60: Play List Features
Play List Features A play list is a collection of the scenes selected from original recorded programmes. A play list can be freely edited and played back without ever changing any original recorded data. A play list includes information such as the beginning and ending time of the scenes, indexes for checking the contents of the recorded data, category information, and more. - Page 61 Confirm the play list. Press to move the arrow to “PREVIEW”, then w r e t press OK. Playback of current play list starts in the left large window. Register the selected scenes. Press to move the arrow to “OK”, then press w r e t Return to the normal screen.
- Page 62 Delete scenes Perform steps A to C of “Create Play List” ( steps A and B of “Edit Scenes” ( continuing. Delete the scene. A Press to move the arrow to “DELETE”, then w r e t press OK. B Press to move the arrow to the desired scene to be deleted in the scene list, then press OK.
-
Page 63: Dubbing
Dubbing Easy Dubbing from HDD deck to VHS deck Because this recorder includes both HDD deck and VHS deck, you can easily use it for dubbing up to eight programmes (or play lists) without connecting any other equipment. Access the HDD Navigation screen. Slide TV/CABLE/SAT to the right, then press HDD, then press EDIT. - Page 64 Select the VHS deck. Press S-VHS. Load a cassette. Insert a cassette with the record safety tab intact. · Set the recording speed. · Press MODE. Locate the start point. A Search for the point where you want to start dubbing by pressing B Press Pause mode.
-
Page 65: Normal Dubbing (From Hdd To Vhs)
Normal Dubbing (from HDD to VHS) You can dub selected scenes from the HDD deck to a cassette, starting and stopping wherever you wish. Load a cassette. Insert a cassette with the record safety tab intact. Prepare the HDD deck for dubbing. A Slide TV/CABLE/SAT to the right, then press HDD and select the programme to be dubbed. -
Page 66: Normal Dubbing (From Vhs To Hdd)
Normal Dubbing (from VHS to HDD) You can dub selected scenes from a cassette to the HDD deck, starting and stopping wherever you wish. Load a cassette. Insert a cassette with the record safety tab intact. Prepare the VHS deck for dubbing. A Slide TV/CABLE/SAT to the right, then press S-VHS and select the programme to be dubbed. -
Page 67: Edit From A Camcorder
AUDIO L input connector on your recorder. For the VHS deck: When a Master Edit Control-equipped JVC camcorder is used, the camcorder is capable of controlling the recorder. Refer to the camcorder’s instruction manual for operating procedure. -
Page 68: Output/Input Set
Output/Input Set L-1 OUTPUT and L-1 INPUT Setting The L-1 IN/OUT connector accepts and delivers either a composite signal (regular video signal) or a Y/C signal (a signal in which the luminance and chrominance signals are separated). Set “L-1 OUTPUT” and “L-1 INPUT” to the appropriate mode depending on the type of appliance connected to the recorder’s L-1 IN/OUT connector. - Page 69 L-2 SELECT and L-2 INPUT Setting Set “L-2 SELECT” and “L-2 INPUT” to the appropriate mode depending on the type of appliance connected to the recorder’s L-2 IN/DECODER connector. Perform steps A and B of “L-1 OUTPUT and L-1 INPUT Setting”...
-
Page 70: Edit To Or From Another Video Recorder
Edit To Or From Another Video Recorder Advantages of S-VHS video recorders You can edit from VHS to S-VHS, S-VHS to VHS, or, from S-VHS to S-VHS. From VHS to S-VHS: Record VHS playback signals in the S-VHS mode. Although the picture quality is inherently limited by that of the original, the edited tape has better picture quality than those made by VHS-to-VHS editing. - Page 71 TV receiver Player 21-pin SCART cable (not provided) AV mode Another recorder Recorder Recorder TV receiver S-Video cable (provided) 21-pin SCART cable (not provided) Another recorder Player NOTES: All necessary cables can be obtained from your dealer. For Y/C signal input/output, be sure to use a 21-pin SCART cable that is compatible with the Y/C signal. When you select “EDIT”...
-
Page 72: Dv Dubbing
DV Dubbing You can dub programmes from a camcorder or DV equipment connected to the recorder with a DV cable. The recorder’s remote control allows you the limited control of the connected camcorder or DV equipment functions during dubbing. NOTE: When you use a PC connecting to the DV IN/OUT connector, we do not assure the normal operation of this recorder. - Page 73 Make connections. Connect the camcorder to the DV IN/OUT connector on the recorder’s front panel. Select the HDD deck. Slide TV/CABLE/SAT to the right, then press HDD. Prepare the HDD deck for dubbing. Press VCR PR+/– to set the channel to “D-1”. The on-screen display for DV dubbing appears.
-
Page 74: Audio Dubbing
Audio Dubbing Audio Dubbing replaces the sound of a recorded programme in the recording speed of “DV” on the HDD deck with the sound played back from external audio equipment. ATTENTION: Audio dubbing is only possible for the programme having the recording speed of “DV”... - Page 75 Make connections. Connect an audio component to the AUDIO L + R input connectors on the recorder’s front panel. When connecting a monaural audio component, use only the recorder’s AUDIO L input connector. Select the HDD deck. Slide TV/CABLE/SAT to the right, then press HDD. Select the audio track to monitor the recorded programme’s original sound.
-
Page 76: System Connections
Connecting To A Satellite Receiver Simple Connections This is an example of simple connection if your TV has one 21-pin AV input (SCART) connector. Connect the satellite receiver to the L-2 IN/DECODER connector, then connect the L-1 IN/OUT connector to the TV’s connector. -
Page 77: Connecting/Using A Stereo System
Connecting/Using A Stereo System These instructions enable you to connect your video recorder to your Hi-Fi stereo system (if you have one) and listen to the soundtrack through the stereo. Stereo amplifier Speaker Television Mains outlet Back of recorder Make connections. Connect the AUDIO OUT L and R connectors on your video recorder to the AUX IN or TAPE MONITOR connectors on your stereo system’s receiver or amplifier. -
Page 78: Subsidiary Settings
Mode Set Turn on the TV and select the AV mode. Slide TV/CABLE/SAT switch to the right. SUBSIDIARY SETTINGS You can change various mode settings on the TV screen by following the procedure described below. The table below shows the structure of the menu system. HDD SET UP 1 ( HDD SET UP 2 ( HDD/VCR SET UP... - Page 79 HDD SET UP 1 LIVE MEMORY When this function is set to “30MIN”, “1HR” or “3HR”, hard disk drive illumination lights blue and you can apply the selected time length to the “Live Memory Features” ( 30MIN AUDIO REC When this function is set to “NICAM”, the NICAM audio programmes will be recorded. When this function is set to “MONO”, the Standard (monaural) audio programmes will be NICAM recorded.
- Page 80 VCR SET UP 1 (cont.) S-VHS ET You can record in SP mode on VHS cassettes with S-VHS picture quality. Tapes recorded using this function can be played back on a recorder equipped with the S-VHS ET function. When this function is set to “ON”, the S-VHS indicator lights up on the front display panel. NOTES: You can activate the S-VHS ET function only before you start recording on a VHS cassette.
- Page 81 AUTO SP LP TIMER When this function is set to “ON”, the recorder automatically switches to LP mode to allow complete recording if there is not enough tape to record the entire programme while timer-recording in SP mode. For Example . . . Recording a programme of 210 minutes in length onto a 180-minute tape Approximately 150 minutes Make sure you set this function to “ON”, before the timer-recording starts.
- Page 82 FUNCTION O.S.D. When this function is set to “ON”, various operational indicators appear on the TV screen. NOTES: When you use this recorder as the source player for editing, be sure to set “O.S.D.” to “OFF” before starting. During playback, the operation mode indicators may be disturbed depending on the type of tape being used.
-
Page 83: Video Plus + ® System Setup
VIDEO P IMPORTANT Normally, Auto Set Up ( pg. 14), Preset Download ( automatically. You need to set the Guide Program numbers manually only in the following cases. When timer-programming with the VIDEO P on your recorder, is not selected, when you add a channel after Auto Set Up, Preset Download or Auto Channel Set has taken place, —Set the Guide Program number for that station manually. -
Page 84: Clock Set
Clock Set Turn on the TV and select the AV mode. Slide TV/CABLE/SAT switch to the right. Just Clock The Just Clock function provides accurate time keeping through automatic adjustments at regular intervals, by reading data from a PDC signal. The Just Clock option can be set “ON”... - Page 85 Set the date and time. Press to set the time, then press OK or “DATE” display begins blinking. Repeat the same procedure to set the date and year. When you set the time, press and hold by 30 minutes. When you set the date, press and hold by 15 days.
-
Page 86: Tuner Set
Tuner Set Turn on the TV and select the AV mode. SUBSIDIARY SETTINGS (cont.) IMPORTANT Perform the following steps only if — — Auto Channel Set has not been set correctly by Auto Set Up or by Preset Download ( pg. - Page 87 View the Confirmation screen. After “SCAN COMPLETED” is displayed on the TV screen for about 5 seconds, the Confirmation screen looking like the one to the right appears. The stations your recorder located appear on a Confirmation screen — channel positions (PR), channels (CH) and station names (ID –...
-
Page 88: Manual Channel Set
SUBSIDIARY SETTINGS (cont.) Manual Channel Set Store channels that were not stored during Auto Set Up pg. 14), Preset Download ( pg. 16) or Auto Channel Set pg. 86). Access the Main Menu screen. Press MENU. Access the Tuner Set screen. A Press to move the arrow to “INITIAL SET UP”, then press... -
Page 89: Delete A Channel
Input the channel. Press the number keys to input the channel number you want to store. Input “0” before any single number entries. To input the registered station name (ID – until “– – – –” (ID setting) begins blinking, then press For fine tuning adjustment, press then press . - Page 90 Set Stations (A) Set station names that are registered in your recorder. Perform steps A and C of “Manual Channel Set” on page 88 to access the Confirmation screen before continuing. Select the item. Press until the item you want begins blinking. w r e t Access the Manual Channel Set screen.
-
Page 91: Tv Station And Id List
TV Station And ID List STATION NAME Anglia TV ANGL ARTE ARTE BBC Group BBC1 BBC1 BBC2 BBC2 Berlin 1 BLN1 Berlin 2 BLN2 Border TV BORD Bayern1 Bayern3 BRT1 BRT1 BRT2 BRT2 Children Ch CHLD Canal + Channel TV CHNL Central TV CNTR... - Page 92 TV Station Channel Number Guide Only the main stations are listed. There are in addition many relay stations, and full lists are available from the BBC and ITV. BBC1 BBC2 ITV London & South-East Bluebell Hill...40 Crystal Palace ...26 Dover ...50 Heathfield ...49 Oxford ...57 South-West...
-
Page 93: Help
HELP Help Function Use this function if you encounter problems while operating this recorder. Access the Help screen. Press ?. An INDEX screen that contains the most common needed topics (headings) relating to the current status appears. Topics with the icon refer to HDD deck operations and with the icon refer to those for the VHS deck. -
Page 94: Troubleshooting
CORRECTIVE ACTION Set the TV to its AV mode. Try manual tracking. ( pg. 41) Use a dry cleaning cassette ECL-3F or consult your JVC dealer. Try manual tracking. ( pg. 41) CORRECTIVE ACTION Insert a cassette, or using adhesive tape, cover the hole where the tab was removed. - Page 95 SYMPTOM 3. Tape-to-tape editing is not possible. 4. Camcorder recording is not possible. 5. “ ” and “ ” on the front display panel won’t stop blinking. TIMER RECORDING SYMPTOM 1. Timer recording won’t work. 2. Timer programming is not possible.
- Page 96 TIMER RECORDING (cont.) SYMPTOM 5. “ ” blinks for 10 seconds and the Timer mode is disengaged. 6. The VIDEO P + system does not timer-record properly. 7. “ ” and “ ” on the front display panel won’t stop blinking. 8.
- Page 97 ON-SCREEN MESSAGES MESSAGE CAN NOT MODIFY LIVE MEMORY TIME, MORE CAPACITY NEEDED DELETE UNWANTED PROGRAMME THEN RETRY DO YOU WANT TO DELETE SELECTED PROGRAMME? DO YOU WANT TO DELETE SELECTED PROGRAMME INFORMATION? DO YOU WANT TO DELETE SELECTED CASSETTE INFORMATION? INSERT CASSETTE CAN NOT MODIFY INDEX NO CASSETTE...
- Page 98 ON-SCREEN MESSAGES (cont.) MESSAGE PROGRAMME NOT COMPLETED PROGRAMME OVERLAPPED PLEASE CONFIRM AND MODIFY TIMER PROGRAMMING STOPPED PROGRAMME COMPLETED PRESS “OK” THEN [ ] TO ENTER TIMER STANDBY MODE TIMER RECORDING WILL START WITHIN 5 MIN INSERT CASSETTE AND PRESS [ REMAINING CAPACITY IS SMALL DELETE UNWANTED PROGRAMME FROM HDD CAPACITY IS FULL, RECORDING STOPPED...
-
Page 99: Questions And Answers
QUESTIONS AND ANSWERS PLAYBACK Q. What happens if the end of the tape is reached during playback or search? A. The tape is automatically rewound to the beginning. Q. During search, slow, still and frame-by-frame playback, I can’t hear any audio. What’s the problem? A. -
Page 100: Specifications
GENERAL Power requirement : AC 220 V – 240 V Power consumption Power on : 42 W Power off : 12 W Temperature Operating : 5°C to 40°C Storage : –20°C to 60°C Operating position : Horizontal only Dimensions (WxHxD) : 435 mm x 98 mm x 357 mm Weight : 5.3 kg... -
Page 101: Check Contents
Check Contents CHECK ALL THE CONTENTS SHOWN BELOW Video Cassette Recorder “AA” Batteries (x 2) RF Cable Infrared Remote Control Unit 21-pin SCART Cable Satellite Controlle... -
Page 102: List Of Terms
... 74 Audio Dubbing ... 86 Auto Channel Set ... 14 Auto Set Up ... 81 AUTO SP LP TIMER ... 82 AUTO TIMER Automatic Satellite Programme Recording ... 45, 81 B.E.S.T. Picture System ... 89 Change Station Channel Position Check, cancel and change programmes ... - Page 103 MEMO...
- Page 104 Printed in Germany 0503-MN-ID-JVE...