Table of Contents
Advertisement
Quick Links
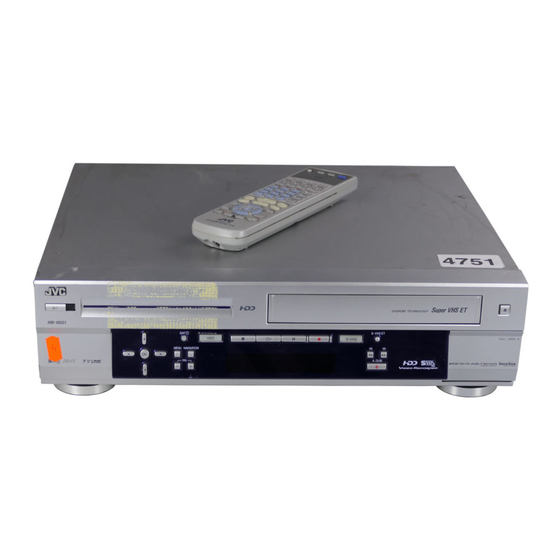
HDD & S-VHS
VIDEO RECORDER
1
2
1
2
3
4
5
6
3
7
8
9
4
0
<
>
-
+
CONTENTS
Safety Precautions .....................................2
Basic Connection ....................................12
S-VIDEO Connection ...............................13
Auto Set Up .............................................14
Preset Download .....................................16
Language .................................................18
Satellite Receiver Control Setting .............19
T-V Link Functions ..................................21
Basic Recording .......................................22
Basic Playback ........................................23
Playback with HDD Navigation ..............24
Live Memory Playback ............................26
Playback Features ....................................27
Recording Features ..................................29
Basic Recording .......................................30
Basic Playback ........................................31
Playback with VCR Navigation ................32
Playback Features ....................................34
Recording Features ..................................37
B.E.S.T. Picture System ............................41
®
V
Express Timer Programming ....................44
About Hybrid Navigation ........................51
Modify Information ..................................52
Dubbing ..................................................56
Normal Dubbing (from HDD to VHS) ......58
F - 1
Normal Dubbing (from VHS to HDD) ......59
Random Assemble Editing .......................60
Edit From A Camcorder ...........................62
Output/Input Set ......................................64
Audio Dubbing ........................................68
Connecting To A Satellite Receiver ..........70
Connecting/Using A Decoder ..................72
Connecting/Using A Stereo System ..........73
Mode Set .................................................74
®
V
Tuner Set .................................................80
Clock Set .................................................88
ENGLISH
Timer Programming .............42
System Setup .......................79
EN
LPT0606-001A
2
5
12
14
19
21
22
30
42
48
51
70
74
90
97
98
99
Advertisement
Chapters
Table of Contents

Related Manuals for JVC HM-HDS1EU


Summary of Contents for JVC HM-HDS1EU
-
Page 1: Table Of Contents
HDD & S-VHS VIDEO RECORDER < > – ENGLISH CONTENTS SAFETY FIRST Safety Precautions ...2 INDEX INSTALLING YOUR NEW RECORDER Basic Connection ...12 S-VIDEO Connection ...13 INITIAL SETTINGS Auto Set Up ...14 Preset Download ...16 Language ...18 SAT CONTROL SET Satellite Receiver Control Setting ...19 T-V LINK T-V Link Functions ...21... -
Page 2: Safety First
Safety Precautions The rating plate and the safety caution are on the rear of the unit. WARNING: DANGEROUS VOLTAGE INSIDE WARNING: TO PREVENT FIRE OR SHOCK HAZARD, DO NOT EXPOSE THIS UNIT TO RAIN OR MOISTURE. CAUTION When you are not using the recorder for a long period of time, it is recommended that you disconnect the power cord from the mains outlet. - Page 3 For Italy: “It is declared that this product, brand JVC, conforms to the Ministry Decree n. 548 of 28 Aug.’95 published in the Official Gazette of the Italian Republic n. 301 of 28 Dec.’95” The STANDBY/ON button does not completely shut off mains power from the unit, but switches operating current on and off.
- Page 4 PRECAUTION FOR Hard Disk Drive 1. Before installing the recorder This recorder has a built-in hard disk drive, which is a device to read minute magnetic changes. The inside of the device is precision-built, which, when installing the recorder, requires you to note the following: ●...
-
Page 5: Index
INDEX FRONT VIEW A STANDBY/ON Button B Infrared Beam Receiving Window C Hard Disk Drive Illumination D MENU Button pg. 18 E SAT Button pg. 47 F HDD Button pg. 22 G Stop Button pg. 22 H Play Button pg. 23 I Pause Button pg. -
Page 6: Rear View
REAR VIEW AV1 (L-1) IN/OUT ENTREE/SORTIE ANTENNA ANTENNE ENTREE IN/DECODER AV2 (L-2) ENTREE/DECODEUR SORTIE A ANTENNA IN Connector B AV1 (L-1) IN/OUT Connector pg. 12, 66, 70, 71, 72 C S OUT Connector pg. 13 D Mains Power Cord pg. 12 SORTIE AUDIO SAT CONTROL... -
Page 7: Front Display Panel
FRONT DISPLAY PANEL VPS/PDC VPS/PDC A B.E.S.T. Picture System Display B Symbolic Mode Indicators STILL: SLOW: PLAY: FF/REW VARIABLE RECORD: SEARCH: RECORD PAUSE: AUDIO DUBBING: AUDIO DUBBING PAUSE: C Recording Speed Indicators pg. 41 D “Timer” Indicator E Tape Remaining Time Indicator F VPS/PDC Indicator G S-VHS Indicator H VCR Indicator... - Page 8 ON-SCREEN DISPLAY (for HDD deck) When “O.S.D.” is set to “ON” ( When playing back a recorded programme PLAY 4 0:59:24 06/12 TUE 0:00 1:00 When watching a programme on air PRESENT TIME T 21:32 ON AIR 20:00 21:00 When pressing PAUSE PAUSE 9 21:33 PRESENT TIME T 21:45 20:00...
- Page 9 ON-SCREEN DISPLAY (for VHS deck) When “O.S.D.” is set to “ON” ( A Operation Mode Indicators B Tape Speed SP/LP/EP C Tape Direction D Counter Display E Tape Remaining Time Indicator F Audio Mode Display pg. 36 G Tape Position Indicator The tape position indicator appears on the TV screen when you press...
- Page 10 REMOTE CONTROL Buttons with a small dot on the left side of the name can also be used to operate your TV. ( pg. 49) A LCD Panel pg. 42 B HDD Button pg. 22 C TV/CABLE/SAT Button pg. 49, 50 D AUDIO Button pg.
-
Page 11: How To Use
How To Use The remote control can operate most of your video recorder’s functions, as well as basic functions of TV sets and satellite receivers of JVC and other brands. ( pg. 49, 50) Point the remote control toward the receiving window. -
Page 12: Installing Your New Recorder
Basic Connection TV aerial cable 21-pin SCART connector RF cable (provided) AV1 (L-1) IN/OUT ANTENNA ANTENNA Mains outlet ATTENTION: Your TV must have a 21-pin AV input connector (SCART) for the connection to the recorder. It’s essential that your video recorder be properly connected. -
Page 13: S-Video Connection
S-VIDEO Connection TV aerial cable ANTENNA IN AV1 (L-1) IN/OUT ENTREE/SORTIE ANTENNA ANTENNE ENTREE IN/DECODER AV2 (L-2) ENTREE/DECODEUR SORTIE ANTENNA OUT To connect to a TV with S-VIDEO/AUDIO IN connectors . . . Connect the recorder to TV. A Connect the aerial, recorder and TV as per “Basic Connection”... -
Page 14: Initial Settings
Auto Set Up Auto Channel Set/Auto Clock Set/ Auto Guide Program Number Set After the button on the recorder or remote control is pressed for the first time to power on the recorder, by simply selecting your country*, the Auto Set Up function sets the tuner channels, clock** and Guide Program numbers automatically. -
Page 15: International Telephone Country Code
Select the language. Press OK. The Language Set display appears on the front display panel and/or on the TV screen. On the front display panel Press to select your language code. Language Code ENGLISH NEDERLANDS DEUTSCH SVENSKA FRANCAIS NORSK ITALIANO SUOMI CASTELLANO DANSK... -
Page 16: Preset Download
Preset Download Auto Channel Set by Downloading from TV/Auto Clock Set/Auto Guide Program Number Set ATTENTION You can use this function only with a TV offering T-V Link, etc.* Be sure to use a fully-wired 21-pin SCART cable. * Compatible with TVs offering T-V Link, EasyLink, Megalogic, SMARTLINK, Q-Link or DATA LOGIC via fully-wired 21-pin SCART cable. -
Page 17: Ceská Republika
Results of Auto Set Up/Preset Download appear on the front display panel If both Auto Channel Set and Auto Clock Set have been performed successfully, the correct current time is displayed. Turn on the TV and select its AV mode, then make sure that all necessary stations have been stored in the recorder’s memory by using the PR button(s). -
Page 18: Language
Language Turn on the TV and select the AV mode. INITIAL SETTINGS (cont.) This recorder offers you the choice to view on-screen messages in 10 different languages. Though Auto Set Up selects the language automatically ( change the language setting manually as required. Access the Main Menu screen. -
Page 19: Sat Control Set
SAT CONTROL SET Satellite Receiver Control Setting Your recorder Satellite Controller Transmitter Satellite receiver 21-pin SCART cable (provided) SAT CONTROL AV2 (L-2) IN/DECODER The following procedure is required if you receive satellite channels through a satellite receiver. Approximately 20 seconds before the S programming ( pg. -
Page 20: Press Rt
Setting satellite receiver's brand and channel After installation, set the satellite receiver’s brand and channel correctly; otherwise, the Satellite Controller cannot work correctly. Turn on the TV and select the AV mode. Turn on the satellite receiver. Turn on the satellite receiver’s power. Access the Main Menu screen on the recorder. -
Page 21: T-V Link
SAT CONTROL SET (cont.) T-V LINK Check the result of the test. If the satellite receiver’s channel number has been changed to the same one as you set in step F ... Press to move the highlight bar (pointer) to “CHANGED TO ...”, then press OK or to finish the... -
Page 22: Recording/Playback On Hdd Deck
Basic Recording Turn on the TV and select the AV mode. If the recorder is turned on with HDD deck selected, there may be about 30 seconds’ delay in starting to show pictures on the screen. RECORDING/PLAYBACK ON HDD DECK Turn on the recorder. -
Page 23: Basic Playback
Basic Playback Turn on the TV and select the AV mode. If the recorder is turned on with HDD deck selected, there may be about 30 seconds’ delay in starting to show pictures on the screen. Turn on the recorder. Press 1. -
Page 24: Playback With Hdd Navigation
Playback with HDD Navigation The following screen appears as the HDD Navigation screen when you press NAVIGATION with the HDD deck selected. You can move the arrow to select the desired position on the screen by pressing Y R U T control (or on the recorder). -
Page 25: Start Playback
Scan for Beginning(s) of Programme(s) ● Turn on the TV and select the AV mode. ● If the recorder is turned on with HDD deck selected, there may be about 30 seconds’ delay in starting to show pictures on the screen. You can scan the beginning of the programme easily with the HDD Navigation. -
Page 26: Live Memory Playback
Live Memory Playback Equipped with a hard disk drive, this recorder allows information to be written to and read from the hard disk at high speeds. Taking advantage of this feature, you can temporarily record programmes received with the tuner or from an externally connected equipment, and can watch them only a few seconds behind actual air time. -
Page 27: Playback Features
Playback Features Turn on the TV and select the AV mode. If the recorder is turned on with HDD deck selected, there may be about 30 seconds’ delay in starting to show pictures on the screen. High-Speed Search During playback (or Live Memory Playback), press for forward high-speed search, or high-speed search. -
Page 28: Repeat Playback
Variable Speed Search During playback (or Live Memory Playback), press forward variable-speed search, or variable-speed search. The playback speed changes for each direction by pressing repeatedly. Refer to the illustration below. To resume normal playback, press 4. RECORDING/PLAYBACK ON HDD DECK (cont.) Quick Rewind a little During playback (or Live Memory Playback), press (START –). -
Page 29: Recording Features
Recording Features Record One Programme While Watching Another Once recording is in progress, all you need to do is to set the channel controls on the TV for the station you wish to view. The programme selected with the TV’s channel controls appears on the TV screen, while the one selected with the recorder’s PR buttons is recorded on the tape. -
Page 30: Recording/Playback On Vhs Deck
Basic Recording Turn on the TV and select the AV mode. If the recorder is turned on with HDD deck selected, there may be about 30 seconds’ delay in starting to show pictures on the screen. NOTE: It is not possible to record a TV programme on both the HDD deck and the VHS deck simultaneously. -
Page 31: Basic Playback
Basic Playback Turn on the TV and select the AV mode. If the recorder is turned on with HDD deck selected, there may be about 30 seconds’ delay in starting to show pictures on the screen. Load a cassette. Make sure the window side is up, the rear label side is facing you and the arrow on the front of the cassette is pointed toward the recorder. -
Page 32: Playback With Vcr Navigation
Playback with VCR Navigation The following screen appears as the VCR Navigation screen when you press NAVIGATION with the VHS deck selected. You can move the arrow to select the desired position on the screen by pressing R U T on the recorder). - Page 33 Scan for Beginning of Programme with VCR Navigation The VCR Navigation can take effect for the programme which has been recorded, and whose information has been registered with this recorder. Once the VHS (S-VHS) cassettes have been used for recording with this recorder, they have the register number given by this recorder.
-
Page 34: Playback Features
Playback Features ATTENTION Picture may not appear during high-speed search with an LP/EP-recorded tape. Noise may appear or the picture may appear distorted with an EP-recorded tape during still, slow motion, frame-by-frame playback or variable speed search. In the high-speed search, still, slow motion or frame-by-frame playback mode, the picture will be distorted, and there will be a loss of colour. -
Page 35: Index Search
Repeat Playback Your recorder can automatically play back the whole tape 100 times repeatedly. Start playback. Press Activate Repeat Playback. Press and hold for over 5 seconds, then release. The Play indicator ( ) on the front display panel and the VHS play indicator blink slowly. -
Page 36: Manual Tracking
Manual Tracking Your recorder is equipped with automatic tracking control. During playback, you can override this and adjust the tracking manually by pressing the PR buttons. Override automatic tracking. Press on the remote control. Adjust the tracking manually. Press PR + or –. Press again to return to automatic tracking. -
Page 37: Recording Features
Recording Features Recording Resume Function If there is a power outage during recording, Instant Timer Recording (in the right column) or timer recording pg. 42, 44), the recording will resume automatically when power is restored to the recorder unless the recorder’s memory backup has expired. - Page 38 Elapsed Recording Time Indication Set the counter display. Press – –:– – until a counter reading appears on the front display panel. Reset the counter. Press 0000 before starting recording or playback. The counter is reset to “0:00:00” and shows the exact elapsed time as the tape runs.
- Page 39 Super VHS ET (S-VHS ET) — Recording on VHS cassettes with S-VHS quality You can record in SP mode on VHS cassettes with S-VHS picture quality. Tapes recorded using this function can be played back on a recorder equipped with the S-VHS ET function. You can activate the S-VHS ET function only before you start recording on a VHS cassette.
- Page 40 RECORDING/PLAYBACK ON VHS DECK (cont.) Receiving Stereo and Bilingual Programmes Your recorder is equipped with a Sound-Multiplex decoder (A2) and a Digital stereo sound decoder (NICAM) making reception of stereo and bilingual broadcasts possible. When the channel is changed, the type of broadcast being received will be displayed on the TV screen for a few seconds.
-
Page 41: Picture System
B.E.S.T. Picture System The B.E.S.T. (Biconditional Equalised Signal Tracking) system checks the condition of the tape in use during playback and recording, and compensates to provide the highest-possible playback and recording pictures. You can set “B.E.S.T.” to “ON” or “OFF” to your preference pg. -
Page 42: Timer Recording
® Programming You can programme this recorder to timer-record as many as 16 programmes. With the S system, timer programming is greatly simplified because each TV programme has a corresponding code number which your recorder is able to recognize. You can use the remote control with LCD panel to enter the number. - Page 43 Set the recording speed. Press MODE ( For the VHS deck: It is not possible to select EP mode if “COLOUR SYSTEM” is set to “MESECAM”. pg. 76 Set the VPS/PDC mode. Press VPS/PDC to select “ON” or “OFF”. If “VPS/PDC ON” is displayed on the TV screen, VPS/PDC is set to ON.
-
Page 44: Express Timer Programming
Express Timer Programming You can programme this recorder to timer-record as many as 16 programmes. If you do not know the S number for the programme you wish to record, use the following procedure to set your recorder to timer-record the programme. Before performing Express Timer Programming: Make sure that the recorder’s built-in clock is set properly. - Page 45 Set the VPS/PDC mode. Press VPS/PDC to select “ON” or “OFF”. If “VPS/PDC ON” is displayed on the TV screen, VPS/PDC is set to ON. If “VPS/PDC OFF” is displayed on the TV screen, VPS/PDC is set to OFF. “VPS/PDC Recording” in the right column Set the category.
- Page 46 Check, cancel and change programmes Disengage the timer mode. (VHS deck only) Press (TIMER), then press Access the Programme Check screen. " Press PROGRAMME CHECK DATE 12/06/01 TUE 15:40 – 16:00 12/06/01 TUE 15:40 – 16:00 SELECT OK EXIT Press programme, then press OK.
-
Page 47: Automatic Satellite Programme Recording
Automatic Satellite Programme Recording NOTE: This function is available for the HDD deck only. This function allows you to automatically record a satellite programme which is timer-programmed on your external satellite receiver. Connect a satellite receiver to the recorder’s AV2 (L-2) IN/DECODER connector and programme the timer on the satellite receiver. -
Page 48: Remote Control Functions
Remote A/B/C/D Code Switching The remote control is capable of controlling four JVC video recorders independently. Each of recorders can respond to one of four codes (A, B, C or D). The remote control is preset to send A code signals because your video recorder is initially set to respond to A code signals. - Page 49 TV Multi-Brand Remote Control Your remote control can operate the basic functions of your TV set. In addition to JVC TVs, other manufacturer’s TVs can also be controlled. Before performing the following steps: Turn off the TV using its remote control.
- Page 50 LCD panel IMPORTANT Although the provided remote control unit is compatible with JVC satellite receivers, as well as many other models, it may not work with your satellite receiver, or in some instances, may have limited function capability. REMOTE CONTROL FUNCTIONS (cont.) Set the satellite receiver brand code.
-
Page 51: Editing
EDITING About Hybrid Navigation In the sections “Playback with HDD Navigation” ( and “Playback with VCR Navigation” ( described how to search for the beginning of each recorded programme using the Navigation functions. More detailed explanations are provided in this section using HDD Navigation by way of example. -
Page 52: Modify Information
Modify Information NOTE: The Navigation systems cannot work during recording on the HDD deck or in SAT mode ( pg. 47). Modify Index Turn on the recorder. Press Select the deck. Press HDD or S-VHS. For the VHS deck: Insert a cassette with the record safety tab intact. Access the Navigation screen. - Page 53 Modify Programme Title Perform steps A to D of “Modify Index” ( continuing. Access the modify screen. A Press to move the arrow to “MODIFY”, then press B Press to move the arrow to “MODIFY TITLE”, then press OK. The “MODIFY TITLE” screen appears. Enter new title.
-
Page 54: Modify Category
Modify Category Perform steps A to D of “Modify Index” ( continuing. Access the modify screen. A Press to move the arrow to “MODIFY”, then press B Press to move the arrow to “MODIFY CATEGORY”, then press OK. The “MODIFY CATEGORY”... - Page 55 Delete Information For HDD Navigation: When you delete the registered information of a programme, the recorder delete the programme itself on the hard disk drive. The deleted programme is never resumed. For VCR Navigation: When you delete the registered information of a programme, the recorder delete only the information on the hard disk drive.
-
Page 56: Dubbing
Dubbing Easy Dubbing from HDD deck to VHS deck Because this recorder includes both HDD deck and VHS deck, you can easily use it for dubbing without connecting any other equipment. Access the HDD Navigation screen. Press HDD, then press NAVIGATION. The HDD Navigation screen appears. - Page 57 Select the VHS deck. Press S-VHS. Load a cassette. Insert a cassette with the record safety tab intact. Set the recording speed. Press MODE ( For the VHS deck: It is not possible to select EP mode if “COLOUR SYSTEM” is set to “MESECAM”.
-
Page 58: Normal Dubbing (From Hdd To Vhs)
Normal Dubbing (from HDD to VHS) You can dub selected scenes from the HDD deck to a cassette, starting and stopping wherever you wish. Load a cassette. Insert a cassette with the record safety tab intact. Prepare the HDD deck for dubbing. A Press HDD and select the programme to be dubbed. -
Page 59: Normal Dubbing (From Vhs To Hdd)
Normal Dubbing (from VHS to HDD) You can dub selected scenes from a cassette to the HDD deck, starting and stopping wherever you wish. Load a cassette. Insert a cassette with the record safety tab intact. Prepare the VHS deck for dubbing. A Press S-VHS and select the programme to be dubbed. -
Page 60: Random Assemble Editing
Random Assemble Editing 8-programme Editing Memory (1 programme x 8 scenes) By using the Random Assemble Editing function, you can select up to 8 scenes from a previously recorded programme on the HDD deck and automatically dub them onto a cassette on the VHS deck. - Page 61 Set edit-in and edit-out points. A Find the point where you HDD NAVIGATION R.A.EDIT want the edited scene to begin, then press OK with the arrow to “IN/OUT”. The edit-in time is fixed and the edit-out time starts EDIT START counting.
-
Page 62: Edit From A Camcorder
AUDIO L input connector on your recorder. For the VHS deck: When a Master Edit Control-equipped JVC camcorder is used, the camcorder is capable of controlling the recorder. Refer to the camcorder’s instruction manual for operating procedure. - Page 63 Select the recording deck. Press HDD or S-VHS. Set the recorder’s input mode. Press AUX (number key “0”) and/or PR to select “F-1”. Set “F-1 INPUT” to “VIDEO” for the VIDEO input connector, or “S-VIDEO” for the S-VIDEO input connector, depending on the connector being used ( pg.
-
Page 64: Output/Input Set
Output/Input Set L-1 OUTPUT and L-1 INPUT Setting The AV1 (L-1) IN/OUT connector accepts and delivers either a composite signal (regular video signal) or a Y/C signal (a signal in which the luminance and chrominance signals are separated). Set “L-1 OUTPUT” and “L-1 INPUT” to the appropriate mode depending on the type of appliance connected to the recorder’s AV1 (L-1) IN/OUT connector. - Page 65 L-2 SELECT Setting Set “L-2 SELECT” to the appropriate mode depending on the type of appliance connected to the recorder’s AV2 (L-2) IN/ DECODER connector. Perform steps A and B of “L-1 OUTPUT and L-1 INPUT Setting” on page 64. Select the input mode for the AV2 (L-2) IN/ DECODER connector.
-
Page 66: Edit To Or From Another Video Recorder
Edit To Or From Another Video Recorder Advantages of S-VHS video recorders You can edit from VHS to S-VHS, S-VHS to VHS, or, from S-VHS to S-VHS. From VHS to S-VHS: Record VHS playback signals in the S-VHS mode. Although the picture quality is inherently limited by that of the original, the edited tape has better picture quality than those made by VHS-to-VHS editing. - Page 67 TV receiver Player 21-pin SCART cable AV mode (not provided) Another recorder Recorder TV receiver Recorder S-Video cable (provided) 21-pin SCART cable (not provided) Another recorder Player NOTES: All necessary cables can be obtained from your dealer. For Y/C signal input/output, be sure to use a 21-pin SCART cable that is compatible with the Y/C signal. When you select “EDIT”...
-
Page 68: Audio Dubbing
Audio Dubbing Audio Dubbing replaces the normal audio sound of a previously recorded tape with a new soundtrack. ATTENTION: Audio dubbing is not possible on the HDD deck. Audio dubbing is not possible with a cassette recorded in EP mode. Normal audio track Video/Hi-Fi audio track... - Page 69 Make connections. Connect an audio component to the AUDIO L + R input connectors on the recorder’s front panel. When connecting a monaural audio component, use only the recorder’s AUDIO L input connector. Select the VHS deck. Press S-VHS. Set the recorder’s input mode. Press AUX (number key “0”) and/or PR to select “F-1”.
-
Page 70: System Connections
Connecting To A Satellite Receiver Simple Connections This is an example of simple connection if your TV has one 21-pin AV input (SCART) connector. Connect the satellite receiver to the AV2 (L-2) IN/ DECODER connector, then connect the AV1 (L-1) IN/ OUT connector to the TV’s connector. - Page 71 Perfect Connections This is an example of recommended connection if your TV has two 21-pin AV input (SCART) connectors. Connect the decoder to the satellite receiver’s connector if you have a decoder, AV1 (L-1) IN/OUT connector to TV’s connector, and AV2 (L-2) IN/DECODER connector to the satellite receiver’s connector.
-
Page 72: Connecting/Using A Decoder
Connecting/Using A Decoder RF cable (provided) TV aerial cable AV1 (L-1) IN/OUT AV2 (L-2) IN/DECODER Decoder The AV2 (L-2) IN/DECODER connector can be used as an input connector for an external decoder (descrambler). Simply connect a decoder and you can enjoy the variety of programming that is available through scrambled channels. -
Page 73: Connecting/Using A Stereo System
Connecting/Using A Stereo System These instructions enable you to connect your video recorder to your Hi-Fi stereo system (if you have one) and listen to the soundtrack through the stereo. Stereo amplifier Speaker Television Make connections. Connect the AUDIO OUT L and R connectors on your video recorder to the AUX IN or TAPE MONITOR connectors on your stereo system’s receiver or amplifier. -
Page 74: Subsidiary Settings
Mode Set Turn on the TV and select the AV mode. SUBSIDIARY SETTINGS You can change various mode settings on the TV screen by following the procedure described below. The table below shows the structure of the menu system. HDD SET UP ( HDD/VCR SET UP VCR SET UP 1 ( VCR SET UP 2 (... - Page 75 HDD SET UP LIVE MEMORY 30MIN AUDIO REC NICAM MONO VCR SET UP 1 NAVIGATION S-VHS AUTO When this function is set to “30MIN”, “1HR” or “3HR”, you can enjoy the selected length of the time for “Live Memory Playback” ( When this function is set to “NICAM”, the NICAM audio programme will be recorded.
- Page 76 VCR SET UP 1 (cont.) AUTO SP LP TIMER COLOUR SYSTEM PAL/NTSC MESECAM When this function is set to “ON”, the recorder automatically switches to LP mode to allow complete recording if there is not enough tape to record the entire programme while timer-recording in SP mode.
- Page 77 VCR SET UP 2 B.E.S.T. PICTURE CONTROL AUTO EDIT SOFT SHARP DIGITAL 3R DIGITAL TBC/NR You can set the B.E.S.T. (Biconditional Equalised Signal Tracking) system to “ON” or “OFF” ( pg. 41). This feature helps you to adjust the playback picture quality according to your preference.
- Page 78 VCR SET UP 2 (cont.) VIDEO STABILIZER FUNCTION O.S.D. AUTO TIMER DIRECT REC When this function is set to “ON”, you can automatically correct vertical vibration in the picture when playing back unstable recordings made on another recorder. NOTES: When you finish viewing a tape, be sure to set this function to “OFF”. Regardless of the setting, this function has no effect during recording and during special effects playback.
-
Page 79: Show View
® IMPORTANT Normally, Auto Set Up ( pg. 14), Preset Download ( automatically. You need to set the Guide Program numbers manually only in the following cases. When timer-programming with the S your recorder, is not selected, when you add a channel after Auto Set Up, Preset Download or Auto Channel Set has taken place, —Set the Guide Program number for that station manually. -
Page 80: Tuner Set
Tuner Set Turn on the TV and select the AV mode. SUBSIDIARY SETTINGS (cont.) IMPORTANT Perform the following steps only if — — Auto Channel Set has not been set correctly by Auto Set Up or by Preset Download ( pg. - Page 81 Perform Auto Channel Set. Press OK twice. You can set up the recorder’s tuner also by Preset Download. ( pg. 16) The Auto Set screen appears, and remains on screen while the recorder searches for receivable stations. As Auto Channel Set progresses, the “...
-
Page 82: Manual Channel Set
SUBSIDIARY SETTINGS (cont.) Manual Channel Set Store channels that were not stored during Auto Set Up pg. 14), Preset Download ( pg. 16) or Auto Channel Set pg. 80). Access the Main Menu screen. Press MENU. Access the Tuner Set screen. A Press to move the HDD/VCR SET UP... -
Page 83: Delete A Channel
Input the channel. Press the number keys to input the channel number you want to store. Input “0” before any single number entries. To input the registered station name (ID – until “– – – –” (ID setting) begins blinking, then press For fine tuning adjustment, press then press . - Page 84 SUBSIDIARY SETTINGS (cont.) Change Station Channel Position Perform steps A and C of “Manual Channel Set” on page 82 to access the Confirmation screen before continuing. Select the item. Press until the item you want to move begins rt w e blinking.
- Page 85 Set Stations (A) Set station names that are registered in your recorder. Perform steps A and C of “Manual Channel Set” on page 82 to access the Confirmation screen before continuing. Select the item. Press until the item you want begins blinking. rt w e Access the Manual Channel Set screen.
- Page 86 Fine-Tuning Channels Already Stored Perform steps A and C of “Manual Channel Set” on page 82 to access the Confirmation screen before continuing. Select the channel to fine-tune. Press until the channel you want to tune begins rt w e blinking.
-
Page 87: Tv Station And Id List
TV Station And ID List STATION NAME 1000 TV1000 3SAT 3SAT ADLT ADULT ANT3 ANTENA3 ARTE ARTE BBC GROUP BBC1 BBC1 BBC2 BBC2 BAYERN3 CANAL PLUS PORTUGUSES CAN5 CANALE5 CANV KETNET CANVAS CHANNEL4 CHANNEL5 CHLD CHILD CINE CINEMA CLUB TELECLUB CSUR ANDALUCIA DISC... -
Page 88: Clock Set
Clock Set Turn on the TV and select the AV mode. Just Clock The Just Clock function provides accurate time keeping through automatic adjustments at regular intervals, by reading data from a PDC signal. The Just Clock option can be set “ON” or “OFF” at the Clock Set screen (the default setting is “OFF”). - Page 89 Set the date and time. Press to set the time, then press OK or “DATE” display begins blinking. Repeat the same procedure to set the date and year. When you set the time, press and hold by 30 minutes. When you set the date, press and hold by 15 days.
-
Page 90: Troubleshooting
“ ” indicator off. Check the cassette. CORRECTIVE ACTION Set the TV to its AV mode. Try manual tracking. ( pg. 36) Use a dry cleaning cassette TCL-2UX or consult your JVC dealer. Try manual tracking. ( pg. 36) ”... - Page 91 RECORDING SYMPTOM 1. Recording cannot be started. 2. TV broadcasts cannot be recorded. 3. Tape-to-tape editing is not possible. 4. Camcorder recording is not possible. POSSIBLE CAUSE There is no cassette loaded, or the cassette loaded has had its record safety tab removed.
- Page 92 TIMER RECORDING SYMPTOM 1. Timer recording won’t work. 2. Timer programming is not possible. 3. “ ” and “ ” on the front display panel won’t stop blinking. 4. “ ” blinks for 10 seconds and the Timer mode is disengaged. 5.
- Page 93 OTHER PROBLEMS SYMPTOM 1. Whistling or howling is heard from the TV during camcorder recording. 2. When scanning channels, some of them are skipped over. 3. The channel cannot be changed. 4. Channel settings that were made manually seem to have changed or disappeared.
- Page 94 ON-SCREEN MESSAGES MESSAGE CAN NOT MODIFY LIVE MEMORY TIME, MORE CAPACITY NEEDED DELETE UNWANTED PROGRAMME THEN RETRY DO YOU WANT TO DELETE SELECTED PROGRAMME? DO YOU WANT TO DELETE SELECTED PROGRAMME INFORMATION? DO YOU WANT TO DELETE SELECTED CASSETTE INFORMATION? INSERT #XXXX CASSETTE CAN NOT MODIFY INDEX WHILE HDD IS RECORDING...
- Page 95 MESSAGE UNABLE TO SET TIMER PROGRAMME DUE TO SHORTAGE OF CAPACITY DELETE UNWANTED PROGRAMME FROM HDD PROGRAMME FULL DELETE UNWANTED TIMER PROGRAMME PLEASE ADJUST CLOCK BEFORE TIMER PROGRAMMING SET GUIDE PROG THEN RETRY SHOWVIEW NO. ERROR CONFIRM SHOWVIEW NO. THEN RETRY PROGRAMME NOT COMPLETED PROGRAMME OVERLAPPED PLEASE CONFIRM AND MODIFY...
- Page 96 ON-SCREEN MESSAGES (cont.) MESSAGE REMAINING CAPACITY IS SMALL DELETE UNWANTED PROGRAMME FROM HDD CAPACITY IS FULL, RECORDING STOPPED CAPACITY IS FULL, UNABLE TO RECORD DELETE UNWANTED PROGRAMME FROM HDD TITLE MEMORY IS FULL, UNABLE TO RECORD DELETE UNWANTED PROGRAMME FROM HDD COPY PROHIBITED, UNABLE TO RECORD ON HDD NO PROGRAMME TO PLAYBACK UNABLE TO GO BACK ANYMORE...
-
Page 97: Questions And Answers
QUESTIONS AND ANSWERS PLAYBACK Q. What happens if the end of the tape is reached during playback or search? A. The tape is automatically rewound to the beginning. Q. Can the video recorder indefinitely remain in the still mode? A. No. It stops automatically after 5 minutes to protect the heads. -
Page 98: Specifications
GENERAL Power requirement : AC 220 V – 240 V Power consumption Power on : 41 W Power off : 16 W Temperature Operating : 5°C to 40°C Storage : –20°C to 60°C Operating position : Horizontal only Dimensions (WxHxD) : 435 mm x 124 mm x 385 mm Weight : 7.3 kg... -
Page 99: Liste Of Terms
LISTE OF TERMS ... 68 Audio Dubbing ... 80 Auto Channel Set ... 14 Auto Set Up ... 76 AUTO SP LP TIMER ... 78 AUTO TIMER Automatic Satellite Programme Recording ... 41, 77 B.E.S.T. Picture System ... 84 Change Station Channel Position Check, cancel and change programmes ... - Page 100 Auto Set Up — referring to the front display panel The Auto Set Up function sets the tuner channels, clock and Guide Program numbers automatically. BEFORE YOU START PLEASE MAKE SURE THAT: The TV aerial cable is connected to the ANTENNA IN connector on the rear panel of the video recorder. The video recorder’s mains power cord is connected to a mains outlet.