Table of Contents
Advertisement
HOME CINEMA DVD-AUDIO/VIDEO CONTROL CENTER
CENTRO DE CONTROL DE CINE EN CASA CON REPRODUCTOR DE DVD AUDIO/VIDEO
CENTRO DE CONTROLE DE AUDIO E VIDEO DO DVD HOME CINEMA
RX-DV31SL
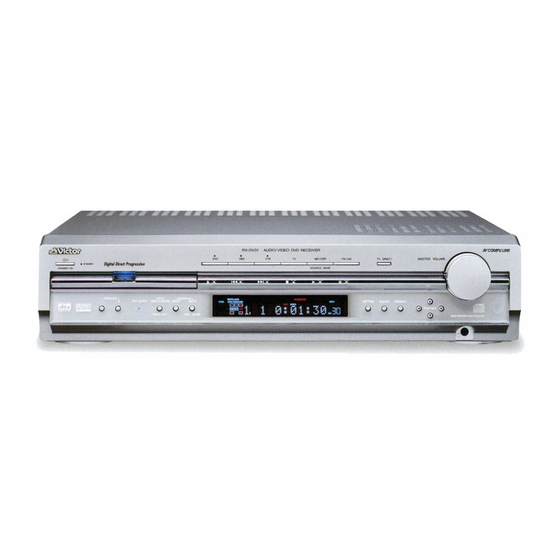
RX-DV31 HOME THEATER DVD-AUDIO/VIDEO RECEIVER
INSTRUCTIONS
MANUAL DE INSTRUCCIONES
INSTRUÇÕES
COMPACT
SUPER VIDEO
DVD/SUPER VCD/VCD/CD
For Customer Use:
Enter below the Model No. and Serial
No. which are located either on the rear,
bottom or side of the cabinet. Retain this
information for future reference.
Model No.
Serial No.
LVT1001-014A
[UW]
Advertisement
Table of Contents

Related Manuals for JVC RX-DV31


Summary of Contents for JVC RX-DV31
- Page 1 HOME CINEMA DVD-AUDIO/VIDEO CONTROL CENTER CENTRO DE CONTROL DE CINE EN CASA CON REPRODUCTOR DE DVD AUDIO/VIDEO CENTRO DE CONTROLE DE AUDIO E VIDEO DO DVD HOME CINEMA RX-DV31SL RX-DV31 HOME THEATER DVD-AUDIO/VIDEO RECEIVER INSTRUCTIONS MANUAL DE INSTRUCCIONES INSTRUÇÕES COMPACT...
- Page 2 Warnings, Cautions, and Others Avisos, precauciones y otras notas Advertêcias, precauções e outras notas Caution — Disconnect the mains plug to shut the power off completely. The mains line. The power can be remote controlled. Precaución — Botón Para desactivar la alimentación completamente, desenchufe el cable de alimentación de CA.
- Page 3 CAUTION • Do not block the ventilation openings or holes. (If the ventilation openings or holes are blocked by a newspaper or cloth, etc., the heat may not be able to get out.) • Do not place any naked flame sources, such as lighted candles, on the apparatus. •...
- Page 4 IMPORTANTE PARA LOS PRODUCTOS LÁSER/ REPRODUCTION OF LABELS/REPRODUCCIÓN DE ETIQUETAS/REPRODUÇÃO, DE ETIQUETAS 1 CLASSIFICATION LABEL, PLACED ON EXTERIOR SURFACE 1 ETIQUETA DE CLASIFICACION, PROVISTA SOBRE LA SUPERFICIE EXTERIOR 1 ETIQUETA DE CLASSIFICACAO, COLOCADA EM SUPERFICIE EXTERNA 1. CLASS 1 LASER PRODUCT 2.
- Page 5 Caution: Proper Ventilation To avoide risk of electric shock and fire and to protect from damage. Locate the apparatus as follows: Front: No obstructions open spacing. Sides: No obstructions in 10 cm from the sides. Top: No obstructions in 10 cm from the top. Back: No obstructions in 15 cm from the back Bottom:...
-
Page 6: Before Installation
Before Installation Precautions General Precautions • DO NOT insert any metal object into the unit. • DO NOT disassemble the unit or remove screws, covers, or cabinet. • DO NOT expose the unit to rain or moisture. Locations • Install the unit in a location that is level and protected from moisture. -
Page 7: Table Of Contents
• Country/Area codes list for Parental Lock ... 61 Glossary for DVD Player ... 62 AV COMPU LINK Remote Control System ... 63 Operating JVC’s Audio/Video Components ... 65 Operating Audio Components ... 65 Operating Video Components ... 66 Operating Other Manufacturers’... -
Page 8: Parts Identification
7 Tuner mode indicators (20, 22) • TUNED, STEREO, AUTO MUTING 8 Front speaker indicators (13) SPK 1/2 9 INPUT ATT (attenuator) indicator (15) 0 REC (recording) indicator (16) RX-DV31 HOME CINEMA DVD-AUDIO/VIDEO CONTROL CENTER TAPE/CDR FM/AM SOURCE NAME MODE REC MODE 9 INPUT ANALOG/DIGITAL button (14, 15) INPUT ATT. -
Page 9: Remote Control
Remote Control See pages in the parentheses for details. 1 OPEN/CLOSE button (17) 2 TV/VIDEO button (17, 66, 67) 3 Source selecting buttons (12) • DVD, VCR, DBS, TV, FM/AM, TAPE, CDR 4 TV VOL (volume) +/– button (66, 67) 5 CHANNEL +/–... -
Page 10: Rear Panel
Parts Identification Remote control—inside the cover 1 SUBTITLE button (39) 2 AUDIO button (40) 3 ZOOM button (44) 4 ANGLE button (39) 5 REPEAT button (48, 50, 52) Rear Panel VOLTAGE 110V SELECTOR 220V 127V 230-240V See pages in the parentheses for details. 1 VOLTAGE SELECTOR (1) 2 Speaker terminals (7) •... -
Page 11: Getting Started
Getting Started Connecting the AM and FM Antennas If AM reception is poor, connect an outdoor AM loop antenna single vinyl-covered wire (supplied) (not supplied). Snap the tabs on the loop into the slots of the base to assemble the AM loop antenna. -
Page 12: Connecting The Speakers
Getting Started Connecting the Speakers You can connect following speakers to this unit: • two pairs of front speakers – FRONT SPEAKERS 1 terminals – FRONT SPEAKERS 2 terminals • a pair of surround speakers • a center speaker • a subwoofer Connection diagram FRONT SPEAKERS CAUTION:... -
Page 13: Connecting Audio/Video Components
TV to this unit using the same type of cord for connecting the DBS tuner or VCR to this unit. • To view the picture from the built-in DVD player, connect the TV to this unit using composite video cord, S-video cord, or component video cord, then register the video output mode correctly (see “Video output mode”... -
Page 14: Tv Connection
Getting Started Turn off all the components and the unit before connection. • Illustrations of the input/output terminals below are typical examples. When you connect other components, refer also to their manuals since the terminal names actually printed on their rear vary among the components. 7 TV connection DO NOT use a TV through a VCR or a TV with a built-in VCR;... -
Page 15: Vcr Connection
7 VCR connection Connect using one of the video terminals. MONITOR (REC) (PLAY) (REC) (PLAY) VOLTAGE SELECTOR CAUTION: SPEAKER IMPEDANCE CAUTION: SPEAKER IMPEDANCE 1 OR 2: 1 AND 2: TAPE / CDR LEFT RIGHT (REC) (PLAY) 7 Cassette deck/CD recorder connection CAUTION: SPEAKER IMPEDANCE... -
Page 16: Digital Connection
Getting Started 7 Digital connection DIGITAL IN DIGITAL 1 DIGITAL 2 (DBS) (TV) CAUTION: SPEAKER IMPEDANCE DIGITAL OUT PCM/STREAM Connect the CD recorder using the DIGITAL OUT terminal for digital recording. Now, you can plug the power cord of the unit into the AC outlet. CAUTIONS: •... -
Page 17: Basic Operations
AC power cord. Selecting the Source to Play Press one of the source selecting buttons. On the front panel From the remote control Select the built-in DVD player. Select the DBS tuner. Select the VCR. Select the TV tuner. TAPE/CDR Select the cassette deck or the CD recorder (front panel ONLY). -
Page 18: Listening With Headphones
Basic Operations 7 Listening with headphones Connect a pair of headphones to the the front panel . This cancels the Surround mode currently selected, deactivates speakers, and activates the HEADPHONE mode. The SPK 1 and 2 indicators go off from the display. •... -
Page 19: Turning Off The Sound Temporarily
Note: • You cannot change the input mode when selecting “DVD” as the source. Digital input is always used for the built-in DVD player. Select a source (DBS, TV, or CDR) for which you want to change the input mode. -
Page 20: Changing The Digital Input Mode Manually-For Dvd Video Only
Basic Operations DGTL AUTO Select for the digital input mode. The DIGITAL AUTO indicator lights up. The unit automatically detects the incoming signal format, then the sound signal indicator for the detected signal (see below) lights up; otherwise, no sound signal indicators light up. ANALOG Select for the analog input mode (initial setting except for the built-in DVD... -
Page 21: Changing The Scanning Mode
“INTERLACE.” To check the compatibility of your TV, contact your dealer. All JVC progressive TVs and High-Definition TVs are fully compatible with this system. • When you select “PROGRESSIVE” as the scanning mode, the picture does not come out correctly through composite video and S-video jacks. -
Page 22: Basic Dvd Player Operations
Before turning on the unit, turn on your TV and select the correct video input (refer to the manual supplied with your TV). • When you use a JVC’s TV, you can turn on your TV by pressing TV on the remote control and select the video input by pressing TV/VIDEO. - Page 23 AUDIO on the remote control while the disc tray is open, the disc tray closes automatically, then the unit is turned off. 7 Other operation buttons for the DVD player On the front panel From the remote control To stop playback temporarily Press 8.
- Page 24 Basic DVD Player Operations About Resume play This unit can memorize the point when you operate the following procedures: • Pressing 7 during play—Pressing 3 starts Resume play • Changing the source—Pressing DVD or 3 starts Resume play • Turning off the unit (including Sleep Timer)—...
-
Page 25: Tuner Operations
Tuner Operations Setting the AM Tuner Interval Spacing Some countries space AM stations 9 kHz apart, and other countries use 10 kHz spacing. • 10 kHz interval spacing is the initial setting. On the front panel ONLY Turn off the unit. •... -
Page 26: Using Preset Tuning
Tuner Operations Using Preset Tuning Once a station is assigned to a channel number, the station can be tuned in quickly. You can preset up to 30 FM and 15 AM stations. 7 Storing preset stations Before you start, remember... There is a time limit in doing the following steps. -
Page 27: Tuning In To A Preset Station
7 Tuning in to a preset station On the front panel Press FM/AM to select the band. The last received station of the selected band is tuned in. The CONTROL buttons now work for tuner operations. ANALOG DIGITAL AUTO DSP SLEEP PROGRAM REPEAT 1A-B... -
Page 28: Basic Settings
Basic Settings Some of the following settings are required after connecting and positioning your speakers while others will make operations easier. 7 Quick speaker setup (see below) 7 Basic item setup (see pages 24 to 27) • Speaker settings – Speaker information for subwoofer, front, center, and surround speakers* –... -
Page 29: Setting Basic Items
Press MEMORY to finish the setting. “SETUP END” appears on the display for a while, then goes back to the source indication. • Speaker configuration settings now become active. For the registered speaker size and distance, see below. Note: • This procedure will not be completed if you stop in the middle of the process. -
Page 30: Speaker Information
Basic Settings 7 Operating procedure Ex.: When setting the digital input (DIGITAL IN) terminals. Before you start, remember... There is a time limit in doing the following steps. If the setting is canceled before you finish, start from step 1 again. -
Page 31: Crossover Frequency
The distance from your listening point to the speakers is another important element to obtain the best possible surround sound from the Surround modes. Set the distance from your listening point to the speakers. By referring to the speaker distance setting, this unit automatically sets the delay time of the sound through each speaker so that sounds through all the speakers can reach you at the same time. -
Page 32: Digital Input (Digital In) Terminals
Basic Settings 7 Digital input (DIGITAL IN) terminals “DGT” ANALOG DIGITAL AUTO DSP SLEEP PROGRAM REPEAT 1A-B RANDOM PROGRESSIVE PPCM AUTO SURROUND GROUP TITLE TRACK CHAP. RESUME B.S.P BONUS TUNED STEREO AUTO MUTING DIGITAL SUBWFR LPCM MPEG-2 AAC When you use the digital input terminals, register what components are connected to which terminals (DIGITAL IN 1/ DIGITAL IN 2), so that the correct source name will appear when you select the digital source. -
Page 33: Sound Adjustments
Sound Adjustments You can make sound adjustments to your preference after completing basic setting. Adjustment items: • Front speaker output balance* • Tone* • Speaker output levels* • DAP effect level • Subwoofer audio position You can also make these adjustments using the Choice menu (see pages 53 to 58). -
Page 34: Tone
Sound Adjustments 7 Tone ¶ For bass sound—“BASS” ANALOG DIGITAL AUTO DSP SLEEP PROGRAM REPEAT 1A-B RANDOM PROGRESSIVE PPCM AUTO SURROUND GROUP TITLE TRACK CHAP. RESUME B.S.P BONUS TUNED STEREO AUTO MUTING DIGITAL LPCM SUBWFR MPEG-2 AAC ¶ For treble sound—“TREBLE” ANALOG DIGITAL AUTO DSP SLEEP... -
Page 35: Creating Realistic Sound Fields
Creating Realistic Sound Fields You can use the following Surround modes to reproduce a realistic sound field: 7 Dolby surround • Dolby Pro Logic II 7 Digital multi-channel surround • Dolby Digital • DTS Digital Surround 7 DAP (Digital Acoustic Processor) modes 7 All Channel Stereo I Dolby surround Dolby Pro Logic II*... -
Page 36: All Channel Stereo
Creating Realistic Sound Fields DAP modes can be used when the front and surround speakers are connected to this unit (without respect to the center speaker connection: no sound comes out of the center speaker even if it is connected). The following DAP modes are provided for this unit: LIVE CLUB Gives the feeling of a live music club with a... -
Page 37: Activating Surround Mode
Activating Surround Mode When Auto Surround is set to “OFF” or 2-channel source other than Dolby Surround software is played back, activate Surround mode manually. Make sure that you have set the speakers’ information correctly (see pages 25 or 57). •... -
Page 38: Adjusting Surround Mode Using Remote Control
Creating Realistic Sound Fields Adjusting Surround Mode Using Remote Control When playing back the source with Surround mode, you can adjust the speaker output levels for Surround modes. Once you have adjusted the Surround modes, adjustment is memorized for each source. •... -
Page 39: Dvd Player Operations
DVD Player Operations Disc Information Playable disc types This unit has been designed to play back the following discs: DVD VIDEO, DVD AUDIO, Video CD (VCD)*, Super Video CD (SVCD)*, audio CD*, CD-R, and CD-RW. * This instruction refers to Video CD as VCD, Super Video CD as SVCD, and audio CD as CD. -
Page 40: Disc Structure
DVD Player Operations 7 Disc structure DVD VIDEO consists of “titles,” and each title may be divided into some “chapters.” For example, if a DVD VIDEO contains some movies, each movie may have its own title number and it may be further divided into some chapters. -
Page 41: About The On-Screen Bar
DVD player by using the remote control. For MP3 playback, see pages 49 and 50, and for JPEG playback, see pages 51 and 52. • See also “Basic DVD Player Operations” on pages 17 to • indicates types of disc available for the operation. -
Page 42: Basic Operation Through The On-Screen Bar
DVD Player Operations Basic Operation through the On- screen Bar Ex.: When selecting the repeat mode for DVD VIDEO & During playback or while stopped Press ON SCREEN twice. The on-screen bar with pull-down menu appears on the DVD-VIDEO TITLE CHAP 8.5Mbps... -
Page 43: Locating A Desired Scene From The Disc Menu
• Before using the remote control, press DVD so that the remote control works for the DVD player. • If the on-screen bar is shown on the TV, press ON SCREEN repeatedly to go off the on-screen bar. -
Page 44: Selecting A View Angle
DVD Player Operations Selecting a View Angle While playing back a DVD VIDEO/DVD AUDIO containing multi-view angles, you can view the same scene from different angles. icon appears at the beginning of playback when the current scene has multi-view angles. -
Page 45: Selecting The Audio Language
Using the on-screen bar Press ON SCREEN repeatedly until the on-screen bar with pull-down menu appears on the TV. Press cursor 3 (or 2) repeatedly to move in the pull-down menu, then press ENTER. The following pop-up window appears under the pull- down menu. -
Page 46: Playing From A Specified Position On A Disc
You can also play a disc from the specified time. Before using the remote control, press DVD so that the remote control works for the DVD player. 7 Locating a desired title/group When playing back DVD VIDEO/DVD AUDIO, you can search for the title/group number to be played. -
Page 47: Locating A Desired Chapter/Track
7 Locating a desired chapter/track When playing back DVD VIDEO/DVD AUDIO, you can search for the chapter/track number to be played. & During playback Press ON SCREEN repeatedly until the on- screen bar with pull-down menu appears on the TV. Press cursor 3 (or 2) repeatedly to move in the pull-down menu, TRACK... -
Page 48: Special Picture Playback
This unit provides special picture playback functions including still picture, frame-by-frame, slow-motion, and zoom. Before using the remote control, press DVD so that the remote control works for the DVD player. 7 Still picture and frame-by-frame playback & During playback Press 8 once. -
Page 49: Zooming In
7 Zooming in & During playback or while paused Press ZOOM. • Each time you press the button, the magnification changes as follows: x 1.8 ] x 4 ] x 8 ] x 16 ] x 32 ] x 64 ] x 1 (normal play) ] (back to the beginning) ZOOM x4 Ex.: When x4 zoom is selected... -
Page 50: Changing The Vfp Setting
Before using the remote control, press DVD so that the remote control works for the DVD player. • There is a time limit in doing the following steps. If the setting is canceled before you finish, start from step 1 again. -
Page 51: Program Playback
• You cannot use Resume play for program playback. • You may program the same tracks more than once. Before using the remote control, press DVD so that the remote control works for the DVD player. & While stopped Press ON SCREEN repeatedly until the on- screen bar with pull-down menu appears on the TV. -
Page 52: Random Playback
• You cannot use Resume play for random playback. Before using the remote control, press DVD so that the remote control works for the DVD player. & While stopped Press ON SCREEN repeatedly until the on- screen bar with pull-down menu appears on the TV. - Page 53 Press cursor ∞ (or 5) repeatedly to select the repeat mode, then press ENTER. • Each time you press cursor ∞ (or 5), the repeat mode changes as follows: For DVD VIDEO: CHAPTER “ TITLE “ A-B “ OFF “ (back to the beginning) For DVD AUDIO: TRACK “...
-
Page 54: Mp3 Disc Playback
MP3 Disc Playback This unit can play back MP3 files on a CD-R or CD-RW. We call such a disc “MP3 disc” in this instruction. • Before using the remote control, press DVD to change the remote control operation mode for the MP3 disc operations. •... -
Page 55: Operations Through The Mp3 Control Screen
Operations through the MP3 CONTROL Screen You can search for and play the desired groups and tracks through the MP3 CONTROL screen shown on TV. MP3 CONTROL screen Current Current group number/Total group number group MP3 CONTROL Time : 00:00:14 Group : 02 / 03 Track : 05 / 14 (Total 41) Blue... -
Page 56: Jpeg Disc Playback
JPEG Disc Playback This unit can play back JPEG files on a CD-R or CD-RW. We call such a disc “JPEG disc” in this instruction. • Before using the remote control, press DVD to change the remote control operation mode for the JPEG disc operations. -
Page 57: Operations Through The Jpeg Control Screen
Stopping slide-show playback completely Press 7. The JPEG CONTROL screen appears on the TV. • For how to operate through the JPEG CONTROL screen, see “Operations through the JPEG CONTROL Screen” below. Notes: • The following functions are not available to the slide-show playback: program playback, random playback, repeat playback, fast-forward/ reverse playback, on-screen bar, and choice menus. -
Page 58: Choice Menu Operations
Choice Menu Operations You can adjust the initial settings through the choice menu on the TV. Before operating the choice menu, select the source you want to adjust by pressing source selecting button. • When selecting FM or AM as the source, you cannot use the choice menu. -
Page 59: Picture Menu
7 Operating procedure Ex.: When setting the picture source. Before operating the choice menu, press DVD to change the source to “DVD.” Press CHOICE. The LANGUAGE menu appears on the TV. LANGUAGE MENU LANGUAGE ENGLISH AUDIO LANGUAGE ENGLISH SUBTITLE ON SCREEN LANGUAGE ENGLISH SELECT TO SELECT. -
Page 60: Language Selection Menu-Language
Choice Menu Operations 7 Language selection menu—LANGUAGE LANGUAGE MENU LANGUAGE ENGLISH ENGLISH AUDIO LANGUAGE SUBTITLE ON SCREEN LANGUAGE ENGLISH You can select “MENU LANGUAGE,” “AUDIO LANGUAGE,” and “SUBTITLE” only before playback. ¶ MENU LANGUAGE Some discs have multiple languages. Select one of the languages or language codes from AA to ZU (see “Language code list”... -
Page 61: Audio Selection Menu-Audio
¶ SCREEN SAVER You can activate or deactivate the screen saver function. Select one of the following settings: The picture on the TV becomes dark when no operation is done for 5 minutes. The screen saver function does not work. ¶... -
Page 62: Speaker Setting Menu-Spk. Setting
Choice Menu Operations 7 Speaker setting menu—SPK. SETTING SPK. SETTING SIZE LEVEL DISTANCE CROSS OVER 100Hz RETURN TO INITIAL ¶ SIZE Select this to enter the SIZE submenu. SIZE FRONT SPEAKER LARGE CENTER SPEAKER SMALL SMALL SURROUND SPEAKER SUB WOOFER NONE RETURN FRONT SPEAKER, CENTER SPEAKER, and... -
Page 63: Other Setting Menu-Others
44) always appear on the display regardless of this setting. ¶ AUTO STANDBY When the playback of the disc on the built-in DVD player ends and no operation is done for more than the selected time, the unit is turned off automatically. -
Page 64: Restricting Playback By Parental Lock
Choice Menu Operations Restricting Playback by Parental Lock You can restrict playback of DVD VIDEO containing violent scenes and those not suitable for your family members. Nobody can play such a disc unless this function is canceled. • This setting takes effect only for a DVD VIDEO containing Parental Lock level information—Level 1 (most restrictive) to Level 8 (least restrictive). -
Page 65: Changing The Parental Lock Setting
7 Changing the Parental Lock setting Press CHOICE, then press cursor 3 (or 2) to display the OTHERS menu. Press cursor ∞ (or 5) repeatedly to move to “PARENTAL LOCK,” then press ENTER. The PARENTAL LOCK submenu appears on the TV. •... -
Page 66: Country/Area Codes List For Parental Lock
Choice Menu Operations Setting DVD preferences Country/Area codes list for Parental Lock Andorra United Arab Emirates Afghanistan Antigua and Barbuda Anguilla Albania Armenia Netherlands Antilles Angola Antarctica Argentina American Samoa Austria Australia Aruba Azerbaijan Bosnia and Herzegovina Barbados Bangladesh Belgium Burkina Faso Bulgaria Bahrain... -
Page 67: Glossary For Dvd Player
Glossary for DVD Player Aspect ratio The ratio of vertical and horizontal sizes of a displayed image. The horizontal vs. vertical ratio of conventional TVs is 4:3 and that of wide-screen TVs is 16:9. Chapter The smallest division on DVD VIDEO. It is a division of a title and similar to a track for CD or VCD. -
Page 68: Av Compu Link Remote Control System
This unit is equipped with the AV COMPU LINK-III, which has added a function to operate JVC’s video components through the video components terminals. To use this remote control system, you need to connect the video components you want to operate, following the diagrams below and the procedures on page 64. - Page 69 (3) button on the VCR or on the remote control. You can get the same result. One-touch DVD play Simply by starting playback on the built-in DVD player, you can enjoy the playback without setting other switches manually. The TV automatically turns on and changes the input mode to the appropriate position so that you can view the playback picture.
-
Page 70: Operating Jvc's Audio/Video Components
Operating JVC’s Audio/Video Components You can operate JVC’s audio and video components with this unit’s remote control, since control signals for JVC’s components are preset in the remote control. Operating Audio Components To operate JVC’s audio components using this remote control: •... -
Page 71: Operating Video Components
AV COMPU LINK- jacks (see page 63) in addition to the audio/video connections (see pages 9 to 11). • Some JVC’s VCRs can accept two types of the control signals—remote codes “A” and “B.” Before using this remote control, make sure that the remote control code of the connected VCR is set to code “A.”... -
Page 72: Operating Other Manufacturers' Equipment
Operating Other Manufacturers’ Equipment The remote control supplied with this unit can transmit control signals for other manufacturers’ TVs, DBS tuners, and VCRs. By changing the transmittable signals from preset ones to the other manufacturers’ signals, you can operate other manufacturers’... - Page 73 To change the transmittable signals for operating other manufacturers’ DBS tuner Press and hold DBS Press DBS. Enter the manufacturer’s code using the number buttons (1 – 9, 0). See the table on the right to find the code. Release DBS You can always perform the following operation: Turns on or off the DBS tuner.
- Page 74 Operating Other Manufacturers’ Equipment To change the transmittable signals for operating other manufacturers’ VCR Press and hold VCR Press VCR. Enter the manufacturer’s code using the number buttons (1 – 9, 0). See the table on the right to find the code. Release VCR You can always perform the following operation: Turns on or off the VCR.
-
Page 75: Maintenance
Maintenance To get the best performance from the system, keep your discs and mechanism clean. General Notes In general, you will have the best performance by keeping your discs and mechanism clean. • Store discs in their cases, and keep them in cabinets or on shelves. -
Page 76: Troubleshooting
Troubleshooting Use this chart to help you solve daily operational problems. If there is any problem you cannot solve, contact your JVC‘s service center. 7 General PROBLEM The power does not come on. No sound from speakers. Sound from one speaker only. - Page 77 7 For DVD Player PROBLEM No picture is displayed on the TV. No picture is displayed on the TV screen, the picture is blurred, or the picture is divided into two parts. No sound is heard and “NO AUDIO” appears on the display.
- Page 78 Troubleshooting 7 For Tuner PROBLEM Hard to listen to broadcast because of noise. Continuous hiss or buzzing during FM reception. Occasional cracking noise during FM reception. 7 For MP3 PROBLEM A disc cannot be played. No MP3 files, only JPEG files are played.
-
Page 79: Specifications
Specifications Amplifier Output Power Audio (Measured on AC 110 V/120 V/220 V/240 V) Audio Input Sensitivity/Impedance (1 kHz): Audio Input (DIGITAL IN)* : Signal-to-Noise Ratio (’66 IHF/DIN): Frequency Response (8 Ω): Tone Control: Video (Measured on AC 110 V/120 V/220 V/240 V) Video Input Sensitivity/Impedance (1 kHz): Composite video: S-video:... - Page 80 Mains (AC) Line Instruction (not applicable for Europe, U.S.A., Canada, Australia and U.K.) Instrucción sobre la línea de la red (CA) (no aplicable para Europa, EE.UU., Canadá, Australia, ni el Reino Unido) Instrução sobre a tensão da rede eléctrica (CA) (não aplicável para a Europa, os E.U.A., o Canadá, a Austrália e o Reino Unido) VOLTAGE 110V...