Draytek Vigor2760 Series Quick Start Manual
Draytek vigor2760 series high speed vdsl2 router
Hide thumbs
Also See for Vigor2760 Series:
- User manual (619 pages) ,
- Quick start manual (25 pages) ,
- User manual (324 pages)
Table of Contents
Advertisement
Quick Links
Download this manual
See also:
User Manual
Advertisement
Table of Contents

Related Manuals for Draytek Vigor2760 Series


Summary of Contents for Draytek Vigor2760 Series
- Page 1 Vigor2760 Series Quick Start Guide...
- Page 2 Vigor2760 Series Quick Start Guide...
-
Page 3: Quick Start Guide
Vigor2760 Series High Speed VDSL2 Router Quick Start Guide Version: 1.0 Firmware Version:1.0.0_RC12b (For future update, contact DrayTek) Date: 21/11/2012 Vigor2760 Series Quick Start Guide... -
Page 5: Copyright Information
Web registration is preferred. You can register your Vigor router via Owner http://www.draytek.com. Firmware & Tools Due to the continuous evolution of DrayTek technology, all routers will be Updates regularly upgraded. Please consult the DrayTek web site for more information on newest firmware, tools and documents. -
Page 6: European Community Declarations
No. 26, Fu Shing Road, HuKou Township, HsinChu Industrial Park, Hsin-Chu, Taiwan Product: Vigor2760 Series Router DrayTek Corp. declares that Vigor2760 Series of routers are in compliance with the following essential requirements and other relevant provisions of R&TTE Directive 1999/5/EEC. The product conforms to the requirements of Electro-Magnetic Compatibility (EMC) Directive 2004/108/EC by complying with the requirements set forth in EN55022/Class B and EN55024/Class B. -
Page 7: Table Of Contents
1. Introduction ..................1 1.1 Panel Explanation................... 2 1.1.1 For Vigor2760 ................... 2 1.1.2 For Vigor2760n ................. 4 1.1.3 For Vigor2760Vn................6 1.2 Package Content .................... 8 2. Installing Your Router ................9 2.1 Hardware Installation ..................9 2.2 Printer Installation ..................11 3. -
Page 9: Introduction
The Vigor2760 series are the routers with high speed in data transmission through DSL port and LAN ports. With the development of NGN (Next Generation Network), you may recently hear the news about FTTx deployment in your local area or even have already subscribed the unbundling last mile service (e.g. -
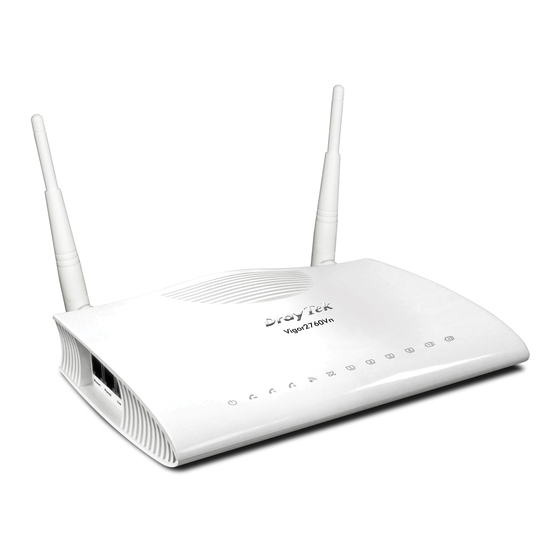
Page 10: Panel Explanation
In addition, Vigor2760 series supports two USB interfaces for connecting USB printer to share the printer or USB storage device for sharing files and 3G backup services. Status Explanation Blinking The router is powered on and running normally. (ACT) The router is powered off. - Page 11 Then the router will restart with the factory default configuration. VDSL/ADSL Connector for accessing the Internet. USB (1-2) Connector for USB storage device or printer or 3G backup. LAN (1-4) Connectors for local network devices. Vigor2760 Series Quick Start Guide...
- Page 12 The router is ready. (Slowly) DSL (Green) Blinking The router is trying to connect to (Quickly) Internet. The port is connected. Blinking The data is transmitting. LAN1/2/3/4 A USB device is connected and active. USB1/2 Vigor2760 Series Quick Start Guide...
- Page 13 (WLAN LED on) or disable (WLAN LED off) wireless connection. VDSL/ADSL Connector for accessing the Internet. USB (1-2) Connector for USB storage device or printer or 3G backup. LAN (1-4) Connectors for local network devices. Vigor2760 Series Quick Start Guide...
- Page 14 The router is ready. (Slowly) DSL (Green) Blinking The router is trying to connect to (Quickly) Internet. The port is connected. Blinking The data is transmitting. LAN1/2/3/4 A USB device is connected and active. USB1/2 Vigor2760 Series Quick Start Guide...
- Page 15 USB (1-2) Connector for USB storage device or printer or 3G backup. LAN (1-4) Connectors for local network devices. Interface Description Line Connector for PSTN life line. Phone1/Phone2 Connector of analog phone for VoIP communication. Vigor2760 Series Quick Start Guide...
-
Page 16: Package Content
The type of the power adapter depends on the country that the router will be installed. * The maximum power consumption is 17-23 Watt. UK-type Power Adapter EU-type Power Adapter USA/Taiwan-type Power AU/NZ-type Power Adapter Adapter Vigor2760 Series Quick Start Guide... -
Page 17: Installing Your Router
3. Connect Phone port to a conventional analog telephone (for V model only). 4. Connect detachable antennas to the router for Vigor2760 series (for n model only). 5. Connect one end of the power cord to the power port of this device. - Page 18 (For the detailed information of LED status, please refer to section 1.1.) Vigor2760 Series Quick Start Guide...
- Page 19 98/SE/Vista, please visit www.draytek.com. Before using it, please follow the steps below to configure settings for connected computers (or wireless clients). 1. Connect the printer with the router through USB port. 2. Open Start->Settings-> Printer and Faxes. Vigor2760 Series Quick Start Guide...
- Page 20 4. Click Local printer attached to this computer and click Next. 5. In this dialog, choose Create a new port Type of port and use the drop down list to select Standard TCP/IP Port. Click Next. Vigor2760 Series Quick Start Guide...
- Page 21 6. In the following dialog, type 192.168.1.1 (router’s LAN IP) in the field of Printer Name or IP Address and type IP_192.168.1.1 as the port name. Then, click Next. 7. Click Standard and choose Generic Network Card. 8. Then, in the following dialog, click Finish. Vigor2760 Series Quick Start Guide...
- Page 22 PC. When you finish the selection, click Next. 10. For the final stage, you need to go back to Control Panel-> Printers and edit the property of the new printer you have added. Vigor2760 Series Quick Start Guide...
- Page 23 OK. Next please refer to the red rectangle for choosing the correct protocol and LPR name. The printer can be used for printing now. Most of the printers with different manufacturers are compatible with vigor router. Vigor2760 Series Quick Start Guide...
- Page 24 Note 1: Some printers with the fax/scanning or other additional functions are not supported. If you do not know whether your printer is supported or not, please visit www.draytek.com to find out the printer list. Open Support >>FAQ; find out the link of Printer Server and click it;...
-
Page 25: Hardware Installation
3. The following window will be open to ask for username and password. Please type “admin/admin” on Username/Password and click Login for opening the web configurator. Notice: If you fail to access to the web configuration, please go to “Trouble Shooting” for detecting and solving your problem. Vigor2760 Series Quick Start Guide... -
Page 26: Basic Configuration
1. Open the web user interface of Vigor router. The Main Screen will appear. The home page will change slightly in accordance with the router you have. Here we take Vigor2760n as an example. 2. Click Wizard >>Quick Start Wizard. Vigor2760 Series Quick Start Guide... - Page 27 Then, click the Next button for next page. 4. In the tab of STEP2, choose the time zone for the router located. Then, click the Next button for next page. Vigor2760 Series Quick Start Guide...
- Page 28 Static IP: if you click Static IP, you will get the following page. Please type in the IP address information and type the values for ADSL settings (it can be ignored if VDSL service is offered) originally provided by your ISP. Then click Finish to complete the configuration. Vigor2760 Series Quick Start Guide...
- Page 29 DHCP: if you click DHCP as the protocol, just enter the values for ADSL settings (it can be ignored if VDSL service is offered) provided by your ISP. Then click Finish to complete the configuration. Vigor2760 Series Quick Start Guide...
-
Page 30: Wireless Lan Configuration
In an Infrastructure Mode of wireless network, Vigor wireless router plays a role as an Access Point (AP) connecting to lots of wireless clients or Stations (STA). All the STAs (clients) will share the same Internet connection with other wired hosts via Vigor wireless router. Vigor2760 Series Quick Start Guide... - Page 31 Simply click any SSID item under the SSID field. A pop up dialog will appear for you to modify the settings. 6. Click Apply to save the changes. Vigor2760 Series Quick Start Guide...
- Page 32 This page is left blank. Vigor2760 Series Quick Start Guide...
-
Page 33: Trouble Shooting
LAN LED is bright. 3. If not, it means that there is something wrong with the hardware status. Simply back to “2.1 Hardware Installation” to execute the hardware installation again. And then, try again. Vigor2760 Series Quick Start Guide... - Page 34 1. Go to Control Panel and then double-click on Network Connections. 2. Right-click on Local Area Connection and click on Properties. Vigor2760 Series Quick Start Guide...
- Page 35 1. Double click on the current used Mac OS on the desktop. 2. Open the Application folder and get into Network. 3. On the Network screen, select Using DHCP from the drop down list of Configure IPv4. Vigor2760 Series Quick Start Guide...
- Page 36 Vigor2760 Series Quick Start Guide...
- Page 37 2. Open the Application folder and get into Utilities. 3. Double click Terminal. The Terminal window will appear. 4. Type ping 192.168.1.1 and press [Enter]. If the link is OK, the line of “64 bytes from 192.168.1.1: icmp_seq=0 ttl=255 time=xxxx ms” will appear. Vigor2760 Series Quick Start Guide...
- Page 38 You can reset the router to factory default via Web page. Open System Maintenance>> Reboot System. The following screen will appear. Choose Using factory default configuration and click OK. After few seconds, the router will return all the settings to the factory settings. Vigor2760 Series Quick Start Guide...
-
Page 39: Contacting Your Dealer
If the router still cannot work correctly after trying many efforts, please contact your dealer for further help right away. For any questions, please feel free to send e-mail to support@draytek.com. Vigor2760 Series Quick Start Guide...