Rheem 310 Series Service Instructions Manual
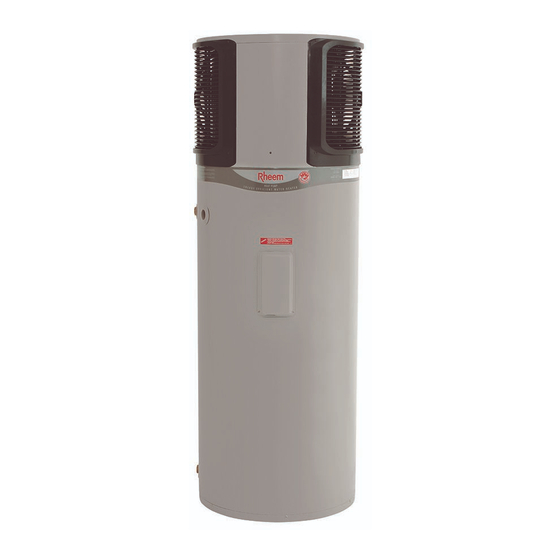
310 series heat pump
Hide thumbs
Also See for 310 Series:
- Service instructions manual (98 pages) ,
- Owner's manual and installation instructions (44 pages) ,
- Installation instructions manual (32 pages)
Table of Contents
Advertisement
R
h
e
e
m
R
h
e
e
m
SERVICE INSTRUCTIONS
This document is stored and maintained electronically by
A
u
s
t
r
a
l
i
A
u
s
t
r
a
l
i
310 Series Heat Pump
Service. All printed copies not bearing this statement in RED are deemed "uncontrolled".
a
P
t
y
L
t
a
P
t
y
L
t
d
d
A
B
N
2
1
A
B
N
2
1
TM025
R
e
v
i
s
i
o
n
:
B
R
e
v
i
s
i
o
n
:
B
R
e
v
i
s
i
o
n
:
B
P
u
b
l
i
s
h
e
d
:
0
8
/
0
7
P
u
b
l
i
s
h
e
d
:
0
8
/
0
7
P
u
b
l
i
s
h
e
d
:
0
8
/
0
7
551310
0
9
8
8
2
3
5
1
1
0
9
8
8
2
3
5
1
1
Advertisement
Table of Contents

Related Manuals for Rheem 310 Series


Summary of Contents for Rheem 310 Series
-
Page 1: Service Instructions
SERVICE INSTRUCTIONS 310 Series Heat Pump TM025 551310 This document is stored and maintained electronically by Service. All printed copies not bearing this statement in RED are deemed “uncontrolled”. -
Page 2: Table Of Contents
Replacement Parts List – Refrigeration Plant..............63 Exploded View - Water Heater...................64 Replacement Parts List – Water Heater .................65 Rheem Electric Water Heater Warranty - (Australia Only) ..........66 Document Revision History....................67 TM025 Rheem Heat Pump Service Instructions REV: B Date of Issue: 02/08/07 This document is stored and maintained electronically by Service. -
Page 3: Safety Warning
Regulatory Authorities to carry out effective repairs to a Rheem 310 series Heat Pump Water Heater in the minimum of time. Safety precautions or areas where extra care should be observed when conducting tests outlined in this manual are indicated by print in bold italics and/or a warning symbol. -
Page 4: Specifications
6. Check evaporator fins and fan blade for build up of dust or debris. 7. Check for sludge build up and if necessary drain and flush tank. TM025 Rheem Heat Pump Service Instructions REV: B Date of Issue: 02/08/07 This document is stored and maintained electronically by... -
Page 5: Operation
TM025 Rheem Heat Pump Service Instructions REV: B Date of Issue: 02/08/07 This document is stored and maintained electronically by... -
Page 6: Electronic Controller
The green and red LED’s indicate the condition of the heat pump (refer to the section titled “LED Indication” on page 12). TM025 Rheem Heat Pump Service Instructions REV: B Date of Issue: 02/08/07 This document is stored and maintained electronically by... -
Page 7: Operating Sequence Flow Charts
3.2 or no HPV Refrigeration identification Heating cycle ends TM025 Rheem Heat Pump Service Instructions REV: B Date of Issue: 02/08/07 This document is stored and maintained electronically by Service. All printed copies not bearing this statement in RED are deemed “uncontrolled”. - Page 8 Heating Cycle complete <61°C? Circulator Off >53°C? TM025 Rheem Heat Pump Service Instructions REV: B Date of Issue: 02/08/07 This document is stored and maintained electronically by Service. All printed copies not bearing this statement in RED are deemed “uncontrolled”.
-
Page 9: Refrigeration Terms And Their Meaning
Evaporator Thermistor - A device responsive to temperature that controls the active supply between the compressor circuit and the booster element circuit. TM025 Rheem Heat Pump Service Instructions REV: B Date of Issue: 02/08/07 This document is stored and maintained electronically by... -
Page 10: Common Faults
TM025 Rheem Heat Pump Service Instructions REV: B Date of Issue: 02/08/07 This document is stored and maintained electronically by... - Page 11 1. Turn off the stopcock on the cold water supply to the water heater. 2. Open a hot tap. If water flow is persistent and cold a cross connection exists. TM025 Rheem Heat Pump Service Instructions REV: B Date of Issue: 02/08/07 This document is stored and maintained electronically by Service.
-
Page 12: Wiring Diagram
Wiring Diagram TM025 Rheem Heat Pump Service Instructions REV: B Date of Issue: 02/08/07 This document is stored and maintained electronically by Service. All printed copies not bearing this statement in RED are deemed “uncontrolled”. -
Page 13: Refrigeration Sealed System Diagram
Refrigeration Sealed System Diagram LED Indication All 310 series Heat Pumps have LED indication. There are two variations of LED indication depending upon the version of the controllers software; however all versions utilise a red and green LED to display the operational status and/or fault condition of the appliance. - Page 14 Controller Software Version HPV 4.0 or higher 310 series Heat Pumps with controller version HPV 4.0 or higher have a red and green LED located externally on the front of the heat pump module or internally on the control board in the heat pump (refrigeration) module depending upon date of manufacture.
-
Page 15: Fault Finding
Leaking water heater Noisy water heater Blowing fuse/circuit breaker TM025 Rheem Heat Pump Service Instructions REV: B Date of Issue: 02/08/07 This document is stored and maintained electronically by Service. All printed copies not bearing this statement in RED are deemed “uncontrolled”. - Page 16 Blowing fuse/circuit breaker Note: For more information on LED indication refer to pages 12 and 13. TM025 Rheem Heat Pump Service Instructions REV: B Date of Issue: 02/08/07 This document is stored and maintained electronically by Service. All printed copies not bearing this statement in RED are deemed “uncontrolled”.
- Page 17 2. Faulty circuit breaker or fatigued fuse wire 3. Unit may be short cycling due to faulty thermostat TM025 Rheem Heat Pump Service Instructions REV: B Date of Issue: 02/08/07 This document is stored and maintained electronically by Service. All printed copies not bearing this statement in RED are deemed “uncontrolled”.
- Page 18 Note: For more information on LED indication refer to pages 12 and13. TM025 Rheem Heat Pump Service Instructions REV: B Date of Issue: 02/08/07 This document is stored and maintained electronically by...
- Page 19 Normal voltage is 240 volts. Note: Refer to page 19 for component test 4 and page 20 for component test 5. TM025 Rheem Heat Pump Service Instructions REV: B Date of Issue: 02/08/07 This document is stored and maintained electronically by...
- Page 20 1.968 1.107 16.11 7.304 3.603 1.91 1.077 TM025 Rheem Heat Pump Service Instructions REV: B Date of Issue: 02/08/07 This document is stored and maintained electronically by Service. All printed copies not bearing this statement in RED are deemed “uncontrolled”.
- Page 21 Component test 5 T Sensor Testing: 310 Series Heat Pumps have five independent thermistors which are utilised to monitor temperatures at various locations around the system. These thermistors connect to and are monitored by the control board and are known as ‘T sensors’.
- Page 22 TM025 Rheem Heat Pump Service Instructions REV: B Date of Issue: 02/08/07 This document is stored and maintained electronically by Service. All printed copies not bearing this statement in RED are deemed “uncontrolled”.
- Page 23 Using a multimeter on the DC voltage scale, measure between the two wires on the control board relay plug. Normal voltage is 6 Volts DC. TM025 Rheem Heat Pump Service Instructions REV: B Date of Issue: 02/08/07 This document is stored and maintained electronically by...
- Page 24 T&PR. System working Note: For more information on LED indication refer to pages 12 and 13. TM025 Rheem Heat Pump Service Instructions REV: B Date of Issue: 02/08/07 This document is stored and maintained electronically by Service. All printed copies not bearing this statement in RED are deemed “uncontrolled”.
- Page 25 Note: Refer to page 5 for T sensor plug socket location on control board. TM025 Rheem Heat Pump Service Instructions REV: B Date of Issue: 02/08/07 This document is stored and maintained electronically by...
- Page 26 Replace control board TM025 Rheem Heat Pump Service Instructions REV: B Date of Issue: 02/08/07 This document is stored and maintained electronically by Service. All printed copies not bearing this statement in RED are deemed “uncontrolled”.
- Page 27 180 – 240V. TM025 Rheem Heat Pump Service Instructions REV: B Date of Issue: 02/08/07 This document is stored and maintained electronically by Service. All printed copies not bearing this statement in RED are deemed “uncontrolled”.
- Page 28 Faulty compressor and/or compressor capacitor wiring. TM025 Rheem Heat Pump Service Instructions REV: B Date of Issue: 02/08/07 This document is stored and maintained electronically by Service. All printed copies not bearing this statement in RED are deemed “uncontrolled”.
- Page 29 (35µF). (Run) Red & Blue terminals – 2.2 ohms (Start) Red & Black terminals – 3.2 ohms TM025 Rheem Heat Pump Service Instructions REV: B Date of Issue: 02/08/07 This document is stored and maintained electronically by Service. All printed copies not bearing this statement in RED are deemed “uncontrolled”.
- Page 30 Tests 19 & 20 Are the refrigeration system pressures correct? TM025 Rheem Heat Pump Service Instructions REV: B Date of Issue: 02/08/07 This document is stored and maintained electronically by Service. All printed copies not bearing this statement in RED are deemed “uncontrolled”.
- Page 31 Note: To reset heat pump switch power off, wait for 30 seconds then switch back on. TM025 Rheem Heat Pump Service Instructions REV: B Date of Issue: 02/08/07 This document is stored and maintained electronically by Service. All printed copies not bearing this statement in RED are deemed “uncontrolled”.
- Page 32 Normal capacitance is 2 micro Farads (2µF). Note: Refer to page 45 for component tests 19 & 20. TM025 Rheem Heat Pump Service Instructions REV: B Date of Issue: 02/08/07 This document is stored and maintained electronically by...
- Page 33 No LED indication 4.14 For more information on LED indication refer to pages 12 and13. TM025 Rheem Heat Pump Service Instructions REV: B Date of Issue: 02/08/07 This document is stored and maintained electronically by Service. All printed copies not bearing this statement in RED are deemed “uncontrolled”.
- Page 34 Replace sensor strip working? Replace control board TM025 Rheem Heat Pump Service Instructions REV: B Date of Issue: 02/08/07 This document is stored and maintained electronically by Service. All printed copies not bearing this statement in RED are deemed “uncontrolled”.
- Page 35 Replace circulator Note: Refer to page 5 for T sensor plug socket location on control board. TM025 Rheem Heat Pump Service Instructions REV: B Date of Issue: 02/08/07 This document is stored and maintained electronically by Service. All printed copies not bearing this statement in RED are deemed “uncontrolled”.
- Page 36 Repair faulty wiring Note: Refer to page 5 for T sensor plug socket location on control board. TM025 Rheem Heat Pump Service Instructions REV: B Date of Issue: 02/08/07 This document is stored and maintained electronically by Service. All printed copies not bearing this statement in RED are deemed “uncontrolled”.
- Page 37 Faulty compressor and/or compressor capacitor wiring. Note: Refer to page 5 for T sensor plug socket location on control board. TM025 Rheem Heat Pump Service Instructions REV: B Date of Issue: 02/08/07 This document is stored and maintained electronically by...
- Page 38 Faulty compressor and/or compressor capacitor wiring. Note: Refer to page 5 for T sensor plug socket location on control board. TM025 Rheem Heat Pump Service Instructions REV: B Date of Issue: 02/08/07 This document is stored and maintained electronically by...
- Page 39 Replace control board. Note: Refer to page 5 for T sensor plug socket location on control board. TM025 Rheem Heat Pump Service Instructions REV: B Date of Issue: 02/08/07 This document is stored and maintained electronically by...
- Page 40 Note: Refer to page 5 for T sensor plug socket location on control board. TM025 Rheem Heat Pump Service Instructions REV: B Date of Issue: 02/08/07 This document is stored and maintained electronically by...
- Page 41 Replace control board. TM025 Rheem Heat Pump Service Instructions REV: B Date of Issue: 02/08/07 This document is stored and maintained electronically by Service. All printed copies not bearing this statement in RED are deemed “uncontrolled”.
- Page 42 Remove anode and repair leak using Teflon thread tape. TM025 Rheem Heat Pump Service Instructions REV: B Date of Issue: 02/08/07 This document is stored and maintained electronically by Service. All printed copies not bearing this statement in RED are deemed “uncontrolled”.
- Page 43 Fit 600kPa pressure limiting valve. TM025 Rheem Heat Pump Service Instructions REV: B Date of Issue: 02/08/07 This document is stored and maintained electronically by Service. All printed copies not bearing this statement in RED are deemed “uncontrolled”.
- Page 44 Check for pinched or damaged wiring touching the heater jacket. TM025 Rheem Heat Pump Service Instructions REV: B Date of Issue: 02/08/07 This document is stored and maintained electronically by Service. All printed copies not bearing this statement in RED are deemed “uncontrolled”.
- Page 45 High High side head pressure excessive (Test 18) TM025 Rheem Heat Pump Service Instructions REV: B Date of Issue: 02/08/07 This document is stored and maintained electronically by Service. All printed copies not bearing this statement in RED are deemed “uncontrolled”.
-
Page 46: Refrigerant Charge
Amps and system pressures should be within normal ranges (refer to component test 19 (above) and component test 20 (above) for typical system pressures). TM025 Rheem Heat Pump Service Instructions REV: B Date of Issue: 02/08/07 This document is stored and maintained electronically by... -
Page 47: Electrical Insulation Testing
Wear Personal Protective Equipment when conducting step 1 of this procedure to reduce the risk of electric shock. Refer to Rheem safety procedure on electrical testing. Insulation resistance of the water heater Neutral Circuit. (Reading not to be below 0.66 Mega ohm). -
Page 48: Component Replacement Procedures - Water Heater
Wear Personal Protective Equipment to prevent scalds or burns. Wear Personal Protective Equipment when conducting step 3 of this procedure to reduce the risk of electric shock. Refer to Rheem Safety Procedure on electrical testing. 1. Isolate the power and water supplies to the water heater. - Page 49 Mechanical Thermostat (Procedure 4) Wear Personal Protective Equipment when conducting step 2 of this procedure to reduce the risk of electric shock. Refer to Rheem Safety Procedure on electrical testing. 1. Isolate the power to the water heater and remove access cover.
- Page 50 9. Refit the anode cap(s), jacket, air inlet louver and jacket top and restore power. Heating Unit (Procedure 6) Wear Personal Protective Equipment when conducting step 1 of this procedure to reduce the risk of electric shock. Refer to Rheem Safety Procedure on electrical testing. 1. Drain the water heater. Refer to procedure 1.
- Page 51 Dropper Tube(s) (Procedure 7) Wear Personal Protective Equipment when conducting step 2 of this procedure to reduce the risk of electric shock. Refer to Rheem Safety Procedure on electrical testing. In order to replace the dropper tube(s) the heat pump (refrigeration) module must be removed and refitted.
- Page 52 Sensor Strip (Procedure 8) Wear Personal Protective Equipment when conducting step 2 of this procedure to reduce the risk of electric shock. Refer to Rheem Safety Procedure on electrical testing. In order to replace the sensor strip the heat pump (refrigeration) module must be removed and refitted.
-
Page 53: Component Replacement Procedures - Refrigeration Plant
Refrigeration Module (Procedure 9) Wear Personal Protective Equipment when conducting step 2 of this procedure to reduce the risk of electric shock. Refer to Rheem Safety Procedure on electrical testing. Due to the weight of the refrigeration unit (approx 45kgs) this is a two man job. - Page 54 Evaporator Fan Motor (Procedure 12) Wear Personal Protective Equipment when conducting step 2 of this procedure to reduce the risk of electric shock. Refer to Rheem Safety Procedure on electrical testing. The fan motor may commence operation without warning. Failure to isolate the power may result in serious injury if the fan commences operation during the removal process.
- Page 55 Control Board (Procedure 13) Wear Personal Protective Equipment when conducting step 2 of this procedure to reduce the risk of electric shock. Refer to Rheem Safety Procedure on electrical testing. 1. Isolate the power to the water heater. 2. Remove the access cover and confirm with a multi-meter between Active and Neutral, then Active and Earth, then Neutral and Earth terminals of the terminal block that voltage is not present.
- Page 56 Fan Capacitor (Procedure 16) Wear Personal Protective Equipment when conducting step 2 of this procedure to reduce the risk of electric shock. Refer to Rheem Safety Procedure on electrical testing. 1. Isolate the power to the water heater. 2. Remove the access cover and confirm with a multi-meter between Active and Neutral, then Active and Earth, then Neutral and Earth terminals of the terminal block that voltage is not present.
- Page 57 T sensor(s) (Procedure 18) Wear Personal Protective Equipment when conducting step 2 of this procedure to reduce the risk of electric shock. Refer to Rheem Safety Procedure on electrical testing. 1. Isolate the power supply to the water heater. 2. Remove the access cover and confirm with a multi-meter between Active and Neutral, then Active and Earth, then Neutral and Earth terminals of the terminal block that voltage is not present.
-
Page 58: Component Replacement Procedures - Sealed Refrigeration System
Evaporator (Procedure 19) Wear Personal Protective Equipment when conducting step 2 of this procedure to reduce the risk of electric shock. Refer to Rheem Safety Procedure on electrical testing. 1. Isolate the power to the water heater. - Page 59 Receiver/Filter Drier (Procedure 20) Wear Personal Protective Equipment when conducting step 2 of this procedure to reduce the risk of electric shock. Refer to Rheem Safety Procedure on electrical testing. 1. Isolate the power to the water heater. 2. Remove the access cover and confirm with a multi-meter between Active and Neutral, then Active and Earth, then Neutral and Earth terminals of the terminal block that voltage is not present.
- Page 60 Compressor and Accumulator (Procedure 21) Wear Personal Protective Equipment when conducting step 2 of this procedure to reduce the risk of electric shock. Refer to Rheem Safety Procedure on electrical testing. 1. Isolate the power to the water heater. 2. Remove the access cover and confirm with a multi-meter between Active and Neutral, then Active and Earth, then Neutral and Earth terminals of the terminal block that voltage is not present.
- Page 61 TX Valve Replacement (Procedure 22) Wear Personal Protective Equipment when conducting step 2 of this procedure to reduce the risk of electric shock. Refer to Rheem Safety Procedure on electrical testing. 1. Isolate the power to the water heater. 2. Remove the access cover and confirm with a multi-meter between Active and Neutral, then Active and Earth, then Neutral and Earth terminals of the terminal block that voltage is not present.
- Page 62 Heat Exchanger (Procedure 24) Wear Personal Protective Equipment when conducting step 2 of this procedure to reduce the risk of electric shock. Refer to Rheem Safety Procedure on electrical testing. A quantity of hot water may discharge from the flexible hose(s) during this procedure.
-
Page 63: Exploded View - Refrigeration Plant
Exploded View - Refrigeration Plant TM025 Rheem Heat Pump Service Instructions REV: A Date of Issue: 02/08/07 This document is stored and maintained electronically by Service. All printed copies not bearing this statement in RED are deemed “uncontrolled”. -
Page 64: Replacement Parts List - Refrigeration Plant
NS Heat Pump Module to Water Heater Mounting Screws (pkt of 3) 080156 NS = Not shown TM025 Rheem Heat Pump Service Instructions REV: A Date of Issue: 02/08/07 This document is stored and maintained electronically by Service. All printed copies not bearing this statement in RED are deemed “uncontrolled”. -
Page 65: Exploded View - Water Heater
Exploded View - Water Heater TM025 Rheem Heat Pump Service Instructions REV: B Date of Issue: 02/08/07 This document is stored and maintained electronically by Service. All printed copies not bearing this statement in RED are deemed “uncontrolled”. -
Page 66: Replacement Parts List - Water Heater
051521 27 T & PR Valve HTE523/507 220641 TM025 Rheem Heat Pump Service Instructions REV: B Date of Issue: 02/08/07 This document is stored and maintained electronically by Service. All printed copies not bearing this statement in RED are deemed “uncontrolled”. -
Page 67: Rheem Electric Water Heater Warranty - (Australia Only)
Rheem WARRANTY EXCLUSIONS REPAIR AND REPLACEMENT WORK WILL BE CARRIED OUT AS SET OUT IN THE RHEEM WATER HEATER WARRANTY ABOVE HOWEVER THE FOLLOWING EXCLUSIONS MAY CAUSE THE WATER HEATER WARRANTY TO BECOME VOID AND MAY INCUR A SERVICE CHARGE AND / OR COST OF PARTS. -
Page 68: Document Revision History
Document Number Service Instructions for Rheem Heat Pump TM025 Revision Details of change D.O.I. Service Instructions issued for 310 Series Heat Pump 03/07 Addition to flow diagram 08/07 TM025 Rheem Heat Pump Service Instructions REV: B Date of Issue: 02/08/07 This document is stored and maintained electronically by Service.