Fisher & Paykel GC901 Service Manual
Hide thumbs
Also See for GC901:
- Installation information (20 pages) ,
- Service manual (15 pages) ,
- User manual (52 pages)

Related Manuals for Fisher & Paykel GC901


Summary of Contents for Fisher & Paykel GC901
-
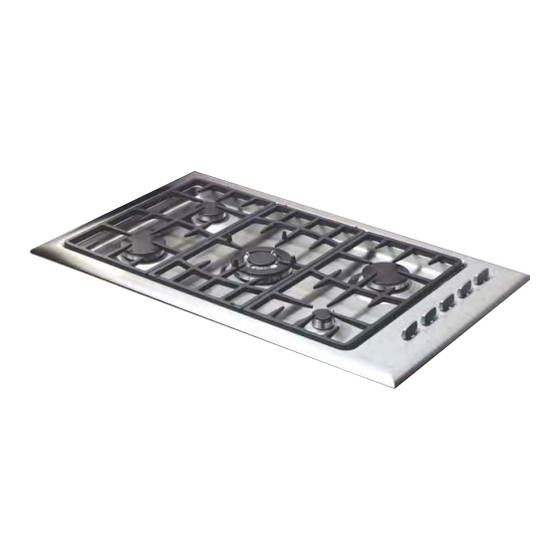
Page 1: Gas Cooktops
Gas Cooktops MODELS GC901 & GC901M (USA & Canada) CG901M (NZ & AUS) CG901 & CG901M (GB & IE) 599079D... -
Page 3: Models Covered By This Manual
599079D – July 2003 MODELS COVERED BY THIS MANUAL Fisher and Paykel Titan Gas Cooktop MODEL CODE MARKET GC901 88410 United States of America/Canada GC901M 88417 United States of America/Canada CG901M 87816 New Zealand CG901M 87816 AUST Australia CG901 87817... -
Page 4: Table Of Contents
..................12 EMOVE THE RODUCT FROM THE ENCH OUNTER REPLACEMENT & SERVICING OF ELECTRONIC IGNITION ................12 ............................12 EPLACE AN LECTRODE ............................12 EPLACE GNITION (GC901 USA & )..............13 EPLACE THE ICROSWITCH ARNESS CANADA GAS VALVES...................................13 .............................13 HANGE A ALVE ............................14 EPLACE AN LECTRODE PROBLEM SOLVING AUTO REIGNITION (USA &... -
Page 5: Specifications
CG901M is for NZ / Aus / GB / IE markets with flame failure and a more powerful (Isphording) wok. It is known as an Iridium Titan Gas Cooktop. GC901 model is made for the GB / IE market with flame failure and a Sabaf triple ring burner. It is known as Titan Gas Cooktop. -
Page 6: Burners & Rating
19,000 1.22 901M Note: Kits of high altitude orifices are available for GC901 and GC901M models. NG Part No. 531566 LPG part no. 531567 These orifices should be used at approximately 6000 feet or above. Serial and model numbers are located on the underside of the product. An extra label is provided to the installer to be placed in a convenient location. -
Page 7: Controls
1.7 Controls NZ / Aus / GB / IE 5 x Flame Failure Valve P/N 530302 USA / Canada 5 x Standard Gas Valve P/N 530029 1.8 Electrical NZ / Aus / GB / IE Mains Powered Ignition System - 220/240V 0.6VA P/N 530033 USA / Canada Mains Powered Auto Re-ignition System 120V 60Hz 2V A P/N 530308 1.9 General Warning... -
Page 8: Wiring Diagrams
Wiring Diagrams 2.1 Schematic Wiring Diagram for CG901 Series Gas Cooktops Ignition Circuit (NZ, Aust, GB, IE) 2.2 Schematic Wiring Diagram for GC901 Series Gas Cooktops Ignition Circuit (USA & Canada Only) - 8 -... -
Page 9: Replacement Of Burner Orifice & Low Setting
Replacement of Burner Orifice & Low Setting Adjustment 3.1 Minimum Setting or Turn Down Note: This is not possible in the UK and Ireland as the gas valves have been sealed. This has been set at the factory but can be checked after the correct pressure has been reached. -
Page 10: Conversion To Different Gas Type
GB/IE GB/IE Note: Kits of high altitude orifices are available for GC901/M (these are also suitable for CG901/M models) NG Part No. 531566 LP Part No. 531567. These orifices should be used at approximately 6000 feet (1830 m) or above. -
Page 11: Trivet Feet
To change the gas pressure (4" NG, 11" LP): (USA/Canada Only) Unscrew the cap from the regulator. Check the orientation of the plastic conversion plug, and if necessary, unscrew, turn over and screw back in (wide section away from cap for LP and against cap for NG - see diagram below for appropriate orientation). -
Page 12: Removal Of Cooktop From Bench/Counter-Top
Removal of Cooktop from Bench/Counter-Top It is probably easiest to service the internal components (gas valves, electronics) by removing the top panel rather than removing the product from the bench (see Section 4). 6.1 To Remove the Product from the Bench/Counter-Top Disconnect the electrical supply. -
Page 13: To Replace The Microswitch Harness (Gc901 Usa & Canada Only)
7.3 To Replace the Microswitch Harness (GC901 USA & Canada Only) Disconnect from power. Remove the product top panel - (see Section 4). Lift off microswitch assembly and replace. Reassemble in reverse order. Gas Valves 8.1 To Change a Gas Valve Turn off the gas and electricity supplies. -
Page 14: Electrode
8.2 To Service a gas Valve Remove product top panel. Remove circlips from each gas valve to free the microswitch assembly. Lift off microswitches. Unscrew the two Philips screws on the top of the gas valve. Gently lift out the valve cone, clean with solvent. Re-grease with high temperature grease. -
Page 15: Sparking Continuously After Ignition
Check the high tensions leads have not been coiled, as this may result in a loss of voltage and a spark of insufficient energy to ignite the gas. (Use correct length leads and locate in correct position.) 9.3 Sparking Continuously after Ignition Check the polarity of the electrical supply is correct to the ignition box (incorrect polarity will cause a problem.) Check electrodes are clean (use rubbing alcohol and an old toothbrush).