Panasonic SC-PM08 Operating Instructions Manual
Dvd stereo system
Hide thumbs
Also See for SC-PM08:
- Operating instructions manual (54 pages) ,
- Service manual (126 pages) ,
- Operating instructions manual (48 pages)

Related Manuals for Panasonic SC-PM08


Summary of Contents for Panasonic SC-PM08
-
Page 1: Operating Instructions
DVD Stereo System Operating Instructions SC-PM08 Model No. Before connecting, operating or adjusting this product, please read these instructions completely. Please keep this manual for future reference. RQT5377-P... -
Page 2: Supplied Accessories
( Only for U.S.A.) To order accessories contact 1-800-332-5368 Main unit SA-PM08 or web site (http://www.panasonic.com). Front SB-PM08 ¸ AC power supply cord ..... . . 1 pc. -
Page 3: Table Of Contents
Table of contents Listening caution Before use EST. 1924 Listening caution ........3 Selecting fine audio equipment such as the unit you’ve just pur- PRECAUTIONS . -
Page 4: Precautions
In the U.S.A., call 1-800-211-7262, 2. Water and Moisture—Do not use this unit near water—for ex- e-mail consumerproducts@panasonic.com, ample, near a bathtub, washbowl, swimming pool, or the like. or visit www.panasonic.com Damp basements should also be avoided. In Canada, call 905-624-5505 or visit www.panasonic.ca... -
Page 5: The Remote Control
The remote control » Batteries R6/LR6, AA, UM-3 ³Insert so the poles (i and j) match those in the remote control. ³Do not use rechargeable type batteries. Do not; ³mix old and new batteries. ³use different types at the same time. ³heat or expose to flame. -
Page 6: Installation
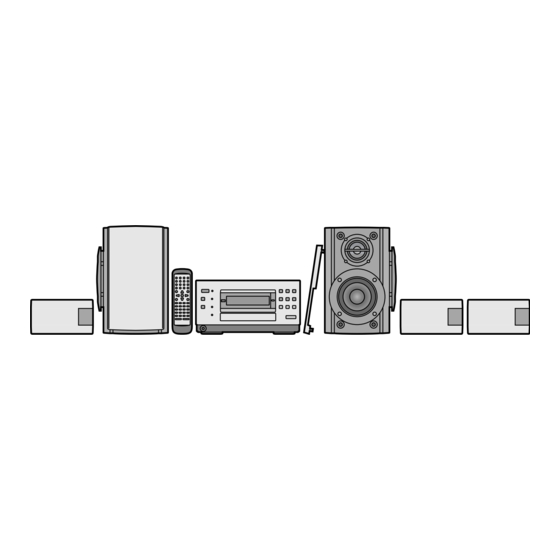
Place the surround speakers either side of the listening position, or slightly to the rear, about 1 meter higher than ear level. Place the speakers with the Panasonic logo facing toward the listen- ing position. However, the position should be adjusted to your per- sonal preference, because the effect varies to some degree depend- ing upon the type of music and the music source. - Page 7 Installation Center/surround speakers Speaker feet Standing Lying down Attach the speaker feet to the speakers These speakers can be set-up either standing or lying down, or they can be attached to a wall. The speaker feet help to keep the speakers in position and prevent scratching of your furniture.
-
Page 8: Basic Connections
Basic connections Adhesive tape (Left) To TV (Right) (not included) Left surround speaker Right surround speaker Center speaker S P E A K E From the left SB -P M SB -P S8 SB -P C8 SB -P S8 F R O N T C E N T E front speaker SB -P M... -
Page 9: Optional Antenna Connections
Optional antenna connections Before connection Use outdoor antennas if radio reception is poor. ³Do not connect the AC power supply cord until all other con- nections are complete. ³To prepare the AM loop antenna, speaker cords and FM an- tenna, twist the vinyl tip and pull off. FM antenna. -
Page 10: Front Panel Controls
Front panel controls Main unit 1 Standby/on switch (POWER ê/I) ..... 12 Press to switch the unit from on to standby mode or vice versa. In standby mode, the unit is still consuming a small amount of power. - Page 11 Front panel controls Remote control Buttons such as > function in the same way as the controls on the main unit. D Sleep timer button (SLEEP) ......34 E Standby/on switch (ê) .
-
Page 12: Setting The Time
Setting the time This is a 12-hour clock. The example shows how to set the clock for 4:25 p.m. Press [POWER ê/I] to turn the unit Press [CLOCK/TIMER] display “CLOCK”. Each time you press the button: 2, 4 CLOCK>FPLAY>Original display ^----------------------------------------------} (Within 7 seconds or so) POWER Í/I... -
Page 13: Television Settings
Television settings Remote control only œPLAY AUTO OFF ACTION TV Í SLEEP DIMMER MUTING The menu language has been factory preset to English. You can Í MIX 2CH change the language by going to “3 Menu Language” of the initial TV/VIDEO S.SURROUND Numbered... -
Page 14: Disc Symbols Used In These Operating Instructions
Disc symbols used in these Disc selection and care operating instructions This unit can play discs bearing any of these marks: The functions you can use depend on the type of disc you play. These marks are used to indicate which type of disc is available for use. -
Page 15: Discs
Discs ∫ Screens illustrated are examples. Normal play [DVD] [V-CD] [CD] Preparation: Turn the television on and switch the video input mode on the televi- sion to suit the type of connection you have made (e.g. VIDEO 1). Press [<, OPEN/CLOSE] to open the tray. - Page 16 Discs ∫ Using the resume function to restart play If you press [º] during play, the unit remembers the position. This function does not work if the disc’s play time is not displayed. [A] To restart play from that position Press [1] while “RESUME”...
-
Page 17: Other Methods Of Disc Play
Other methods of disc play » Frame-by-frame viewing œPLAY AUTO OFF ACTION TV Í SLEEP DIMMER MUTING Í MIX 2CH TV/VIDEO S.SURROUND [DVD] [V-CD] Remote control only TOP MENU TV CH MENU 1 Press [;] during play. CH SELECT ENTER TEST 2 Press the cursor buttons [2] or [1]. -
Page 18: Repeat Function
Other methods of disc play » AUTO OFF œPLAY ACTION TV Í SLEEP DIMMER MUTING Repeat function Í MIX 2CH TV/VIDEO S.SURROUND [DVD] [V-CD] [CD] TOP MENU MENU TV CH Remote control only CH SELECT ENTER Press [REPEAT] during play. TEST DISPLAY RETURN... -
Page 19: Marking A Position
Other methods of disc play AUTO OFF œPLAY ACTION TV Í SLEEP DIMMER MUTING Í Marking a position MIX 2CH TV/VIDEO S.SURROUND [DVD] [V-CD] [CD] TOP MENU MENU TV CH Remote control only CH SELECT ENTER TEST This feature allows you to mark up to 5 points on a disc so you can DISPLAY RETURN return to them easily at a later time. -
Page 20: Changing Soundtrack And Subtitle Languages
Other methods of disc play AUTO OFF œPLAY ACTION TV Í SLEEP DIMMER MUTING Í Changing soundtrack and subtitle MIX 2CH TV/VIDEO S.SURROUND languages Numbered buttons [DVD] TOP MENU MENU TV CH CH SELECT Cursor Remote control only ENTER ENTER buttons TEST DISPLAY... -
Page 21: Switching Angles
Other methods of disc play » œPLAY AUTO OFF ACTION TV Í SLEEP DIMMER MUTING Switching angles Í MIX 2CH TV/VIDEO S.SURROUND Numbered [DVD] buttons TOP MENU MENU Remote control only TV CH CH SELECT ENTER Some DVDs allow you to view the same scene from different angles. TEST DISPLAY RETURN... -
Page 22: Changing The Picture Quality For Movie Viewing (Cinema Mode)
Other methods of disc play CINEMA Changing the picture quality » for movie viewing (Cinema mode) [DVD] [V-CD] You can enjoy better pictures by changing the picture quality. Press [CINEMA]. The CINEMA indicator lights and the CINEMA display appears on the screen. -
Page 23: Program Play
Other methods of disc play AUTO OFF œPLAY ACTION TV Í SLEEP DIMMER MUTING Program play Í MIX 2CH TV/VIDEO S.SURROUND [V-CD] [CD] TOP MENU MENU TV CH Remote control only CH SELECT ENTER You can select up to 24 tracks to play in the order you choose. TEST DISPLAY RETURN... -
Page 24: Random Play
Other methods of disc play » œPLAY AUTO OFF ACTION TV Í SLEEP DIMMER MUTING Random play Í MIX 2CH TV/VIDEO S.SURROUND [V-CD] [CD] TOP MENU TV CH MENU Remote control only CH SELECT ENTER Plays all tracks on a disc once each in random order. TEST DISPLAY RETURN... -
Page 25: Using On-Screen Menu Icons
Using on-screen menu icons [DVD] œPLAY AUTO OFF ACTION TV Í SLEEP DIMMER MUTING Í Remote control only MIX 2CH TV/VIDEO S.SURROUND On-screen menu icons are long thin menus that contain information about the disc or player. These menus allow you to perform opera- tions by changing this information. - Page 26 Using on-screen menu icons Detailed descriptions of each icon Screen for disc information Icon Content Operation Title number Press [3] or [4] or the numbered buttons to change the number and press [ENTER]. Chapter number Press [3] or [4] or the numbered buttons to change the number and press [ENTER].
- Page 27 Screen for player information Icon Content Operation Start and finish points for A-B repeat. Press [ENTER] at the start point and press [ENTER] again at the finish point. Press [ENTER] to cancel A-B repeat. Select a repeat play mode: C (chapter), T (title), OFF Press [3] or [4] .
-
Page 28: The Radio: Manual Tuning
The radio: manual tuning FM MODE Radio stations can be tuned manually by selecting the station’s frequency or they can be preset into channels to make it easy to tune page 29). Press [TUNER/BAND] to select “FM” or “AM”. The unit comes on automatically. Each time you press the button: FM(>AM Press... -
Page 29: The Radio: Preset Tuning
The radio: preset tuning X /4 5/ W There are two methods of presetting stations. Automatic presetting: The stations the tuner can receive are preset. Manual presetting: You can select the stations to preset and the order they are preset in. Up to 12 stations can each be set in the FM and AM bands. -
Page 30: Enjoying Surround Sound
Enjoying surround sound The following chart gives a summary of this unit’s surround features. Note ³All the features are only effective if speakers are used. No discernable effect will be heard through headphones. ³You may experience a reduction in sound quality when these surround systems are used with some sources. If this occurs, turn the surround system off. - Page 31 Enjoying surround sound DOLBY DIGITAL Play a DVD encoded with Dolby Digital. DOLBY DIGITAL indicator The DOLBY DIGITAL indicator lights. Remote control only [A] Subwoofer (not included) The included front speakers have superwoofers, but you can en- hance the bass effect by connecting another subwoofer ( page 36 œPLAY AUTO OFF...
-
Page 32: Adjusting The Tone
Enjoying surround sound S.SURROUND SUPER SURROUND Press [S.SURROUND] to select “MOVIE” or “MUSIC”. Each time you press the button: MUSIC>MOVIE>OFF ^--------------------------------} The S.SURROUND indicator lights. To cancel Press [S.SURROUND] to select “OFF”. The indicator turns off. œPLAY AUTO OFF ACTION TV Í... -
Page 33: Using The Timers
Using the timers The play timer POWER Í/I This timer starts play of the selected source at the selected time. The example shows settings for play between 6:30 a.m. and 7:40 a.m. Preparation: ³Press [POWER ê/I] to turn the unit on, set the time ( page 12). - Page 34 Using the timers » Using the play timer Turning the timer on and off The timer comes on at the set time if “F PLAY” is displayed. The timer can be turned on and off by pressing [SHIFT] i [F PLAY]. Checking the timer CLOCK/TIMER Press [CLOCK/TIMER].
-
Page 35: Convenient Functions
Convenient functions » Dimming the display AUTO OFF œPLAY ACTION TV Í SLEEP DIMMER MUTING MUTING Í DIMMER MIX 2CH TV/VIDEO S.SURROUND Remote control only Press [DIMMER]. The display’s shutter closes. TOP MENU MENU TV CH CH SELECT ENTER TEST DISPLAY RETURN To restore the display... -
Page 36: External Unit Connections
External unit connections ³Turn the unit off before making connections. Rear panel ³Refer to the manual of the other unit for details. AUDIO (Cables, cords and equipment not included.) LINE Stereo connection cable (not included) White AUDIO Cassette tape deck/ video cassette recorder [A] Cassette tape deck/video cassette recorder... - Page 37 Change the remote control code in either of the following circum- stances ( see below): TOP MENU TV CH MENU ³If the Panasonic TV cannot be operated as a result of a difference in CH SELECT the remote control code. TV CH ENTER TEST ³If you wish to operate some other make of TV.
-
Page 38: Initial Settings
Initial settings Summary of initial settings This chart shows the initial settings for this unit. The menu and on-screen message language has been factory preset to English. You can change the language by going to “3 Menu Language” and selecting the preferred language. See page 40 for details on operation. - Page 39 Changes to the initial settings remain intact after the unit is turned off. Do the setting procedures again to restore to the original settings. There is no item 8. Setting details Select the soundtrack language. Some discs are designed to start in a certain language despite any changes you make here. Input a code number with the numbered buttons when you select “5 Other ¢¢¢¢”...
- Page 40 Initial settings AUTO OFF œPLAY ACTION TV Í SLEEP DIMMER MUTING Changing the initial settings Í MIX 2CH TV/VIDEO S.SURROUND Numbered Remote control only buttons TOP MENU MENU TV CH Once the initial settings have been completed, the unit can always be operated under the same conditions.
- Page 41 Entering a password To change the level setting or the password The password screen is shown if you select levels 7 to 0. 1 Select “2 Ratings”. Ratings Ratings The password screen is Enter a 4-digit password, Enter your 4-digit password, shown.
- Page 42 Initial settings How different kinds of software appear on your television DVD software is recorded in a variety of picture formats, and how they appear on your television depends on the software, the kind of television you have, and the picture mode your television is set to. ³Letterbox refers to pictures where black bands appear at the top and bottom.
- Page 43 Calculating delay time The sound from speakers can reach the listening position at different times depending on placement. You can allow for this difference by changing the delay time of the center and surround speakers. Center speaker delay time Surround speaker delay time If D1 R D2, then set delay time to 0 ms.
-
Page 44: Troubleshooting Guide
Before requesting service, make the below checks. If you can’t fix the unit as described below, or if something not listed here occurs, refer to the enclosed directory to locate an Authorized Service Center convenient to you or contact your dealer. For detailed instructions, contact an authorized servicenter in the U.S.A. and Panasonic Canada Inc. Customer Care Centre in Canada. -
Page 45: Glossary
When there is a television set nearby The picture on the TV disappears The location and orientation of the antenna are incorrect. If you are using an indoor antenna, change or stripes appear on the screen. to an outdoor antenna. The TV antenna wire is too close to the unit. -
Page 46: Servicenter List (Us)
Web Site. Accessory Purchases: 1-800-332-5368 (Customer Orders Only) Panasonic Services Company 20421 84th Avenue South, Kent, WA 98032 (6 am to 5 pm Monday–Friday; 6 am to 10:30 am Saturday; PST) (Visa, MasterCard, Discover Card, American Express, Check) Factory Servicenters Locations... -
Page 47: Specifications
Specifications AMPLIFIER SECTION SPEAKER SECTION [Front\speakers\SB-PM08] Input sensitivity 250 mV Type 3 way, 3 speaker Input impedance Speakers 30 k Super woofer 14 cm (5 ") cone type Woofer 10 cm (4") cone type Tweeter 6 cm (2 ") cone type FM TUNER SECTION Impedance Frequency range... -
Page 48: Maintenance
Division of Matsushita Electric of 5770 Ambler Drive Mississauga, Ontario Electric Corporation of America Puerto Rico, Inc. (“PSC”) L4W 2T3 One Panasonic Way Secaucus, Ave. 65 de Infantería, Km. 9.5 www.panasonic.ca New Jersey 07094 San Gabriel Industrial Park, Carolina, http://www.panasonic.com...