Table of Contents
Advertisement
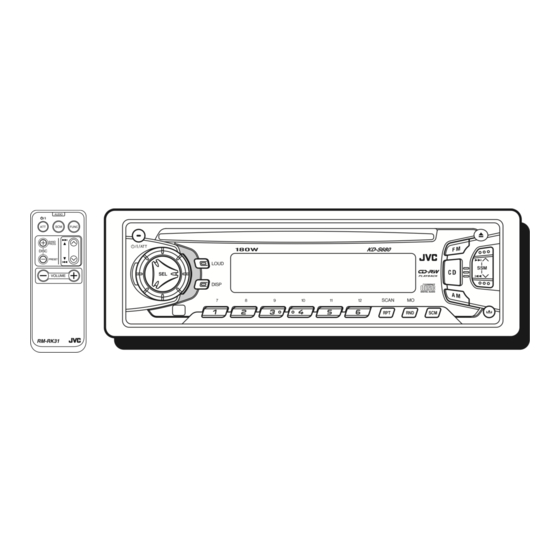
CD RECEIVER
RECEPTOR CON CD
RECEPTEUR CD
KD-S7250/KD-S700/
KD-S680
COMPACT
DIGITAL AUDIO
For installation and connections, refer to the separate manual.
Para la instalación y las conexiones, refiérase al manual separado.
Pour l'installation et les raccordements, se référer au manuel séparé.
KD-S7250
RM-RK31
KD-S700
RM-RK31
KD-S680
RM-RK31
INSTRUCTIONS
MANUAL DE INSTRUCCIONES
MANUEL D'INSTRUCTIONS
KD-S7250
KD-S700
KD-S680
For customer Use:
Enter below the Model No. and
Serial No. which are located on
the top or bottom of the cabinet.
Retain this information for future
reference.
Model No.
Serial No.
GET0058-001A
[J]
Advertisement
Table of Contents

Related Manuals for JVC KD-S680


Summary of Contents for JVC KD-S680
- Page 1 CD RECEIVER RECEPTOR CON CD RECEPTEUR CD KD-S7250/KD-S700/ KD-S680 COMPACT DIGITAL AUDIO For installation and connections, refer to the separate manual. Para la instalación y las conexiones, refiérase al manual separado. Pour l’installation et les raccordements, se référer au manuel séparé.
-
Page 2: To Reset
INFORMATION (For USA) This equipment has been tested and found to comply with the limits for a Class B digital device, pursuant to Part 15 of the FCC Rules. These limits are designed to provide reasonable protection against harmful interference in a residential installation. This equipment generates, uses, and can radiate radio frequency energy and, if not installed and used in accordance with the instructions, may cause harmful interference to radio communications. -
Page 3: Table Of Contents
Thank you for purchasing a JVC product. Please read all instructions carefully before operation, to ensure your complete understanding and to obtain the best possible performance from the unit. CONTENTS LOCATION OF THE BUTTONS ... 4 BASIC OPERATIONS ... 7 RADIO BASIC OPERATIONS ... -
Page 4: Location Of The Buttons
LOCATION OF THE BUTTONS Control panel Display window (standby/on/attenuator) button 2 Control dial 3 LOUD (loudness) button 4 DISP (display) button 5 Display window 6 Loading slot 7 CD button 8 FM button 9 0 (eject) button /¢ buttons • Also functions as SSM buttons when pressed together. -
Page 5: Remote Controller
Remote controller RM-RK31 1 • Turns on the unit if pressed when the unit is turned off. • Turns off the unit if pressed and held until “SEE YOU” appears on the display. • Drops the volume level in a moment if pressed briefly. -
Page 6: Installing The Battery
Preparing the remote controller Before using the remote controller: • Aim the remote controller directly at the remote sensor on the main unit. Make sure there is no obstacle in between. Remote sensor • Do not expose the remote sensor to strong light (direct sunlight or artificial lighting). -
Page 7: Basic Operations
Turning on the power Turn on the power. Note on One-Touch Operation: When you select a source in step 2 below, the power automatically comes on. You do not have to press this button to turn on the power. Select the source. To operate the tuner (FM or AM), see pages 8 –... -
Page 8: Radio Basic Operations
RADIO BASIC OPERATIONS Listening to the radio You can use either automatic searching or manual searching to tune into a particular station. Searching a station automatically: Auto search Select the band (FM1 – 3, AM). Selected band appears. Audio (see page 18) or volume level indicator Note: This receiver has three FM bands (FM1, FM2,... -
Page 9: Storing Stations In Memory
Tune into a station you want while “M” is flashing. Press ¢ stations of higher frequencies. Press 4 stations of lower frequencies. • If you release your finger from the button, the manual mode will automatically turn off after 5 seconds. •... -
Page 10: Scanning Broadcast Stations
Manual preset You can preset up to 6 stations in each band (FM1, FM2, FM3 and AM) manually. Ex: Storing an FM station of 88.3 MHz into the preset number 1 of the FM1 band Select the band (FM1 – 3, AM) you want to store FM stations into (in this example, FM1). -
Page 11: Cd Operations
Playing a CD Insert a disc into the loading slot. The unit turns on, draws a CD and starts playback automatically. Note: • When a CD is inserted upside down, the CD automatically ejects. The CD-in indicator lights up. Total playing time of the inserted disc Elapsed playing time... -
Page 12: Selecting Cd Playback Modes
Locating a track or a particular portion on a CD To fast-forward or reverse the track Press and hold ¢ playing a CD, to fast-forward the track. Press and hold 4 playing a CD, to reverse the track. To go to the next tracks or the previous tracks Press ¢... -
Page 13: Prohibiting Cd Ejection
Prohibiting CD ejection You can prohibit CD ejection and can lock a CD in the loading slot. Press and hold CD and 0 for more than 2 seconds. “EJECT” flashes on the display for about 5 seconds, and the CD is locked and cannot be ejected. -
Page 14: Sound Adjustments
SOUND ADJUSTMENTS Adjusting the sound You can adjust the sound characteristics to your preference. Select the item you want to adjust. Each time you press the button, the adjustable items change as follows: (bass) (treble) (volume) Indication To do: Adjust the bass. (Bass) Adjust the treble. - Page 15 • When “SCM LINK” is set to “LINK ON”, the selected sound mode can be stored in memory for the current source and the effect applies only to the current source. • When “SCM LINK” is set to “LINK OFF”, the selected sound mode effect applies to any source.
- Page 16 Storing your own sound adjustments You can adjust the sound modes (BEAT, SOFT, POP) to your preference and store your own adjustments in memory. • There is a time limit in doing the following procedure. If the setting is canceled before you finish, start from step 1 again.
-
Page 17: Other Main Functions
Setting the clock Press and hold SEL (select) for more than 2 seconds. “CLOCK H”, “CLOCK M”, “SCM LINK” or “LEVEL” appears on the display. Set the hour. 1 Select “CLOCK H” if not shown on the display. 2 Adjust the hour. Set the minute. -
Page 18: To Cancel Advanced Scm
To Cancel Advanced SCM You can cancel the Advanced SCM (Sound Control Memory), and unlink the sound modes and the playback sources. When shipped from the factory, a different sound mode can be stored in memory for each source so that you can change the sound modes simply by changing the sources. -
Page 19: Detaching The Control Panel
Detaching the control panel You can detach the control panel when leaving the car. When detaching or attaching the control panel, be careful not to damage the connectors on the back of the control panel and on the panel holder. How to detach the control panel Before detaching the control panel, be sure to turn off the power. -
Page 20: Maintenance
MAINTENANCE Handling CDs This unit has been designed only to reproduce the CDs bearing the following marks. COMPACT DIGITAL AUDIO You can also play back your original CD-Rs (Recordable) and CD-RWs (Rewritable) on this receiver. This unit is not compatible with MP3. How to handle CDs When removing a CD from its case, press down... -
Page 21: Troubleshooting
What appears to be trouble is not always serious. Check the following points before calling a service center. Symptoms • CD cannot be played back. • CD sound is sometimes interrupted. • Sound cannot be heard from the speakers. • SSM (Strong-station Sequential Memory) automatic preset does not work. -
Page 22: Specifications
SPECIFICATIONS AUDIO AMPLIFIER SECTION Maximum Power Output: Front: 45 W per channel Rear: 45 W per channel Continuous Power Output (RMS): Front: 17 W per channel into 4 Ω, 40 to 20 000 Hz at no more than 0.8% total harmonic distortion. - Page 23 http://www.jvcmobile.com Visit us on-line for Technical Support & Customer Satisfaction Survey. US RESIDENTS ONLY Having TROUBLE with operation? Please reset your unit Refer to page of How to Reset Still having trouble?? USA ONLY Call 1-800-252-5722 http://www.jvcservice.com We can help you! VICTOR COMPANY OF JAPAN, LIMITED EN, SP, FR 1001KKSFLEJEIN...
-
Page 24: Localizacion De Averias
• The following illustration shows a typical installation. However, you should make adjustments corresponding to your specific car. If you have any questions or require information regarding installation kits, consult your JVC car audio dealer or a company supplying kits. Before mounting: Press (Control Panel Release button) to detach the control panel if already attached. - Page 25 • When using the optional stay • Cuando emplea un soporte opcional • Lors de l'utilisation du hauban en option Fire wall Tabique a prueba de incendios Cloison Washer Arandela Rondelle Dashboard Tablero de instrumentos Tableau de bord Sleeve Cubierta Manchon Removing the unit •...
-
Page 26: Electrical Connections
NEGATIVA solamente. Si su vehículo no posee este sistema, será necesario un inversor de tensión, que puede ser adquirido en los concesionarios de JVC de equipos de audio para automóviles. • Reemplace el fusible por uno con la corriente especificada. - Page 27 Cable remoto Conector en Y (no suministrado con esta unidad) Fil d'alimentation à distance Connecteur Y (non fourni avec cet appareil) JVC amplifier Amplificador de JVC Blue with white stripe Amplificateur JVC Azul con rayas blancas Bleu avec bande blanche ONLY FOR KD-S7250.