Table of Contents
Advertisement
Advertisement
Chapters
Table of Contents

Related Manuals for Tesla Roadster 2


Summary of Contents for Tesla Roadster 2
- Page 1 Owners Manual ROADSTER 2 / ROADSTER SPORT...
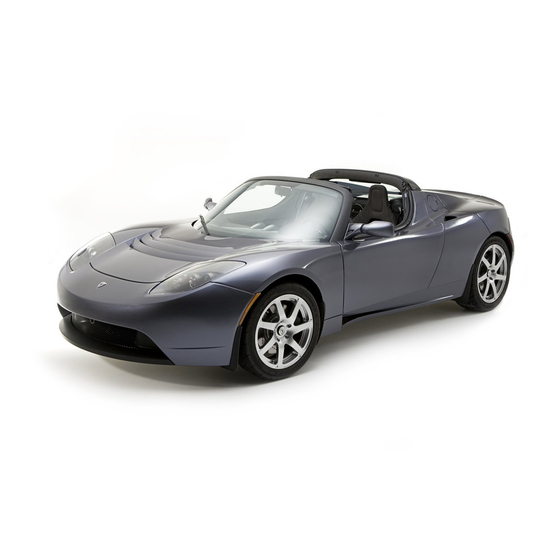
- Page 3 A WORD TO ROADSTER OWNERS Thank you for choosing a Tesla Roadster. Not only have you chosen one of the finest sports cars on the road, you have also chosen the most energy efficient sports car ever sold. You are participating in a revolution, demonstrating that kicking the oil habit does not mean you have to give up performance and driving pleasure.
-
Page 4: Table Of Contents
For information on how to use the Touch Screen and how to charge your vehicle, refer to the separate manuals provided in your owners package. For information on how to use the audio and navigation system, refer to the Original Equipment Manufacturer (OEM) documentation provided by Tesla Motors. - Page 5 Introduction & consumer information Important notes about your vehicle Electric vehicle precautions California Proposition 65 Vehicle modifications Service data recording Change of address or ownership Important notes about this manual Read this manual first Copyright and trademarks Symbols glossary Consumer information Reporting safety defects...
-
Page 6: Introduction And Consumer Information
If you change your address, it is in your best injury. Always observe and obey the parts and accessories, or the interest to notify Tesla Motors so we can instructions on all labels attached to implementation of non-approved contact you should the need arise. Send in... -
Page 7: Important Notes About This Manual
In addition to the documents in your owners Controls, Inc. iPod® is a registered trademark package, Tesla provides the following This manual applies to all Roadster 2 and of Apple Computer, Inc. Havoline® is a documents: Roadster Sport vehicles. As a result, you may... -
Page 8: Consumer Information
Important notes about this manual Symbols glossary The following symbols used within this manual call your attention to specific types of information: WARNING: Indicates a situation in which serious bodily injury or death could result if the warning is ignored. Caution: Indicates a situation in which bodily injury or damage to your vehicle, or both, could result if the caution is ignored. -
Page 9: Consumer Information
However, NHTSA cannot become involved in individual complaints between you and another party such as Tesla Motors. To contact NHTSA, call the Auto Safety Hotline toll-free at 1-888-327-4236 (TTY: 1-800-424-9153); go to http://www.safercar.gov;... -
Page 10: Your Vehicle At A Glance
Your vehicle at a glance Exterior Exterior overview Interior Dashboard overview... -
Page 11: Exterior
Exterior 10TR0109 Your vehicle at a glance Your vehicle at a glance... -
Page 12: Exterior Overview
Exterior Exterior overview 1. Roof. See Removable roof, page 7-8. 2. Charging port door. For details on vehicle charging, see the manual titled “Charging Your Vehicle” provided in your owners package. 3. Wheel bolts. See Removing the wheel, page 9-6. 4. -
Page 13: Interior
Interior Interior REGEN REGEN POWER POWER LIMIT LIMIT x1000 x1000 RANGE RANGE AMPS CRUISE BRAKE BRAKE FAULT FAULT TR0050 Your vehicle at a glance... - Page 14 Interior Dashboard overview 1. Trunk release. See Opening the trunk, page 4-6. 2. Turn signals, headlight high beam and cruise control. See Exterior lights, page 6-6 and Cruise control, page 6-9. 3. Instruments. See Instruments, page 6-11. 4. Windshield wiper and washer. See Windshield wiper and washer, page 6-8.
-
Page 15: Seating And Safety Restraints
Seating and safety restraints Seats Seat adjustment Seat belts General information Seat belt safety instructions Using the seat belts Seat belt reminder Wearing seat belts during pregnancy 3-4 Seat belt tensioners Caring for seat belts Child seats and restraints Airbag system General information How the system works Deployment effects... -
Page 16: Seats
To reduce the risk of injury in the event of an accident, Tesla recommends the following when adjusting seat position: • Adjust the seat so that you can press the foot pedals fully to the floor with your knees slightly bent. -
Page 17: Seat Belts
Seat belts General information WARNING: Always adjust the belt to slack, or that prevent the seat belt being Seat belts remove slack. Seat belts worn too loose adjusted to remove slack. A slack belt greatly WARNING: Seat belts should be worn can result in injuries because they allow reduces the level of occupant protection. -
Page 18: Seat Belt Reminder
3. With the webbing half unreeled, hold the components checked and, if necessary, themselves and their unborn child. tongue plate and pull forward quickly. replaced by Tesla Motors. WARNING: Never place anything The mechanism must lock automatically The seat belts are equipped with between you and the seat belt to and prevent further unreeling. -
Page 19: Child Seats And Restraints
Child seats and restraints Currently, child seats and restraints are not approved for use in your vehicle. Until these are available, Tesla Motors strongly recommends that children are not carried as passengers in your vehicle. WARNING: The seat belts fitted to your vehicle are designed to secure adult sized passengers only. -
Page 20: Airbag System
Airbag system The airbag system is not designed to operate as a result of: • Rear collisions • Minor front impacts • Minor side impacts • Heavy braking • Driving over bumps or potholes It follows, therefore, that significant superficial damage can occur without the air bags deploying or, conversely, that a relatively small amount of structural damage can cause the... -
Page 21: Obstruction Of Airbags
WARNING: Currently, child seats and occupants. restraints are not approved for use in Airbag warning labels your vehicle. Until these are available, Tesla Motors strongly recommends that children WARNING: Extreme hazard! Do not use are not carried as passengers in your vehicle,... -
Page 22: Airbag Service Information
Airbag system Airbag service information WARNING: The disposal of used airbag units is subject to stringent regulations, and should only be handled by Tesla Motors. For your safety, a Tesla Motors technician, who is familiar with your vehicle, must perform the following tasks: •... -
Page 23: Doors, Locks, And Security
Doors, locks, and security Keys About your keys Using the key fob Doors Exterior door release Interior door release Central door locking Emergency unlocking Glove box Trunk Opening the trunk Closing the trunk Trunk interior release handle Vehicle security Alarm System Security PIN PIN lock Valet mode... -
Page 24: Keys
If you lose a key, contact alarm has been set, the horn will sound and Note: Interference from other radio Tesla Motors for a replacement. the turn signals will flash for one minute. See equipment operating on a similar frequency Alarm System, page 4-7. - Page 25 2. Remove the battery, taking care to avoid By default, Tesla has programmed this key to touching the circuit board or the contact open the trunk. To re-program this button, surfaces of the battery holder.
-
Page 26: Doors
Doors TR0091 TR1335 TR0093 Doors Exterior door release Interior door release Central door locking With the doors unlocked, lightly press the From inside your vehicle, pull the interior For your security, you can lock both doors touch pad (located in the air inlet on the door release handle to unlock and open the from inside your vehicle by pressing the door) to release the door. -
Page 27: Emergency Unlocking
Doors Glove box doors using the key fob. The central door locking switch also does not operate if a door, To open the glove box, press the button trunk, or the hood is not completely closed. located on the dashboard immediately to the Drive away locking left of the glove box. -
Page 28: Trunk
Trunk TR0149 Trunk interior release handle Your vehicle is equipped with a mechanical trunk release handle that provides a means of escape in the event that a person becomes locked inside the trunk. Adults are advised to familiarize themselves with the operation and location of the release handle. -
Page 29: Vehicle Security
An indicator on the instrument panel will illuminate green whenever the The default PIN code is 1234. Tesla Motors doors are locked and the alarm is not active. strongly recommends that you change this to a unique PIN code. If you sell your vehicle, you’ll need to tell the new owner the security... - Page 30 Vehicle security If the PIN codes match, then the PIN Code Set You will be then be asked to enter the new Setting the security PIN screen will be displayed. PIN code. Enter a new PIN code and then With the hand brake engaged, touch Touch OK to return to the Settings screen.
-
Page 31: Pin Lock
Vehicle security PIN lock Activating PIN lock Deactivating PIN lock When activated, the PIN lock inhibits starting To activate the PIN lock, touch the To deactivate the PIN lock, touch the and driving your vehicle until the PIN code is LOCK icon on the main parked screen. -
Page 32: Valet Mode
Vehicle security Valet mode For your peace of mind, your vehicle has a unique valet mode for those times that your vehicle is parked by another person. When valet mode is active, your vehicle’s power is limited and the Touch Screen displays activity information about the vehicle. -
Page 33: Charging Your Vehicle
Charging your vehicle General information about charging Important! The Battery Designed to be plugged in Leaving the vehicle unplugged Storing your vehicle Maximum level of charge Charge level and range are estimates 5-3 How long does it take to charge? Charge settings About charge settings Four charge modes... -
Page 34: General Information About Charging
Under no of decline can be significant. When fully circumstances should you open or tamper The Tesla Roadster is designed to be plugged charged, the Battery’s charge level can drop with the Battery. Always contact Tesla Motors in when not in use. -
Page 35: Charge Settings
General information about charging • DO charge the Battery to a full charge Maximum level of charge and estimated remaining mileage are also before leaving it unplugged. This displayed on the vehicle’s LCD panel (see The maximum level of charge the Battery will maintains the charge level needed to page 6-11). -
Page 36: Charge Settings
4 hours 4.5 hours back to Standard after 72 hours or when the extended period of time, Tesla recommends vehicle’s charging port door is opened after Note: The charge process slows down as the leaving the vehicle plugged in and setting the the vehicle has been driven over a tenth of a Battery approaches a full charge. -
Page 37: Schedule The Charge Time
Charge settings This setting also charges the cells within the Cost Battery to the maximum available level. You can display the cost of a charge on the To preserve the life of the Battery, this charge Touch Screen when the vehicle has finished setting is automatically cancelled and reverts charging. -
Page 38: Charging Components
Charging components Charging components 1. Battery 2. Charging port door A Tesla Motors High Power Connector is the fastest way to recharge your vehicle. 3. Charging cable connector During normal use, the High Power Connector 4. Charging cable should be left on, even when the charging 5. -
Page 39: Driving Your Vehicle
Driving your vehicle Driving basics Starting the vehicle Key positions Steering column lock Selecting gears Driving tips Hand brake Braking Anti-lock Braking System (ABS) Traction control Switches and controls Exterior lights Turn signals Windshield wiper and washer Cruise control Hazard warning 6-10 Horn 6-10... -
Page 40: Driving Basics
Driving basics 0-60 mph (0-100 kmh). When in Performance mode, you’ll notice a small blue When the key is OFF, the vehicle is letter “P” in the upper right-hand corner of automatically in the P (Park) gear position the Touch Screen’s Drive screen. and the following features are operational: Note: You will be unable to use the key to •... -
Page 41: Steering Column Lock
Driving basics Steering column lock Park is activated automatically, regardless truck. You can pull the vehicle by selecting of which gear was engaged before you Neutral or by using the Touch Screen to The steering column locks whenever you turned the key. activate Tow Mode. -
Page 42: Hand Brake
Do not drive through flooded areas, water of increase pressure on the brake pedal, you upwards. The hand brake operates on the should not drive the car. Contact Tesla Motors unknown depth, or deep puddles. When rear wheels only, and is totally independent as soon as possible. -
Page 43: Anti-Lock Braking System (Abs)
ABS shuts down. Contact of regenerative braking if the Battery is Tesla Motors as soon as possible. During emergency braking conditions, the extremely hot or cold or if the Battery has ABS constantly monitors the speed of each The vehicle’s brakes remain fully operational... -
Page 44: Switches And Controls
Switches and controls driving without traction control and then as the circumstances requiring you to switch enable cruise control, traction control will traction control off have passed, press the automatically switch back on. switch to turn traction control back on. Switching off traction control If required, traction control can be manually switched off by pressing the switch on the... -
Page 45: Turn Signals
Switches and controls after the key is removed, manually turn the exterior light switch to the OFF position and then back to the ON position. Lights on warning If the exterior lights have been left on, an audible alert sounds when the driver’s door is opened. -
Page 46: Windshield Wiper And Washer
Switches and controls Windshield washer Pull the lever towards you to operate the windshield washer and wiper. The washer and wiper continue to operate as long as the lever is held in this position. When you release the lever, the wiper blade operates for six sweeps of the blade. -
Page 47: Cruise Control
Switches and controls R - initially resumes a previously set speed. Alternatively, use the rocker switch to Subsequent presses reduce the speed. increase ( I) or reduce ( R) speed when cruise control is active. Setting the vehicle speed You can press the accelerator pedal to To engage cruise control, the vehicle must be exceed the set speed. -
Page 48: Hazard Warning
Switches and controls TR0013 TR1337 Hazard warning Horn The hazard warning switch is located in the Press either of the two horn symbols center console and operates even when the embossed on the steering wheel to sound the key is not in the starter switch. horn. -
Page 49: Instruments
Instruments LCD panel The Liquid Crystal Display (LCD) panel in the instrument panel operates whenever the key is in the ON position. The LCD displays three types of information. POWER POWER REGEN REGEN LIMIT LIMIT RANGE AMPS x1000 x1000 RANGE RANGE AMPS AMPS... -
Page 50: Warning Indicators
Instruments Warning indicators The following warning indicators light up for approximately four seconds when you turn the key to the ON position. They will then extinguish (unless the indicator is applicable to the current situation) and the gear buttons on the center console will light up, indicating TR1349 the vehicle is ready to be driven. - Page 51 The Touch Screen will display a message North American version of the vehicle. WARNING: Driving the vehicle with the describing the fault. Contact Tesla Motors. High beam. Illuminates blue when the brake indicator illuminated could result Critical fault. Illuminates red when a FAULT headlight high beams are selected.
-
Page 52: Instrument Panel Lighting
Instruments Instrument panel lighting TR1327 The control for the instrument panel lighting is located on the left-hand side of the dashboard. When instrument panel lighting is turned on using the adjacent switch, you can adjust the amount of backlighting on the instrument panel, the Touch Screen, and the center console by turning this knob clockwise to increase the backlighting and... -
Page 53: Comfort And Convenience
Comfort and convenience Power windows Driver’s door window controls Operating the windows Rear view mirrors Exterior rear view mirrors Interior rear view mirror Interior temperature control General information Control panel Operating the system Ventilation Windshield defrosting Seat heaters Interior accessories Interior light Sun visors Accessory power socket... -
Page 54: Power Windows
Power windows Operating the windows WARNING: Closing power windows on fingers, hands or other vulnerable parts of the body may result in serious injury. Ensure that your passenger is familiar with the window controls and aware of the potential dangers. WARNING: To prevent the risk of injury, always remove the key if a child is to be left unattended in the vehicle. -
Page 55: Rear View Mirrors
Rear view mirrors Mirror folding The exterior mirrors are spring-loaded to reduce any possible damage in the event of accidental contact. Caution: The mirrors are not designed to be folded flat against the vehicle. Interior rear view mirror The interior mirror can be manually dipped to reduce glare from a following vehicle’s headlights. -
Page 56: Interior Temperature Control
Interior temperature control Air distribution Rotate the air distribution control to change the location in which air enters the interior of the vehicle. Windshield vents Footwell vents Face vents To allow air to flow from more than one vent location, position the control between two locations. -
Page 57: Ventilation
Interior temperature control Windshield defrosting Note: It is recommended that you switch off air recirculation for a short period each hour For maximum efficiency when removing frost to refresh the air inside the vehicle, and to or mist from your windshield, set the controls help prevent the windshield from fogging. -
Page 58: Interior Accessories
It is used to download your vehicle log file so you can send it to Tesla Motors, as requested by a Tesla service technician. This port is not designed to be used for personal devices such as an iPOD®. -
Page 59: Cup Holder
Interior accessories Cup holder WARNING: Do not carry open drink containers. A spilled hot drink could cause personal injury as well as damage to upholstery, carpeting and electrical systems. Pull the cup holder from the side of the center console to use. The fingers of the cup holder are spring-loaded to hold the cup securely. -
Page 60: Removable Roof
Removable roof Hard-top and soft-top Removable roof In the Tesla Roadster, you can enjoy exposure to the natural environment and drive without the confinement of a cockpit roof. To provide weather protection in unfavorable conditions, you have the choice of installing either the soft-top or hard-top roof. -
Page 61: Installing The Soft-Top
Starting at the drivers side Note: The support stays and the side rails of you will need to have Tesla Motors adjust your minimizes potential damage to the roof the soft-top assembly have arrows on them windows. -
Page 62: Removing The Soft-Top
Removable roof Removing the soft-top WARNING: Never attempt to remove the soft-top while the vehicle is moving. This could cause an accident in which you or others may be seriously injured or killed. Caution: It is recommended that you release the side towards the front of the vehicle first to prevent the adjusters for the tensioning cables from damaging the seals. - Page 63 Removable roof TR0129 Comfort and convenience 7-11...
-
Page 64: Installing The Hard-Top
Removable roof Installing the hard-top The hard-top has been designed to provide a seasonal alternative to the standard soft-top. To ensure proper installation, Tesla recommends that the hard-top be installed by a Tesla service technician. WARNING: The mounting bracket bolts securing the hard-top to the vehicle should be routinely checked and tightened. -
Page 65: Removing The Hard-Top
Driving with a loose 14. Return the Torx tool to the tool kit. or incorrectly secured hard-top could Note: Tesla Motors has set your windows to result in an accident which could lead to accommodate either the hard-top or the serious injury and even death. -
Page 66: Homelink
HomeLink Any changes or modifications to the device settings. not expressly approved by the manufacturer or Tesla Motors could void the user’s WARNING: Do not use the HomeLink authority to operate the equipment. Universal Transceiver with any garage... -
Page 67: Maintenance And Care
Maintenance and care Maintenance General information Routine maintenance Owner maintenance Opening the hood Closing the hood Fluid reservoirs Fluid reservoir locations Brake fluid Windshield washer fluid Battery coolant Windshield wiper and washer Checking the wiper blade Replacing the wiper blade Windshield washer jets Cleaning and vehicle care Environmental precautions... -
Page 68: Maintenance
Tesla Motors. section. Daily checks Routine maintenance • Check that all lights, horn, turn indicators, Take your vehicle to Tesla Motors at the wipers, washers and warning indicators regularly scheduled maintenance intervals of operate every 12 months, or every 12,000 miles Service interval indicator •... -
Page 69: Maintenance And Care Maintenance
Maintenance Opening the hood Never work on a vehicle that is plugged in. Always remember to unplug the vehicle before working under the hood or the underside of the vehicle. WARNING: Make sure that the hood is in the fully open position before working in the area under the hood. -
Page 70: Closing The Hood
Maintenance TR1353 Closing the hood Return the hood stay to its original position and lower the hood to the closed position. Press down firmly on each side of the hood (see illustration) to engage the locks. You can hear the locks ‘click’ into place. Caution: Before driving, check that the locks on both sides of the hood are fully engaged by attempting to lift the hood. -
Page 71: Fluid Reservoirs
Fluid reservoirs Topping up the fluid WARNING: Brake fluid is highly toxic. Keep containers sealed and out of the reach of children. In the event of accidental consumption, seek medical attention immediately. 1. Clean the filler cap before removing to prevent dirt from entering the reservoir. -
Page 72: Fluid Reservoirs
If the level drops significantly, a leak may manufacturer’s directions and mix the Ensure cap is replaced and fully tightened exist. Contact Tesla Motors before using the recommended quantities of water and after topping up. vehicle. -
Page 73: Windshield Wiper And Washer
Windshield wiper and washer TR0079 TR0078 TR0070 Windshield wiper and washer Checking the wiper blade Replacing the wiper blade Windshield washer jets Periodically check and clean the wiping edge Install only a replacement wiper blade that is Washer jets are set when your vehicle is of the wiper blade. -
Page 74: Cleaning And Vehicle Care
When washing the soft-top, follow these waterways. Used toxic chemicals must be washers guidelines: disposed of at authorized waste disposal Caution: Tesla Motors recommends that sites only. 1. Before washing, vacuum the soft-top you hand wash your vehicle. using a soft brush attachment to remove... -
Page 75: Cleaning And Vehicle Care
More extensive repairs to the body should Do not use cleaning compounds or solutions. only be carried out by a facility approved by Tesla Motors. Contact Tesla Motors for a list of approved body repair facilities. Maintenance and care... -
Page 76: Roadside Emergencies
Roadside emergencies Tool kit Tool kit location Tool kit components Energy Depletion Dealing with a low Battery A few extra miles (kms) Tire repair Tire sealant Safety precautions Repairing a tire Replacing the tire sealant Wheels Removing the wheel Replacing the wheel Fuse replacement Replacing a fuse Fuse specification chart... -
Page 77: Tool Kit
Tool kit TR0161 Roadside emergencies Tool kit Tool kit location The tool kit is located in the storage space beneath the trunk floor. To access the storage space, pull the tab located at the rear edge of the floor covering. TR0150 Tool kit components ®... -
Page 78: Energy Depletion
As the charge level approaches a low level, Warranty. If you are unable to charge the you’ll also notice the color of the charge level vehicle, contact Tesla Motors immediately. graph turn yellow, then red, to alert you that you need to charge the vehicle. -
Page 79: Tire Repair
Tire repair • Do not breathe gas, fumes, vapor or spray propellant inflates the tire, allowing you to drive the vehicle at low speed (less than 30 that may be emitted from the tire sealant. mph/48 kmh) to reach a tire repair facility. Inhalation can cause drowsiness and dizziness. -
Page 80: Replacing The Tire Sealant
Note: Tire sensors must be set up by Tesla 9. If the wheel rim has lifted from the Motors. If a non-Tesla service center ground, drive immediately for 6 to 12... -
Page 81: Wheels
Wheels 5. Remove the wheel. 5. Return the wheel bolt extension tool and the locking wheel bolt adapter to the tool Caution: Place the wheel face up to kit. avoid scratching the surface. 6. Check and tighten the wheel bolts every 1000 miles (1600 km). -
Page 82: Fuse Replacement
3. Open the panel to access the fuses. fastener 90° clockwise. Remove the panel by using the If a replacement fuse fails to solve an screwdriver supplied in the toolkit to electrical failure, or the replacement fuse fails prematurely, contact Tesla Motors. Roadside emergencies... -
Page 83: Fuse Specification Chart
Fuse replacement Fuse specification chart Fuse number Rating (amps) Circuit protected Anti-lock Braking System (ABS) Auxiliary power socket Heating and ventilation fan Windshield wiper motor and washer Electrical accessories, audio and navigation systems Turn signals and side lights Starter key in ‘ON’ position Instruments Horn Interior and trunk lights... -
Page 84: Bulb Replacement
The interior light, trunk light, and license plate To install the new bulb, reverse the above be replaced by Tesla Motors: lights are easy to replace. To replace these steps. lights, refer to the following table and •... -
Page 85: Trunk Light
Bulb replacement TR0171 TR0172 Trunk light License plate light To remove the bulb: To remove the bulb: 1. Using the screwdriver supplied in the 1. Using the screwdriver supplied in the toolkit, remove the two screws securing toolkit, remove the two screws securing the light unit to the inside of the trunk. -
Page 86: Raising The Vehicle
Raising the vehicle TR0137 Raising the vehicle Vehicle jacking points Caution: Jacking the vehicle at any WARNING: Never raise a vehicle when other point will damage the underside the charge cable is connected, even if Refer to the illustration, and the labels on the of the vehicle. -
Page 87: Vehicle Lifting Points
Before lifting on a two-post lift, you must undershield still in place. remove the rear undershield and fit rear lift point adaptors 1 to the chassis. Rear lift point adapters can be purchased from Tesla 9-12 Roadside emergencies... -
Page 88: Vehicle Recovery
Vehicle recovery 2. Touch to display the first settings 10TR0164 screen. Vehicle recovery • activate Tow Mode to disengage the Transporting the vehicle transmission lock, or turn the key to the The only approved method of transporting ON position and select the Neutral gear your vehicle is using a flatbed trailer or position transporter. - Page 89 Vehicle recovery Note: Although Tow Mode is activated, the steering column lock will be engaged. To disengage the steering column, turn the key to the ACC position. If it is difficult to turn the key, move the steering wheel slightly. Caution: The car can roll freely when Tow Mode is active.
-
Page 90: Securing The Wheels
Vehicle recovery 3. Insert the recovery eye through the hole in the front grill and screw into the mounting point. Ensure the recovery eye is fully tightened. After use, remove the recovery eye and return it to the tool kit. Insert the plug back into the mounting point to prevent dirt from entering. -
Page 91: Technical Specifications
Technical specifications Vehicle identification Vehicle Identification Number 10-2 Safety compliance certification label 10-3 Wheels and tires Specifications and tire pressures 10-4 Tire markings 10-5 Tire placard/label 10-7 Uniform tire quality grading 10-7 Tire care 10-8 Tire Pressure Monitoring System 10-11 Dynamic tire pressure monitoring 10-12 Wheels and tires glossary... -
Page 92: Vehicle Identification
Vehicle identification SFZRE11B063000000 TR1355 Vehicle Identification Number You can find the Vehicle Identification Number (VIN) in multiple locations: • Top of Dashboard - the VIN is stamped on a plate which is visible through the lowest part of the drivers side of the windshield. •... -
Page 93: Safety Compliance Certification Label
Vehicle identification TR1343 Safety compliance certification label The National Highway Traffic Safety Administration (NHTSA) regulations require that a safety compliance certification label is affixed to the vehicle. This label is located on the opening face of the driver’s door. Technical specifications 10-3... -
Page 94: Wheels And Tires
Wheels and tires Specifications and tire Wheels and tires pressures Wheel type Location Size Roadster - cast alloy, Roadster Sport - forged light alloy Front 6J x 16 Rear 7.5J x 17 Tire type Location Size Roadster - Yokohama Neova AD07 LTS - Directional Front 175/55 R16 Rear... -
Page 95: Tire Markings
Wheels and tires Tire markings 1, Tire width This three digit number gives the width in millimeters of the tire from sidewall edge to sidewall edge. 2, Aspect ratio This two digit number, known as the aspect ratio or profile, gives the sidewall height as a percentage of the tread width. - Page 96 Wheels and tires 9, Treadwear grade Rating Speed (mph) This number indicates the tire's wear rate. The higher the treadwear number is, the longer it should take for the tread to wear down. A tire rated at 400 for example, will last twice as long as a tire rated at 200.
-
Page 97: Tire Placard/Label
Wheels and tires 5. Determine the combined weight of luggage and cargo being loaded on the vehicle. That weight may not safely exceed the available cargo and luggage load capacity calculated in Step 4. 6. Your vehicle should never be used to tow a trailer. -
Page 98: Tire Care
Inflate each tire to the pressure WARNING: The traction grade assigned performance on the laboratory test wheel recommended by Tesla Motors on the vehicle to this tire is based on straight-ahead than the minimum required by law. - Page 99 Always inflate your tires to the Tesla Motors A tire must be replaced as soon as an recommended inflation pressure even if it is...
- Page 100 Your vehicle is fitted with directional tires. An lose pressure, which is why frequent checking arrow on the tire wall shows the direction of Tesla recommends the following winter tires of tire pressures is important. Punctured or rotation. These tires must be fitted to rotate...
-
Page 101: Tire Pressure Monitoring System
“Tire Pressure Hardware Fault”, the System system is not operating properly. system should be checked by Tesla Motors to WARNING: The TPMS is not a substitute determine if a tire sensor requires The TPMS malfunction indicator is combined for manually checking tire pressures. -
Page 102: Dynamic Tire Pressure Monitoring
Wheels and tires Dynamic tire pressure A blue wheel indicates an acceptable monitoring operating pressure for the tire. A red wheel indicates that the pressure is The Touch Screen can display the pressure below the recommended operating pressure, and temperature for each tire. and that action must be taken to rectify the Touch the information icon on the main issue. -
Page 103: Wheels And Tires Glossary
Wheels and tires Wheels and tires glossary Note: This pressure is the maximum allowed by the tire manufacturer. It is not the pressure Accessory weight recommended for use. The combined weight (in excess of those Maximum loaded vehicle weight items replaced) of items available as factory The sum of curb weight, accessory weight, installed equipment. -
Page 104: Approved Fluids And Capacities
Approved fluids and capacities Fluid specifications Approved fluids and capacities Only use new fluid from sealed containers. Capacities Battery cooling system* 7.4 quarts (US) 7.0 liters Brake fluid* 1.6 quarts (US) 1.5 liters Transmission fluid 1.4 quarts (US) 1.325 liters Washer reservoir 2.3 quarts (US) 2.2 liters... -
Page 105: Vehicle Dimensions And Weights
Vehicle dimensions and weights TR0261 Vehicle dimensions and weights Exterior dimensions Overall length 155.4 in 3,946 mm Overall width (including mirrors) 72.9 in 1,851 mm Overall height (mid laden weight) 44.4 in 1,127 mm Wheel base 92.6 in 2,351 mm Front overhang 34.3 in 871 mm... -
Page 106: Vehicle Weights
Vehicle dimensions and weights Vehicle weights Curb weight (no occupants or cargo) 2,723 lb 1,235 kg Mid laden weight 3,053 lb 1,385 kg † Gross vehicle weight 3,273 lb 1,485 kg Maximum front axle load 1,144 lb 519 kg Maximum rear axle load 2,147 lb 974 kg Trailer towing... -
Page 107: Subsystem Specifications
Subsystem specifications Motor Subsystem specifications Type AC induction motor, air-cooled, with variable frequency drive Rating 375 Volts Maximum speed 14,000 rpm Maximum net power 248 HP (185 kW) @ 5500-6800 rpm Maximum net torque 277 ft/lb (376 Nm) @ 0-4500 rpm Efficiency 92% peak, 85% at max power Transmission... -
Page 108: Front Suspension
Subsystem specifications Front suspension Type Roadster Independent. Upper and lower unequal length wishbones. Co-axial coil spring/telescopic damper. Sway bar. Roadster Sport Adjustable damping. Adjustable anti-roll bar. Alignment optimum 0.1 mm toe-in tolerance 0.5 mm toe-out to 0.7 mm toe-in. overall Maximum side to side 0.3 mm Camber optimum... -
Page 109: Electrical
Subsystem specifications Discs Ventilated front and rear discs. Hand brake Cable operation of rear calipers. Self-adjusting for pad wear. Electrical Type Rechargeable Battery Rating 13 V to 400 V DC, and up to 400 V AC Polarity Negative (-) ground Battery Type Lithium ion (Li-ion) - Page 110 Index Range .............. 6-3 Charge settings ...........5-4 Specifications..........10-19 Charge types ..........5-4 Accessing your vehicle........4-2 Battery Life Cost ..............5-5 Accessory power socket ........ 7-6 Overview............5-2 Current limit ..........5-5 Air conditioning..........7-4 Body High Power Connector ......5-6 Air distribution............ 7-4 Cleaning ............
- Page 111 Index Fuse Interior Colors .............. 9-7 Door release handle ........4-4 Dashboard overview......... 2-5 Location............9-7 Light ..............7-6 Data recording ............. 1-2 Specifications ..........9-8 Overview ............2-5 Defrosting ............. 7-5 Temperature ..........7-4 Dimensions ............10-15 Doors Garage door opener........7-14 Automatic locking when driving ..4-5 Gear selector............6-3 Jacking the vehicle ...........
- Page 112 Index Interior ............7-6 Replacing interior light bulb ....9-9 Odometer display ..........6-12 Safety compliance certification label..10-3 Replacing license plate bulb ....9-10 Opening the doors Safety defects............1-5 Replacing trunk light bulb ....9-10 Inside the vehicle........4-4 Safety instructions Warning indicators ........
- Page 113 Index Brakes ............10-18 Grading ............10-7 Vehicle Identification Number (VIN) ..10-2 Coolant ............10-14 Markings ............10-5 Vehicle loading..........10-7 Electrical .............10-19 Pressure monitoring ........10-11 Vehicle recovery eye ........9-14 Fluids ............10-14 Pressures........... 10-4, 10-8 Ventilation.............7-5 Front suspension ........10-18 Quality............10-7 VIN (Vehicle Identification Number) ..
- Page 114 Wiper..............6-8 Wiper blade inspection ........8-7 ©2009 TESLA MOTORS INC. All rights reserved. This material may not be reproduced or copied, in whole or in part, without the written permission of Tesla Motors, Inc. Part Number 02-008043-00 Rev AA...
- Page 116 TESLAMOTORS.COM...