Table of Contents
Advertisement
Advertisement
Table of Contents

Related Manuals for Escort iLog


Summary of Contents for Escort iLog
-
Page 2: Table Of Contents
Safety Instructions ........................3 Safety Instructions ........................4 Logger features .........................5 iLog Display..........................5 Connecting your iLog to your PC .....................6 Installing and using a USB to serial port cable................6 Installing ESCORT Console ......................7 Programming your iLog logger ....................7 Description & Passwords ....................10 Connecting a sensor .....................11... -
Page 3: Safety Instructions
In no circumstance should heavy force be applied to your iLog logger. Applying heavy force to any part of your iLog could result in logger malfunction and/or injury. Your iLog logger should only be operated within the parameters specified in the technical data discussed within this user manual. -
Page 4: Safety Instructions
(see instructions located within this manual). Once your logger’s case has been opened and the warranty seal is broken your iLog logger is no longer covered by warranty. This includes the replacement of your logger’s battery. -
Page 5: Logger Features
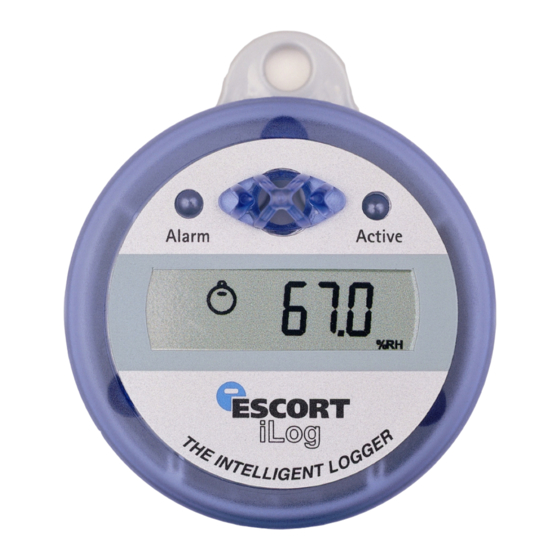
User Guide Logger features Internal, Internal/External, Two External and Internal/humidity sensor options. Rear label specifying product code and serial number plus bar coded serial number according to EAN 128. Lug (loop on top) to fix logger on wall or other surface as required. -
Page 6: Connecting Your Ilog To Your Pc
User Guide Connecting your iLog to your PC You can connect your iLog logger directly to an ESCORT Logger Interface, which is attached to a serial port located on your PC. Remember the COM port that the logger was connected to and open your ESCORT Console software. -
Page 7: Installing Escort Console
COM port. If you are using a USB to serial port converter you may have to look up the correct COM port number in your Device Manager. Select the iLog tick box as one of the ESCORT products you want to use. This dialog appears automatically when you first install ESCORT Console. If you have already used Console before, go to the Edit menu and choose the command Options. - Page 8 User Guide Programming your iLog logger Open ESCORT Console. Connect your iLog to an ESCORT interface and ensure the correct COM port is selected in Console. From the Action menu, select the ‘Program and Configure’ command. Follow the on-screen instructions (see below).
- Page 9 The ‘Program and Configure’ wizard will display the following window (see figure 1.5 below). If your iLog logger cannot be programmed the logger tick box (located below the description heading) will not be checked and you will not be able to proceed. If your logger is password- protected, you will be prompted for the password upon selecting the tick box.
-
Page 10: Description & Passwords
The ‘Details’ window allows for the assignment of a unique logger description for easy logger identification and the ability to assign a password to your iLog logger (see figure 1.6 below). To assign a password click the ‘Change Password’ button located at the bottom right of the ‘Program and Configure Details’... -
Page 11: Connecting A Sensor
EI-1E-D-32-L, EI-1E-DC-32-L and EI-2E-32-L. Users are able to connect external sensors to their iLog by inserting the sensor connector into the sensor socket located on the left and/or the right side(s) of the logger (see figure 1.8). - Page 12 User Guide Select to Configure Sensor(s) Sensor options – Tick to select or deselect Figure 1.9 – Program and Configure Sensors Window If you wish to configure your logger’s sensor(s), simply highlight the appropriate sensor(s) and select the Configure Sensor(s) button located in the top left corner of the ‘Program and Configure’...
- Page 13 User Guide The first window to appear is the ‘Configure Sensors - Information’ window (see figure 1.10), which supplies specific information relating to you logger and allows for the addition of logger description for easy logger identification. Once you have entered a description and checked your sensor(s) information, click the ‘Next’...
- Page 14 The second window displayed is the ‘Configure Sensors – Specification’ window (see figure 1.11). This window provides you with the ability to add and adjust your sensor(s) out of specification settings and the increment in which your ESCORT Console software will display changes in your logger readings.
- Page 15 User Guide The third window is the ‘Configure Sensors – alarm’ window (see figure1.12). You can select a series of different option relating to your sensor(s) alarm settings by selecting the corresponding tick box. If you wish to alter the number of out of specification readings or consecutive readings...
- Page 16 User Guide The fourth window is the ‘Configure Sensors – Display’ window (see figure 1.13). This widow provides you with the ability to activate or restrict the information displayed on your loggers screen. To alter your logger display settings, first ensure that you have selected the ‘Show this sensor’s readings on display’...
-
Page 17: Setting A Date And Time
Following the ‘Sensors’ window is the ‘Date/Time’ window (see figure 1.14), which allows for the selection and configuration of you iLog’s clock settings. You are given three options; the first allows you to simply keep your loggers current clock settings. The second option is the recommended option and updates your logger with you computers current clock settings. -
Page 18: Setting Start Conditions
Following the ‘Date/Time’ window is the ‘Start-up’ window (see figure 1.15), which allows for the selection and configuration of you iLog’s start-up settings. This window allows users to enter a logger’s trip duration from 0 to 60 days, define your loggers recording intervals (1 hour to 10... -
Page 19: Logger Summary
Logger summary Following the ‘Startup’ window is the ‘Summary’ window (see figure 1.16), which provides a brief summary of you iLog’s startup settings. Once you have checked that your logger’s settings are correct, simply click the ‘Program’ button. Check the logger details and select the program button Figure 1.16 ‘Program and Configure –... -
Page 20: Program Window
The final window to be displayed is the ‘Program’ window (see figure 1.17), which is simply an indication that your updated logger settings are being uploaded into your iLog logger’s memory. Once your logger has been programmed the ‘Program and Configure’ wizard will allow you to program additional loggers with the same settings. - Page 21 User Guide Select this tick box to program additional loggers with the same settings and select the ‘Next’ button (which will appear once the tick box is selected) Figure 1.18 - ‘Program and Configure – Program’ window...
-
Page 22: Bookmarking
A bookmark is an identification method used to locate a place or time when an action has taken place. iLog users have the ability to ‘bookmark’ logger readings by swiping a magnet over the iLog’s label. Once your iLog is downloaded, your ESCORT Console software will highlight bookmarked readings using the colour green (see figure 1.19). -
Page 23: Downloading Your Ilog Logger
(see figure 2.1). If your logger has been recording and has information saved within its memory a tick box will be checked to the left of the iLog icon. If the tick box is not checked this indicates that your logger has no recorded information within its memory, your logger is unable to be downloaded, or your logger is password protected. - Page 24 User Guide Download Readings The second window to be displayed in the ‘Download’ wizard is called the ‘download’ window, and displays a task bar which simulates that a logger download is taking place (see figure 2.2). Once the wizard has successfully downloaded your logger the ‘Next’ button located at he button of the window will become available, simply select the ‘Next button to proceed.
- Page 25 User Guide Select the search button to reattempt logger download Figure 2.3 - ‘Download – Unsuccessful search’ window...
- Page 26 User Guide Logger summary and start conditions The fourth window to be displayed in the ‘Download’ wizard is called the ‘Finish’ window. This window allows for start conditions to be added to your logger once your loggers download is complete (see figure 2.4).
- Page 27 User Guide Rearming your iLog If you choose to rearm the logger, the final screen to be displayed within the ‘Download’ wizard is the ‘Rearm’ window (see figure 2.5). This window is helpful when you have more than one logger to download.
-
Page 28: Analysing Your Downloaded Information
User Guide Analysing your downloaded information Once downloaded using ESCORT Console, the data saved within your iLog logger will be displayed as a readings summary. Within this summary you are able to view the following information; your logger’s serial number, hardware version, trip number, your loggers description... -
Page 29: Viewing Downloaded Information
The first option under the readings menu is the list of readings menu option. This option displays a list of your loggers reading in their entirety. If you have an iLog with two sensors, Console will display your logger’s readings side by side. -
Page 30: Readings And Summary
User Guide Readings and Summary The second option under the readings menu is the readings and summary menu option. This is the default menu option and displays all the information mentioned in the analysing your downloaded information section on page 28. -
Page 31: Step Graph
User Guide Step Graph The second menu option under the 2D Graph menu is the step graph menu option. This format is similar to that of the line graph format except that changes in the readings are shown as a line as opposed to smooth lines. - Page 32 User Guide The second menu option under the Summary menu is the Statistics menu option. This menu option provides the basic statistics relating to your logger file, including; your loggers serial number, description and average, highest and lowest readings.
- Page 33 Figure 3.10 Out of Specification Note: For detailed information regarding the operation of ESCORT Console please refer to the help guide provided within the software. You can access the help menu via the dropdown menu Help, or CONTROL H. Alternatively you can select the help symbol from the Console task bar located below the dropdown menu, and click on an item located on the screen that you require assistance with.
- Page 34 (polarity + C -). 7. Place the three small screw o-ring seals and larger o-ring case seal on their appropriate positions and replace the lid of your iLog case ensuring the lid of the case is the correct direction.
-
Page 35: Cleaning An Ilog's Humidity Sensor
Cleaning an iLog’s humidity sensor The iLog humidity sensor needs to be clean in order to operate at an optimum level. If your iLog’s humidity sensor comes into contact with a foreign object (e.g. fingers), it is vital that the sensor is cleaned with a cleaning solution. -
Page 36: Specifications
0.1ºC (0.2ºF) Accuracy +/- 0.3ºC Software programmable LED’s Active and Alarm Data Recovery Via standard ESCORT PC interface and ESCORT Console software Size Diameter 76mm, height 36mm IP Rating Internal sensor IP67, others IP51 Warranty 2 years (excluding battery) Power 1x User replaceable SAFT 3.6 volt ½... -
Page 37: Warranty Information
Warranty information Warrant conditions are set out the ESCORT Data Logging Systems’ current Terms and Conditions as published on the date a claim is made. Below please find the wording as per version TCEDLSINT042. This is, however, not binding and the current Terms and Conditions will prevail over the details given here. -
Page 38: Contact Details
User Guide Contact details If you require further information regarding ESCORT Data logging Systems products please contact us at: ESCORT Data Logging Systems Ltd PO Box 15-639, New Lynn, Auckland, New Zealand Tel: 0064 9 826 0960 Fax: 0064 9 826 0285 Email: mail@escortdls.com...