Table of Contents
Advertisement
Quick Links
Advertisement
Table of Contents

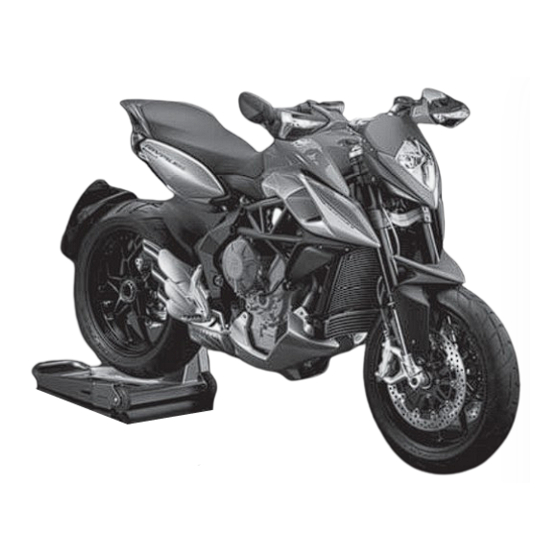
Related Manuals for MV Agusta Rivale 800


Summary of Contents for MV Agusta Rivale 800
- Page 2 User’s manual English Version...
- Page 3 We wish to thank you for your preference and congratulate you on purchasing your new Rivale 800. Your choice is a reward for the passionate effort our technicians have put into giving the Rivale 800 func- tional and aesthetic characteristics that place it above the finest motorcycles currently available on the market, making it an exclusive and sought-after item.
-
Page 4: Table Of Contents
CONTENTS chap. Subjects covered page chap. Subjects covered page GENERAL INFORMATION OPERATION 1.1. Purpose of the manual 4.1. Using the motorcycle 1.2. Symbols 4.2. Running-in 1.3. Contents of the digital support 4.3. Starting the engine 1.4. Identification data 4.4. Selecting and setting the display functions 35 SAFETY INFORMATION 4.4.1. - Page 5 CONTENTS chap. Subjects covered page 5.2. Table of adjustments 5.3. Adjusting the front brake lever 5.4. Adjusting the rearview mirrors 5.5. Adjusting the front suspension 5.5.1. Spring preload (front suspension) 5.5.2. Rebound damper (front suspension) 5.5.3. Compression damper (front suspension) 5.6.
-
Page 6: General Information
PC, equipped either with Windows or Mac operative system. We recommend to carefully read the User’s Manual before using your motorcycle, and to make sure that anyone who uses the motorcycle had previously made the same. Copyright MV AGUSTA Motor Spa All rights reserved - 5 -... -
Page 7: Symbols
GENERAL INFORMATION 1.2. Symbols Sections of text that are particularly important in terms of personal safety or possible damage to the motorcycle are marked with the following symbols: Danger - Failure to observe these prescriptions, even in part, may pose a serious hazard to the driver’s and other people’s safety. -
Page 8: Contents Of The Digital Support
GENERAL INFORMATION 1.3. Contents of the digital support Inside the digital support supplied you will find, besides the User’s Manual, the Maintenance Manual, the World Dealer Guide and the Warranty Booklet. When delivering the bike, your Dealer has also supplied the Warranty and Pre-Delivery Certificate. -
Page 9: Identification Data
GENERAL INFORMATION 2) engine serial number 1) vehicle identification number 3) homologation data 1.4. Identification data 1) vehicle identification number 2) engine serial number 3) homologation data Motorcycle identification The motorcycle is identified by the vehicle identi- We recommend writing down the main numbers in the spaces provided below. - Page 10 GENERAL INFORMATION Motorcycle key identification A key is supplied in duplicate for both the ignition and all the locks. Keep the duplicate in a safe place. When placing orders for spare keys, you may be required to provide the key identification number. It is advised to note this number in the following space: KEY Nr.: Identification of motorcycle colour combination...
- Page 11 GENERAL INFORMATION After removing the seat, it is possible to get to the colour code label. On this label you can read the motorcycle Colour code label colour combination, which determines the painting of the bodywork parts. We recommend writing down the colour code in the space provided below: COLOUR CODE: - 10 -...
-
Page 12: Safety Information
MV Agusta recommends that all maintenance motorcycle on race track during non- operations are performed only by skilled person- competitive events. nel from an authorized MV Agusta Service In this case, however, in consequence of Center. the higher stresses affecting the bike... -
Page 13: Accessories And Modifications
2.4. VEHICLE LOAD WARNING Your motorcycle is designed for use by the rider MV Agusta prohibits to make any modi- and it can also seat a passenger. fication to its motorcycles. To use the vehicle in complete safety and in... - Page 14 SAFETY INFORMATION WARNING Since the load can strongly affect han- dling, braking, performance and safety characteristics of your motorcycle, you should always keep in mind the follow- ing warnings. • NEVER OVERLOAD YOUR MOTOR- CYCLE! Driving an overloaded motorcy- cle can cause damage to the tyres, loss of control of the vehicle and serious injury.
-
Page 15: Controls And Instruments
CONTROLS AND INSTRUMENTS 3.1. Location of controls and instruments Instruments and warning lights (§3.7.) Left handlebar electrical controls (§3.3.) Rearview mirror (§5.1.) Front brake lever (§5.1.) Clutch lever (§5.1.) Rearview mirror (§5.1.) Throttle twist grip (§3.4.) Ignition switch and steering lock (§3.5.) Right handlebar electrical controls (§3.4.) Fuel tank cap (§4.5.) Rear brake lever (§5.1.) -
Page 16: Sidestand
CONTROLS AND INSTRUMENTS 3.2. Sidestand The sidestand is equipped with a safety switch that prevents the motorcycle from moving off while the stand is down. If the rider attempts to engage the gears while the engine is running and the stand is down, the switch automatically turns off the engine by cutting the current supply. -
Page 17: Handlebar Controls, Left Side
CONTROLS AND INSTRUMENTS 3.3. Handlebar controls, left side High beam flasher button Press the button repeatedly. SET/OK button Press to change the dashboard functions (§ 4.4). Low/high beam button Button not pressed in : low beam Button pressed in : high beam Horn button Press to operate the warning horn. - Page 18 CONTROLS AND INSTRUMENTS High beam flasher button It is used to attract the attention of other road users in case of danger. When the high beam is on, the function is inactive. SET/OK button The SET button enables to select the display digits to carry out adjustments, while the OK button enables to confirm the set digits.
-
Page 19: Handlebar Controls, Right Side
CONTROLS AND INSTRUMENTS 3.4. Handlebar controls, right side Front brake lever Pull to the lever to apply the front brake. Engine stop switch Stops the engine and prevents it from being restarted. Engine start button Starts the engine. To be released as soon as the engine starts. When the engine is running, pressing the button selects the dis- play functions. - Page 20 WARNING If your motorcycle has toppled over or has been involved in an accident, have the working of the throttle control checked by a MV Agusta authorized center before restarting. - 19 -...
- Page 21 If there is a fault in the ABS system, it is recommended to resume rid- ing at reduced speed and contact a MV Agusta authorized service centre. If the ABS sys- tem is turned off, follow the activation procedure described at § 4.4.6.
-
Page 22: Ignition Switch And Steering Lock
CONTROLS AND INSTRUMENTS 3.5. Ignition switch and steering lock WARNING Do not attach a ring or any other object to the ignition key as they may hinder the steering action. WARNING Never attempt to change the switch functions while riding, as you may lose control of the vehicle. - Page 23 CONTROLS AND INSTRUMENTS OFF position All electrical circuits are deactivated. The key can be removed. ON position All electrical circuits are activated. The instruments and warning lights perform the self-diagnostic cycle. The engine can be started. The key cannot be removed. CAUTION Do not leave the key on the ON position for a long time when the engine is not running, in...
- Page 24 CONTROLS AND INSTRUMENTS LOCK position Turn the handlebar to the left or right. Press the key in gently while rotating it to the LOCK position. All electrical circuits are deactivated and the steering is locked. The key can be removed. Right side Left side - 23 -...
-
Page 25: Gear Lever
“Quick Shift” function The Rivale 800 model is equipped with a “Quick Shift” WARNING: When you are riding the gear change system; this device enables you to upshift... -
Page 26: Instruments And Warning Lights
CONTROLS AND INSTRUMENTS 3.7. Instruments and warning lights The instruments and warning lights are activated by turning the ignition switch to the ON position. After a preliminary check (approx. 7 seconds) the displayed information reflects the current general condition of the motorcycle. Multifunction display (§3.7.2.) Tachometer display... -
Page 27: Warning Lights
§4.4.6.). In this case, resume correct, do not resume riding and riding at reduced speed and contact a MV Agusta authorized contact a MV Agusta autho- service centre. rized service centre. Turn indicator lights... - Page 28 If it ABS display (only on certain models) needs to be filled up, contact a MV Agusta licensed Indicates the activation state of the ABS function. service centre (see § 3.8). If the warning light turns...
-
Page 29: Table Of Lubricants And Fluids
: MV Agusta suggests to refer directly to its authorized dealers in order to purchase the recommended product. The eni i-Ride moto2 5W-40 engine oil has been expressly produced for the Rivale 800 motor- cycle engine. If the above described lubricant is not available, MV... -
Page 30: Operation
OPERATION 4.1. Using the motorcycle This section provides the basic information needed to correctly operate the motorcycle. WARNING Your motorcycle shows high power and performance characteristics; therefore, its use requires an adequate level of knowledge of the vehicle. When you use this motorcycle for the first time, it is essential to adopt a cautious attitude. -
Page 31: Running-In
OPERATION 4.2. Running-in CAUTION Failure to observe the indications provided 5500-6000 rpm below can reduce performance and shorten the life of the motorcycle. Running-in is generally considered to apply only to the engine. In fact, it should be regarded as an essential phase for other important parts such as the tyres, the brakes and the drive chain. - Page 32 OPERATION 500 to 1000 km (300 to 600 mi) Avoid lugging or overspeeding the engine, and vary your speed frequently. 8000-9000 rpm 1000 to 2500 km (600 to 1600 mi) Higher engine performance can be demanded, but it is advisable not to exceed the engine speed shown in the 11000 rpm figure.
-
Page 33: Starting The Engine
OPERATION 4.3. Starting the engine WARNING Starting the engine in a closed place can be dan- gerous. Exhaust emissions contain carbon monox- ide, a colourless and odourless gas that can lead to serious harm or even death when inhaled. Only start the engine outdoor, in the open air. - Page 34 OPERATION If the self-diagnostic cycle detects a fault in the vehi- cle, the display shows the warning alert shown in the picture. In particular, this message highlights the vehicle part or device on which the fault has been detected. Press “OK” button to access to “RUN” mode. WARNING If a fault is detected on the vehicle, do not start engine and contact an authorized MV...
- Page 35 OPERATION Engine start procedure START button Press the start button without turning the throttle twist grip. As soon as the engine starts, release the button. CAUTION • Do not press the start button for longer than 5 consecutive seconds, in order to avoid dam- age to the electrical equipment.
-
Page 36: Selecting And Setting The Display Functions
OPERATION 4.4. Selecting and setting the display functions Some of the main measurements of the instruments may be changed. The available options include: - Select an operating mode: “RUN” (Odometer) “SPEED LIMITER” “TC” (Traction control) “CHRONO” (Chronometer) “ABS” (Antilock braking system)* “QUICK SHIFT”... -
Page 37: Selecting The Display Functions
OPERATION 4.4.1. Selecting the display functions The following settings may be changed on the display: • “RUN” (Odometer) • “SPEED LIMITER” • “TC” (Traction control) • “CHRONO” (Chronometer) • “ABS” (Antilock braking system)* • “QUICK SHIFT” • “CLOCK” To display the operating modes, press “SET”... - Page 38 OPERATION “RUN” Mode In addition to the speedometer, the display shows the following functions (see §4.4.2.): • Total odometer “TOTAL” • Trip counter 1 “TRIP 1” As an alternative: • Total odometer “TOTAL” • Trip counter 2 “TRIP 2” “SPEED LIMITER” Mode This mode adjusts the maximum value of the vehicle speed to your driving requirements (see §4.4.3.).
- Page 39 OPERATION “TC” Mode This Mode adjusts the engine traction control level to your driving requirements (see §4.4.4.). “CHRONO” Mode This mode turns on the Chronometer and saves the recorded information (see §4.4.5.). The following is displayed: • Chronometer Current lap “CURRENT LAP”...
- Page 40 OPERATION “ABS” Mode * This mode allows to activate or deactivate the antilock braking system (ABS) (see §4.4.6.). (*): This function is present only on certain models “QUICK SHIFT” Mode This mode allows to turn off or on the “quick shift” func- tion of the gear change (see §4.4.7.).
- Page 41 OPERATION “CLOCK” Mode The present function enables to change the time (hours and minutes) reported on the dashboard (see §4.4.8.). - 40 -...
-
Page 42: Trip Reset
OPERATION 4.4.2. Trip reset To reset “TRIP 1” and “TRIP 2”, proceed as follows. WARNING The display modes may be changed or set when the engine is off, the gear in neutral, the motorbike stationary with your feet on the ground. - Page 43 OPERATION Press the “OK” key for less than three seconds until the partial speedometer 2 function (“TRIP 2”) appears on the display. By pressing the “OK” key for more than three sec- onds, the “TRIP 2” value will be reset to zero. - 42 -...
-
Page 44: Speed Limiter" Mode
OPERATION 4.4.3. “SPEED LIMITER” mode When starting the engine, the “SPEED LIMITER” func- tion is disabled. In order to activate it, it is necessary to perform the following operations: Press “SET” in order to access to “SPEED LIMITER” mode. The maximum speed value shown on the display (equal to the current speed of the vehicle) starts blink- ing. - Page 45 OPERATION Press “OK” for over three seconds to confirm the selected maximum speed value. The displayed digit stops blinking and the display returns to “RUN” mode. On the other hand, if you press “SET” for over three seconds, the “SPEED LIMITER” function is disabled. The display shows the “OFF”...
-
Page 46: Tc" Mode
OPERATION 4.4.4. “TC” mode Press “SET” in order to access to “TC” mode, then press “OK” for less than three seconds until “TC LEVEL” appears. The current traction control level is the same as the one shown on the display. NOTE The traction control level may be changed or set even during the use of the vehicle. -
Page 47: Chronometer
OPERATION 4.4.5. Chronometer Lap time recording Turn on the chronometer (“CHRONO” mode) to record the time taken to cover a lap. Press the headlight button to start recording the time. The colon that separates the minutes from the sec- onds and from the tenths of a second will start blinking. Now, the instrument is recording the time. - Page 48 OPERATION Press the headlight button again to record the time taken to cover the 1st lap. At the same time, the instru- ment starts recording the time taken to cover the sec- ond lap. The time measurement for the first lap is stored in the memory and is visualised on the display for ten sec- onds, after which the time measurement for the follow- ing lap appears.
- Page 49 OPERATION Data display Once all times have been recorded, they may be dis- played. Access the “CHRONO” mode; the time of the fastest lap (“BEST LAP”) and the time of the last lap (“LAST LAP”) appears on the display. WARNING The display modes may be changed or set when the engine is off, the gear must be in neutral, the motorbike must be stationary with...
- Page 50 OPERATION By repeatedly pressing the “OK” key, all the times previously acquired starting from the last lap memorised can be displayed in sequence. Once all the data have been displayed, press the “SET” key to return to the “LAPS VIEW” mode and then to the following mode.
- Page 51 OPERATION How to delete data To delete the saved data, proceed as follows: WARNING The display modes may be changed or set when the engine is off, the gear in neutral, the motorbike stationary with your feet on the ground. Do not change the display while dri- ving.
- Page 52 OPERATION Now, press “OK” for over three seconds to delete the value. Otherwise, press “SET” for less than three sec- onds to stop the deletion procedure. Subsequently, by pressing the “OK” key for more than three seconds, all the previously acquired times can be cancelled.
- Page 53 OPERATION Resetting of best lap time: Access the “CHRONO” mode and press the “SET” key for less than three sec- onds until the words “BEST LAP RESET” appear on the display. Press the “OK” key for less than three seconds; the value of the fastest last lap time memorised will start flashing.
- Page 54 OPERATION Now, press “OK” for over three seconds to delete the value. Otherwise, press “SET” for less than three sec- onds to stop the deletion procedure. Once all the data have been cancelled, press the “SET” key to exit the “BEST LAP RESET” mode and then pass to the following mode.
- Page 55 OPERATION Press the “OK” key for less than three seconds; the display will ask you to confirm cancellation of all the data present in the memory. By pressing the “OK” key for more than three sec- onds, all the previously acquired times will be cancelled. By pressing the “SET”...
-
Page 56: Abs Mode
OPERATION 4.4.6. Selecting the ABS functions * Press “SET” in order to access to “ABS” mode; “SETTING ABS” appears on the display. WARNING The display modes may be changed or set when the engine is off, the gear in neutral, the motorbike stationary with your feet on the ground. - Page 57 OPERATION Otherwise, by pressing “OK” while the caption is still blinking, “ABS OFF” appears on the display. If you do not press any button, after three seconds the “ABS OFF” selection is confirmed; under this condi- tion, the ABS system is deactivated. Press “SET” to exit the “ABS”...
-
Page 58: Quick Shift" Mode
OPERATION 4.4.7. “QUICK SHIFT” mode Press “SET” in order to access to “QUICK SHIFT” mode. The display shows the current activation state of the “quick shift” function of the gear change. WARNING The display modes may be changed or set when the engine is off, the gear in neutral, the motorbike stationary with your feet on the ground. -
Page 59: Clock Settings
OPERATION 4.4.8. Clock settings To carry out clock settings, press the "SET" button until viewing the "CLOCK SETTING" caption. WARNING The display modes may be changed or set when the engine is off, the gear in neutral, the motorbike stationary with your feet on the ground. - Page 60 OPERATION After having carried out the hour digit setting, the dashboard automatically switches to the minute digit setting. The minute digit begins to flash. By pressing the "OK" button for less than three sec- onds, the minute digit is increased by going to the fol- lowing numeric value.
-
Page 61: How To Select The Mapping Of The Control Unit
OPERATION 4.4.9. How to select the mapping of the control unit On the Rivale model is it possible to select different con- trol unit mappings which allow to obtain variable power and performance characteristics based on the type of vehicle use. NOTE The mapping selection may be performed even during the use of the vehicle. - Page 62 OPERATION Setting of “Custom” mapping Press the start button when the engine is switched on until selecting the “Custom” mapping of the control unit. WARNING The “Custom” mapping setting operations must be performed when the gear is in neutral and the motorbike stationary with your feet on the ground.
- Page 63 OPERATION Press “SET” for less than three seconds. The display shows the current setting for throttle control sensitivity. Press “OK” for less than three seconds; the dis- played setting will start flashing. By repeatedly pressing “OK” for less than three sec- onds, the following settings can be displayed in sequence: •...
- Page 64 OPERATION Press “OK” for more than three seconds; the new setting will be confirmed. The displayed caption stops flashing and after a few seconds the display returns to “GAS SENSITIVITY” mode. It is now possible to pro- ceed with the setting of the following parameter. Maximum engine torque: Press “OK”...
- Page 65 OPERATION Press “SET” for less than three seconds. The display shows the current setting for maximum engine torque. Press “OK” for less than three seconds; the dis- played setting will start flashing. By repeatedly pressing “OK” for less than three sec- onds, the following settings can be displayed in sequence: •...
- Page 66 OPERATION Press “OK” for more than three seconds; the new setting will be confirmed. The displayed caption stops flashing and after a few seconds the display returns to “MAX TORQUE ENGINE” mode. Engine brake: Press “OK” for less than three sec- onds until “ENGINE BRAKE”...
- Page 67 OPERATION Press “SET” for less than three seconds. The display shows the current setting for engine brake. Press “OK” for less than three seconds; the dis- played setting will start flashing. By repeatedly pressing “OK” for less than three sec- onds, the following settings can be displayed in sequence: •...
- Page 68 OPERATION Press “OK” for more than three seconds; the new setting will be confirmed. The displayed caption stops flashing and after a few seconds the display returns to “ENGINE BRAKE” mode. Engine response: Press “OK” for less than three sec- onds until “ENGINE RESPONSE”...
- Page 69 OPERATION Press “SET” for less than three seconds. The display shows the current setting for engine response. Press “OK” for less than three seconds; the dis- played setting will start flashing. By repeatedly pressing “OK” for less than three sec- onds, the following settings can be displayed in sequence: •...
- Page 70 OPERATION Press “OK” for more than three seconds; the new setting will be confirmed. The displayed caption stops flashing and after a few seconds the display returns to “ENGINE RESPONSE” mode. Engine RPM limiter: Press “OK” for less than three seconds until “RPM LIMITER”...
- Page 71 OPERATION Press “SET” for less than three seconds. The display shows the current setting for engine RPM limiter. Press “OK” for less than three seconds; the dis- played setting will start flashing. By repeatedly pressing “OK” for less than three sec- onds, the following settings can be displayed in sequence: •...
- Page 72 OPERATION Press “OK” for more than three seconds; the new setting will be confirmed. The displayed caption stops flashing and after a few seconds the display returns to “RPM LIMITER” mode. Press “OK” for less than three seconds until the dis- play switches to the “RUN”...
-
Page 73: Warning/Malfunction Alerts
Press “OK” button to access to “RUN” mode. WARNING If a fault is detected on the vehicle when the engine is off, do not start engine and contact an authorized MV Agusta centre. - 72 -... - Page 74 WARNING If a fault is detected during riding, stop the vehicle and contact an authorized MV Agusta centre. After the vehicle is stopped, the display shows the warning message highlighting the vehicle part or device on which the fault has been detected.
- Page 75 If the coolant temperature is high, stop the motorbike and check the coolant level. If it needs to be filled up, contact a MV Agusta licensed service centre (see § 3.8). If the warn- ing alert appears even if the level is adequate, stop driving and contact a MV Agusta licensed service centre.
-
Page 76: Refuelling
OPERATION 4.5. Refuelling WARNING Petrol and its fumes are highly toxic and flam- mable. Avoid contact and inhalation. When refuelling, switch off the engine, avoid smoking, and keep away from flames, sparks and heat sources. Perform refuelling in the open air or in a well ventilated area. CAUTION Only use unleaded fuel with a R.O.N. - Page 77 OPERATION WARNING Overfilling the tank may cause the fuel to overflow as a result of the expansion due to the heat from the engine or to exposure to sunlight. Fuel spills can catch fire. The level of the fuel in the tank must never be higher than the base of the filler. CAUTION Immediately wipe the overflown fuel with a clean cloth, to avoid damage to the painted or plastic surfaces.
-
Page 78: Glove Compartment
OPERATION 4.6. Glove compartment Insert the key. Push the seat downwards at the back and at the same time turn the key in a anticlockwise direction. Lift up the seat at the back end, let it slide back- wards and make it rotate as shown in the figure. In order to reassemble the above mentioned part, you must perform the following operations: •... -
Page 79: Parking The Motorcycle
Before riding off, ensure that the sidestand warning light on the instrument panel goes out. In any case, make sure that the stand has been retracted. If you notice a malfunction of the side stand switch, have it controlled by your MV Agusta dealer before using the motorcycle. - Page 80 OPERATION Using the rear stand Insert the stand pin into the rear wheel axle hole on the left side of the motorcycle. Rest the stand on the ground and, pressing down on the stand, lift the vehicle until it reaches a stable condition. CAUTION This operation is best carried out with two people.
-
Page 81: Adjustments
However, since an incorrect adjustment of particularly important components can lead to dangerous situa- tions, some of the above adjustments must be per- formed only by authorized MV Agusta Service Centers. WARNING All adjustments must be performed when the vehicle is stationary. - Page 82 ADJUSTMENTS (B) Rearview mirror adjustment (§5.4.) (D) Rear suspension adjustment (§5.6.) (F) Headlight adjustment (§5.7.) (E) Drive chain (C) Front suspension adjustment (§5.5.) adjustment (§5.2.) (A) Front brake lever adjustment (§5.3.) - 81 -...
-
Page 83: Table Of Adjustments
ADJUSTMENTS 5.2. Table of adjustments A - Front brake lever adjustment: Optimizes D - Rear suspension adjustment: The following can be adjusted to adapt the response of the sus- the grip to suit the rider’s needs (§5.3). pension to the rider’s preference: - geometry height - spring preload B - Rearview mirror adjustment: Optimizes the... -
Page 84: Adjusting The Front Brake Lever
ADJUSTMENTS 5.3. Adjusting the front brake lever Rotate the lever adjust to change its position. Clockwise: the lever moves closer to the handle. Counter-clockwise: the lever moves away from the handle. 5.4. Adjusting the rearview mirrors Get hold of the rear-view mirror to adjust the posi- tion in its four directions. -
Page 85: Adjusting The Front Suspension
ADJUSTMENTS 5.5. Adjusting the front suspension Rebound damper NOTE: The adjustment of the suspen- sions must be preferably performed with the fuel tank full. 5.5.1. Spring preload (front suspension) The adjustment is obtained from the reference posi- tion, which is found by fully turning the adjusting nut counterclockwise;... -
Page 86: Rebound Damper (Front Suspension)
ADJUSTMENTS 5.5.2. Rebound damper (front suspension) 5.5.3. Compression damper (front suspension) The adjustment is obtained from the reference The adjustment is obtained from the reference position, which is found by fully turning the screw position, which is found by fully turning the screw clockwise and then counterclockwise until you clockwise and then counterclockwise until you reach the standard position (see enclosed table). -
Page 87: Adjusting The Rear Suspension
ADJUSTMENTS 5.6. Adjusting the rear suspension WARNING: The rear shock absorber contains highly compressed gas. Do not try to open or disassemble it in any way. CAUTION: To evaluate the rear suspension calibration do not in any way act on the tail. It would surely be subject to damage. -
Page 88: Rebound Damper (Rear Suspension)
ADJUSTMENTS 5.6.1. Rebound damper (rear suspension) The adjustment is obtained from the reference position, which is found by fully turning the screw clockwise and then counterclockwise until you reach the standard position (see enclosed table). Rotate clockwise to increase the damping action or counterclockwise to decrease it. -
Page 89: Compression Damper (Rear Suspension)
ADJUSTMENTS 5.6.2. Compression damper (rear suspension) The adjustment is obtained from the reference position, which is found by fully turning the screw clockwise and then counterclockwise until you reach the standard position (see enclosed table). Rotate clockwise to increase the damping action or counterclockwise to decrease it. -
Page 90: Headlight Adjustment
ADJUSTMENTS 5.7. Headlight adjustment Place the vehicle at a distance of 10 m from a vertical wall. Make sure that the motorcycle is placed on an even horizontal surface, and that the headlight’s optical axis is perpendicular to the wall. The vehicle must be held in an upright position. - Page 91 ADJUSTMENTS The light beam can be adjusted vertically by turn- ing the screw illustrated. If turned in a clockwise direction: the optical unit tilts upwards. If turned in an anti-clockwise direction: the optical unit tilts downwards. It can be tilted up to an angle of ±4° Counterclockwise from the standard position.
- Page 92 TABELLA REGOLAZIONE SOSPENSIONI - SUSPENSION ADJUSTMENT TABLES - TABLEAU DE RÈGLAGE DES SUSPENSIONS - TABELLE DER EINSTELLUNGFEDERUNG - TABLA REGULACIÓN SUSPENSIÓNES Part. N. 8000B8452 Rev. 1 Rivale 800 Tipo di assetto - Type of geometry - Type d’assiette - Einstellungsart - Tipo de equilibrado...