MV Agusta BRUTALE 800 Maintenance Manual
Hide thumbs
Also See for BRUTALE 800:
- User manual (445 pages) ,
- Owner's manual (407 pages) ,
- Maintenance manual (402 pages)
Table of Contents
Advertisement
Advertisement
Table of Contents

Related Manuals for MV Agusta BRUTALE 800


Summary of Contents for MV Agusta BRUTALE 800
- Page 1 Maintenance manual English Version...
-
Page 2: Table Of Contents
CONTENTS chap. Subject covered page chap. Subject covered page MAINTENANCE 1.14. Cleaning the motorcycle 1.1. Symbols 1.15. Prolonged inactivity TROUBLESHOOTING FLOW CHART 1.2. Tables of scheduled maintenance and checks 1.3. Tools and accessories supplied 2.1. Engine problems 1.4. Table of lubricants and fluids 2.2. -
Page 3: Maintenance
MAINTENANCE 1.1. Symbols Sections of text that are particularly important in terms of personal safety or possible damage to the motorcycle are marked with the following symbols: Danger - Failure to observe these prescriptions, even in part, may pose a serious hazard to the driver’s and other people’s safety. -
Page 4: Tables Of Scheduled Maintenance And Checks
MAINTENANCE 1.2. Tables of scheduled maintenance and checks The main periodic checks and maintenance operations are shown in the following tables. These operations are necessary to keep the motorcycle safe and in perfect running order. The intervals indicated in the periodic maintenance and lubri- cation tables must be intended as a general guide under nor- mal riding conditions. - Page 5 If you use the motorcycle on race track, we recommend to have the bike checked before and after using it by skilled personnel belonging to the MV Agusta Service Centers network. Using the motorcycle on road track is allowed only occasionally and, however, not for com- petitive purpose, even during amateur events.
- Page 6 Every time vehicle is used Engine oil Renew At least once a year Replace Engine oil filter (Use only MV Agusta Every time engine oil is changed genuine spare oil filters) Check / Restore level Every time vehicle is used Coolant...
- Page 7 MAINTENANCE Tables of scheduled maintenance 1000 6000 12000 18000 24000 30000 36000 km (mi) covered (600) (3800) (7500) (11200) (14900) (18600) (22400) Pre- Service coupon delivery ESCRIPTION PERATION Check / Replace Timing movable shoe Replace Every time timing chain is replaced Timing chain stretcher Check / Replace Check / Replace...
- Page 8 MAINTENANCE Tables of scheduled maintenance 1000 6000 12000 18000 24000 30000 36000 km (mi) covered (600) (3800) (7500) (11200) (14900) (18600) (22400) Pre- Service coupon delivery ESCRIPTION PERATION Check operation Every time vehicle is used Clean lever / master cyl. Every 500 ÷...
- Page 9 MAINTENANCE Tables of scheduled maintenance 1000 6000 12000 18000 24000 30000 36000 km (mi) covered (600) (3800) (7500) (11200) (14900) (18600) (22400) Pre- Service coupon delivery ESCRIPTION PERATION Flexible controls and Check / Adjust transmissions Check Every 1000 Km (600 mi) Lubricate Every 1000 Km (600 mi) and after riding under the rain Drive chain...
- Page 10 MAINTENANCE Tables of scheduled maintenance 1000 6000 12000 18000 24000 30000 36000 km (mi) covered (600) (3800) (7500) (11200) (14900) (18600) (22400) Pre- Service coupon delivery ESCRIPTION PERATION Rear sprocket spring drive Check / Replace Check Steering bearings Lubricate Check pressure Every time vehicle is used;...
- Page 11 MAINTENANCE Tables of scheduled maintenance 1000 6000 12000 18000 24000 30000 36000 km (mi) covered (600) (3800) (7500) (11200) (14900) (18600) (22400) Pre- Service coupon delivery ESCRIPTION PERATION Check operation Every time vehicle is used Sidestand Check operation Check operation Every time vehicle is used Clean contact area Every 500 ÷...
- Page 12 MAINTENANCE Tables of scheduled maintenance 1000 6000 12000 18000 24000 30000 36000 km (mi) covered (600) (3800) (7500) (11200) (14900) (18600) (22400) Pre- Service coupon delivery ESCRIPTION PERATION Battery connections Check and clean Electrical equipment Check operation Check operation Every time vehicle is used Instrument panel Check operation Check operation /...
- Page 13 MAINTENANCE Tables of scheduled maintenance 1000 6000 12000 18000 24000 30000 36000 km (mi) covered (600) (3800) (7500) (11200) (14900) (18600) (22400) Pre- Service coupon delivery ESCRIPTION PERATION Check operation Every time vehicle is used Locks Check operation Screws and nuts Check / Tighten Hose clamps Check / Tighten...
-
Page 14: Tools And Accessories Supplied
MAINTENANCE 1.3. Tools and accessories supplied Under the passenger seat you can find the following Tools: 2 Allen wrenches (2,5 mm. - 4 mm hexagon); 1 spanner for rear wheel eccentric with extension; 1 fuse puller; Inside the fuse box are also provided the following spare fuses (see §1.12.1): 2 fuses (10A);... -
Page 15: Table Of Lubricants And Fluids
D.I.D. CHAIN LUBE – : MV Agusta suggests to refer directly to its authorized dealers in order to purchase the recommended product. The eni i-Ride moto2 5W/40 engine oil has been expressly produced for the Brutale motor- cycle engine. If the above described lubricant is not available, MV... -
Page 16: Checking The Engine Oil Level
MAINTENANCE 1.5. Checking the engine oil level Check the oil level while the engine is not running, and has been allowed to cool down for at least ten minutes after a ride. The check must be performed after placing the motor- cycle in an upright position on a horizontal surface. -
Page 17: Topping Up The Engine Oil Level
MAINTENANCE 1.5.1. Topping up the engine oil level Remove the oil filler plug. Pour an appropriate amount of engine oil of the recommended type. Never exceed the MAX level mark. At the end of the operation, place back the oil filler plug. CAUTION To avoid clutch sliding and damage to the engine, never add chemical addi-... - Page 18 MAINTENANCE WARNING New or exhaust engine oil can be dan- • Keep new or exhaust engine oil out of gerous. Engine oil is highly toxic for reach of children and domestic animals. people and domestic animals. Avoid • While topping up the engine oil, wear ingestion and contact.
-
Page 19: Checking The Coolant Level
MAINTENANCE 1.6. Checking the coolant level Check the coolant level while the engine is off and cold. The check must be performed after placing the motor- cycle in an upright position on a horizontal surface. Ensure that the coolant level should be slightly above the MIN mark, as shown in the figure. -
Page 20: Topping Up The Coolant Level
MAINTENANCE 1.6.1. Topping up the coolant level Unscrew and remove the coolant filler cap. Using a syringe, top up with the recommended coolant (see §1.4). WARNING: Perform the top- ping up of the coolant when the engine is off and cold. Never attempt to remove the coolant filler cap when the engine is hot, in order to... - Page 21 MAINTENANCE WARNING CAUTION Under certain conditions, ethylene gly- To top up the coolant level and/or renew col contained in the coolant can become the coolant, use only the product speci- flammable. When it is lighted, it pro- fied in the table at paragraph 1.4. Do not duces an invisible flame.
-
Page 22: Checking The Wear Of The Brake Pads
MAINTENANCE Front brake caliper Rear brake caliper 1.7. Checking the wear of the brake pads Disc Pads Periodically check the width of the friction material layer of the pads, making sure it never falls below the wear limit (1 mm). WARNING If the brake pads are excessively worn out, the effective- ness of the braking system decreases, increasing the risk... -
Page 23: Checking The Brake Fluid Level
MAINTENANCE Rear brake fluid reservoir Front brake fluid reservoir 1.8. Checking the brake fluid level WARNING The level of the brake fluid decreases as the Lack of maintenance of the braking sys- brake pads wear down. Ensure that the fluid level tem can increase the risk of accidents. - Page 24 MIN mark, you decrease of the braking efficiency, with must have the braking system over- subsequent increase of the risk of acci- hauled by an authorized MV Agusta dents. dealer. WARNING WARNING...
-
Page 25: Checking And Replacing The Tyres
MAINTENANCE 1.9. Checking and replacing the tyres WARNING Before using the motorcycle, always check the pressure and wear of the tyres. Checking the inflating pressure of the tyres is an essential requirement to ensure driving safety. Insufficiently inflat- ed tyres can reduce the handling of the motorcycle and wear themselves out very quickly. - Page 26 Moreover, it is extremely important to check the excessively worn out, have it replaced wear of the tyres before riding. In fact, a worn out by your MV Agusta dealer. Besides tyre can be punctured more easily than a new being illegal, riding a motorcycle with...
- Page 27 2.2. Moreover, avoid using MV Agusta dealer and have the tyre tyres of a different brand or type on the replaced. With a provisionally repaired front and on the rear wheel at the same tyre, never exceed 60 km/h.
- Page 28 MAINTENANCE • Do not assemble an air tube on a • New tyres should be run in for a short tubeless tyre. The overheating of the period before demanding their full per- tyre could cause the explosion of the air formance.
- Page 29 Therefore, we strongly recommend M50x1.5 mm not to have the tyres replaced by an left-hand pitch thread improperly equipped workshop. 55 mm polygonal socket wrench Always have the tyres replaced by an authorized MV Agusta dealer. Torque wrench - 29 -...
- Page 30 MV Agusta recommends not to use WARNING balancing or balancing/sealing fluids. If you find that the wheel rim is dam-...
-
Page 31: Checking And Lubricating The Drive Chain
Checking the chain adjustment WARNING: Before checking the chain adjust- ment, contact a MV Agusta authorized centre to verify that the value of the static setup of 116 mm the rear suspension is correct. Also make sure that the chain is properly lubricated. - Page 32 WARNING rear wheel hub screws, contact an If any chain link is flattened, seized or authorized MV Agusta dealer. In order to elongated, have the chain replaced by a tighten the screws, apply a tightening MV Agusta authorized service centre.
- Page 33 MAINTENANCE Lubrication To ensure proper operation, the drive chain needs to be properly lubricated. Preliminary cleaning - Before lubrication, the dirt accumulated on the chain must be dissolved using kerosene. The dirt must then be removed with a clean rag and/or an air jet. CAUTION The chain is of the O-ring type.
- Page 34 MAINTENANCE Lubrication - Apply a slight and uniform film of lubricant over the whole length of the drive chain, taking care not to smear the surrounding parts, and in particular the tyres. Direct the lubricant jet on the internal links, in order to lubricate the surface of the O-Rings and penetrate inside the chain roller.
-
Page 35: Checking The Idle Speed
MAINTENANCE 1.11. Checking the idle speed Check the idle speed when the engine has reached the operating temperature. Ensure that the choke control has not been activated. The idle speed should range from 1,250 to 1,350 rpm. If a tune-up is necessary, contact an authorized service centre. -
Page 36: Replacing Parts - General Information
MAINTENANCE 1.12. Replacing parts - General information 1.12.1. Replacing the fuses The battery recharge fuse is located on the The replacement of the fuses and the light bulbs solenoid starter, in the position indicated on the can be carried out by the owner according to the right side of the motorcycle. - Page 37 MAINTENANCE CAUTION Turn the ignition key on the “OFF” posi- tion before checking or replacing the fuses, in order to avoid a short circuit Recharge fuse with subsequent damage to other elec- (40A) tric parts of the motorcycle. To replace the fuse, you must swap the Spare fuse (40A) recharge fuse with the spare fuse.
- Page 38 MAINTENANCE The service fuses are located on the right side of the motorcycle. Unfasten and lift the lid of the fuse box. CAUTION Turn the ignition key on the “OFF” posi- tion before checking or replacing the fuses, in order to avoid a short circuit with subsequent damage to other elec- tric parts of the motorcycle.
- Page 39 MAINTENANCE To identify the position and function of the fuses, refer to the information provided under the lid of the box and on the attached wiring diagram; the reference letters in the figure correspond to those shown in the diagram. Remember that the fuse box contains three spare fuses.
-
Page 40: Replacement Headlight Bulb
MAINTENANCE 1.12.2. Replacing the headlight bulb Remove the two headlight lateral fixing screws. Pay attention in slipping off the adjuster from its seat when the headlight is being removed from its support. Before removing the headlight from its support, pull out the relay from its holder and detach the connector on the rear side of the headlight. - Page 41 MAINTENANCE Place the headlight on a table in order to be able to perform the following operations. Remove the protective cap. Unplug the bulb connector. Release the retaining spring. - 41 -...
- Page 42 MAINTENANCE Extract the bulb. CAUTION: Do not touch the bulb glass with bare hands. If you do, clean the bulb with an oil-free solvent. Insert the new bulb. Reattach the retaining spring. Replug the bulb connector. Reposition the protective headlight cover. Reattach the headlight connector.
-
Page 43: Replacing Turn Indicator Bulbs
MAINTENANCE 1.12.3 Replacing turn indicator bulbs Remove the fixing screw. Remove the lens. - 43 -... - Page 44 MAINTENANCE To remove the burnt-out bulb rotate it counter- clockwise, while pulling outward. To fit the new bulb, press it and rotate it clock- wise. Replace the lens and insert the fixing screw. - 44 -...
-
Page 45: Replacing The License Plate Light Bulb
MAINTENANCE 1.12.4. Replacing the license plate light bulb Remove the fixing screws of the lower cover of the plate holder. Remove the cover complete with plate holder. - 45 -... - Page 46 MAINTENANCE Extract the bulb holder pulling it from its seat. Extract the burnt-out bulb by pulling it from the holder. Fit the new bulb. Refit the bulb holder. Push back the lower cover in touch with the upper surface. Refit the fixing screws of the cover. - 46 -...
-
Page 47: Replacing The Tail Light Bulb
MAINTENANCE 1.12.5. Replacing the tail light bulb Remove the two upper fixing screws of the tail side fairings. Remove the two fixing screws of the tail lamp. Detach the tail lamp connector. - 47 -... - Page 48 MAINTENANCE Remove the tail lamp by rotating it to free it from his seat. Extract the bulb holder pulling it from its seat. Extract the burnt-out bulb. Fit the new bulb. Replace the bulb holder. Reassemble the tail lamp and all the previous- ly removed parts.
-
Page 49: Replacing The Brake Light Bulb
MAINTENANCE 1.12.6. Replacing the brake light bulb Remove the tail lamp as described at §1.12.5. To extract the bulb holder, rotate it counter- clockwise. Extract the burnt-out bulb. Fit the new bulb. Replace the bulb holder by rotating it clock- wise. -
Page 50: Battery
Always have the battery replaced by HIGHLY TOXIC AND CORROSIVE sub- your local MV Agusta dealer. stance. Avoid any contact with your eyes, skin and clothes. Always wear protective glasses when you have to work near the battery. - Page 51 MAINTENANCE Prolonged inactivity If the motorcycle is to remain unused for a long To do this connect the charger on the connector time (a month or longer), it is advisable remove placed under the driver’s seat. the recharging fuse (see §1.12.1). In case of pro- longed inactivity, recharge the battery once a month, in order to ensure durability.
-
Page 52: Cleaning The Motorcycle
MAINTENANCE 1.14. Cleaning the motorcycle Periodic careful cleaning is a key fac- tor in preserving the value of the motorcycle, protecting its surface fin- ish and checking for damages, wear and leakage of corrosive fluids. CAUTION Before washing the vehicle, stop up the exhaust pipes and protect the electrical parts. - Page 53 MAINTENANCE Wash the motorcycle with water, a mild detergent WARNING Avoid smearing brakes or tyres with oil and a sponge. Wipe the vehicle with a soft cloth. or wax. If necessary, clean the brake Use an air jet to dry difficult-to-reach areas. discs with a brake disc detergent or with CAUTION acetone, and wash the tyres with warm...
-
Page 54: Prolonged Inactivity
MAINTENANCE Empty the fuel tank. Remove the recharge fuse (§1.12.1). Recharge the battery every month. (§1.13). Remove the spark plug caps and the spark plugs. Pour a teaspoonful of engine oil in every spark plug hole, then place back the spark plugs and the corresponding caps. Make the engine run idle for a few times. -
Page 55: Troubleshooting Flow Chart
TROUBLESHOOTING FLOW CHART 2.1. Engine problems: ENGINE DOES NOT START The battery Replace the battery Engine starts charging fuse is Problem solved charging fuse (§1.12.1) Return the engine stop Engine stop switch Engine starts Problem solved switch in rest position depressed Disengage gears or Gears engaged and... - Page 56 Replace fuses F1, F2 Fuses F1, F2 and Problem solved Engine starts and F5 (§1.12.1) F5 are OK Recharge the battery The battery is Problem solved Engine starts (§1.13) charged Contact a MV Agusta authorized service centre - 56 -...
- Page 57 ENGINE SHUTS OFF DURING RIDING Refuel Fuel tank empty Engine is running Problem solved Replace fuses Fuses F1, F2 and Engine is running Problem solved F1, F2 and F5 (§1.12.1) F5 are OK Contact a MV Agusta authorized service centre - 57 -...
- Page 58 TROUBLESHOOTING FLOW CHART ENGINE OVERHEATS Contact a MV Agusta Coolant level is authorized service centre correct (§1.7.) Engine cools Replace fuse F7 Fuse F7 down to operating Problem solved (§1.12.1.) is OK temperature Contact a MV Agusta authorized service centre...
- Page 59 TROUBLESHOOTING FLOW CHART OIL PRESSURE IS TOO LOW (Engine oil pressure warning light is on with the engine running) Have the oil level Oil pressure is Oil level is correct restored by a MV Agusta Problem solved optimal (§1.5.) authorized service centre...
-
Page 60: Electrical Equipment Problems
LIGHTS DO NOT WORK Replace fuse(s) F4 and The fuses F4 e Problem solved Lights work F5 (§1.12.1.) F5 are OK Replace bulb(s) Problem solved Bulbs are OK Lights work (§1.12.) Contact a MV Agusta authorized service centre - 60 -... - Page 61 TROUBLESHOOTING FLOW CHART HORN DOES NOT WORK Fuse F6 Replace fuse F6 Problem solved Horn works is OK (§1.12.1) Contact a MV Agusta authorized service centre DASHBOARD DOES NOT WORK Fuse F5 Replace fuse F5 Problem solved Dashboard works is OK (§1.12.1)
-
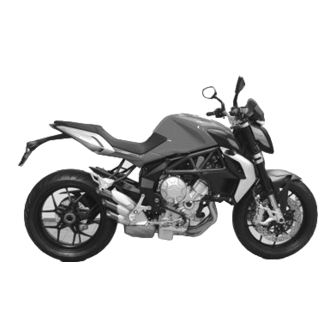
Page 62: Technical Information
TECHNICAL INFORMATION 3.1. Motorcycle overview (N) Dashboard (B) Ignition - Power supply (I) Battery (G) Front suspension (F) Frame (E) Cooling system (L) Front brake (A) Engine (D) Final drive (C) Gearbox (O) Exhaust system (M) Rear brake (H) Rear suspension - 62 -... - Page 63 TECHNICAL INFORMATION A - Engine: four-stroke, inline three-cylinder. G - Front suspension: upside-down hydraulic Double-overhead camshaft valve train. Wet fork with external adjusting system. sump lubrication. H - Rear suspension: progressive, with single- B - Ignition - Power supply: integrated ignition- sided swingarm and single shock absorber injection system.
-
Page 64: Front Brake Circuit
TECHNICAL INFORMATION 3.1.1 Front brake circuit 1 Brake master cylinder 2 Brake lever 3 Brake line 4 Brake caliper 5 Brake discs - 64 -... -
Page 65: Rear Brake Circuit
TECHNICAL INFORMATION 3.1.2. Rear brake circuit 1 Brake lever 2 Brake master cylinder 3 Brake line 4 Brake fluid reservoir 5 Brake caliper 6 Brake disc - 65 -... -
Page 66: Engine Lubrication
TECHNICAL INFORMATION 3.1.3. Engine lubrication 1 Oil sump 2 Oil filter - 66 -... -
Page 67: Coolant Circuit
TECHNICAL INFORMATION 3.1.4. Coolant circuit 1 Expansion tank 2 Upper radiator 3 Lower radiator 4 Coolant pump - 67 -... -
Page 68: Fuel System
TECHNICAL INFORMATION 3.1.5. Fuel system 1 Throttle bodies 2 Fuel pump 3 Fuel line - 68 -... -
Page 69: Specifications
TECHNICAL INFORMATION 3.2. Specifications Description BRUTALE 800 SPECIFICATIONS Wheelbase (mm) (*) 1380 Overall length (mm) (*) 2085 Max. width (mm) Seat height (mm) (*) Min. ground clearance (mm) (*) Trail (mm) (*) 95.3 *: The indicated values must not be intended as binding informations. They can change according to the vehicle setup. - Page 70 TECHNICAL INFORMATION Specifications Description BRUTALE 800 Dry weight (kg) Fuel tank capacity (l) (*) 16.6 Reserve fuel (l) (*) Oil in crankcase (kg) ENGINE Type Three-cylinder, four-stroke, 12 valves Bore (mm) 79.0 Stroke (mm) 54.3 Total displacement (cm Compression ratio 13.3 : 1...
- Page 71 TECHNICAL INFORMATION Specifications Description BRUTALE 800 LUBRICATION Type Wet sump IGNITION - POWER SUPPLY Type Integrated ignition-injection system MVICS with three injectors. Engine control unit Eldor EM2.0; throttle body full drive by wire Mikuni; pencil-coils with ion-sensing technology, control of detonation and misfire. Torque control with 4 mappings;...
- Page 72 TECHNICAL INFORMATION Specifications Description BRUTALE 800 TRANSMISSION Type Removable, six-speed gearbox with constant-mesh gears Gear ratio (overall ratios) First gear 2.846 (13.819) Second gear 2.125 (10.317) Third gear 1.778 (8.632) Fourth gear 1.579 (7.666) Fifth gear 1.429 (6.936) Sixth gear 1.318 (6.400)
- Page 73 TECHNICAL INFORMATION Specifications Description BRUTALE 800 FRONT BRAKE Type Dual floating disc with steel braking band Disc diameter (mm) Disc flange Steel Calipers, piston diameters (mm) Radial-type, 4-piston ( Ø 32 ) REAR BRAKE Type Single steel disc Disc diameter (mm) Caliper, piston diameter (mm) 2-piston ( Ø...
- Page 74 TECHNICAL INFORMATION Specifications Description BRUTALE 800 Inflating pressure (*): Front 2.3 bar (33 psi) Rear 2.3 bar (33 psi) ELECTRICAL EQUIPMENT Equipment voltage 12 V Headlight bulb H4 12V 60/55W Front indicator HY6W 12V 6W Rear indicator HY6W 12V 6W...
- Page 75 TECHNICAL INFORMATION Specifications Description BRUTALE 800 Dashboard cover Thermoplastic material Front mudguard Thermoplastic material Chain guards Thermoplastic material License-plate holder Thermoplastic material Rearview mirrors Thermoplastic material Exhaust pipe guard Aluminium Radiator side covers Aluminium - 75 -...
- Page 76 TECHNICAL INFORMATION - 76 -...
-
Page 77: Bodywork Parts Reference Colours
TECHNICAL INFORMATION 3.3. Bodywork parts reference colours Bodywork parts are painted with the following reference colours, according to the corresponding motor- cycle colour combination: 1. - Rear side fairing, right-hand; 5. - Fuel tank: 2. - Rear side fairing, left-hand: Colour code A: Colour code A: Pearly Red... - Page 78 TECHNICAL INFORMATION - 78 -...
-
Page 79: Frame Parts Reference Colours
TECHNICAL INFORMATION 3.4. Frame parts reference colours Frame parts are painted with the following reference colours, according to the corresponding motorcy- cle colour combination: 3. - Right-hand frame plate; 1. - Frame: 4. - Left-hand frame plate; 5. - Rear swingarm: Colour codes A-C-D: Mica Black Quasar Black... - Page 80 © 2012 This document may not, in whole or in part, be reproduced without prior consent, in writing, from MV Agusta Motor S.p.A. Part. n° 8000B7950 Edition n° 1 - October 2012...