Table of Contents
Advertisement
Available languages
Available languages
Quick Links
Download this manual
See also:
Owner's Manual
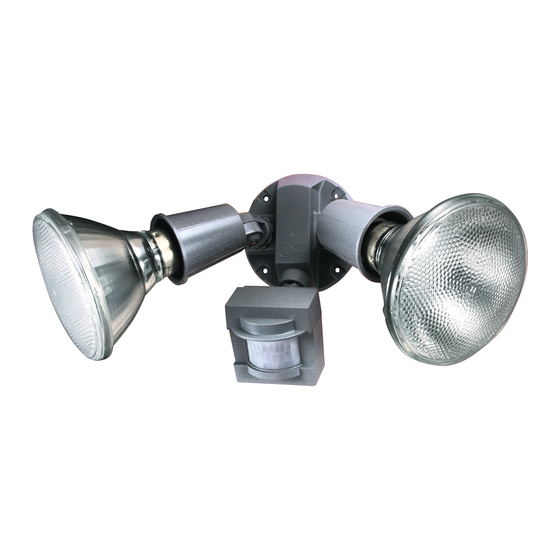
Motion Sensor Light
Control
Model 5408
Features
• Turns on lighting when motion is detected.
• Automatically turns lighting off.
• Photocell keeps the lighting off during daylight hours.
This package includes:
Lamp Holders
Cover
Plate
Sensor
Light Control
Requirements
• The light control requires 120-volts AC.
• If you want to use Manual Mode, the control must be
wired through a switch.
• Some codes require installation by a qualified
electrician.
• This product is intended for use with a junction box
marked for use in wet locations.
• The backplate has knockouts so the sensor can be
mounted on most junction boxes.
• In some applications a universal adaptor plate may
be needed. Adaptors are available at home centers
and electrical supply stores.
© 2012 HeathCo LLC
4 Mounting
Screws (2 sizes)
Gasket
2 Wire
Connectors
OPERATION
Mode:
On-Time
Test
5 Seconds
Auto
1, 5, or 10 Min
Manual
Until Dawn*
* resets to Auto Mode at dawn.
Note: When first turned on wait about 1
the circuitry to calibrate.
Put the ON-TIME switch on the bottom
of the sensor in the TEST position.
Put the ON-TIME switch in the 1, 5,
or 10 minute position.
MANUAL MODE
Manual mode only works at night
because daylight returns the sensor
to AUTO.
Flip the light switch off for one second
then back on to toggle between AUTO
and MANUAL MODE.
Manual mode works only with the
ON-TIME switch in the 1, 5, or 10
position.
Mode Switching Summary
TEST
AUTO
MANUAL MODE
* If you get confused while switching modes, turn the
power off for one minute, then back on. After the cali-
bration time the control will be in the AUTO mode.
Works:
Day Night
x
/
minutes for
1
2
TEST
ON-TIME
10 5 1 TEST
AUTO
ON-TIME
10 5 1 TEST
1 Second OFF
then...
... back on.
Move ON-TIME Switch to
1, 5, or 10 minutes
Flip light switch off
for one second then
back on*
204020-01A
x
x
x
Advertisement
Table of Contents

Related Manuals for Heath Zenith 5408


Summary of Contents for Heath Zenith 5408
- Page 1 Control * resets to Auto Mode at dawn. Note: When first turned on wait about 1 minutes for the circuitry to calibrate. Model 5408 TEST ON-TIME Features Put the ON-TIME switch on the bottom • Turns on lighting when motion is detected.
-
Page 2: Installation
INSTALLATION Wire the Light Control For easy installation, select an existing light operated by a wall switch for replacement. WARNING: Turn power off at circuit breaker or fuse. For best performance, mount the fixture about 8 feet (2.4 m) above the ground. NOTE: If fixture is mounted ❒ Remove the existing light fixture. -
Page 3: Test And Adjustment
TEST AND ADJUSTMENT ❒ Loosen the clamp screw in the Clamp sensor ball joint and gently Screw rotate the sensor. ❒ Turn on the circuit breaker and light switch. ❒ Walk through the coverage Ball NOTE: Sensor has a 1 minute warm up period area noting where you are Joint... -
Page 4: Troubleshooting Guide
TROUBLESHOOTING GUIDE SYMPTOM POSSIBLE CAUSE SYMPTOM POSSIBLE CAUSE Lights will not come 1. Light switch is turned off. Lights stay on 1. A flood lamp is positioned too close to 2. F l o o d l i g h t i s l o o s e o r continuously. -
Page 5: Two Year Limited Warranty
TWO YEAR LIMITED WARRANTY This is a “Limited Warranty” which gives you specific legal rights. You may also have other rights which vary from state to state or province to province. For a period of two years from the date of purchase, any malfunction caused by factory defective parts or workmanship will be corrected at no charge to you. - Page 6 Manual y Control de Luz Hasta el amanecer* *Se pone en Automático al amanecer. Nota: Cuando lo prenda por primera vez espere 1 Modelo 5408 minutos para que el circuito se claibre. Para PRUEBA: Características ON-TIME • Prende la luz cuando detecta movimiento.
- Page 7 INSTALACION Conecte el Control de Luz Para una fácil instalación escoja una luz con un ADVERTENCIA: Desconecte la energía en interruptor de pared. el fusible o cortacircuitos. Para un mejor funcionamiento, instale el aparato a casi 2,4 m del suelo. NOTA: Si el aparato está instalado a ❒ Quite el aparato de luz existente.
-
Page 8: Prueba Y Ajuste
PRUEBA Y AJUSTE ❒ Afloje el tornillo sujetador Tornillo en la unión esférica y gire Sujetador ❒ Prenda el cortacircuitos y el interruptor de luz. despacio el detector. Unión ❒ Camine por el área a prote- NOTA: El detector tiene un período de cerca de 1 Esférica gerse y dése cuenta dónde minutos de calentamiento antes de detectar... -
Page 9: Guia De Investigacion De Averias
GUIA DE INVESTIGACION DE AVERIAS SINTOMA POSIBLE CAUSA SINTOMA POSIBLE CAUSA La luz no se en- 1. El interruptor de luz está apaga- La luz se 1. Un faro está colocado demasiado cerca ciende. queda al detector o apunta a objetos cercanos prendida 2. - Page 10 GARANTÍA LIMITADA A 2 AÑOS Esta es una “Garantía Limitada” que le da a Ud. derechos legales específicos. Usted puede también tener otros derechos que varían de estado a estado o de provincia a provincia. Por un período de 2 años desde la fecha de compra, cualquier mal funcionamiento ocasionado por partes defectuosas de fábrica o mano de obra será...
- Page 11 1, 5 ou 10 Min Manuel au choix, amanecer* détecteur de mouvement * Revient au mode automatique au lever du soleil. Note: Après mise en circuit, attendre enfiron Modèle 5408 minute pour que l’étalonnage du circuit soit complété. Caractéristiques ESSAI •...
- Page 12 INSTALLATION Câblage de la Commande D’Éclairage Pour faciliter l’installation, choisir un appareil d’éclairage MISE EN GARDE : Coupez l’alimentation au devant être remplacé et qui est déjà commandé par un disjoncteur ou au fusible. interrupteur. Pour assurer un rendement maximal, monter l’appareil ❒...
-
Page 13: Essais Et Réglages
ESSAIS ET RÉGLAGES ❒ Desserrer la vis de blocage Vis de de la rotule et faire pivoter le blocage ❒ Mettre en circuit le disjoncteur et l’interrupteur détecteur pour pointer. d’éclairage. Rotule ❒ Marcher dans la zone de NOTE: Le capteur doit se réchauffer 1 minute avant couverture et noter à... -
Page 14: Guide De Dépannage
GUIDE DE DÉPANNAGE SYMPTÔME CAUSE POSSIBLE SYMPTÔME CAUSE POSSIBLE L’éclairage ne s’al- 1. L’interrupteur d’éclairage est hors L’éclairage reste 1. Un projecteur est situé trop près du lume pas. tension. allumé continuel- détecteur ou pointé vers des objets lement. 2. Le projecteur est dévissé ou et la chaleur déclenche le détecteur. -
Page 15: Garantie Limitée De 2 Ans
GARANTIE LIMITÉE DE 2 ANS Il s’agit d’une « Garantie limitée » qui vous confère des droits juridiques spécifiques.Vous pouvez également jouir d’autres droits, variables d’une province à l’autre. Pendant une période de 2 ans à compter de la date d’achat, toute anomalie de fonctionnement imputable à... - Page 16 Purchase Information Información de la compra Renseignements d’achat Model #: _________________ Date of Purchase: ______________ Nº de modelo / N° de modèle Fecha de compra / Date d’achat Staple Purchase Receipt Here Engrape aquí el recibo de compra Agrafez le reçu d’achat ici PLEASE KEEP YOUR DATED SALES RECEIPT, IT IS REQUIRED FOR ALL WARRANTY REQUESTS.