Table of Contents
Advertisement
Available languages
Available languages
Quick Links
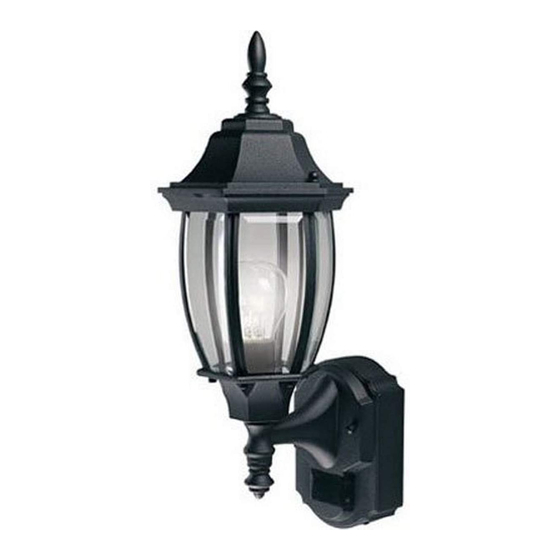
D
B
ual
rite
Sensing Diecast
Lantern
Items
Models
066799
SH-4192-BK-A
067208
SH-4192-WH4-A
Questions or problems? Before returning
to your retailer, refer to the troubleshooting
guide in this manual or call our technical ser-
vice department at 1-800-858-8501 (English
speaking only), 8:00 am to 5:00 pm, CST,
Monday – Friday.
Features
• Light comes on when motion is detected.
• Automatically turns light off.
• Dusk Accent lighting.
• Photocell keeps the light off during daylight
hours.
Package Contents
• Lantern
• Easy to use Universal Mounting Bracket
(X-bar)
• Mounting Hardware
• Wire Connectors
Before installation, record the model number
from back of fixture below. Attach receipt in
case of possible warranty issues.
© 2012 HeathCo LLC
Motion
®
Requirements
• The light control requires 120 volts AC.
• If you want to use Manual Mode, the control
must be wired through a switch.
• Some electrical codes require installa-
tion by a qualified electrician.
OPERATION
Mode:
On-Time
Test
5 Seconds
Auto
1, 5, or 10 Min
Manual
To Dawn*
Accent 3, 6 Hr, to Dawn
* resets to Auto Mode at dawn.
Note: When first turned on wait about 1
minutes for the circuitry to calibrate.
Set the ON-TIME switch
on the bottom of the cover
plate to TEST.
Set ON-TIME switch to
1, 5, or 10 minutes.
MANUAL MODE
Manual mode only works at
night because daylight re-
turns the sensor to AUTO.
Flip the light switch off for
one second then back on to
toggle between AUTO and
MANUAL MODE.
Manual mode works only with
the ON-TIME switch in the 1,
5, or 10 position.
Works: Day Night
x
TEST
ON-TIME
TEST 1 5 10 MIN
AUTO
ON-TIME
TEST 1 5 10 MIN
1 Second
OFF then...
... back on.
200477-02A
x
x
x
x
/
1
2
Advertisement
Table of Contents

Related Manuals for Heath Zenith Secure Home SH-4192-BK-A


Summary of Contents for Heath Zenith Secure Home SH-4192-BK-A
- Page 1 Requirements • The light control requires 120 volts AC. • If you want to use Manual Mode, the control must be wired through a switch. Motion ® • Some electrical codes require installa- rite tion by a qualified electrician. Sensing Diecast OPERATION Lantern Mode:...
-
Page 2: Installation
Mode Switching Summary 1. Remove two nuts. 2. Remove X-bar. TEST ON-TIME Switch at 1, 5, or 10 minutes AUTO Flip light switch 3. Tighten screws off for one second finger tight. MANUAL MODE then back on* * If you get confused while switching modes, SENS turn the power off for 1 minutes, then... - Page 3 WIRING Twist the junction box wires and the fixture wires together as shown below. Secure with Note: All wiring should be run in accordance wire connectors. If you have a metal junction with the National Electrical Code through box, you may not need the green “pigtail”. If conduit or another acceptable means.
-
Page 4: Optional Wiring
OPTIONAL WIRING This fixture is provided with a sensor rated for 360 Watts. Since the fixture is only rated 100 Watts (180 Watts candelabra), 260 Watts (180 Watts candelabra) of additional load may be controlled by this sensor. When determining what a fixture is rated for, do not simply look at the rating on the lamp in the fixture. -
Page 5: Complete The Installation
COMPLETE THE INSTALLATION 1. Stuff the wires into the junction box. Make 2. Install light bulb. See fixture markings for sure none of the wires get pinched. proper bulb type and wattage. 3. Install the fixture top. Secure with decorative screws. 4. - Page 6 TESTING The detector is less sensitive to motion di- rectly towards it and more sensitive to across 1. Turn on the circuit breaker and light motion. switch. Note: Sensor has a 1 minute warm up pe- Motion riod before it will detect motion. When Motion first turned on wait 1 minutes.
-
Page 7: Specifications
SPECIFICATIONS Range ..Up to 30 ft. (9.1 m) [varies with surrounding temperature]. Sensing Angle ..Up to 180° Electrical Load ..See rating on fixture for maximum wattage. -
Page 8: Technical Service
TECHNICAL SERVICE Please call 1-800-858-8501 (English speaking only) for assistance before returning product to store. If you experience a problem, follow this guide. You may also want to visit our Web site at: www.hzsupport.com. If the problem persists, call* for assistance at 1-800-858-8501 (English speaking only), 8:00 AM to 5:00 PM CST (M-F). - Page 9 FUNCIONAMIENTO Modalidad: A tiempo: Trabaja: Día Noche Prueba 5 segundos Autom. 1, 5 o 10 min. Farol D ® Manual Hasta el rite amanecer* fundición con detector de Adorno 3, 6 hrs, hasta el amanecer movimiento *Se pone en Automático al amanecer. Articulos Modelos Nota: Cuando lo prenda por primera vez es-...
- Page 10 Resumen de las modalidades del 1. Quite las 2. Quite la banda dos tuercas. interruptor “X” de montaje. PRUEBA Mueva el interruptor de tiempo (ON-TIME) a 1, 5 o 10 minutos AUTOM. Apague el interruptor por un segundo y 3. Ajuste los tornillos tan préndalo de nuevo* MODO sólo con los dedos.
- Page 11 CABLEADO Tuerza los cables de la caja de empalme con los cables del aparato, como se muestra Nota: Todo el cableado debe realizarse de abajo. Asegúrelos con conectores de cables. acuerdo con el Código Eléctrico Nacional Si tiene una caja de empalme de metal, no usando tubería o algún otro medio aceptable.
- Page 12 CONEXION ALTERNA Este aparato viene con un detector con una potencia de 360 Vatios. Puesto que el aparato tiene sólo una potencia de 100 Vatios (180 vatios candelabro), la carga adicional de 260 Vatios (180 vatios candelabro) puede ser controlada por el detector. Cuando desee determinar la clasificación de un aparato no vea tan sólo la potencia de la lámpara.
-
Page 13: Complete La Instalacion
COMPLETE LA INSTALACION 1. Meta los cables en la caja de empalme. 2. Instale la bombilla. Vea las marcaciones Asegúrese que los cables que no estén en el aparato para el tipo y vataje correcto pinchados. de la bombilla. 3. Instale la parte de arriba. Asegúrela con tornillos decorativos. - Page 14 PRUEBA El detector es menos sensible al movimiento que se dirige directamente hacia él. 1. Prenda el cortacircuitos y el interruptor de luz. Nota: El detector tiene un período de cerca Movimiento de 1 minutos de calentamiento Movimiento antes de detectar movimiento. Cuando lo prenda por primera vez, Detector espere 1...
-
Page 15: Especificaciones
ESPECIFICACIONES Alcance ......Hasta 9.1 m (varía con la temperatura del medio ambiente). Angulo de detección ..Hasta 180° Carga Eléctrica ....Vea el número máximo de vatios en los valores nominales del artefac- Capacidad del Detector ..Hasta un máximo de 360 Vatios (3,0 A.) de tungs- teno incandescente Requisitos de Energía ..120 VCA, 60 Hz Fases de Operación ..PRUEBA, AUTOMATI-... -
Page 16: Servicio Técnico
SERVICIO TÉCNICO Favor de llamar al 1-800-858-8501 (sólo para hablar en inglés) para pedir ayuda antes de devolver el producto a la tienda. Si tiene algún problema, siga esta guía. Usted puede también visitar nuestro sitio Web: www.hzsupport.com. Si el problema continúa, llame al 1-800-858-8501 (sólo para ha- blar en inglés), de 8:00 AM a 5:00 PM CST (L-V). - Page 17 • Certains codes de bâtiment locaux peu- vent exiger que l’installation soit faite par un électricien qualifié. FONCTIONNEMENT Lanterne moulée sous En fonction : pression D à rite Mode : Temps en circuit : jour nuit Essai 5 secondes détecteur de mouvement Auto 1, 5, ou 10 min.
- Page 18 Résumé du mode de commutation 1. Enlever les 2. Enlever la plaque deux écrous. de montage. TEST Placer l’interrupteur ON- TIME à 1, 5 ou 10 minutes AUTO Mettre l’interrupteur hors circuit pendant une seconde, puis le PRIORITÉ MANUELLE remettre en circuit * Si vous ne savez plus dans quel mode 3.
- Page 19 CÂBLAGE Torsadez ensemble les fils de la boîte de jonction et ceux du luminaire comme indiqué Note : Tous les fils doivent être installés ci-dessous. Utilisez des serre-fils. Si la boîte dans un conduit ou un autre dispositif ac- de jonction est en métal, vous pourriez néces- ceptable, conformément au Code national siter une «queue de cochon»...
- Page 20 CÂBLAGE FACULTATIF Ce luminaire est pourvu d’un capteur de 360 W. Puisque le luminaire a une intensité de seulement 100 W (180 W pour le candélabre), un luminaire additionnel de 260 W (180 W pour le candélabre) peut être contrôlé par ce capteur. Lorsque vous déterminez l’intensité...
- Page 21 COMPLÉTEZ L’INSTALLATION 1. Insérez les fils dans la boîte de jonction. 2. Installez la lampe. Consultez l’étiquette Assurez-vous qu’aucun fil n’est pincé. apposée sur le luminaire pour connaître le type et la puissance de lampe appro- priés. 3. Installez le dessus du luminaire. Fixez avec les vis décoratives.
- Page 22 ESSAIS Le détecteur est moins sensible au mouve- ment dans sa direction. 1. Mettre en circuit le disjoncteur et l’in- terrupteur d’éclairage. Mouvement Note : Le capteur doit se réchauffer 1 minute avant de pouvoir détecter le mou- Mouvement vement. Lorsque l’appareil est mis en circuit, attendre 1 minute.
-
Page 23: Guide De Dépannage
FICHE TECHNIQUE Portée ... . .Jusqu’à 9,1 m (varie selon la température ambiante) Angle de détection ..jusqu’à 180° Charge électrique ..Voir la capacité sur l’appareil pour la puissance maxi- Capacité... -
Page 24: Service Technique
SERVICE TECHNIQUE Veuillez faire le 1 800 858-8501 (service en anglais seulement) pour obtenir de l’aide avant de retourner l’article au magasin. En cas de problème, suivez ce guide. Vous pouvez aussi visiter notre site Web à www. hzsupport.com. Si le problème persiste, composez* le 1 800 858-8501 (service en an- glais seulement), entre 8 h 00 et 17 h 00, HNC, du lundi au vendredi.