Table of Contents
Advertisement
Available languages
Available languages
Quick Links
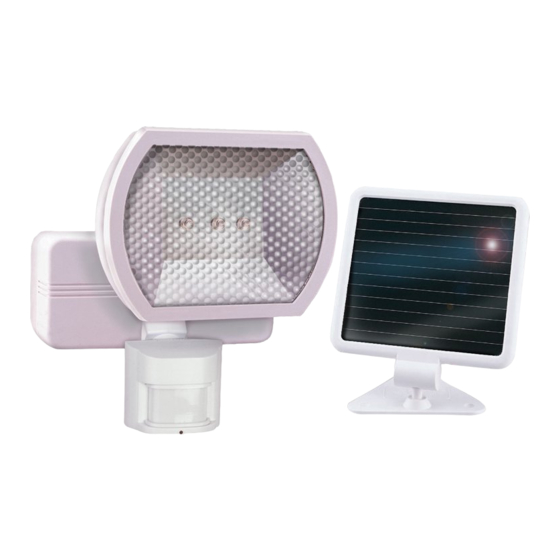
Solar Powered
Motion Sensor Light
Model 7101
FeatureS
• Turns on light when motion is detected.
• Automatically turns light off.
• Photocell keeps the light off during daylight hours.
• Battery Protection Circuitry. Unit will shut down when
battery is low. Unit will automatically resume operation
when battery is recharged to a safe level.
requireMentS
• Do not turn the light on before the battery is fully charged.
Charge the battery by keeping the switch in the OFF
position. Plug the solar panel cable into the bottom of
the battery case. Point the solar panel directly at the
noon sun for 3 sunny days. If not fully charged, the unit
will not work.
• When FULLY charged, the solar light will operate a
maximum of 15 days without sunlight. Actual operating
time will vary depending upon how frequently the light
is triggered.
unPacking
Be sure to remove all contents from packaging and verify
all items are present before assembling this light fixture.
This package includes the following items:
2. Solar Panel
1. Solar Light Fixture
Battery Case
Light
Sensor
3. Mounting Screws (2 sizes)
Round Head Screw (2)
Tapered Screw (3)
© 2008 HeathCo LLC
inStaLLatiOn
For best performance, mount the fixture about 8 feet (2.4
m) above the ground.
Mounting Holes (3)
Three Mounting Holes for Solar Panel Base
1. Mount solar panel base on a solid surface using three
tapered screws. Adjust the panel to point directly at
the noon sun. Avoid obstructions such as trees or
buildings that may block sun light. Allow for enough
wire to reach the case.
Note: You will want to re-aim the solar panel as the
seasons change to keep it pointed directly at the noon
sun.
Mounting
5
/
"
3
Holes (2)
4
2. Mount the battery case on a solid surface using two
round-head screws and the keyholes on the back of
the case.
3. Adjust sensor. For proper operation, the sensor head
must be rotated so that the sensor controls face down-
ward as shown below.
IMPORTANT: the controls must face downward to
avoid damage from rain. If controls face upward, move
sensor to the original down position, rotate 180°, then
raise to the position shown below.
Light Joint Clamps
Light
Battery Case
Sensor
Lens Removal
Tab
Sensor Joint
Clamp
Controls
4. Plug the solar panel cable into the bottom of the battery
case. IMPORTANT: allow the battery to charge
with three days of sunshine before testing.
598-1344-00
Advertisement
Table of Contents

Related Manuals for Heath Zenith Motion Sensor Light 7101


Summary of Contents for Heath Zenith Motion Sensor Light 7101
- Page 1 Solar Powered Motion Sensor Light Model 7101 FeatureS • Turns on light when motion is detected. • Automatically turns light off. • Photocell keeps the light off during daylight hours. • Battery Protection Circuitry. Unit will shut down when battery is low. Unit will automatically resume operation when battery is recharged to a safe level.
-
Page 2: Test And Adjustment
teSt anD aDJuStMent NOTE: Sensor has a 30 second warm up period before it will detect motion. When switching modes wait 30 seconds. 1. Slide the sensor switch to the TEST position. 2. Place the RANGE adjustment in the medium position (halfway between MIN and MAX position). -
Page 3: Battery Replacement
batterY rePLaceMent This solar light contains a rechargeable battery that can be replaced if needed. To replace the battery follow the steps below. IMPORTANT: the sealed lead-acid battery must be recycled or disposed of properly. 1. Remove rear battery cover. Press in the two catch releases on the cover and remove the cover. -
Page 4: Troubleshooting Guide
SYMPtOM POSSibLe cauSe Lights will not come on. 1. Battery is dead. 2. Sensor is turned OFF. 3. Daylight turn-off is in effect. 4. Incorrect aiming. Lights come on in daylight. 1. Light control may be installed in a relatively dark location. -
Page 5: Instalación
Luz detectora de movimiento con alimentación solar Modelo 7101 caracteríSticaS • Prende la luz cuando detecta movimiento. • Apaga la luz automáticamente. • La fotocélula mantiene la luz apagada durante el día. • Circuito protector de la batería. La unidad se apagará automáticamente cuando la batería está... -
Page 6: Prueba Y Ajuste
IMPORTANTE: Los controles deben estar hacia abajo para que la lluvia no los dañe. Si los controles están hacia arriba, mueva el detector a su posición original de hacia abajo, gírelo por 180°, luego súbalo a la posición que se muestra abajo. Sujetadores de la unión con la luz Caja de la batería Detector... -
Page 7: Cambio De La Batería
FunciOnaMientO Ponga el interruptor del detector en la fase de 1 o 5 mi- nutos para su funcionamiento normal. Si no se necesita la luz, ponga el interruptor en la posición OFF. Modalidad: Duración Prueba 5 Seg. autom. 1 o 5 minutos PuntOS que Se Deben recOrDar •... -
Page 8: Servicio Técnico
SíntOMa POSibLe cauSa Las luces no se prenden. 1. La batería está muerta. 2. El detector está APAGADO. 3. La modalidad de apagado durante el día está en efecto. 4. Está apuntando incorrectamente. Las luces se prenden 1. El control de luz puede estar instalado en durante el día. -
Page 9: Installation
Éclairage à détecteur de mouvements, à énergie solaire Modèle 7101 caractÉriStiqueS • Allume l’éclairage lorsqu’un mouvement est détecté. • Éteint automatiquement l’éclairage. • Photocellule qui maintient l’éclairage éteint pendant la période de lumière du jour. • Circuit de protection de la pile. L’appareil se désactive lorsque la pile est faible, puis se réactive automatique- ment lorsque la puissance de la pile est suffisante. - Page 10 IMPORTANT : Les commandes doivent pointer vers le sol pour éviter qu’elles ne soient endommagées par la pluie. Lorsque les commandes pointent vers le haut, replacer le capteur à la position originale, le faire pivoter de 180 °, puis le relever comme indiqué dans l’illustration ci-dessous.
-
Page 11: Remplacement De La Pile
FOnctiOnneMent Placez le commutateur du détecteur en position 1 ou 5 minutes pour le fonctionnement normal. Si vous n’avez pas besoin d’éclairage, placer le commutateur en position OFF. Mode: Temps en circuit En fonction: Jour Nuit essal 5 Secondes auto 1 ou 5 minutes raPPeL •... -
Page 12: Guide De Dépannage
SYMPtÔMe cauSe POSSibLe L’éclairage ne s’allume 1. La pile est à plat. pas. 2. Le capteur est en position OFF. 3. La fonction de fermeture pendant le jour est activée. 4. Mauvaise orientation. L’éclairage s’allume en 1. La commande peut être installée dans un plein jour.