Kenwood TH-F6A Instruction Manual
Multi/dual-band portable transceiver
Hide thumbs
Also See for TH-F6A:
- Service manual (157 pages) ,
- Instruction manual (64 pages) ,
- Quick reference (2 pages)

Related Manuals for Kenwood TH-F6A


Summary of Contents for Kenwood TH-F6A
-
Page 1: Instruction Manual
INSTRUCTION MANUAL MULTI-BAND PORTABLE TRANSCEIVER TH-F6A DUAL-BAND PORTABLE TRANSCEIVER TH-F7E KENWOOD CORPORATION © B62-XXXX-XX (K) 09 08 07 06 05 04 03 02 01 00... -
Page 2: Supplied Accessories
THANK YOU THANK YOU SUPPLIED ACCESSORIES Thank you for choosing this KENWOOD TH-F6A/ TH- After carefully unpacking the transceiver, identify the F7E transceiver. It has been developed by a team of items listed in the table below. We recommend you... -
Page 3: Models Covered By This Manual
NOTICE TO THE USER The models listed below are covered by this manual. One or more of the following statements may be applicable for this equipment. TH-F6A: 144 MHz/ 220 MHz/ 440 MHz FM Multi-band Portable Transceiver FCC WARNING TH-F7E: 144 MHz/ 430 MHz FM This equipment generates or uses radio frequency energy. -
Page 4: Installing The Antenna
PREPARATION 3 Align the two tabs on the battery case cover, then INSTALLING THE Li-ion BATTERY PACK close the cover until the locking tabs click. Note: Because the battery pack is provided uncharged, you must charge the battery pack before using it with the transceiver. To charge the battery pack, refer to “CHARGING THE Li-ion BATTERY PACK”... -
Page 5: Connecting To A Regulated Power Supply
Only use power supplies recommended by your authorized of battery packs may damage the charger and battery pack. KENWOOD dealer. The supply voltage must be between 5.5 V and 16 V to prevent damaging the transceiver. If input voltage exceeds approximately 18 V, warning beeps sound and “VOLTAGE... -
Page 6: Your First Qso
Press [BAND] until you select the amateur radio FIRST QSO band you wish to operate. Are you ready to give your TH-F6A/ TH-F7E a quick t Turn the Tuning control to select the receive try? Reading this page should get your voice on the frequency. -
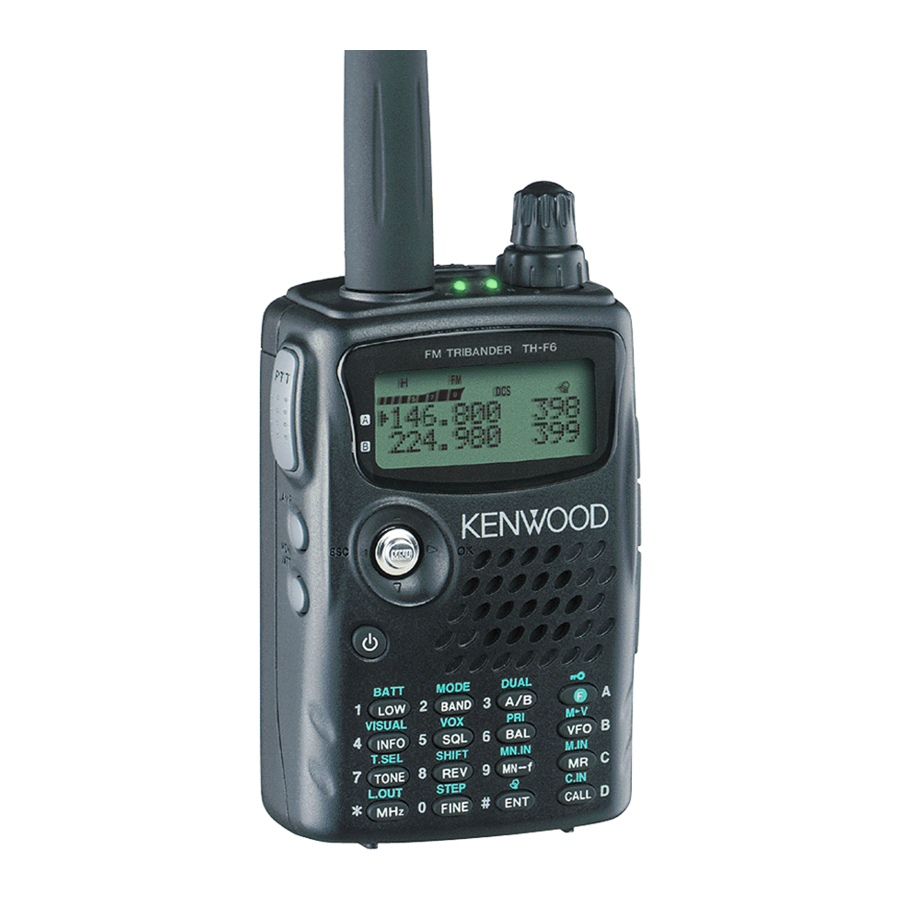
Page 7: Getting Acquainted
GETTING ACQUAINTED KEYS AND CONTROLS Antenna Tuning Control VOL Control PTT switch Display SP/MIC jack LAMP Key Menu/Cursor Keys Speaker/ Mic. MONI Key Power Switch DC IN jack Keypad A/ B-band status LEDs... -
Page 8: Display
4 GETTING ACQUAINTED DISPLAY 19 20 q E L Appears when the transmit output power is set to Low Appears when the Key lock function is activated (“L”) or Economic Low (“E L”) {pages 7, }. {page xx}. Appears when the transmit output power is set to Appears when the function key is pressed. -
Page 9: Basic Operation
4 GETTING ACQUAINTED • The higher the level, the stronger the signals BASIC OPERATION must be, to receive. SWITCHING POWER ON/ OFF • 6 different levels can be set (OPEN: unmuted ~ 1 Press [ ] (POWER) briefly to switch the || || || || || || : maximum). -
Page 10: Selecting A Frequency
4 GETTING ACQUAINTED 1 Press [MHz]. TRANSMITTING • A MHz digit blinks. 1 To transmit, hold the transceiver approximately 5 cm (2 inches) from your mouth, then press and 2 Turn the Tuning control or press [ ]/[ ] to select hold the PTT switch and speak into the the desired MHz digit. - Page 11 4 GETTING ACQUAINTED Example 2 To enter 439.000 MHz: Key in Display [ENT] – – – – – – [4], [3], [9] 4 3 9. – – – [ENT] 4 3 9. 0 0 0 Example 3 ( f > 1000 MHz) To enter 1250.500 MHz (B-band only): Key in Display...
-
Page 12: Menu Setup
MENU SETUP WHAT IS A MENU? SELECTING A MENU LANGUAGE You can select either English or Japanese (katakana) Many functions on this transceiver are selected or for the menu description. To switch the language: configured via a software-controlled Menu, rather than through the physical controls of the transceiver. - Page 13 6 MENU SETUP i t c — e l i t t i i n i c i t o l l v i t y t i s i t v i t t f i...
-
Page 14: Alphabetical Function List
6 MENU SETUP ALPHABETICAL FUNCTION LIST — —... -
Page 15: Operating Through Repeaters
144 MHz band is 600 kHz (All models); the default on the 430/ 440 MHz band is 5 MHz (TH-F6A) or 1.6 MHz Select a receive frequency. (TH-F7E); the default on the 220 MHz band is 1.6 MHz (TH-F6A). - Page 16 This function automatically selects an offset direction, OFF). according to the frequency that you select on the 144 MHz and 220 MHz (TH-F6A only) bands. The • “T” appears when the Tone function is ON. transceiver is programmed for offset direction as shown below.
-
Page 17: Tone Freq. Id Scan
5 OPERATING THROUGH REPEATERS REVERSE FUNCTION TONE FREQ. ID SCAN The reverse function exchanges a separate receive This function scans through all tone frequencies to and transmit frequency. So, while using a repeater, identify the incoming tone frequency on a received you can manually check the strength of a signal that signal. -
Page 18: Simplex & Repeater Or Odd-Split Memory Channel
MEMORY CHANNELS In memory channels, you can store frequencies and STORING SIMPLEX FREQUENCIES OR related data that you often use. Then you need not STANDARD REPEATER FREQUENCIES reprogram those data every time. You can quickly recall a programmed channel through simple 1 Press [VFO]. -
Page 19: Memory Recall Mode
8 MEMORY CHANNELS 4 Press [MR] to erase the channel data. RECALLING A MEMORY CHANNEL • The contents of the memory channel are There are 2 ways of recalling the desired memory erased. channel. • To quit clearing the memory channel, press any key other than [MR]. -
Page 20: Naming A Memory Channel
8 MEMORY CHANNELS NAMING A MEMORY CHANNEL Available characters using the Tuning control You can name memory channels using up to 8 Available characters alphanumeric characters. When you recall a named memory channel, its name appears on the display in place of the stored frequency. -
Page 21: Memory Transfer
8 MEMORY CHANNELS MEMORY CHANNEL GROUPS ERASING MEMORY CHANNELS USING MEMORY GROUP DELETE 400 memory channels have been divided into 8 groups of 50. Group 0 contains memory channel Instead of erasing each unnecessary channel one by numbers 0 ~ 49, group 1 is 50 ~ 99, group 2 is 100 ~ one, you can erase an entire group of memory 149, and so on. - Page 22 The default Call channel frequencies are 144.000 MHz for the 144 MHz band, 223.000 MHz for 220 MHz band (TH-F6A), 430.000 MHz (TH-F7E)/ 440.000 MHz (TH-F6A) for the 430/ 440 MHz band. Each Call channel can be reprogrammed either as a simplex or odd-split channel.
- Page 23 8 MEMORY CHANNELS Reprogramming the Information Channel INFORMATION CHANNELS 1 Press [VFO]. 10 Information channels are available for storing radio broadcasting service frequencies, such as 2 Select a desired frequency and mode. weather radio stations and community FM 3 Press [F]. broadcasting stations.
-
Page 24: Channel Display
8 MEMORY CHANNELS CHANNEL DISPLAY While in this mode, the transceiver displays only memory channel numbers (or memory names if stored) instead of frequencies. 1 Press [ ] (POWER) + [A/B]. • The transceiver displays the memory channel number in place of the operating frequencies. 2 Turn the Tuning control or press [ ]/ [ ] to select your desired memory channel number. -
Page 25: Normal Scan
SCAN Scan is a useful function for hands-off monitoring of NORMAL SCAN your favorite frequencies. By becoming comfortable with all types of Scan, you will increase your operating When you are operating the transceiver in VFO mode, efficiency. 3 types of scanning are available: Band Scan, Program Scan, and MHz Scan. -
Page 26: Program Scan
14 SCAN PROGRAM SCAN MHz SCAN You can limit the scanning frequency range. There MHz Scan allows you to scan an entire 1 MHz are 10 memory channel pairs (L0/ U0 ~ L9/ U9) frequency range within the current VFO frequency. available for specifying the start and end frequencies. -
Page 27: Memory Scan
14 SCAN Note: MEMORY SCAN If the Fine Tuning function is ON, you cannot perform the Group Scan. Memory Scan monitors all memory channels in which If you press [MONI], All-Channel Scan temporarily pauses. you have stored frequencies (All-Channel Scan) or Release [MONI] to resume scanning. -
Page 28: Priority Scan
144 MHz, 430/ 440 MHz, and 220 frequency activities while monitoring the A and MHz (TH-F6A only) bands {page 19}. You can B-bands. In this case, use the Priority Scan function. monitor one of these Call channels and the current It checks the activities of Pr1 and Pr2 channels every operating frequency alternatively. -
Page 29: Visual Scan
14 SCAN Using Priority Scan VISUAL SCAN 1 Press [F], [BAL]. While you are receiving, Visual Scan allows you to monitor frequencies near the current operating frequency. Visual Scan graphically displays the busy status of all frequencies in the selected range. You will see a maximum of 7 segments, for each frequency (channel) point that represent relative S- meter levels. -
Page 30: Scan Resume Method
14 SCAN Using Visual Scan (Memory Channel) SCAN RESUME METHOD 1 Press [MR] to enter Memory Recall mode. The transceiver stops scanning at the frequency (or memory channel) where a signal is detected. It then 2 Turn the Tuning control or press [ ]/ [ ] to continues or stops scanning according to which select your desired center memory channel. -
Page 31: Selective Call
SELECTIVE CALL CTCSS and DCS CTCSS (Continuous Tone Coded Squelch System) You may sometimes want to hear calls from only specific persons or groups. In this case, use the A CTCSS tone is a sub-audible tone and is selectable selective call function. This transceiver is equipped from among the 42 tone frequencies listed in the with CTCSS (Continuous Tone Coded Squelch table on the following page. -
Page 32: Ctcss Freq. Id Scan
7 SELECTIVE CALL CTCSS FREQ. ID SCAN DCS (Digital Coded Squelch) This function scans through all CTCSS frequencies to DCS is similar to CTCSS. However, instead of using identify the incoming CTCSS frequency on the an analog signal, it uses a continuous sub-audible received signal. - Page 33 7 SELECTIVE CALL DCS CODE ID SCAN This function scans through all DCS codes to identify the incoming DCS code on the received signal. You may find this useful when you cannot recall the DCS code that the other persons in your group are using. 1 While in DCS mode, press [TONE] (1 s) to start the DCS Code ID Scan function.
-
Page 34: Dtmf Functions
DTMF FUNCTIONS The keys on the keypad also function as DTMF keys; AUTOMATIC DIALER the 12 keys found on a push-button telephone plus 4 If you use the 10 dedicated memory channels to store additional keys (A, B, C, D). This transceiver also DTMF numbers, you need not remember a long string provides 10 dedicated DTMF memory channels. - Page 35 8 DTMF FUNCTIONS • Each press of [t t t t t ] causes the cursor to Adjusting the DTMF tone tranmission speed move backward. This transceiver allows you to configure the DTMF number transmission speed between Fast (default) and Slow. If a repeater cannot respond to the fast speed, adjust this parameter.
- Page 36 The frequency for the B-band appears the bottom part of the display. Although A-band transceiver covers only 144 MHz/ 220 MHz (TH-F6A only)/ 430/ 440 MHz amateur radio bands in FM mode, B-band receiver can receive from 100 kHz to 470 MHz in SSB, CW, FM, or AM mode.
-
Page 37: Bar Antenna
8 ENHANCED COMMUNICATIONS SELECTING A MODE FOR B-BAND BAR ANTENNA When using B-band, the following receiving mode is Although the supplied wide-band helical antenna is available. used for receiving B-band frequencies, due to the size and length limitation, it may not suitable for the i v i low HF band (below 7 MHz) receiption. -
Page 38: Enhanced Communications
8 ENHANCED COMMUNICATIONS Selecting Fine Tuning Frequency step You can select the Fine Tuning frequency step from 50 Hz, 100 Hz (default), or 1000 Hz. To select the Fine Tuning frequency step size: 1 Select a frequency on the B-band. 2 Press [F], [FINE]. -
Page 39: Operator Conveniences
OPERATOR CONVENIENCES APO (Auto Power OFF) BATTERY SAVER The TH-F6A/ TH-F7E switches OFF automatically if Battery Saver extends the operating time of the no keys or controls are pressed or adjusted for 30 transceiver. It becomes automatically active when minutes (default). 1 minute before the transceiver... -
Page 40: Beat Shift
15 OPERATOR CONVENIENCES The transceiver generates the following warning beeps even if the beep function is turned OFF. • DC voltage error {page 2}. — • PLL circuit malfunctions. Note: A beep output level is linked the VOL control position. BEAT SHIFT Since the transceiver uses a microprocessor to control various functions of the transceiver, the CPU... -
Page 41: Microphone Pf Keys (Optional)
Menu No. 29 (FM NARROW). [2]: VFO/ MR 3 Press [s s s s s ] or [MNU]. [3]: CALL (TH-F6A)/ 1750 Hz (TH-F7E) Note: 4 Turn the Tuning control or press [ ]/ [ ] to select Turn the transceiver OFF before connecting the optional speaker “ON”. -
Page 42: Programmable Vfo
15 OPERATOR CONVENIENCES [0] to select space or 0. Refer to page 17 for the available characters and control keys. 3 To return to normal dual band operation, press [F], PROGRAMMABLE VFO [A/B] again. If you want to limit the operating frequencies within a TIME-OUT TIMER certain range, program the upper and lower frequency limits to the program VFO pamameters. -
Page 43: Volume Balance
15 OPERATOR CONVENIENCES the transceiver. VOLUME BALANCE 1 Press [MNU]. While you are receiving A and B-bands at the same 2 Turn the Tuning control or press [ ]/ [ ] to select time, you may sometimes feel that audio output on Menu No. - Page 44 15 OPERATOR CONVENIENCES normal tone of voice, adjust the setting (default is 4) using the Tuning control or press [ ]/ [ ] until the transceiver reliably switches to transmit mode each time you speak. • The selectable gain range is from 0 (least sensitive) to 9 (most sensitive).
-
Page 45: Control Operation
WIRELESS REMOTE CONTROL (TH-F6A ONLY) If you also have a KENWOOD multi-band mobile 10 Make the transceiver enter Remote Control mode. transceiver, you can control one of its bands by • For the method, refer to the instruction manual sending DTMF tones from this handy transceiver. -
Page 46: Optional Accessories
OPTIONAL ACCESSORIES BT-13 EMC-3 HMC-3 HMC-5 Drycell Battery Case Clip Microphone Headset with VOX/ PTT Headset HS-9 PB-42L PG-2W PG-3J Earphone Li-ion Battery Pack DC Cable Filtered Cigarette Lighter Cable SMC-32 SMC-33 SMC-34 VC-H1 Speaker Microphone Remote Control Speaker Remote Control Speaker Interactive Visual Microphone Microphone (with VOL...