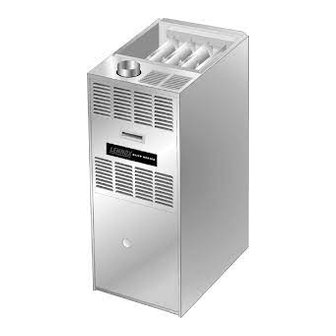
Lennox G50UH Series Installation Instructions Manual
G50uh series
Hide thumbs
Also See for G50UH Series:
- User's information manual (6 pages) ,
- Unit information (43 pages)
Table of Contents
Advertisement
E 2006 Lennox Industries Inc.
Dallas, Texas, USA
RETAIN THESE INSTRUCTIONS
FOR FUTURE REFERENCE
Do not store or use gasoline or other
flammable vapors and liquids in the
vicinity of this or any other ap-
pliance.
Installation and service must be
performed by a qualified installer,
service agency or the gas supplier.
05/09
*2P0509*
INSTALLATION
INSTRUCTIONS
G50UH(X) Series
GAS FURNACE
505,254M
05/2009
Supersedes 08/2006
Table of Contents
Troubleshooting
Start−Up & Performance Check List
WARNING
FIRE OR EXPLOSION HAZARD.
Failure to follow safety warnings exact-
ly could result in serious injury, death,
or property damage.
WHAT TO DO IF YOU SMELL GAS:
D Do not try to light any appliance.
D Do not touch any electrical switch; do not
use any phone in your building.
D Leave the building immediately.
D Immediately call your gas supplier from a
neighbor's phone. Follow the gas supplier's
instructions.
D If you cannot reach your gas supplier, call
the fire department.
Page 1
. . . . . . . . . . . . . . . . . . . . . . . . . . . . . . . .
. . . . . . . . . . . . . . . . . . . . . . . . . .
. . . . . . . . . . . . . . . . . . . . . . . .
. . . . . . . . . . . . . . . . . . . . . . . . . . . . . . .
. . . . . . . . . . . . . . . . . . . . . . . . . . . . . . . . . . . . . . . .
. . . . . . . . . . . . . . . . . . . . . . . . . . . . . . .
. . . . . . . . . . . . . . . . . . . . . . . . . . . . . . . . . . . . . . . . . .
. . . . . . . . . . . . . . . . . . . . . . . . . . . . . . . . . . . .
. . . . . . . . . . . . . . . . . . . . . . . . . . . . . . . . . . . . . . . .
. . . . . . . . . . . . . . . . . . . . . . . . . . . . . . . . . . . . .
. . . . . . . . . . . . . . . . . . . . . . . . . . . . . . . . . . . . . . .
. . . . . . . . . . . . . . . . . . . . . . . . . . . . . . . . . . .
. . . . . . . . . . . . . . . . . . . . . . . .
. . . . . . . . . . . . . . . . . . . . . . . . .
. . . . . . . . . . . . . . . . . . . . . . . . . .
. . . . . . . . . . . . . . . . . . . . . . . .
. . . . . . . . . . . . . . . . . . . . . . . . . . . . . . . . . . . . . . . .
. . . . . . . . . . . . . . . . . . . . . . . . . . . . . . . .
. . . . . . . . . . . . . . . . . . . . . . . . . . . . . . . .
. . . . . . . . . . . . . . . . . . . . . . . . . . . . . . . . .
*P505254M*
Litho U.S.A.
2
. . . . . . . . . . . . . . . . . . . .
3
4
4
4
. . . . . . . . . . .
5
5
. . . . . . . . . . . . . .
6
9
13
13
13
21
22
26
27
28
28
29
33
34
35
. . . . . . . . . . .
35
36
. . . . . . . . . . . . . . . .
40
505,254M
Advertisement
Table of Contents

Related Manuals for Lennox G50UH Series


Summary of Contents for Lennox G50UH Series
-
Page 1: Table Of Contents
INSTALLATION INSTRUCTIONS E 2006 Lennox Industries Inc. Dallas, Texas, USA G50UH(X) Series GAS FURNACE 505,254M 05/2009 Supersedes 08/2006 Litho U.S.A. Table of Contents Unit Dimensions ....... . -
Page 2: Unit Dimensions
G50UH(X) Unit Dimensions − inches (mm) 3−3/4 (95) NOTE − 60C and 60D size units that require air volumes over 1800 cfm (850 L/s) must have one of the following: 1. Single side return air with transition, to accommodate 20 x 25 x 1 in. (508 x 635 x 25 mm) air filter. Required to maintain proper air velocity across the filter. -
Page 3: G50Uh(X) Parts Arrangement
*135 and 155 kBtuh units only −− Flame rollout switches are located on brackets on the inner sides (one Door Interlock Switch on the left and one on the right) of the burner box. FIGURE 1 Page 3 G50UH Series... -
Page 4: G50Uh(X) Gas Furnace
G50UH(X) Gas Furnace CAUTION The G50UH(X) gas furnace is shipped ready for installation As with any mechanical equipment, personal injury in the upflow or horizontal position (left or right). The fur- can result from contact with sharp sheet metal edges. Be careful when you handle this equipment. nace is shipped with the bottom panel in place. -
Page 5: Use Of Furnace As A Construction Heater
Use of Furnace as a Construction Heater In addition to the requirements outlined previously, the fol- Lennox does not recommend the use of G50UH units as a lowing general recommendations must be considered construction heater during any phase of construction. Very... -
Page 6: Combustion, Dilution & Ventilation Air
Water softening chemicals available from address shown below, or contact your De-icing salts or chemicals supervisor. Carbon tetrachloride Lennox Industries Inc. Halogen type refrigerants P.O. Box 799900 Cleaning solvents (such as perchloroethylene) Dallas, TX 75379−9900 Printing inks, paint removers, varnishes, etc. - Page 7 100 square inches (64516 mm they are opened automatically during equipment opera- FIGURE 2 tion. Page 7 G50UH Series...
- Page 8 EQUIPMENT IN CONFINED SPACE CHIMNEY OR ALL AIR FROM OUTSIDE GAS VENT (Inlet Air from Crawlspace and Outlet Air to Ventilated Attic) VENTILATION LOUVERS (Each end of attic) OUTLET WATER FURNACE HEATER INLET VENTILATION LOUVERS (For unheated crawl space) NOTE−The inlet and outlet air openings shall each have a free area of at least one square inch (645 ) per 4,000 Btu (1.17 kW) per hour of the total input rating of all equipment in the enclosure.
-
Page 9: Setting Equipment
Allow for clearances to combustible materials as indicated inch cabinets, or 2 inches if a single wall vent is used on 17−1/2 inch cabinets. on the unit nameplate. Minimum clearances for closet or al- FIGURE 6 cove installations are shown in figure 6. Page 9 G50UH Series... - Page 10 Return Air −− Upflow Applications 5 − Return air from bottom and one side. Refer to Engineering Handbook for additional information. Return air can be brought in through the bottom or either side of the furnace installed in an upflow application. If the Side Return Air furnace is installed on a platform with bottom return, make (with transition and filter)
- Page 11 4 − Adjust the outside nut to the appropriate height and tighten the inside nut to secure the arrangement. FIGURE 11 Page 11 G50UH Series...
- Page 12 This furnace may be installed in either an attic or a crawl- Horizontal Application space. Either suspend the furnace from roof rafters or floor Unit Installed on Platform joists, as shown in figure 12, or install the furnace on a plat- NOTE −...
-
Page 13: Filters
Use fiberglass sealing strips, caulking, or equivalent seal- ing method between the plenum and the furnace cabinet to ensure a tight seal. If a filter is installed, size the return air duct to fit the filter frame. FIGURE 15 Page 13 G50UH Series... - Page 14 Use sheet metal shears to remove the cut out from the side flue transition. If self−drilling screws are used to attach the vent pipe, it is recommended that three be used. Drive one of the cabinet. Use the two provided sheet metal screws to self−drilling screw through the front and one through each install the cut out on the top cap to cover the original flue side of the vent pipe and collar.
- Page 15 Do not install a manual damper, barometric draft regulator, or flue restrictor between the furnace and the chimney. ods. Page 15 G50UH Series...
- Page 16 5 − The entire length of single wall metal vent connector means, except vent connectors of listed type B vent material which shall be assembled according to the shall be readily accessible for inspection, cleaning, manufacturer’s instructions. Joints between sections and replacement.
- Page 17 90° elbows. For each additional 90° elbow or equivalent (for example two 45° elbows equal one 90° elbow) beyond two, the maximum capacity listed in the venting table should be reduced by 10 percent (0.90 x maxi- mum listed capacity). Page 17 G50UH Series...
- Page 18 TABLE 4 Capacity of Type B Double−Wall Vents with Single−Wall Metal Connectors Serving a Single Category I Appliance Vent and Connector Diameter − D (inches) Height Lateral 3 Inch 4 Inch 5 Inch 6 Inch Appliance Input Rating in Thousands of Btu Per Hour (feet) (feet) (feet)
- Page 19 Height Appliance Input Rating in Thousands of Btu Per Hour (feet) (feet) FAN + FAN FAN + NAT FAN + FAN FAN + NAT FAN + FAN FAN + NAT FAN + FAN FAN + NAT Page 19 G50UH Series...
- Page 20 TABLE 7 Vent Connector Capacity Type B Double−Wall Vents with Single−Wall Metal Connectors Serving Two or More Category I Appliances Vent and Connector Diameter − D (inches) Vent Vent Connector Connector 3 Inch 4 Inch 5 Inch 6 Inch Height Height Rise Rise...
-
Page 21: Gas Piping
3900 3700 3450 3250 (76.2) (77.927) (311.48) (218.03) (176.98) (150.07) (134.50) (121.76) (110.43) (104.77) (97.69) (92.03) NOTE − Capacity given in cubic feet (m ) of gas per hour and based on 0.60 specific gravity gas. Page 21 G50UH Series... -
Page 22: Electrical
Left Side Piping AUTOMATIC MANUAL (Standard) GAS VALVE MAIN SHUT−OFF MANUAL (with manual VALVE AUTOMATIC MAIN SHUT−OFF shut−off valve) (With 1/8 in. NPT GAS VALVE VALVE Plugged Tap (with manual (With 1/8 in. NPT Shown) shut−off valve) Plugged Tap Shown) GROUND JOINT UNION... - Page 23 C22.1) for Canada. A green ground wire is 3 − When there is a cooling demand, the indoor blower will provided in the field make−up box. run on the cooling speed. Page 23 G50UH Series...
- Page 24 TYPICAL G50UH(X) FIELD WIRING DIAGRAM FIELD INSTALLED CLASS II 24V FIELD INSTALLED LINE VOLTAGE FIGURE 24 INTEGRATED CONTROL BOARD TERMINAL DESIGNATIONS COOL Blower − Cooling Speed (120VAC) HEAT Blower − Heating Speed (120VAC) PARK Unused Blower (Not energized) Continuous Low Blower Speed Accessory Terminal (120VAC) XFMR Transformer (120VAC)
- Page 25 G50UH(X) Schematic Wiring Diagram FIGURE 26 Page 25 G50UH Series...
-
Page 26: Unit Start−Up
5 − Remove the upper access panel. Unit Start−Up 6 − Honeywell VR8205 Gas Valve with ON/OFF Switch − FOR YOUR SAFETY READ BEFORE LIGHTING Move gas valve switch to OFF. See figure 27. Honeywell VR8205 Gas Valve with Control Knob − WARNING Turn knob on gas valve clockwise to OFF. -
Page 27: Gas Pressure Adjustment
A minimum of 4.5 in. w.c. for natural gas or move thermostat from Heat" to OFF" then back to Heat". Heating sequence then restarts at step 1. 11.0 in. w.c. for LP/propane gas should be maintained. Page 27 G50UH Series... -
Page 28: High Altitude Information
2 − After the line pressure has been checked and ad- Temperature Rise justed, check the manifold pressure. A natural gas to Place the unit into operation with a heating demand. After LP/propane gas changeover kit is required to convert supply and return air temperatures have stabilized, check the unit. -
Page 29: Blower Performance Data
0.30 1340 1180 0.30 1400 1200 1020 0.40 1285 1140 0.40 1345 1170 1000 0.50 1215 1080 0.50 1300 1135 0.60 1150 1015 0.60 1235 1080 0.70 1060 0.70 1165 1020 0.80 0.80 1080 0.90 0.90 Page 29 G50UH Series... - Page 30 NOTES − All air data is measured external to unit with 1 in. cleanable filter (not furnished − field provided) in place. Air volume based on bottom air return air. Actual air volume may vary on side return air applications. G50UH−36C−110 PERFORMANCE G50UH−48C−110 PERFORMANCE Air Volume / Watts at Various Blower Speeds...
- Page 31 1595 1990 1146 1870 1700 1505 2080 1161 1935 1760 1545 1895 1111 1775 1655 1465 2010 1122 1855 1690 1495 1805 1074 1680 1565 1425 1880 1071 1755 1585 1430 1695 1042 1590 1480 1335 Page 31 G50UH Series...
- Page 32 NOTES − All air data is measured external to unit with 1 in. cleanable filter (not furnished − field provided) in place. G50UH−60D−155 PERFORMANCE Air Volume / Watts at Different Blower Speeds Bottom Return Air, Side Return Air with Optional RAB Single Side Return Air −...
-
Page 33: Service
NOx insert to the corbel at the entrance to each NOTE − Use papers or protective covering in front of the fur- heat exchanger section. Carefully remove the NOx in- nace during cleaning. sert from each section. See figure 31. Page 33 G50UH Series... -
Page 34: Planned Service
18− Reconnect vent pipe to combustion air inducer outlet. NOx INSERTS 19− Reconnect gas supply piping. (X models only) 20− Turn on power and gas supply to unit. 21− Set thermostat and check for proper operation. 22− Check all piping connections, factory and field, for gas leaks. -
Page 35: Repair Parts List
Repair Parts List The following repair parts are available through Lennox dealers. When ordering parts, include the complete furnace model number listed on the CSA International nameplate −− Example: G50UH(X)−24A−045−8. All service must be performed by a licensed professional installer (or equivalent), service agency, or gas supplier. - Page 36 SureLight ® Troubleshooting: Heating Sequence of Operation ® SURELIGHT CONTROL HEATING SEQUENCE OF OPERATION NORMAL HEATING MODE ABNORMAL HEATING MODE POWER ON GAS VALVE OFF. COMBUSTION AIR INDUCER ON. INDOOR BLOWER ON. LED #1 ALTERNATING FAST FLASH CONTROL SELF−CHECK OKAY? LED#2 ALTERNATING FAST FLASH CHECK FOR BROKEN IGNITOR OR OPEN IGNITOR CIRCUIT...
- Page 37 HAS CAB SWITCH CLOSED IN 2.5 MINUTES? LED #1 & #2 SIMULTANEOUS SLOW FLASHES. 5-MINUTE PRESSURE SWITCH COMB. AIR INDUCER CONTINUES 5-SECOND WATCHGUARD MODE. POST PURGE AFTER T’STAT DEMAND IS SATISFIED. INDOOR AIR BLOWER COMPLETES SELECTED OFF" DELAY BEFORE SHUTTING OFF. Page 37 G50UH Series...
- Page 38 SureLight ® Troubleshooting: Cooling Sequence of Operation ® SURELIGHT CONTROL COOLING SEQUENCE OF OPERATION NORMAL COOLING MODE ABNORMAL COOLING MODE POWER ON IGNITION CONTROL MAIN POWER ON. GAS VALVE OFF. COMBUSTION AIR INDUCER OFF. INDOOR BLOWER OFF WITH NORMAL DELAY. CONTROL SELF DIAGNOSTIC CHECK.
- Page 39 AND HUM TERMINAL ARE DE−ENERGIZED. THERMOSTAT OPENS. INDOOR BLOWER SELECTED TIME OFF DELAY BEGINS. AFTER DELAY HEAT SPEED DE−ENERGIZED. (blower remains energized during continuous fan mode). INDOOR BLOWER SWITCHES TO FAN SPEED. EAC TERM. REMAINS ENERGIZED. Page 39 G50UH Series...
- Page 40 G50UH(X) Start−Up & Performance Check List Job Name Job No. Date Job Location City State Installer City State Technician Unit Model No. Serial No. Heating Section Electrical Connections Tight? Blower Motor H.P. Supply Voltage Gas Piping Connections Blower Motor Amps Tight &...