Table of Contents

Related Manuals for Axminster 100090


Summary of Contents for Axminster 100090
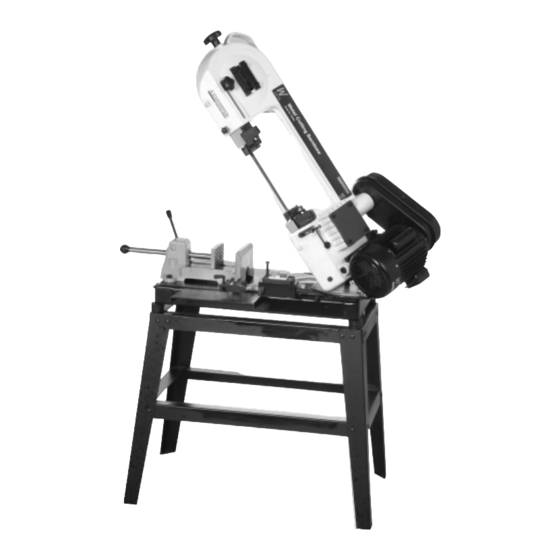
- Page 1 Metal Cutting Bandsaw 100090 A X M I N S T E R W H I T E Axminster Devon EX13 5HU UK 01297 33656 (International Dialling +44 1297 33656) A X M I N S T E R W H I T E...
-
Page 2: Table Of Contents
Index of Contents Notes Page No. Index of Contents...............................2 Declaration of Conformity………….………..……..…………..............2 What’s in the Box………….………..……..…………..................3 General Instructions for 230v Machines..................3,4 Initial Assembly instructions......................4,5 Mounting of the Machine......................... 6 Specifications........................... 7 Parts Identification and Description....................8 Machine Illustration of the Metal Cutting Bandsaw.............. -
Page 3: What's In The Box
Having unpacked your machine and its accessories, please check the contents against the equipment list ”What’s in the box”, if there are any discrepancies, please contact Axminster Power Tool Centre using the procedures laid down in the catalogue. Please dispose of the packaging responsibly;... -
Page 4: Initial Assembly Instructions
Routine Maintenance (Continued) General Instructions for 230v Machines (Continued) Work Place/Environment. The machine is not designed for sub-aqua operation, do not use when or where it is liable to get wet. If the machine is being used outside, and it starts to rain (unusual though this would be in U.K.), cover it up or move it into the dry. - Page 5 Routine Maintenance Initial Assembly instructions (Continued) Daily Fig 1 Assembling the stand •Keep the machine clean Locate and identify the 4 legs, the rails (A) and the stretchers for the stand, (B) and the packet containing •Check the saw blade for missing teeth and cracks in the fabric. the coach bolts, washers and nuts.
-
Page 6: Mounting Of The Machine
Mounting of the Machine Operating instructions There are no hard and fast rules for using the metal cutting bandsaw. As a general guide the Locate the 2 No. M8 bolts etc., put to hand. harder the material, the slower the blade speed and the feed rate, conversely for softer material. However, some materials cut better with a fast saw speed and a slow feed rate, likewise some NOTE. -
Page 7: Specifications
Setting up the Machine Specifications The machine has been set up in the factory. If, however, you think the settings may have been Axminster No. Metal Cutting Bandsaw 100090 moved due to a ’knock’ or whatever, proceed to set the machine up as follows:-... -
Page 8: Parts Identification And Description
Parts Identification and Description Machine Illustration of the Metal Cutting Bandsaw (Continued) Please read through the section entitled Identification and Description of Parts, so that you will be familiar with the terminology we will use in the manual, so that you can Front View identify the parts quickly and easily. -
Page 9: Machine Illustration Of The Metal Cutting Bandsaw
Parts Identification and Description (Continued) Machine Illustration of the Metal Cutting Bandsaw Height preset A large bolt threaded into the front part of the quadrant. It strikes against a (See fig 5) lower protrusion on the main frame casting. Adjusting the height of the bolt Blade tensioner Handle Fig 5... -
Page 10: Machine Illustration Of The Metal Cutting Bandsaw (Continued)
Machine Illustration of the Metal Cutting Bandsaw (Continued) Machine Illustration of the Metal Cutting Bandsaw (Continued) Fig 10a (The drive belt has been adjustment removed for clarity) spring holes Motor pulley ‘Keeper’ Transition gearbox pulley Mounting Fig 6 pivot yoke Fig 6a Fig 6b Slide &... - Page 11 Machine Illustration of the Metal Cutting Bandsaw (Continued) Machine Illustration of the Metal Cutting Bandsaw (Continued) Fig 9a Fig 9b Front wheel mounting Fig 7a axle assembly Front guide assembly Blade tensioner Blade guide Lock nuts assembly Front wheel Tracking control bolt Blade guide Safety cover assembly...
-
Page 12: Parts Identification And Description (Continued)
Machine Illustration of the Metal Cutting Bandsaw (Continued) Parts Identification and Description (Continued) Drive belt There is a bolt fitted through a hole bored and threaded in the front edge of Drive belt tensioner tensioner the motor plate. Driving this bolt ‘down’ will cause it to ‘push’ against the Front wheel Fig 8a (See fig8a)