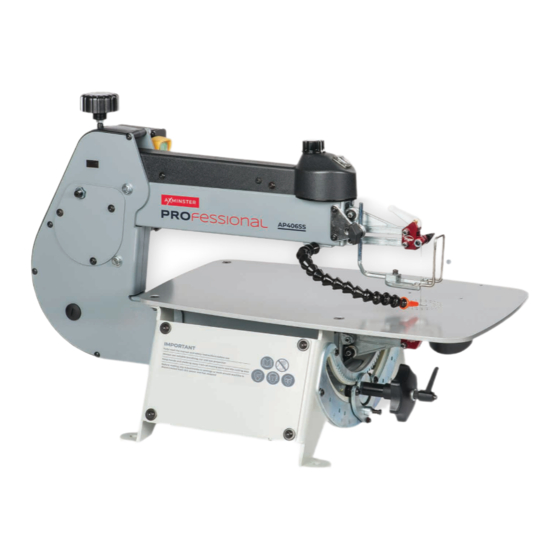
Summary of Contents for Axminster AP535SS
- Page 1 All manuals and user guides at all-guides.com AP406SS Code 107653 AP535SS Code 107654 Original Instructions AP406SS, AP535SS Scroll Saws AP406SS (KC-16) AP535SS (KC-21) AT: 08/02/2022 BOOK VERSION: 6...
- Page 2 Base Mounting Holes Wiring Diagram Notes EU DECLARATION OF CONFORMITY Cert No: KC-16, KC-21 EU Declaration of Conformity Axminster Tool Centre Ltd This machine complies with the following directives: Axminster Devon EX13 5PH UK axminstertools.com 2006/42/EC 06/42/EC - Annex I/05.2006...
- Page 3 RULES FOR SAFE OPERATION To help ensure safe operation, please take a moment to learn the machine’s applications and limitations, as well as potential hazards. Axminster Tool Centre disclaims any real or implied warranty and holds itself harmless for any injury that may result from the improper use of its equipment.
- Page 4 All manuals and user guides at all-guides.com SAFETY INSTRUCTIONS...
- Page 5 All manuals and user guides at all-guides.com ELECTRICAL REQUIREMENTS...
- Page 6 All manuals and user guides at all-guides.com IDENTIFICATION OF MAIN PARTS & COMPONENTS ON/OFF Switch (A) Speed Control Dial (B) AP535SS NVR power isolating switch...
- Page 7 All manuals and user guides at all-guides.com UNPACKING & SET UP AP535SS (KC-21) AP406SS (KC-16) INSTALLATION & ASSEMBLY...
- Page 8 All manuals and user guides at all-guides.com INSTALLATION & ASSEMBLY Saw guard assembly Slot the guard clamping arm (d) through the pre-drilled hole in the hexagon clamp (c). Insert the hexagon clamp (c) into the brackets hexagon recess, place the washer (b) over the hexagon clamp thread and secure using the butterfly clamping knob (a).
- Page 9 All manuals and user guides at all-guides.com CHOOSING & INSTALLING A SAW BLADE...
- Page 10 All manuals and user guides at all-guides.com CHOOSING & INSTALLING A SAW BLADE OPERATING INSTRUCTIONS...
- Page 11 All manuals and user guides at all-guides.com OPERATING INSTRUCTIONS Adjusting the Osolation (Front to Back) Top & Bottom Blade holder Alignment Fig A Fig B Fig A Fig B Fig C Fig D Fig C Fig D Place a 90˚ square upagainst the blade, the blade movement If the blade is out of alignment please follow the procedures below for can be set between course and fine for different cutting tasks, adjusting the top and bottom blade holders:...
- Page 12 All manuals and user guides at all-guides.com OPERATING INSTRUCTIONS...
- Page 13 All manuals and user guides at all-guides.com OPERATING INSTRUCTIONS...
- Page 14 All manuals and user guides at all-guides.com MAINTENANCE, ADJUSTMENTS & SERVICING...
- Page 15 2. Unscrew the fuse cap to the rear of the scroll saw 4. Re-insert the fuse assembly and finger tighten. and remove the 5 AMP fuse. SPECIFICATIONS Code 107653 107654 Model AP406SS (KC-16) AP535SS (KC-21) Rating Professional Professional Power 230V 50Hz 320W 230V 50Hz 320W Throat 406 mm...
- Page 16 All manuals and user guides at all-guides.com STAND ASSEMBLY x4 M8 x24 M8 x32 M8 x28 M8 x4 Thread Rubber Foot Bolts Coatch Bolts Washers Nuts Step 1 Step 2...
- Page 17 All manuals and user guides at all-guides.com STAND ASSEMBLY Step 3 Step 7 Use the holes in the bracket to adjust the stand height Step 4 Stand assembled Step 5 Lower the scroll saw on top of the stand and lineup the holes, secure using the four bolts washers and Nuts...
- Page 18 All manuals and user guides at all-guides.com EXPLODED DIAGRAMS/LISTS KC-16 - KC-21 - Diagram A...
- Page 19 All manuals and user guides at all-guides.com EXPLODED DIAGRAMS/LISTS KC-16 - KC-21 - Diagram A REF. PART NO. DESCRIPTION SPECIFICATION EX21-A55 Label EX21-A01 Main Body EX21-A56 Screw 1/4*2-1/2 EX16-A78 Main Body EX21-A57 Upper Arm EX30-A01 Main Body EX16-A80 Upper Arm EX21-A03N Top Cover EX30-A57...
- Page 20 All manuals and user guides at all-guides.com EXPLODED DIAGRAMS/LISTS KC-16 - KC-21 - Diagram B...
- Page 21 All manuals and user guides at all-guides.com EXPLODED DIAGRAMS/LISTS KC-16 - KC-21 - Diagram B REF. PART NO. DESCRIPTION SPECIFICATION Q’TY KC21-B23 Tilt Detent Barrel KC21-B01 Trunnion KC21-B24 Spring KC21-B02 Side Panel KC21-B25 Detent Plunger KC16-B41 Side Panel KC21-B26 Tilt Handle KC30-B02 Side Panel KC21-B27...
- Page 22 All manuals and user guides at all-guides.com EXPLODED DIAGRAMS/LISTS KC-16 - KC-21 - Diagram C...
- Page 23 All manuals and user guides at all-guides.com EXPLODED DIAGRAMS/LISTS KC-16 - KC-21 - Diagram C REF. PART NO. DESCRIPTION SPECIFICATION EX21-C37 Set Screw M6*8 EX21-C02 Balance Block EX21-C38 Blade Clamp Thumb screw EX21-C03 Set Screw M6*6 EX21-C39 Blade EX21-C04 Allen Screw 1/4-20x1/2 EX21-C40 Allen Key...
- Page 24 All manuals and user guides at all-guides.com BASE MOUNTING HOLES Length Base Hole Dimensions Model Length Width AP406SS (KC-16) 262 mm 343 mm AP535SS (KC-21) 385 mm 343 mm...
- Page 25 All manuals and user guides at all-guides.com WIRING DIAGRAM...
- Page 26 All manuals and user guides at all-guides.com NOTES...
- Page 27 All manuals and user guides at all-guides.com NOTES...
- Page 28 The packaging is suitable for recycling. Please dispose of it in a responsible manner. EU Countries Only Do not dispose of electric tools together with household waste material. By law they must be collected and recycled separately. Axminster Tools, Axminster Devon EX13 5PH axminstertools.com...


