
Related Manuals for Jet GH-1340W


Summary of Contents for Jet GH-1340W
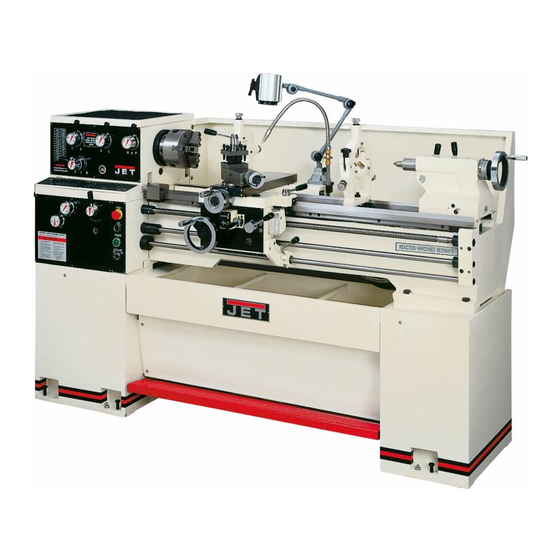
- Page 1 GH-1340W/1440W Lathes JET EQUIPMENT & TOOLS, INC. A WMH Company www.jettools.com OWNER’S MANUAL P.O. BOX 1349 Auburn, WA 98071-1349 e-mail jet@jettools.com 253-351-6000 Fax 253-939-8001 M-321810 6/00...
-
Page 2: Warranty
Important Information 1-YEAR LIMITED WARRANTY REPLACEMENT PARTS Replacement parts for this tool are available directly form JET Equipment & Tools. To place an order, call 1-800-274-6848. Please have the following information ready: 1. Visa, MasterCard, or Discover Card number 2. Expiration date 3. - Page 3 These lathes are designed and intended for use by properly trained and experienced personnel only. If you are not familiar with the proper and safe operation of a lathe, do not use until proper training and knowledge have been obtained.
-
Page 4: Specifications
Specifications: GH-1340W/1440W Stock Number... 321810 GH-1340W-1 Stock Number... 321820 GH-1340W-3 Stock Number... 321830 GH-1440W-1 Stock Number... 321840 GH-1440W-3 Capacities: Swing Over Bed ... 13" (1340W) ... 14” (1440W) Swing Over Cross Slide... 7-1/2" (1340W) ... 8-1/2” (1440W) Swing Through Gap... 19" (1340W) ... -
Page 5: Table Of Contents
Miscellaneous: Steady Rest Capacity ... 1/4" - 3-3/4" Follow Rest Capacity ... 1/4" - 2-3/4" Length of Bed... 54-1/2" Width of Bed...10-1/2” Height of Bed... 12-3/4" Overall Dimensions ... 75-3/4"L x 29-1/2"W x 47-1/4"H Main Motor (1340W-1 & 1440W-1) ... 3HP, 1Ph, 230V Only Main Motor (1340W-3 &... -
Page 6: Warnings
Failure to comply may cause serious injury! Contents of the Shipping Container Lathe Steady Rest Follow Rest 6" Three Jaw Chuck w/ Top Reversing Jaws (Direct Mount) 8" Four Jaw Chuck with Backplate 12"... -
Page 7: Uncrating And Clean-Up
2. Unbolt the lathe from the shipping crate bottom. 3. Choose a location for the lathe that is dry, has good lighting, and has enough room to be able to service the lathe on all four sides. -
Page 8: Chuck Preparation
WARNING Read and understand all directions for chuck preparation! Failure to comply may cause serious injury and/or damage to the lathe! Note: Before removing the chuck from the spindle, place a way board across the bedways under the chuck 1. Support the chuck while turning three camlocks 1/4 turn counter-clockwise with the chuck key enclosed in the tool box. -
Page 9: Lubrication
CAUTION Lathe must be serviced at all lubrication points and all reservoirs filled to operating level before the lathe is put into service! Failure to comply may cause serious damage to the lathe! 1. Headstock - Oil must be up to indicator mark in oil sight glass (A, Fig. - Page 10 3. Apron - oil must be up to indicator mark in oil sight glass (A, Fig. 6). Top off with Mobil DTE Oil Heavy Medium. Remove oil cap (B, Fig. 6) on top of apron to fill. To drain, remove drain plug on bottom of apron.
-
Page 11: Coolant Preparation
Failure to comply may cause serious injury and / or damage to the machinery and property! The GH-1340W-1 & GH-1440W-1 Gear Head Lathes are rated at 3HP, 1Ph, 230V only. Confirm power available at the lathe's location is the same rating as the lathe. - Page 12 If the chuck rotates in the clockwise direction, disconnect the lathe from the power source, switch two of three power leads (for GH-1340W-3 & GH1440W-3), and connect the lathe to the power source. To Switch from 230V to 460V Operation GH-1340W-3 &...
-
Page 13: General Description
General Description Lathe Bed The lathe bed (A, Fig. 10) is made of high grade cast iron. By combining high cheeks with strong cross ribs, a bed with low vibration and high rigidity is realized. Two precision ground vee slideways, reinforced by heat hardening and grinding, are an accurate guide for the carriage and headstock. - Page 14 Tailstock The tailstock (A, Fig. 12) slides on a v-way and can be locked at any location by a clamping lever. The tailstock has a heavy duty spindle with a Morse Taper #3. Leadscrew and Feed Rod The leadscrew (B Fig. 12) and feed rod (C, Fig.
-
Page 15: Controls
C. Emergency Stop Switch (C, Fig. 13) - depress to stop all machine functions. Caution: lathe will still have power. Twist to re-set. D. Jog Switch (D, Fig. 13) - depress and release to advance spindle momentarily. - Page 16 Turn counter-clockwise to unlock. Caution: carriage lock must be unlocked before engaging automatic feeds or damage to lathe may occur. 10. Longitudinal Traverse Hand Wheel - (D, Fig. 14) - located on the apron assembly. Rotate hand wheel clockwise to move the apron assembly toward the tailstock.
-
Page 17: Break-In Procedure
R.P.M. range for three hours. To allow time for the gears and bearings to break-in and run smoothly, do not run the lathe above 650 R.P.M. for the first six hours of operation and use. -
Page 18: Operation
Operation Feed and Thread Selection 1. Reference the feed and thread found on the gear box faceplate tables (A, Fig. 17 & page 22 of manual). 2. Move levers (B, C, D, E & F, Fig. 17) to the appropriate positions according to the chart. - Page 19 Automatic Feed Operation and Feed Changes 1. Move the forward/reverse selector (A, Fig. 19) up or down depending on desired direction. 2. Set selector levers (A, B, C, & D, Fig. 20) to desired rate. Note: for feeding, lever (D) will be set at "F"...
- Page 20 Metric Thread Table Inch Lead and Feed Table Cross Feed Table...
-
Page 21: Adjustments
Compound Rest The compound rest is located on top of the cross slide and can be rotated 360 degrees. Loosen the two socket head cap screws (A, Fig. 21) on the compound rest base. There is a calibrated dial (in degrees B, Fig. 21) below the rest to assist in placement of the compound to the desired angle. - Page 22 1. Using a machinist's precision level on the bedways, make sure the lathe is level side to side and front to back. If the lathe is not level, correct to a level condition before proceeding. Re-test alignment if any leveling adjustments were made.
-
Page 23: Removable Gap
4. Set up and cut along five inches of the bar stock. 5. Using a micrometer, measure the bar stock next to the chuck and at the end. The measurement should be the same. 6. If the measurements are not the same and adjustment is required, loosen hex socket cap screws (A , Fig. -
Page 24: V-Belts
5. Tension by tightening motor mount hex nut until 8 lbs. force causes approximately 3/4" deflection on belts. 6. Close end gear door, install cover and connect lathe to the power source. Aligning Tailstock to Headstock Before proceeding, headstock should be aligned. See section labeled "Headstock Alignment".