Honeywell Lynx Plus Series Installation And Setup Manual
Honeywell lynx plus series security systems
Hide thumbs
Also See for Lynx Plus Series:
- User manual (64 pages) ,
- Programming manual (24 pages) ,
- Quick manual to user functions (2 pages)
Table of Contents
Advertisement
800-03857V1 12/09 Rev. A
Lynx Plus Series
Security Systems
Installation and Setup Guide
Installation and Setup Guide
Installation and Setup Guide
Installation and Setup Guide
ARMED
READY
1
2
3
OFF
STAY
ESCAPE
RECORD
VOLUME
PLAY
DELETE
4
5
6
AWAY
AUX
ADD
LIGHTS ON
TEST
BYPASS
SELECT
9
7
8
LIGHTS OFF
CODE
CHIME
0
STATUS
NO DELAY
FUNCTION
Advertisement
Table of Contents

Related Manuals for Honeywell Lynx Plus Series


Summary of Contents for Honeywell Lynx Plus Series
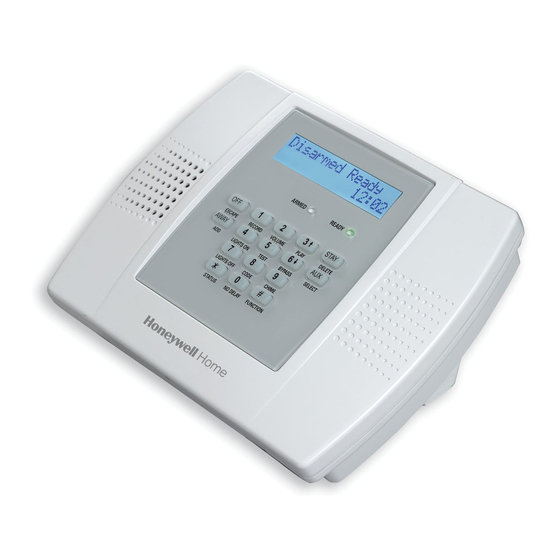
- Page 1 Lynx Plus Series Security Systems Installation and Setup Guide Installation and Setup Guide Installation and Setup Guide Installation and Setup Guide ARMED READY STAY ESCAPE RECORD VOLUME PLAY DELETE AWAY LIGHTS ON TEST BYPASS SELECT LIGHTS OFF CODE CHIME STATUS...
-
Page 2: Recommendations For Proper Protection
RECOMMENDATIONS FOR PROPER PROTECTION The Following Recommendations for the Location of Fire and Burglary Detection Devices Help Provide Proper Coverage for the Protected Premises. Recommendations for Smoke and Heat Detectors With regard to the number and placement of smoke/heat detectors, we subscribe to the recommendations contained in the National Fire Protection Association's (NFPA) Standard #72 noted below. -
Page 3: Table Of Contents
Table of Contents SYSTEM FEATURES ..........................5 MOUNTING THE CONTROL........................6 WIRING CONNECTIONS...........................7 CONNECTING/CONFIGURING COMMUNICATIONS DEVICES ............9 AC POWER AND BACKUP BATTERY....................11 INSTALLING WIRELESS ZONES......................13 MECHANICS OF PROGRAMMING ......................16 ZONE RESPONSE TYPE DEFINITIONS ....................18 DATA FIELD DESCRIPTIONS ........................20 ✻56 ENHANCED ZONE PROGRAMMING MODE ................38 ✻80 DEVICE PROGRAMMING MENU MODE ..................43 ✻81 ZONE LIST MENU MODE........................47 ✻83 ENHANCED SEQUENTIAL MODE ....................49... - Page 4 - 4 -...
-
Page 5: System Features
The Lynx Plus Series control is a self-contained, rechargeable wireless control/communicator that features easy installation and usage. A built-in speaker provides voice annunciation of system status along with voice descriptors of each zone. An internal module (if provided) allows the Lynx Plus Series to communicate with the Central Station via the Internet. -
Page 6: Mounting The Control
Lynx Plus Series Installation and Setup Guide Mounting the Control Wall Mounting Release the front assembly from the back case by depressing the two locking tabs at the top of the unit with the blade of a medium size screwdriver. -
Page 7: Wiring Connections
Lynx Plus Series Installation and Setup Guide Wiring Connections Wiring Overview The following summarizes the connections required. Refer to the Wiring Connections paragraph and the Summary of Connections diagram on the inside back cover when making connections. Ensure that the battery cable is routed as shown in the figure below. - Page 8 Lynx Plus Series Installation and Setup Guide Wiring Connections c. Wire the flying leads of a Direct Connect Cord to the control’s phone terminals as shown in the diagram or plug into the 8-position jack. d. Plug the Direct Connect Cord into the RJ31X jack.
-
Page 9: Connecting/Configuring Communications Devices
Connecting/Configuring Communication Modules General This Lynx Plus Series control supports central station reporting via the internet using wireless (GSM) and hardwire (IP) communications modules. It also supports upload/download programming capability via the Internet or a Private local area network (Intranet). This allows site maintenance independent of central station monitoring, and modification to sites globally via the Internet or through a private LAN. - Page 10 Lynx Plus Series Installation and Setup Guide Connecting/Configuring Communication Modules Example: SIGNAL GPRS REG -86 GOOD Y Diagnostic Mode Definitions SIGNAL = Communications Module’s Signal Level (RSSI) will be displayed in dBm, where: -01 to -93 GOOD = Good signal level -94 to -95 POOR = Poor signal level, move unit for better signal level -96 (and lower) FAIL = Fail signal level, do not install, move unit for better signal level.
-
Page 11: Ac Power And Backup Battery
Lynx Plus Series Installation and Setup Guide AC Power and Backup Battery The system is powered by a 9VAC, 25VA Plug-in Transformer, K10145WH or K10145X10 (K10145CN in Canada). Refer to the wiring table below for wire gauge and length. Distance between... -
Page 12: Ac Power And Rechargeable Backup Battery
AC Power and Backup Battery AC Power and Rechargeable Backup Battery The Lynx Plus Series is equipped with an integral, replaceable, rechargeable battery pack rated at 7.7Vdc. Select the appropriate battery pack, based on the installation’s requirement, and install the battery pack. -
Page 13: Installing Wireless Zones
Lynx Plus Series Installation and Setup Guide Installing Wireless Zones General Information Zones: The control supports up to 24 wireless zones using 5800 Series transmitters, and up to 16 wireless buttons. Range: The built-in RF receiver can detect signals from wireless transmitters within a nominal range of 200 feet. - Page 14 Lynx Plus Series Installation and Setup Guide Installing Wireless Zones • Button-type transmitters should be periodically tested for battery life. The 5801, 5802MN, 5802MN2, 5804, 5804BD, 5804BDV, and 5804E button transmitters have replaceable batteries. Using the Transmitter Sniffer Mode Use this mode after all transmitters have been entered to check that all transmitters have been properly programmed.
-
Page 15: Series Transmitter Loop Numbers
Lynx Plus Series Installation and Setup Guide Installing Wireless Zones 5800 Series Transmitter Loop Numbers (Refer to this information when programming transmitters) The following illustration shows the compatible transmitters, their associated input types and loop designations. LOOP 1 LOOP 1... -
Page 16: Entering Program Mode
Lynx Plus Series Installation and Setup Guide Mechanics of Programming General Programming Information Programming options are stored in non-removable, electrically erasable, nonvolatile EEROM memory. The system can be programmed at any time, even at the installer's premises prior to the actual installation. -
Page 17: Loading Factory Defaults
Lynx Plus Series Installation and Setup Guide Mechanics of Programming Interactive Menu Mode Programming ( ✻ , ✻ , ✻ , ✻ , ✻ , ✻ (i.e., ✻56). The keypad will display the first of a series of prompts. A detailed [✻] + interactive mode No. -
Page 18: Zone Response Type Definitions
Lynx Plus Series Installation and Setup Guide Zone Response Type Definitions General Information During programming, you must assign a zone type to each zone, which defines the way in which the system responds to faults in that zone. Zone types are defined below. - Page 19 Lynx Plus Series Installation and Setup Guide Zone Response Type Definitions Zone type 09 can be assigned to any wireless zone used as a fire zone. This zone type Type 09 is always active and cannot be bypassed. Supervised Fire Zone Characteristics: •...
-
Page 20: Data Field Descriptions
Lynx Plus Series Installation and Setup Guide Data Field Descriptions The following pages list all data fields in this Control (in numerical order). Use the blank programming form to record the data for this installation. Specific fields include options for programming that are unique to the LynxSIA Plus version. - Page 21 Lynx Plus Series Installation and Setup Guide Data Field Descriptions Powerline Carrier Device (X10) House ID 25 25 25 25 Powerline Carrier Devices require a House ID. This field identifies this House ID to the Control. The Powerline Carrier Devices are programmed in field ✻80.
-
Page 22: Alarm Bell Timeout
Lynx Plus Series Installation and Setup Guide Data Field Descriptions Alarm Bell Timeout 33 33 33 33 This field determines whether the external sounder will shut off after a selected time, or ALRM SND ALRM SND TIMEOUT TIMEOUT ALRM ALRM... -
Page 23: Audible Exit Warning/Quick Exit
Lynx Plus Series Installation and Setup Guide Data Field Descriptions ✻ ✻ ✻ ✻ ✻ Field 39: Field 37 is not available on the LynxSIA Plus control. Fields 38 and 39 are used to program different features in the Lynx Plus and LynxSIA Plus controls. Please be sure that you use the correct field for the control being installed. - Page 24 Notes: Whenever AAV is used, primary (Field ✻41) and secondary (Field ✻42) phone numbers should be preceded with the call waiting disable command. Otherwise, there is the possibility of connection of the third party to Lynx Plus Series during AAV mode. The PABX phone number entered in field ✻ 40 is not dialed on GSM/IP (Digital Communication with AAV).
- Page 25 24 digits are entered, exit by pressing [✻]. To clear entries from the field press ✻46✻. The telephone message can be terminated (acknowledged) by pressing any key on the telephone keypad. Pressing any key on the local Lynx Plus Series keypad will terminate (acknowledge) both the follow me and the local reminder announcements.
- Page 26 Lynx Plus Series Installation and Setup Guide Data Field Descriptions ✻ ✻ Field 47 is used to program different options in the Lynx Plus and LynxSIA Plus controls. Fields Please be sure that you use the correct field for the control being installed.
- Page 27 Lynx Plus Series Installation and Setup Guide Data Field Descriptions Report Format for Primary/Secondary 48 48 48 48 This field is used to select the Primary and Secondary Report Format. (For an REP FRMT FRMT FRMT FRMT PRI PRI/S /S /S /SEC EC EC EC explanation of these formats, see the System Communication section of this manual).
- Page 28 Lynx Plus Series Installation and Setup Guide Data Field Descriptions ✻ Field 50: Field *50 is used to program different features in the Lynx Plus and LynxSIA Plus controls. Please be sure that you use the correct field for the control being installed.
- Page 29 Lynx Plus Series Installation and Setup Guide Data Field Descriptions Lack of Usage Notification 54 54 54 54 If enabled, notifies the central station if an end user is not operating their security LACK OF OF OF OF USAGE LACK...
- Page 30 Lynx Plus Series Installation and Setup Guide Data Field Descriptions ✻ Field 57: Field *57 only applies to the LynxSIA Plus control. The control validates the data entered in this field. If the selection is not valid the control will emit a single long beep indicating that the selection has been rejected. The control replaces the selection with the default value, which is displayed on the keypad, and advances to the next field.
- Page 31 Lynx Plus Series Installation and Setup Guide Data Field Descriptions With ADEMCO Contact ID® Reporting: Enter a digit in the first box to enable the zone to report. Use a different digit for each zone until you have used up available digits. If the number of zones exceeds the number of available digits, begin with digit 1 again.
- Page 32 Lynx Plus Series Installation and Setup Guide Data Field Descriptions Bypass Report Code (See notes above) 61 61 61 61 A Bypass Report will be sent when a zone is manually bypassed. BYPASS BYPASS REP BYPASS BYPASS REP COD CODE E E E...
- Page 33 To ensure that the Lynx Plus Series properly transmits its reports to the Central Station via the proper channel you must program a Primary Phone Number in Field ✻41 and/or activate/deactivate the LRR/IP Communications Module in Field ✻55.
- Page 34 Lynx Plus Series Installation and Setup Guide Data Field Descriptions If the LRR/IP communications device is selected as the preferred channel option and the control detects a communication failure or supervision failure, reports will be sent to the Primary Phone without any delay.
-
Page 35: Aux Function/1-Button Paging
Lynx Plus Series Installation and Setup Guide Data Field Descriptions AUX Function/1-Button Paging 87 87 87 87 If “0” is entered, user can define a macro function for the AUX key. See user manual for AUX FUNC FUNC FUNC 1 1 1 1 BTN... - Page 36 Lynx Plus Series Installation and Setup Guide Data Field Descriptions Audio Alarm Verification (AAV)/ Remote Phone Control 91 91 91 91 This option is used to enable the Audio Alarm Verification and/or the Remote Phone AAV/REM PHN AAV/REM PHN CTRL...
- Page 37 Lynx Plus Series Installation and Setup Guide Data Field Descriptions Flexible Callback 93 93 93 93 Note: This feature only applies to telephone downloading FLEXBLE FLEXBLE CALLBACK FLEXBLE FLEXBLE CALLBACK CALLBACK CALLBACK If enabled, the control will ignore the last 1, 2, or 3 digits of the programmed callback number (field ✻94) during a single download session.
-
Page 38: Enhanced Zone Programming Mode
Lynx Plus Series Installation and Setup Guide ✻56 Enhanced Zone Programming Mode This is an interactive menu mode that is used to program zone numbers, zone types, alarm and report codes, and to identify the type of loop input device. This mode can also be used for entering 5800 Series transmitter serial numbers. - Page 39 Lynx Plus Series Installation and Setup Guide ✻56 Enhanced Zone Programming Mode Input Type Enter the input type for the transmitter assigned to this zone. Refer to the transmitter’s INPUT INPUT TYPE TYPE INPUT INPUT TYPE TYPE instructions for input types of each transmitter. Press [✻] to advance to the next field or [#] to return to previous prompt.
-
Page 40: Delete Zone Parameters Confirmation
Lynx Plus Series Installation and Setup Guide ✻ 56 Enhanced Zone Programming Mode Delete Zone Parameters Confirmation F F F F This function deletes either the serial number or all zone information that is DELETE DELETE ZONE DELETE DELETE ZONE... - Page 41 Lynx Plus Series Installation and Setup Guide ✻ 56 Enhanced Zone Programming Mode Serial Number I I I I b This prompt can be used only to manually enroll a serial number. RF enrollment will be SERIAL NU NU NU NUMBER...
- Page 42 Lynx Plus Series Installation and Setup Guide ✻ 56 Enhanced Zone Programming Mode Descriptor 3 IF IF IF IF This prompt is used to enter a Voice Descriptor. Enter [#] + 2-digit vocabulary index number † of third descriptor word for this zone. Use the [6] or [8] key to advance to descriptor 2 or to next zone.
-
Page 43: Device Programming Menu Mode
Lynx Plus Series Installation and Setup Guide ✻ 80 Device Programming Menu Mode Powerline Carrier Devices (e.g.; X10 brand devices) are programmable switches that can be used to perform many different functions, such as turning lights on and off, controlling sounders, or for status indications. - Page 44 Lynx Plus Series Installation and Setup Guide ✻ 80 Device Programming Menu Mode Upon a Zone Type or System Operation - Zone Type/System Operation: Instead of using a “RESTORE ZONE LIST”, a specific zone (response) type or system operation action can be selected to de-activate the device.
- Page 45 Lynx Plus Series Installation and Setup Guide ✻80 Device Programming Menu Mode Start Event Type C C C C Enter the 1-digit start event type (0-3) to activate the device being programmed. A zone START START EVENT START START EVENT...
- Page 46 Lynx Plus Series Installation and Setup Guide ✻80 Device Programming Menu Mode Stop Zone Type 1A 1A 1A 1A If a zone type or system operation will be used to STOP the device action, enter the STOP STOP ZONE STOP...
-
Page 47: Zone List Menu Mode
Lynx Plus Series Installation and Setup Guide ✻81 Zone List Menu Mode While in Program mode, press ✻81 to enter Zone List Menu Mode. This mode is used to program zone lists for output devices (programmed in ✻80 Device Programming Menu Mode) or Chime-by-Zone in Zone List 3. - Page 48 Lynx Plus Series Installation and Setup Guide ✻81 Zone List Menu Mode Delete Zones E E E E Enter each 2-digit zone number to be deleted from the current zone list, followed by the [✻] key. When deleting a zone(s) from the zone list, if the selected zone has a Voice...
-
Page 49: Enhanced Sequential Mode
Lynx Plus Series Installation and Setup Guide ✻83 Enhanced Sequential Mode By using this mode, you can add, delete, or change the serial number of a transmitter in a zone, but retain all other existing data that has been programmed for that zone. Note that the ✻83 Enhanced Sequential mode requires that all zone information must first be entered using the ✻56 Enhanced Zone Programming... - Page 50 Lynx Plus Series Installation and Setup Guide ✻83 Enhanced Sequential Mode Enroll Mode IA IA IA IA This prompt is used to enter, view or confirm a serial number. If “L” is displayed, the ENROLL ENROLL ENROLL ENROLL MODE MODE...
- Page 51 Lynx Plus Series Installation and Setup Guide ✻83 Enhanced Sequential Mode Serial Number I I I I b This prompt can be used to enroll the transmitter serial number via RF transmission or manually. If using the RF Learning Mode there is no need to manually enter a serial...
-
Page 52: Assign Zone Voice Descriptors
Lynx Plus Series Installation and Setup Guide ✻84 Assign Zone Voice Descriptors Use this mode to assign voice descriptors for each zone. These are the descriptors that are announced when the system announces any event involving a zone number. Each descriptor can consist of up to ✻... -
Page 53: Voice Vocabulary Index
Lynx Plus Series Installation and Setup Guide ✻84 Assign Zone Voice Descriptor VOICE VOCABULARY INDEX 00 ½ second pause SYSTEM WORDS GARAGE PATIO ZERO AC LOSS 49 GUEST ROOM POLICE ZONES ARMED 82 ALARM POOL AWAY 32 ATTIC BYPASSED CARBON MONOXIDE... -
Page 54: Record Custom Voice Descriptors
Lynx Plus Series Installation and Setup Guide ✻85 Record Custom Voice Descriptors Use this mode to record up to 5 custom voice descriptors. To enter this mode, enter ✻85 while in Programming mode. Note: Entering a number other than one specified will give unpredictable results. -
Page 55: Remote Programming/Control (Downloading)
Callback programming field for additional information. Remote Programming Information If using Remote Programming, the Lynx Plus Series must be connected to the telephone line or to the Internet, as applicable. The downloading system can perform many functions when in communication with the Control. Besides... -
Page 56: Remote Programming Advisory Notes
Lynx Plus Series Installation and Setup Guide Remote Programming/Control (Downloading) • Read: arming status, AC power status, lists of faulted zones, bypassed zones, zones currently in alarm, zones currently in trouble, and RF sensors with low battery conditions; read control’s time. -
Page 57: System Operation
Lynx Plus Series Installation and Setup Guide System Operation Keypad Operation The keypad allows the user to arm and disarm the system, and perform other system functions, such as bypassing zones. Zone and system conditions (ALARM, trouble, bypass) are displayed on the keypad. When an alarm occurs, keypad sounding and external sounding will occur, and the zone(s) in alarm will be displayed on the keypad. -
Page 58: Remote Phone Control Feature
Delivery of a reminder message on the local Lynx Plus Series keypad will continue. If the message has timed out the system will redial the programmed number a maximum of seven additional times or until it is acknowledged. Pressing any key on the Lynx Plus Series keypad will terminate (acknowledge) both the follow me reminder and the local reminder announcements. -
Page 59: System Displays
Lynx Plus Series Installation and Setup Guide System Operation Exit Error Alarm Displays + OFF The system will display the following if programmed in Field *59. Entering a second Code sequence will clear the display. Display Meaning Appears along with a zone indication if an exit or interior zone contained a fault during closing at the time the exit delay ended (e.g., exit door left open), but the system was... - Page 60 Lynx Plus Series Installation and Setup Guide System Operation The following words or phrases define conditions on specific zones or individually displayed system status conditions. Display Meaning Fault A malfunction is discovered in the system; or an open is detected in a fire zone; or a fault in a day/night burglary zone is discovered during a disarmed period.
-
Page 61: Audio Alarm Verification (Two-Way Voice Feature)
It also assists the operator in gathering information about the nature and location of the alarm that may be helpful in responding to police and fire departments. All Lynx Plus Series control panels are capable of supporting the Two-Way Voice feature. The Lynx Plus Series does not make system announcements when the Two-Way voice feature is active. -
Page 62: Testing The System
Lynx Plus Series Installation and Setup Guide Testing the System Test Mode After installation is completed, the security system should be carefully tested, as follows. 1. With the system in the disarmed state, check that all zones are intact. If the READY LED is not lit, press the [ ✻... -
Page 63: System Communication
Lynx Plus Series Installation and Setup Guide System Communication This section provides an explanation of formats this system accommodates for reporting alarms and other system conditions to the central station. The process of a successful transmission consists of both the method of communication between the control panel and the central station receiver, and the actual way the information is sent and displayed at the central station. -
Page 64: Contact Id Event Codes
Lynx Plus Series Installation and Setup Guide System Communication Report 3+1/4+1 Standard 3+1/4+1 Expanded Alarm SSS(S) A SSS(S) A SSSS AZ AAA(A) Z Trouble SSS(S) T SSS(S) T SSSS Tt TTT(T) t Bypass SSS(S) B SSS(S) B SSSS Bb BBB(B) b... -
Page 65: Troubleshooting Guide
Lynx Plus Series Installation and Setup Guide Troubleshooting Guide Trouble Conditions The word “Fault” on the keypad’s display, accompanied by a rapid “beeping” at the keypad, indicates that there is a trouble condition in the system. Pressing any key can silence the audible warning sound. Instruct users to call for service immediately upon seeing any “Fault”... -
Page 66: Smoke Detectors
Lynx Plus Series Installation and Setup Guide Troubleshooting Guide C o n t r o l SYMPTOM POSSIBLE CAUSE REMEDY 1a. Interrupted AC power supply. 1a. Check transformer connection and “No AC” is displayed. powerline circuit breaker. 2a. System in Test mode. -
Page 67: Programming Default Tables
Lynx Plus Series Installation and Setup Guide Programming Default Tables Lynx Plus Control Defaults (boldface indicates defaults that differ between tables) Function Table 1 Table 2 Table 3 Table 4 *20 Installer code 4112 4112 4112 4112 *21 Quick arm enable... - Page 68 Lynx Plus Series Installation and Setup Guide Programming Default Tables Lynx Plus Control Defaults (boldface indicates defaults that differ between tables) Function Table 1 Table 2 Table 3 Table 4 *87 Auxiliary Function/ 1-button paging *88 Pager characters *89 Event log 80% full report code...
-
Page 69: Lynxsia Plus Control Defaults
Lynx Plus Series Installation and Setup Guide Programming Default Tables LynxSIA Plus Control Defaults (boldface indicates defaults that differ between tables) Function Table 1 Table 2 Table 3 Table 4 *20 Installer code 4112 4112 4112 4112 *21 Quick arm enable... - Page 70 Lynx Plus Series Installation and Setup Guide Programming Default Tables LynxSIA Plus Control Defaults (boldface indicates defaults that differ between tables) Function Table 1 Table 2 Table 3 Table 4 *84 Assign zone voice descriptors Refer to *84 Programming *86 Multi-mode (E-mail notification)
- Page 71 Lynx Plus Series Installation and Setup Guide Programming Default Tables ✻56 ZONE ASSIGNMENT/ALARM REPORT CODES FOR TABLE 1 Zone No. Zone Type Alarm Code Input Type Loop Number Zone Descriptor 3 (RF) 47, 04 (FRONT DOOR) 3 (RF) 33, 04 (BACK DOOR)
- Page 72 Lynx Plus Series Installation and Setup Guide Programming Default Tables ✻80 DEFAULT TABLE: Applies to Default Tables 1 and 2 (devices 01-07 have no default values, devices 09-15 have all default values set to 00) Start Stop Zone Type Restore of...
-
Page 73: Regulatory Agency Statements
Lynx Plus Series Installation and Setup Guide Regulatory Agency Statements FCC STATEMENTS Federal Communications Commission (FCC) Part 15 Statement The user shall not make any changes or modifications to the equipment unless authorized by the Installation Instructions or User's Manual. - Page 74 Lynx Plus Series Installation and Setup Guide WARNING THE LIMITATIONS OF THIS ALARM SYSTEM While this System is an advanced design security system, it does not offer guaranteed protection against burglary, fire or other emergency. Any alarm system, whether commercial or residential, is subject to compromise or failure to warn for a variety of reasons.
-
Page 75: Limitations Of This System Statement
Lynx Plus Series Installation and Setup Guide UL NOTICES 1. For UL Residential Burglar Alarm installations with line security, total exit delay time must not exceed 60 seconds. For UL Burglar Alarm installations without line security, total exit delay time must not exceed 120 seconds. -
Page 76: Specifications
Lynx Plus Series Installation and Setup Guide Specifications Lynx Plus Series Security Controls 1. Physical: 8-3/4” W x 6-3/4” H x 1-3/4” D 2. Electrical: VOLTAGE INPUT: 9VAC from plug-in 25VA transformer. RECHARGEABLE BACKUP BATTERY: Nickel-metal hydride battery pack rated at 7.7Vdc. -
Page 77: Index
Lynx Plus Series Installation and Setup Guide – Index – *56 Enhanced zone programming mode....13, 17, 38 Change the master code ............57 * 80 Device programming menu mode ...... 17, 43 Chime mode ................21 Chime-by-zone ..............67, 69 *81 Zone list menu mode ........... 17, 47 Closing report ................23... - Page 78 Lynx Plus Series Installation and Setup Guide Handshake frequency .............. 63 Quick arm enable ............... 67, 69 Hardwired zone connections............8 Quick exit .................23 Hayes ..................55 House ID .................. 20 House identification..............13 Radionics ..................27 Radionics/sescoa ...............76 Range..................13 Input type ................13, 39 Real-time clock display ............
- Page 79 Lynx Plus Series Installation and Setup Guide Unsupervised button RF............13 X10..................43, 55 Unsupervised RF ..............13 Ur (unsupervised RF) ............13, 39 Zone entry to list ..............47 Zone list ..............17, 67, 69, 72 Voice descriptor..............38, 52 Zone number................38 Voice prompt programming mode ...........
- Page 80 The burglar alarm signal shall not be connected to a police emergency number. The System must be checked by a qualified technician once every three years 2 Corporate Center Drive, Suite 100 Ê800-03857V1lŠ P.O. Box 9040, Melville, NY 11747 Copyright © 2009 Honeywell International Inc. 800-03857V1 12/09 Rev. A www.honeywell.com/security...