
Related Manuals for Samsung DVD-HR720


Summary of Contents for Samsung DVD-HR720
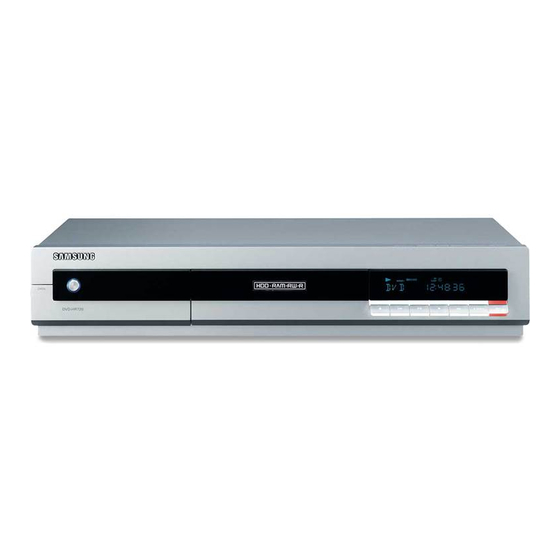
- Page 1 Instruction Manual DVD-HR720 TV Guide On Screen User’s Manual is attached as an appendix. English www.samsung.com AK68-00758B-01...
-
Page 2: Warning
FCC NOTE (for U.S.A ): This equipment has been tested and found to comply with the Warning limits for a Class B digital device, pursuant to Part 15 of the FCC Rules. These limits are designed to provide reasonable protection against harmful interference in a residential installation. -
Page 3: Precaution
Handling Cautions Precaution • Before connecting other components to this HDD & DVD RECORDER, be sure to turn them all off. • Do not move the HDD & DVD RECORDER while a disc is being played, or the disc may be scratched or broken, the HDD &... -
Page 4: Disc Handling
• Do not place the HDD & DVD RECORDER on • Do not use discs printed with label printers top of a heat source. available on the market. • Do not disconnect the AC power cord while the • Do not load warped or cracked discs. power is on. - Page 5 • This unit can play back DVD-R discs recorded and in out. finalized with a Samsung DVD video recorder. It may • Playable bitrate range is from 56Kbps to 320Kbps. not be able to play some DVD-R discs depending on •...
-
Page 6: Disc Copy
Macrovision Corporation issue upgrading your HDD & DVD RECORDER, and other rights owners. Use of this copyright contact the Call Center at 1-800-SAMSUNG. protection technology must be authorized by Macrovision Corporation, is intended for home and other limited viewing uses only unless otherwise authorized by Macrovision Corporation. -
Page 7: Table Of Contents
Step 4 : Connecting External devices ..26 Connecting an external device to the AV 1 IN or Contents AV 2 IN jacks .......26 Connecting a Camcorder to the DV IN jack . - Page 8 Copying from DVD to HDD........110 Repeat Play..............65 Copying MP3 or JPEG Files Zooming-In ..............67 from a Disc to HDD..........111 Select Media...............68 Playing an Audio CD/MP3.........68 File Copy ................111 Viewing a Picture ............75 Folder Copy ..............112 Disc Manager............113 Editing the Disc Name ..........113 Disc Protection...............114 Recording Recording...
-
Page 9: General Features
Creating a DVD video title using DVD-RW/-R disc General Features With the HDD & DVD RECORDER, you can create your own DVD Video titles on 4.7 GB DVD-RW/-R discs. Copying data from a digital camcorder using a DV input jack Record DV Device video onto HDD, DVD-RAM, DVD-RW The HDD (Hard Disk Drive) &... -
Page 10: Before Reading The User's Manual
All rights reserved; No part or whole of this user’s User’s Manual manual may be reproduced or copied without the prior written permission of Samsung Electronics Co. Make sure to check the following terms before reading the user manual. How to use the Icons that will be used in manual HDD &... - Page 11 You can only use either the VR or Video mode on a DVD-RW, but not both at the NOTE same time. Step 5 Editing a recorded disc You can change the DVD-RW to another format by reinitializing. It should be noted that the disc's data will be lost when Editing on discs is easier than conventional video changing formats.
-
Page 12: Unpacking
Unpacking Dispose of batteries according to local environmental Accessories regulations. Do not put them in the household trash. Check for the supplied accessories below. RF Cable for TV Video/Audio Cable AC39-42001J AC39-00073A Setting the Remote Control You can control certain functions of another manufacturer’s TV with this remote control. - Page 13 53, 54, 74, 75 PHILIPS 06, 55, 56, 57 PHONOLA 06, 56, 57 PIONEER 58, 59, 73, 74 RADIOLA 06, 56 RADIOMARELLI 45, 46 SABA 57, 72, 73, 74, 75 SALORA SAMSUNG 01,02,03,04,05,06,07,08,09 SANYO 41, 42, 43, 44, 48 SCHNEIDER English - 13...
-
Page 14: Description
Description Front Panel 1. POWER BUTTON 8. CH BUTTONS Turns the HDD & DVD RECORDER Select TV preset Channels. Same as CH on and off. button on the remote control. 2. DVD BUTTON 9. AV 2 INPUT Select DVD mode. Connect external equipment. -
Page 15: Rear Panel
Rear Panel Ensure a minimum of 4” clear space on all sides of the fan when installing the product. 1. DIGITAL AUDIO OUT(OPTICAL) 6. COMPONENT VIDEO OUT(best video quality) Connects to an amplifier having a digital optical Connects to equipment having Component video audio input jack. -
Page 16: Tour Of The Remote Control
12. MENU Button Tour of the Remote Control Brings up the HDD & DVD RECORDER’s setup menu. 13. ENTER/DIRECTION Buttons (…†œ √ Buttons) 14. RETURN Button 15. INFO Button This will display current setting or disc status. 16. REC Button Use to make a recording on HDD/DVD-RAM/-RW/-R discs. -
Page 17: Connecting & Setting Up
Quick Overview Connecting & Setting up A Quick Overview presented in this guide will give you enough information to start using the HDD & DVD RECORDER. This section involves various methods of connecting the HDD & DVD RECORDER to Step 1 : Connecting the Antenna cable other external components and required initial setting modes. -
Page 18: Step 1: Connecting The Antenna Cable
Step 1: Connecting the Antenna Cable There are several ways to connect your HDD & DVD RECORDER. Select one of the following antenna connections that best suits you below. Antenna + HDD & DVD RECORDER + TV : No Cable box You can record non-scrambled channels by selecting the channel on the HDD &... -
Page 19: Antenna + Cable Box + Hdd & Dvd Recorder + Tv
Antenna + Cable box + HDD & DVD RECORDER + TV You can record channels by selecting the channel on the cable box. You cannot record one channel while watching another channel. Be sure that the cable box is turned on. Wall TO ANT IN TO ANT OUT... -
Page 20: Step 2 : Connecting The Video Cable
Step 2 : Connecting the Video cable There are several ways to connect your HDD & DVD RECORDER. Select one of the video connections on the following pages. The VHF/UHF RF OUT jack of this product sends only signals received through the antenna. It does not output audio/video signals. -
Page 21: Connecting To An S-Video Input Jack
Connecting to an S-Video input jack Connect an S-Video cable(not supplied) between the S-VIDEO OUT jack on the HDD & DVD RECORDER and S-VIDEO IN jack on your TV (or AV amplifier). LINE IN S-VIDEO S-Video Cable • You will enjoy high quality images. S-Video separates S-Video and Component video outputs are the picture element into black and white (Y) and color available only if your TV supports S-Video... -
Page 22: Connecting To Component Video Input Jacks(Y ,P )
If there are questions the picture element into black and White(Y), regarding TV set compatibility with this model, blue(P ), red(P ) signals to present clear and clean please contact our customer service center at images. 1-800-SAMSUNG. 22 - English... -
Page 23: Step 3 : Connecting The Audio Cable
Step 3 : Connecting the Audio cable There are several ways to connect your HDD & DVD RECORDER. Select the audio connection that best suits you below. Connecting to your TV This connection will use your TV’s speakers. Audio Cable White Yellow AUDIO... -
Page 24: Connecting To A Stereo Amplifier With Analog Input Jacks
Connecting to a stereo amplifier with analog input jacks If your stereo amplifier only has AUDIO INPUT jacks(L and R), use the AUDIO OUT jacks. Audio Cable White ANALOG AUDIO Front(L)speaker Front(R)speaker LINE IN 24 - English... -
Page 25: Connecting To An Av Amplifier With A Digital Input Jack
Connecting to an AV amplifier with a digital input jack If your AV amplifier has a Dolby Digital or DTS decoder and a digital input jack, use this connection. To enjoy Dolby Digital or DTS sound, you will need to set up the audio settings. (See pages 42~43) Optical Cable Coaxial Cable (not supplied) -
Page 26: Step 4 : Connecting External Devices
Step 4 : Connecting External devices This allows you to connect your HDD & DVD RECORDER to other external devices and view or record their outputs. Connecting an external device to the AV 1 IN or AV 2 IN jacks Connect a external device to AUDIO/VIDEO AV 1 IN jacks or AV 2 IN jacks of the HDD &... -
Page 27: Connecting A Camcorder To The Dv In Jack
Connecting a Camcorder to the DV IN jack If your camcorder has a DV output jack, connect it to the DV input jack of your HDD & DVD RECORDER. If the input is not selected automatically, press the INPUT button on the remote to NOTE select proper input. -
Page 28: Connecting A Cable Box To The G-Link Jack
Connecting a Cable box to the G-Link jack Your cable box (not supplied) receives Guide show listings from TV Guide On Screen System on the HDD & DVD RECORDER through the IR Blaster cable. Connect your cable box to the G-Link jack on the rear panel of the HDD &... -
Page 29: Step 5 : Connecting The Power Cord
Step 5 : Connecting the Power Cord “Auto” appears in the panel display. This means that the current time is being set automatically (Auto Program) through the antenna under connection and also the channel is being set. The setup may take a few minutes. When the HDD &... -
Page 30: System Setup
On-Screen Menu System Setup Navigation The on-screen menus allow you to enable or disable various functions on your HDD & DVD RECORDER. Use the following buttons to open and navigate through the on-screen menus. Setup √ √ Title System √ √ Language Music √... -
Page 31: Osd Language Setup
OSD Language Setup Auto Clock Set After plugging in the HDD & DVD RECORDER, the first This menu is used to set the current time. time you press the POWER button, this screen comes You need to set the time to use timer recording. (This screen will only appear when you plug in the HDD &... -
Page 32: Time Zone
Clock Data CH Press the …† buttons to select Clock Set, then Select a channel that carries a time signal using the press the ENTER or √ button. …† buttons, then press the ENTER button. • Select Auto to set the clock data channel automatically. -
Page 33: Manual Clock Set
Manual Clock Set Press the …† buttons to select Manual Clock Set, then press the ENTER or √ button. Manual Clock Set Title If your clock cannot be set automatically, set the clock Date Time Music manually. JAN / 01 / 2005 SAT 12 : 00 AM Photo Timer Record Setup... -
Page 34: Auto Channel Memory
Auto Channel Memory Press the …† buttons to select Channel Set, then press the ENTER or √ button. Channel Set √ √ Antenna/Cable TV : Cable TV You can set the Antenna/Cable TV channel settings Title √ √ Auto Channel Memory automatically. -
Page 35: Manual Channel Set
Press the …† buttons to select Channel Manual Channel Set Add/Delete, then press the ENTER or √ button. Channel Add/Delete Title Select channel : Music Manual Channel Set can be used after you have first Photo Delete performed Auto Channel Memory. Use the Manual Timer Record Channel Setting to delete unnecessary channels after Setup... -
Page 36: Auto Power Off Setting
Auto Power Off Setting Press the …† buttons to select the desired item, then press the ENTER or √ button. • Off : Auto power off is disabled. • 2 Hour : HDD & DVD RECORDER will This feature automatically turns off your HDD & DVD automatically turn off for 2 hours after RECORDER if you do not press any button for 2 or 6 the last button is pressed. -
Page 37: Cm Skip Time Setting
CM Skip Time Setting Press the …† buttons to select CM Skip Time, then press the ENTER or √ button. System √ √ Clock Set Title √ √ Channel Set Music √ √ When a program recorded on a HDD, a DVD-RAM, a Auto Power Off : Off √... -
Page 38: Ep Mode Time Setting
EP Mode Time Setting Press the …† buttons to select EP Mode Time, then press the ENTER or √ button. System √ √ Clock Set Title You can select one of four recording modes by pressing √ √ Channel Set Music √... -
Page 39: Setting Up The Front Display Options
Setting up the Front Press the …† buttons to select Front Display, then press the ENTER or √ button. Display Options System √ √ Clock Set Title √ √ Channel Set Music √ √ Auto Power Off : Off √ √ CM Skip Time : 15 Sec Photo... -
Page 40: Automatic Chapter Creator
Automatic Chapter Press the …† buttons to select Chapter Creator, then press the ENTER or √ button. Creator System DVD-RW(V) √ √ Clock Set Title The Automatic Chapter Creator function doesn't operate √ √ Channel Set Music √ √ Auto Power Off : Off when you record the current TV program on the TV √... -
Page 41: Setting Up The Language Options
Setting up the Language Press the STOP button to stop recording. Options To display the created titles, finalize the disc (See page 118) and then press the TITLE MENU button. Title menu will be displayed. If you set the On-Screen menu, disc menu, audio and subtitle language in advance, they will come up automatically every time you watch a movie. -
Page 42: Setting Up The Audio Options
Setting up the Audio Press the …† buttons to select the desired language option, then press ENTER or √ button. Options Language Original √ √ Title Audio : Original You can connect the HDD & DVD RECORDER to an English √... -
Page 43: Digital Output
Digital Output Dynamic Compression This is only active when a Dolby Digital signal is 1. PCM : Select this when your equipment is not detected. Dolby Digital compatible. 2. Bitstream : Outputs Dolby Digital (or MPEG-2) 1. Off : You can enjoy the movie with the audio as bitstream. -
Page 44: Setting Up The Video Display Options
Setting up the Video Press the …† buttons to select the desired item, then press the ENTER or √ button. display Options Press the RETURN or œ button to return to the previous menu. NOTE Press the MENU button to exit the menu. This function allows you to setup the TV screen settings. -
Page 45: Setting Up The Progressive Scan
Setting up the The message “Video Output Mode Progressive Scan” will appear. The video will now be Progressive Scan. Progressive scan If your TV supports Progressive Scan, press the P.SCAN button on the front of the HDD & DVD Video Output Mode RECORDER. -
Page 46: Canceling The Progressive Scan
Do not press the P.SCAN button if you are Canceling the using a TV that does not support NOTE Progressive mode as nothing will be Progressive scan displayed on the screen. If you press the P.SCAN button by mistake when your TV does not support Progressive mode, the mode will then need to be released. -
Page 47: Setting Up The Parental Control
Setting up the Parental Enter the 4-digit password using the number buttons on the remote control. Control The “Confirm the password” message will be displayed. Enter your password again. Parental Control The Parental Control function works in conjunction with DVDs that have been assigned a rating which helps you Title Confirm the password control the types of DVDs that your family watches. -
Page 48: Setting The Rating Level
Setting the Rating Level Changing the Password Press the …† buttons to select Rating Level, Press the …† buttons to select Change Password, then press the ENTER or √ button. then press the ENTER or √ button. Parental Control Parental Control √... -
Page 49: Playback
Before Playing Playback Read the following information before playing a disc. This section introduces basic functions of Region code (DVD-Video only) playback and playback by disc type. Both the HDD & DVD RECORDER and the discs are coded by region. These regional codes must match in order for the disc to play. -
Page 50: Playing A Disc
This HDD & DVD RECORDER can only operate with discs that are compatible with Press the OPEN/CLOSE button. NOTE DVD-RAM Standard Version 2.0. Playback and/or recording may not work for some types of discs, or when specific operations, such as angle change and Place a disc gently into the tray with the disc’s aspect ratio adjustment, are being label facing up. -
Page 51: Using The Disc Menu & Title Menu
Using the Disc Menu & Using the Search & Skip Functions Title Menu Searching through a Chapter or Some type of discs contain a dedicated menu system that allows you to select special functions for title, chapter, audio Track track, subtitle, film preview, information on characters, etc. For DVD-VIDEO discs During play, press the SEARCH ( ) buttons on... -
Page 52: Slow Motion Play/Step Motion Play
Skipping Chapters, Tracks or Slow Motion Play/ Markers Step Motion Play During play, you can search quickly through a chapter or track. Slow Motion Play During play, press the SKIP ( ) buttons on the remote control. • If you press the SKIP ( ) button, it moves to the beginning of the chapter or track or In pause or step mode, press the SEARCH (... -
Page 53: About Anykey
Step Motion Play About ANYKEY Press the STEP( ) buttons on the remote control in the pause mode. The ANYKEY function allows you to easily search for a desired scene by accessing title, chapter, track, • Each time the button is pressed, a new frame will time. - Page 54 This may not work for some discs. When Press the …† buttons to select Title, Chapter an audio CD(CD-DA) or an MP3 disc is NOTE or Track. inserted, depending on the disc type, the information display may not appear. The Time Search function does not œ...
-
Page 55: Playing The Title List
… … † † Press the buttons to select an entry you Playing the Title List want to play from Title List, then press the ENTER or PLAY ( ) button. The selected entry (title) will be played back. - About INFO button - During playback, if you press the INFO button once Follow these instructions to play back a scene from the during playback, the system information screen... -
Page 56: Navigation Menu
… … † † Press the buttons to select an entry you Navigation Menu want to play from Title List, then press the ANYKEY button. Title List Title Length Rename Protection 001 JAN/18/2005 12:15A 00:10:21 Scene Navigation 002 JAN/19/2005 12:15A 00:40:03 Copy 003 JAN/20/2005 12:15A 00:20:15 Delete... -
Page 57: Using The Anykey Button
Time Navigation Using the ANYKEY button (VR mode) Press the ANYKEY button during playback. Using this function, you can search scene minute-by- minute from the recorded title list. Search Using the TITLE LIST button √ √ Navigation Marker √ √ Subtitle √... - Page 58 … … † † Press the buttons to select an entry you Using the ANYKEY button want to play from Title List, then press the ANYKEY button. Press the ANYKEY button during playback. Title List Title Length Rename Protection 001 JAN/18/2005 12:15A 00:10:21 Search Copy 002 JAN/19/2005 12:15A 00:40:03...
-
Page 59: Using Markers
Using Markers Press the ENTER button when the desired scene appears. • The number 01 is displayed and the scene is memorized. -- -- -- -- -- -- -- -- -- Marker (VR mode) Using the MARKER button √ √ PLAY MOVE CANCEL RETURN... - Page 60 Playing back a marker Clearing a marker Using the MARKER button Using the MARKER button Press the MARKER button during playback. Press the MARKER button during playback. Marker 02 -- -- -- -- -- -- -- -- Marker 02 03 04 05 06 07 08 09 10 √ √ N:10 √...
-
Page 61: Using The Bookmarks
When a marker is cleared while HDD/DVD- RAM/-RW (VR mode) is playing, marker Press the ENTER button when the desired scene numbers will change. For example, if the 7th appears. marker is cleared after ten markers are registered, the marker numbers after the •... - Page 62 Playing back a bookmark Clearing a bookmark Using the MARKER button Using the MARKER button Press the MARKER button during playback. Press the MARKER button during playback. 2 - - - - - - - -- 2 - - - - - - - -- Bookmark Bookmark √...
-
Page 63: Selecting The Subtitle Language
Selecting the Subtitle Using the ANYKEY button Language Press the ANYKEY button during playback. subtitle languages Selects one of the recorded on the Search disc. Navigation √ √ Marker √ √ Subtitle √ √ Audio √ √ Repeat Zoom √ √ Select Media Disc Manager (VR mode) -
Page 64: Selecting The Soundtracks & Audio Channels
Selecting the Soundtracks Using the ANYKEY button & Audio Channels Press the ANYKEY button during playback. Selecting the Audio Search √ √ Navigation Selects one of the soundtracks recorded on the disc. Also Marker selects the audio channels from recorded TV programs. √... -
Page 65: Changing The Camera Angle
Changing the Camera Repeat Play Angle When a DVD-VIDEO contains multiple angles of a Playing Repeatedly(Repeat Playback) particular scene, you can select the Angle function. Using the REPEAT button Using the ANYKEY button Press the REPEAT button during playback. Press the ANYKEY button during playback. Repeat Search Bookmark... - Page 66 Repeat A-B Using the ANYKEY button Press the ANYKEY button during playback. Using the REPEAT A-B button Search √ √ Press the REPEAT A-B button during playback. Navigation Marker √ √ Subtitle √ √ Audio √ √ Repeat Zoom Repeat A-B √...
-
Page 67: Zooming-In
Zooming-In Using the ANYKEY button Press the ANYKEY button during playback. Search √ √ Navigation Marker √ √ Subtitle √ √ Audio Press the ANYKEY button during playback. √ √ Repeat Zoom √ √ Select Media Disc Manager Search √ √ Navigation Marker √... -
Page 68: Select Media
Select Media Playing an Audio CD/MP3 Playing an Audio CD(CD-DA) Press the ANYKEY button during playback. Insert an audio CD (CD-DA) into the disc tray. • The audio CD menu appears and the tracks (songs) are played automatically. Search √ √ Navigation Marker √... -
Page 69: Playing An Mp3 Disc
a Buttons on the Remote Control Playing an MP3 Disc used for Audio CD(CD-DA) playback Insert an MP3 disc into the disc tray. • The MP3 menu is displayed and the tracks (songs) are played automatically. Music List √ √ 02 : 10 Flower.mp3 Flower.mp3 Love.mp3... - Page 70 Buttons on the Remote Control Repeat CD (CD-DA) & MP3 used for MP3 playback Using the REPEAT button. Press the REPEAT button during playback. Music List √ √ 02 : 10 TRACK 1 TRACK 1 TRACK 2 CDDA TRACK 3 CDDA TRACK 4 CDDA...
- Page 71 New Playlist Using the ANYKEY button You can register a maximum 28 tracks in the playlist. Press the ANYKEY button during the Music List playback. Press the ANYKEY button during the Music List playback. Music List » » 02 : 10 TRACK 1 TRACK 1 Music List...
- Page 72 Go To Playlist If you playlisted a wrong track, press the √ … … † † buttons to select the wrong track, then press the ENTER or CANCEL button. The wrong Press the ANYKEY button during the Music List track will be removed. playback.
- Page 73 Delete the Playlist Go To Edit Playlist Press the ANYKEY button during the Music List Press the ANYKEY button during the Music List playback. playback. Music List Music List » » 02 : 10 TRACK 1 » » 02 : 10 TRACK 1 TRACK 1 TRACK 1...
-
Page 74: Enter Button
Go To Music List … … † † Press the buttons to select the Go To Edit √ √ Playlist, then press the ENTER or button. Press the ANYKEY button during the Playlist playback. Edit Playlist TRACK 1 CDDA TRACK 1 TRACK 3 TRACK 2 CDDA... -
Page 75: Viewing A Picture
Select Media (MP3) Viewing a Picture Press the ANYKEY button. Music List » » 02 : 10 .mp3 flower Insert a JPEG disc or Mixed disc (JPEG + MP3) into the flower.mp3 disc tray. Love.mp3 Copy Straight from the heart.mp3 √... -
Page 76: Slide Show
Slide Show Rotate To set up, follow steps 1~3 on page 75. To set up, follow steps 1~3 on page 75. Press the ANYKEY button. Press the ENTER button to select the picture you want to see, then press the ANYKEY button. Photo List DSC01194 Index: 1/10... - Page 77 Zoom Go To Photo List To set up, follow steps 1~3 on page 75. To set up, follow steps 1~3 on page 75. Press the ENTER button to select the picture you Press the ENTER button to select the picture you want to see, then press the ANYKEY button.
-
Page 78: Recording
This HDD & DVD RECORDER can record on the Recording methods. following discs. DVD-RAM DVD-RW DVD-R •DVD-RWs and DVD-RAMs are rewritable. •DVD-Rs are non-rewritable Compatibility between Samsung and Other Companies' Recorders Disc Types Recording Recording Device Finalizing Additional Recording format in Samsung Recorder Samsung Recordable DVD-RAM... -
Page 79: Recording Formats
Recording Formats Recording Mode Select one of four recording modes by pressing the When you insert an unused disc, the following message REC MODE button repeatedly while the unit is in Stop appears. Since available functions differ depending on mode for the desired recording time and picture quality. the disc type, select a disc that best fits your preferences. -
Page 80: Recording The Current Tv
Signal type Copy-Free Copy-Once Copy-Never Media Recording the current TV DVD-RW(Ver.1.1) DVD-RW(Ver.1.1) program you are watching with CPRM VR mode V mode DVD-R DVD-RAM(Ver.2.0) Check that the disc has enough available space for the This * marked parts are compatible with CPRM. recording. - Page 81 You cannot change the recording mode Press the REC MODE button repeatedly, (or press the and the channel while recording. NOTE … … † † REC MODE button and then press the buttons) to Recording will stop automatically if there is select the recording speed (quality).
-
Page 82: Recording From External Equipment You Are Watching
Recording from external Press the REC button. Information concerning the external input mode is equipment you are watching displayed on the screen, then recording begins. Icon( ) is displayed on the front panel. - To pause recording - • Press the REC PAUSE button to pause a recording Before you start in progress. -
Page 83: Copying From A Camcorder
Copying from a Camcorder Press the INPUT button to select DV. If the input is set to DV, a playback/record menu that enables camcorder control appears on the top of the screen. The DV device is connected. You may control the Camcorder using the IEEE1394 (DV) interface. -
Page 84: Making A One Touch Recording (Otr)
The timer counter decreases by the Making a One Touch minute from 8:00 to 0:00, then the HDD & NOTE DVD RECORDER stops recording. Recording (OTR) - To stop recording - Press the STOP ( ) button. The message “Do you You can set the HDD &... -
Page 85: Chasing Play
Press the ENTER or PLAY ( ) button. Chasing Play It plays back the title that you are currently recording from the beginning. √ √ Play You can play back from the beginning of the program you are currently recording. While Recording Press the PLAY ( ) button. -
Page 86: Simultaneous Recording And Playback
Simultaneous - Stopping Playback / Recording - Press the STOP ( ) button. Playback screen Recording and Playback disappears and the recording in progress screen appears. Pressing the STOP ( ) button once more will You can watching the previous title list while recording a stop the recording. -
Page 87: Editing
Editing This section introduces basic editing functions on a Disc/HDD. • Title List Title List is a list of previously recorded programs. If a title is deleted, that title cannot be played again. • Play List This refers to a list of user-selected titles. When one playlist is played,only the scene selected by the user will play and then stop. -
Page 88: Basic Editing (Title List)
Basic Editing (Title List) Press the …† buttons to select Rename, then press the ENTER or √ button. The Rename screen is displayed. Rename Renaming(Labeling) a Title JAN / 1 8 / 2005 12:15 AM CH 11 Follow these instructions to rename a title list entry, i.e., to edit the title of a recorded program. -
Page 89: Locking (Protecting) A Title
Locking (Protecting) a Title Press the …† buttons to select Protection, then press Follow these instructions to lock a title to protect it from the ENTER or √ button. accidental deletion. Title List Title Protection: JAN/18/2005 12:15 AM CH11 Using the TITLE LIST button JAN/18/2005 12:15 AM MOVE SELECT... -
Page 90: Deleting A Title
Press the …† buttons to select Delete, then press the Deleting a Title ENTER or √ button. Follow these instructions to delete an entry from the Title List. Title List Do you want to delete? (Related playlists may be deleted.) JAN/18/2005 12:15 AM CH11 Using the TITLE LIST button JAN/18/2005 12:15 AM... -
Page 91: Splitting A Section Of A Title (Split)
Splitting a Section of a Title (Split) You cannot delete a protected entry. If you want to delete a protected entry, select NOTE Follow these instructions to split a section of a Title “Off” in the Title Protection menu. (See List entry into two titles. - Page 92 Press the …† buttons to select Edit, then press the Press the ENTER button to select Split. ENTER or √ button. The message “This title cannot be recovered after splitting. Do you want to split?” is displayed. Title List Title Length Rename Split...
-
Page 93: Deleting A Section Of A Title (Partial Delete)
Deleting a Section of a Title (Partial Press the …† buttons to select Edit, then press the Delete) ENTER or √ button. Follow these instructions to delete a section of a Title List entry. Title List Title Length Rename Protection 001 JAN/18/2005 12:15A 00:10:21 Copy 002 JAN/19/2005 12:15A 00:40:03... - Page 94 Edit Title List Screen Elements Press the œ √ buttons to select Delete, then press the ENTER button. Partial Delete JAN/18/2005 12:15 AM CH11 Title List No. 001 Partial Delete Start JAN/18/2005 12:15 AM CH11 Title List No. 001 ➃ Start 00:01:00 00:00:00...
-
Page 95: Advanced Editing (Playlist)
… … † † Press the buttons to select New Playlist, Advanced Editing √ √ then press the ENTER or button. The Make Playlist screen is displayed. (Playlist) Make Playlist New Playlist Scene No. 001 Creating a Playlist Start Follow these instructions to create a new playlist entry Title List 1/9 from a recorded title. -
Page 96: Playing Entries In The Playlist
Playing Entries in the Playlist Press the œ √ buttons to select Make, Follow these instructions to play the playlist entries. then press the ENTER button. • To make a scene the playlist. A new Make scene screen is displayed. Repeat steps 3~6 to make a new scene for the playlist. -
Page 97: Renaming A Playlist Entry
Renaming a Playlist Entry Press the …† buttons to select Rename, then press Follow these instructions to rename a playlist entry, i.e. the ENTER or √ button. to edit the title of a playlist entry. The Rename screen is displayed. Rename (VR mode) 1 8 / JAN / 2005 12:15 AM... -
Page 98: Editing A Scene For The Playlist
Editing a Scene for the Playlist Press the …† buttons to select Edit Playlist, Follow these instructions to edit scenes for a playlist. then press the ENTER or √ button. The Edit Playlist Scene screen is displayed. (VR mode) Edit Playlist Playlist No. - Page 99 Modifying a Scene (Replacing a Scene) Press the ENTER button at the end point of the scene. To setup, follow steps 1 to 3 on page 98. Modify Scene New Playlist Press the …† œ √ buttons to select the scene you Scene No.
- Page 100 Moving a Scene (Changing the Position of a Scene) Press the …† œ √ buttons to select the position to which you want to move the selected scene, then select the ENTER button. To setup, follow steps 1 to 3 on page 98. Edit Playlist Press the …†...
- Page 101 Press the ENTER button at the end point of the scene. Adding a Scene Add Scene JAN/16/2005 12:15AM To setup, follow steps 1 to 3 on page 98. Scene No. 001 Start Press the …† œ √ buttons to select the scene that will have a new scene inserted before it, then press 00:00:15 00:00:35...
-
Page 102: Deleting A Playlist Entry From The Playlist
Deleting a Scene Deleting a Playlist Entry from the Playlist To setup, follow steps 1 to 3 on page 98. Using the PLAY LIST button Press the …† œ √ buttons to select the scene you want to delete, then press the ANYKEY button. With the unit in Stop mode/Playback mode, press the PLAY LIST button. -
Page 103: Copying From Hdd To Dvd
Press the …† buttons to select Delete, then press the ENTER or √ button. Copying from HDD to • You will be prompted with the delete confirmation message “Do you want to delete?”. Playlist About the Copy Screen Do you want to delete? Copy Copy To : HDD ©... - Page 104 Using the TITLE LIST button Press the ANYKEY button. Title List Title Length Rename Press the OPEN/CLOSE button and place a Protection 001 JAN/18/2005 12:15A 00:10:21 002 JAN/19/2005 12:15A 00:40:03 Copy recordable disc on the disc tray. 003 JAN/20/2005 12:15A 00:20:15 Delete 004 JAN/25/2005 12:15A 00:50:16 √...
- Page 105 High speed copy : This means that you - Copying a Title that has been edited can transfer without having to worry about once before - NOTE the quality getting worse with each copy ‘generation’. It also means that copying can be carried out at the maximum speed The “Do you want to view screen of copying title?”...
-
Page 106: Changing The Record Mode
Changing the Record Mode Copying Multiple Titles To setup, follow steps 1 to 7 on page 104. at One Time √ † Press the buttons to select Rec. Mode, then press the ENTER button. Using the TITLE LIST button Copy Copy To : HDD ©... - Page 107 Press the …† buttons to select Add, then press the Press the ANYKEY button. ENTER button. The Add Copy List screen is displayed. Title List Press the …† buttons to select the title you want to Title Length Rename Protection 001 JAN/18/2005 12:15A 00:10:21 copy, then press the ENTER button.
-
Page 108: Deleting An Undesired Title From The Copy List
Deleting an Undesired Title from the Previewing a Selected Title from the Copy List Copy List To setup, follow steps 1 to 7 on pages 105~106. To setup, follow steps 1 to 7 on pages 105~106. Press the …† buttons to select a title you want to Press the …†... -
Page 109: Selecting Record Mode Of Each Title From The Copy List
Selecting Record Mode of Each Changing Record Mode of All Titles Title from the Copy List from the Copy List You can copy multiple titles while setting different record You can copy multiple titles while setting the same record modes for each title. mode for all titles. -
Page 110: Copying From Dvd To Hdd
Copying from DVD to Press the ANYKEY button. Title List Title Length Rename Protection 001 JAN/18/2005 12:15A 00:10:21 Copy 002 JAN/19/2005 12:15A 00:40:03 003 JAN/20/2005 12:15A 00:20:15 Delete 004 JAN/25/2005 12:15A 00:50:16 √ √ Edit √ √ Playlist JAN/18/2005 12:15 AM CH11 √... -
Page 111: Copying Mp3 Or Jpeg Files
Copying MP3 or JPEG After a successful copy, “The title is successfully copied.” message is displayed. Files from a Disc to HDD File Copy The title is successfully copied. Insert a JPEG disc or MP3 disc into the disc tray. Press the OPEN/CLOSE button to close the disc tray. -
Page 112: Folder Copy
Folder Copy Press the …† buttons to select the MP3 or JPEG files you want to copy, then press the ANYKEY button. Insert a Disc (JPEG or MP3) in to the tray. Music List » » 02 : 10 .mp3 flower Press the …†... -
Page 113: Disc Manager
Pressing the CANCEL button during folder Disc Manager copying will cancel the folder copying after NOTE the current file is copied. Up to 1,500 files and 1,000 subfolders can be copied into one folder for MP3 files. Up to 4,500 files and 1,000 subfolders can be copied into one folder for JPEG files. -
Page 114: Disc Protection
Disc Protection Press the œ √ buttons to select Rename, then press Disc Protection allows you to protect your discs from the ENTER button. being formatted or deleted due to unintended The Rename screen is displayed. operations. Rename DVD-RAM(VR) With the unit in Stop mode, press the ANYKEY button. -
Page 115: Formatting A Disc
Formatting a Disc Shortly after HDD disc format, the space equivalent to several 10 seconds Use these instructions to format a disc. NOTE or several minutes will be displayed as The disc protect should also be cleared. used. This is because a certain HDD space is always reserved for data recording for the purpose of EPG service even though there is no data to... -
Page 116: Delete All Title Lists/Music Lists/Photo Lists
Delete All Title Lists/Music Press the œ √ buttons to select the Title, Music or Lists/Photo Lists Photo, then press the ENTER button. Title Disc Manager With the unit in Stop mode, press the ANYKEY [Title Partition] Used Space 00 : 10 : 32 button. -
Page 117: Delete All Title Lists
• When Protected Entry exists: The Delete All Title List Delete All Title Lists function will not operate. If there is a title containing a still picture, however, that function will not operate. If you want to delete a protected entry, disable Protect for it on the Lock item. -
Page 118: Finalizing A Disc
If you select Yes, you will be prompted again with the Finalizing a Disc message “Disc will be finalized. Do you want to After you record titles onto a DVD-RW/DVD-R disc with continue?”. your HDD & DVD RECORDER, it needs to be finalized before it can be played back on external devices. -
Page 119: Unfinalizing A Disc (V/Vr Mode)
Press the œ √ buttons to select Yes, then press the Unfinalizing a Disc (V/VR mode) ENTER button. The disc is unfinalized. To add additional titles to a finalized disc,you must first unfinalize it. A DVD-RW can be finalized or unfinalized in Video mode. -
Page 120: Additional Information
Troubleshooting Additional Information If your product malfunctions, go through the checkpoints below before contacting a Samsung authorized service center. Power The input is displayed for a while when the power is turned on. The HDD & DVD RECORDER Checkpoint 1 requires some time to initialize and the input will be displayed for approx. - Page 121 Playback Cannot play the disc. The angle operation does not work while playing a DVD disc. Check whether the disc is inserted Checkpoint 1 correctly with the label facing up. The angle operation is available only Checkpoint 1 when the disc contains images Check the regional code of the DVD Checkpoint 2 captured from different angles.
-
Page 122: Remote Control Unit
Video The disc revolves, but no image or bad quality No audio output. images are displayed. Check whether you have selected Checkpoint 1 Be sure that the Video Setting is Checkpoint 1 the correct digital output options in properly set. (See pages 44~46) the Audio Output Options menu. - Page 123 If the problem still persists, contact a Checkpoint 3 no disc is inserted.) nearby Samsung service center. To locate a center near you, call 1-800 SAMSUNG. Is it possible to change a subtitle and an audio...
-
Page 124: Problems And Solutions
Problems and Solutions (Display error Message) Before contacting a Samsung authorized service center, perform the following simple checks. Problem Explanation / Solution You cannot record a copy protected movie. • You can’t record the video since it is protected by copyright. - Page 125 • The model and serial number on the rear of your HDD & DVD RECORDER • The warranty information • A clear description of the problem Then contact your nearest SAMSUNG authorized service center. Call 1-800-SAMSUNG for a center near you. English - 125...
-
Page 126: Specifications
Specifications Power requirements 120V AC, 60Hz Power consumption 44 Watts Weight 9.27 lb (4.20 kg) General Dimensions 17in (43 cm) (W) x 10in (25.5 cm) (D) x 3.1in (7.9 cm) (H) Operating temp. +41°F to +95°F Other conditions Keep level when operating. Less than 75% operating humidity 1.0 V p-p at 75Ω... -
Page 127: Tv Guide On Screen User Manual
® TV Guide On Screen User Manual TV Guide On Screen Overview † For use in USA Guide Setup for a DVD Recorder † Screen Components † Guide Navigation † Main Services - Listing, Search, Schedule, Recordings, Setup, Record and Remind Notice . -
Page 128: Notice
Notice TV Guide on Screen Overview Congratulations, your new TV contains the TV Guide Trademark Notice On Screen Interactive Program Guide! This Guide has features and services that help you get the most In the United States, TV GUIDE and other related out of your viewing experience. -
Page 129: Listing
Guide Setup for a DVD Recorder Welcome Screen Welcome Screen Initial DVD Recorder set up leads you to the Welcome screen. Or press the GUIDE button to begin setup. The Welcome Screen lists features in the Guide. Press ENTER to display Screen Reminder Screen. -
Page 130: Search
Screen 2: Enter ZIP or Postal Code Screen 2 If you selected USA in Screen 1, you see the ZIP Code screen. You input numbers by either - pressing the number buttons on the remote or - using the up or down arrow button to display a number, and then the left or right arrow button to move to another field. - Page 131 Screen 5 : Which TV Guide input is the Screen 5 cable box plugged into? If you select RF TUNER, you will see screen 6. If you make any other choice, you will see screen 7. Screen 6 Screen 6 : Cable Box Tuning Channel Select the channel used for the cable box.
- Page 132 Screen 9 : Cable Box Preparation Screen 9 Follow the on-screen instructions, and press ENTER to display Screen 10. Screen 10 Screen 10: Cable Box Code Testing When testing is done, Screen 11 displays automatically. Screen 11 Screen 11: Cable Box Tuned to Channel 9? If you select Yes, you will see Screen 12.
-
Page 133: Recordings
Screen 12:Do you have an antenna Screen 12 connected? If you select Yes, you will see Screen 13. If you selected No in Screen 3 then you must select Yes in this screen to receive a NOTE channel lineup and listings. If you select No, you will see Screen 13. -
Page 134: Screen Component
Screen Components Guide screens have all or many of the features and controls in common, as shown in the following figure: Video Window - displays TV video while the Guide is displayed Tile - displays show title Highlight - indicates an active tile Info Box - provides information for a highlighted item Info Button - cycles through the various Info Box sizes Channel Logo - identifies network... -
Page 135: Schedule
Video Window TV Guide Logo Clock The Video Window is located in the upper-left corner of the Guide. When you enter the Guide, the TV video for the current show appears in the Video Window. The Video Window also includes a clock display and a Lock/Unlock Icon lock/unlock icon to indicate the status of the Video... - Page 136 Name Icon Description Indicates additional Info box information is available or that the Info box has additional sizes. Info Button Indicates additional Info box information is available. Icon only appears for Panel Menus. Progress Bar Indicates how much time has elapsed in current program. HDTV Show is presented in High-Definition TV, if available Show is new (not a re-run)
-
Page 137: Setup
Panel Menu Panel Menu Highlight Parked Highlight Odometer Number Entry Box A Panel Menu appears when the MENU or ENTER (context dependent) button is pressed on a highlighted tile and additional options are available. When a Panel Menu appears, the highlighted tile is parked (changes color). The Panel Menu displays over the Panel Ad and below the Video Window. -
Page 138: Guide Navigation
Guide Navigation Remote Control The following table describes remote control When you enter the Guide while watching TV, the actions related to the Guide. highlight appears on the currently watched show in Listings. Button Description Use the arrow buttons on the remote control to TV Guide When watching TV, enters the highlight any show and then ENTER to tune to... -
Page 139: Listing
Listings Screen 1 Access Listings by pressing the TV GUIDE button on your remote. Listings is always the first Service displayed in the Guide. With Listings highlighted, press the INFO button to display a Help screen. Press the INFO button again to close the screen. -
Page 140: Search
Search Search lets you find shows by category (HDTV, Movies, Sports, Children, Educational, News, Variety, Series), Keyword, or Alphabetical. Category Search Example: Movies Screen 1 With Search highlighted, press the INFO button to display a Help screen. Screen 2 Press the INFO button again to close the screen. Screen 3 From Search, use the down arrow to highlight Movies. - Page 141 Panel Menu Navigation Press the Info button to display a Help screen. Press the Info button again to close the screen. NOTE The up and down arrows move the highlight among the options within a Panel Menu. The number buttons on the remote are used to input information. An odometer option has arrows on both sides.
- Page 142 Keyword Search Example Keyword search lets you enter a word(s) for a particular show title found in the Listings and Recordings Services. Screen 1 Highlight the KEYWORD Section Bar, and press ENTER to display the Keyword Search menu. Highlight New Search, and press ENTER. Screen 2 The Search Options menu is displayed.
-
Page 143: Record
Screen 5 The Guide stores all the keywords you create. To edit or delete a keyword, highlight the keyword, and press the MENU button. A Search Options menu is displayed. • Go to Service Bar - closes the menu, changes no information, and returns to the Search Service Bar. - Page 144 - List : Displays a complete list of every recorded Screen 2-1 episode for a show(see example in Screen 2-1) • Sort By, use the left and right arrows to choose between - Title : shows are displayed in alphabetical order (see example in Screen 2) - Date : Shows are displayed by date and time, with most recent date and time first (see...
-
Page 145: Schedule
Panel Menu Navigation The up and down arrows move the NOTE highlight among the options within a Panel Menu. The number buttons on the remote are used to input information. An odometer option has arrows on both sides. Use the left and right arrows to cycle through the different options. - Page 146 Remind • Once : sets a show reminder one time • Regularly : the show title appears on any day of the week, on the same channel and is at the midway point of the originally scheduled show (e.g., 8:15 for an 8:00–8:30 program, 9:30 for a 9:00–10:00 program) •...
-
Page 147: Remind
Panel Menu Navigation NOTE Press the INFO button to display a Help screen. Press the INFO button again to close the screen. The up and down arrows move the highlight among the options within a Panel Menu. The number buttons on the remote are used to input information. - Page 148 Change System Settings Change System Settings lets you change your channel lineup as well as any updates to the information you entered during initial Guide setup (e.g., ZIP code, cable, antenna, recorder, etc.). Screen 1 Press ENTER to display the Confirming Your Settings screen.
- Page 149 • Change the service type if you are able to switch the source of the channel (e.g., cable, cable box, over-the-air, antenna, etc.) • Change the tune channel number using your remote control. • Enter a position number in the number entry - The position number determines where in Listings the channel displays - That number can range from 1 (top position)
- Page 150 Change Default Options Change Default Options lets you change default settings in the following categories: • General Defaults • Record Defaults • Remind Defaults Screen 1 Highlight Change Default Options, and press ENTER. General Default Options Screen 1-1 General Default Options lets you set defaults for the following: •...
-
Page 151: Record Defaults
Press the INFO button to display a Help screen. Press the INFO button again to NOTE close the screen. When finished, press ENTER to highlight Done. Press ENTER again to close the menu and accept the changes. If you do not wish to save the changes: Highlight Go to Service Bar and press ENTER NOTE to close the menu, change no information, and... -
Page 152: Guide Navigation
When finished, press ENTER to highlight Done. Press ENTER again to close the menu and accept the changes. If you do not wish to save the changes: Highlight Go to Service Bar and press ENTER NOTE to close the menu, change no information, and return to the Setup Service Bar. -
Page 153: Screen Components
If you do not wish to save the changes: Highlight Go to Service Bar and press ENTER NOTE to close the menu, change no information, and return to the Setup Service Bar. Highlight Cancel and press ENTER to close the menu, change no information, and return to the highlighted channel. - Page 154 Press the INFO button to display a Help screen. Press the INFO button again to NOTE close the screen. Screen 1-1 • Highlight Set Recording, and press ENTER to display the Record Options menu. • Highlight the Frequency option, and use the left and right arrows to choose between Once, Regularly, Weekly, and Off, as previously described.
- Page 155 Press the INFO button to display a Help screen. Press the INFO button again to NOTE close the screen. Use the arrow buttons to move through the options. Use the number or arrow keys to change the information, as necessary. Screen 3 Highlight New Manual Recording and press ENTER to display the Record Options menu.
-
Page 156: Panel Menu
Screen 4 When finished, press ENTER to highlight Schedule Recording. Press ENTER again to close the menu. You will see a Record icon for the selected frequency next to the show title. Manual recording is listed by channel number. NOTE If you do not wish to save the changes: Highlight Cancel and press ENTER to close the menu, change no information, and return to the... -
Page 157: Guide Setup For A Dvd Recorder
Panel Menu Navigation Press the INFO button to display a Help NOTE screen. Press the INFO button again to close the screen. The up and down arrows move the highlight among the options within a Panel Menu. The number buttons on the remote are used to input information. - Page 158 Screen 2 Highlight Set Reminder, and press ENTER to display the Remind Options menu. • Highlight the Frequency option, and use the left and right arrows to choose among - Once : sets a show reminder one time - Regularly : the show title appears on any day of the week, on the same channel and is at the midway point of the originally scheduled...
- Page 159 Using Manual Reminder Screen 1 Highlight the Schedule Service label, and press the MENU button to display the Schedule Options menu. Press the INFO button to display a Help screen. Press the INFO button again to NOTE close the screen. Screen 2 Use the arrow buttons to move through the options.
- Page 160 • Based on your option settings and if the TV is On Screen 3-1 at the reminder time, a notification screen will appear. You can then choose to hide the reminder, or highlight the show, and press ENTER to tune to the show.
- Page 161 • proceed, no auto-tune - set the show as a Screen 2-1 Reminder but do not auto-tune Screen 2-2 • don’t set this reminder - cancel the Reminder Panel Menu Navigation Press the INFO button to display a Help NOTE screen.
-
Page 162: Frequently Asked Questions(Faqs)
If I have a power outage, do I need to complete Frequently Asked Setup again? Questions(FAQs) No, Setup information is stored in TV Checkpoint 1 Guide On Screen. If I add a recorder or change my cable service, how do I change my Setup information? Is Help available in the Guide? If so, how do I find it? 1) Highlight the Setup Service in the Answer 1... -
Page 163: Troubleshooting
º Can I set a Record or Remind event without Troubleshooting highlighting a show title in the Guide? Yes. TV Guide On Screen has a Checkpoint 1 Manual Record and Remind feature. Highlight Schedule and press menu. Choose the event type, press ENTER I got listings after my initial Setup;... -
Page 164: Tv Guide On Screen Glossary
A show I set to Record did not occur. I set a show with the Power On TV option and it did not. • Check the Schedule menu and verify • Make sure your recorder is turned Checkpoint 1 Checkpoint 1 that the show is listed as a Off before the recording begins. - Page 165 • Direct Tune - When a show currently airing is • Keyword Search – The ability to enter a word to highlighted in the Guide, pressing the ENTER button search for a particular show on the remote closes the Guide and tunes to the show •...
- Page 166 • Panel Menu Option - Any option displayed in a Panel • Reminder Notification Screen - A message that Menu (e.g., Done, Start, Auto-Tune, Channel, Cancel, appears when a scheduled show is about to begin etc.) • Parked Highlight - When a Panel Menu is displayed, indicates the object to which the Panel Menu applies •...
-
Page 167: Warranty
Transportation to and from the service center is the responsibility of the purchaser. SAMSUNG will repair or replace this product, at our option and at no charge with new or reconditioned parts, if found to be defective during the limited warranty period specified above. The product must be returned during the warranty period with transportation charges prepaid to SAMSUNG’s designated service center. - Page 168 ELECTRONICS Samsung Electronics America, lnc. 105 Challenger Road Ridgefield Park, NJ 07660-0511 TEL: 1-800-SAMSUNG (7267864) www.samsung.com AK68-00758B-01 English...