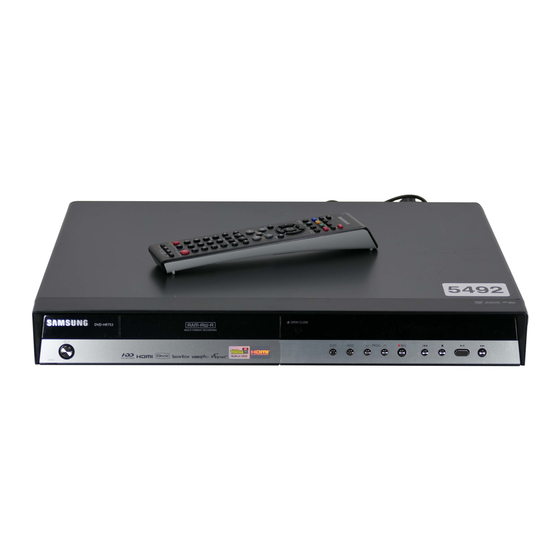
Samsung DVD-HR753 Instruction Manual
Hide thumbs
Also See for DVD-HR753:
- Instruction manual (213 pages) ,
- Service manual (132 pages) ,
- Introducing (69 pages)
Table of Contents
Advertisement
Quick Links
Download this manual
See also:
Instruction Manual
Advertisement
Table of Contents

Related Manuals for Samsung DVD-HR753


Summary of Contents for Samsung DVD-HR753
- Page 1 Instruction Manual DVD-HR753 DVD-HR755 DVD-HR756 <HR753/HR756> <HR755> The colour of the front panel differs depending upon the model. DVD+R www.samsung.com/uk English Ελληνικά AK68-01370A Downloaded From Disc-Player.com Samsung Manuals...
-
Page 2: Warning
This product satisfi es CE regulations when shielded cables and connectors are used to connect the unit to other equipment. To prevent electromagnetic interference with electric appliances, such as radios and televisions, use shielded cables and connectors for connections. English - 2 Downloaded From Disc-Player.com Samsung Manuals... -
Page 3: Precaution
• Do not use the HDD & DVD RECORDER in a place subject to extreme changes in temperature. • Do not apply a strong shock to the HDD & DVD RECORDER. English - 3 Downloaded From Disc-Player.com Samsung Manuals... -
Page 4: Disc Handling
fi xed with exposed tape adhesive or leftover peeled-off stickers.) • Do not use scratch-proof protectors or covers. • Do not use discs printed with label printers available on the market. • Do not load warped or cracked discs. English - 4 Downloaded From Disc-Player.com Samsung Manuals... - Page 5 • This unit can play back DVD±R discs recorded and fi nalised with a Samsung DVD video recorder. It may not be able to play some DVD±R discs depending on the disc and the condition of the recording.
-
Page 6: English
You cannot play back the disc that is larger than a • Disc-protected: See page 94 “Disc Protection” 720 x 576 pixel resolution. ❋ DVD-RAM/±RW/±R discs that are incompatible with the DVD-VIDEO format cannot be played with this product. English - 6 Downloaded From Disc-Player.com Samsung Manuals... - Page 7 DVD video format, it may also not be playable. ◆ Disc compatibility • High Speed Recording discs can be used in this unit. • Not all brands of discs will be compatible with this unit. English - 7 Downloaded From Disc-Player.com Samsung Manuals...
-
Page 8: Table Of Contents
Using the Disc Menu & Title Menu ......41 Case 1 : Connecting to a TV with HDMI Jack ..22 Case 2 : Connecting to a TV with DVI Jack ..... 22 English - 8 Downloaded From Disc-Player.com Samsung Manuals... - Page 9 Video Plus+ Extended ..........74 Go To Recorded List..........74 Editing Basic Editing (Title List) ..........76 Playing the Title ............76 Renaming (Labeling) a Title ........76 Locking (Protecting) a Title ........77 English - 9 Downloaded From Disc-Player.com Samsung Manuals...
-
Page 10: General Features
You can record up to approximately 16-hours of video RECORDER to a SAMSUNG TV using an HDMI on a double side 9.4GB DVD-RAM disc, up to 15-hours Cable. (This is only available with SAMSUNG TVs that on a dual-layer 8.5GB DVD±R disc, and up to 8-hours support Anynet+.) on a 4.7GB DVD-RAM/±RW/±R disc, depending on the... -
Page 11: Before Reading The User's Manual
Make sure to check the following terms before All rights reserved; No part or whole of this user’s reading the user manual. manual may be reproduced or copied without the prior written permission of Samsung Electronics Co. Icons that will be used in manual Icon Term Defi... - Page 12 Chapters will be created automatically when you fi nalise recording on DVD-RW/-R discs in Video mode. The chapter’s length (interval between chapters) varies according to the recording mode. English - 12 Downloaded From Disc-Player.com Samsung Manuals...
-
Page 13: Unpacking
Point the remote control towards the television. Press and hold the TV STANDBY/ON button and enter the two-fi gure code corresponding to the brand of your television, by pressing the appropriate number buttons. English - 13 Downloaded From Disc-Player.com Samsung Manuals... - Page 14 The functions listed above will not necessarily work on all televisions. If you encounter RADIOLA 06, 56 problems, operate the television directly. RADIOMARELLI 45, 46 SABA 57, 72, 73, 74, 75 SALORA English - 14 Downloaded From Disc-Player.com Samsung Manuals...
-
Page 15: Description
Connect external digital equipment with a DV jack. SEARCH/SKIP buttons (such as a camcorder) Goes to the next title/chapter/track or goes back to the previous title/chapter/track. P.SCAN button Selects the progressive scan mode. DVD button Select DVD mode. English - 15 Downloaded From Disc-Player.com Samsung Manuals... -
Page 16: Rear Panel
Playing time/clock/current status indicator. Lights in the record mode. Lights in the progressive scan mode. Lights when a HDD/DVD is selected. Lights to indicate the timer record mode. Lights when a DVD-RAM/±RW/±R disc is loaded. English - 16 Downloaded From Disc-Player.com Samsung Manuals... -
Page 17: Tour Of The Remote Control
Tour of the Remote Control Your HDD & DVD RECORDER remote control will work with Samsung televisions and compatible brands. INFO button This will display current setting or disc status. TITLE LIST/DISC MENU button Use this to enter the View Recording list/disc menu. -
Page 18: Connecting The Hdd & Dvd Recorder
TV mode : Press the TV/DVD button on remote control, then “TV” appear on Front LED display (or turn off HDD & DVD RECORDER). Then you can watch programmes received through TV. English - 18 Downloaded From Disc-Player.com Samsung Manuals... -
Page 19: Other Type Of Connecting The Video Output Cable
It is recommended that the user switch the connection to the ‘standard defi nition’ output. If there are questions regarding our TV set compatibility with this model 576P HDD & DVD RECORDER, please contact our customer service centre. English - 19 Downloaded From Disc-Player.com Samsung Manuals... -
Page 20: Case 2 : Connecting To An S-Video Output Jack
HDD & DVD RECORDER must be connected to the exact corresponding component input jacks on your TV. Progressive setting is only available when the Video Out is set to Component. (See pages 36~37) English - 20 Downloaded From Disc-Player.com Samsung Manuals... -
Page 21: Other Type Of Connecting The Audio Output Cable
“DTS” and “DTS Digital Out” are trademarks of DTS, Inc. White Case 1 : Connecting to your TV If your TV has audio input jacks, use this connection. Front(L) Front(R) speaker speaker Yellow White English - 21 Downloaded From Disc-Player.com Samsung Manuals... -
Page 22: Connecting Hdmi/Dvi To A Tv
TV. Turn on the HDD & DVD RECORDER and TV. • Press the input selector on your TV remote control until the DVI signal from the HDD & DVD RECORDER appears on your TV screen. English - 22 Downloaded From Disc-Player.com Samsung Manuals... - Page 23 If you use an HDMI cable to connect a Samsung TV to the HDD & DVD RECORDER, you can operate the recorder using the TV remote control. (This is only available with SAMSUNG TVs that support Anynet+(HDMI-CEC).)
-
Page 24: Connecting To Av 3 In, Dv Input Jack
White AV 3 in selection will be automatically done. If the input is not selected automatically, use INPUT SEL. button to select proper input. Copy protected content cannot be recorded. English - 24 Downloaded From Disc-Player.com Samsung Manuals... -
Page 25: On-Screen Menu Navigation
OK button. If you do not want to do auto Press the [OK] button to auto clock set. clock setting, select No using the ◄► buttons, then press the OK button. English - 25 Downloaded From Disc-Player.com Samsung Manuals... -
Page 26: Setting The Clock
The HDD & DVD RECORDER automatically sets the clock Monday according to the time signal broadcast between the channels PR1 to PR5. If you do not need the Auto Clock Set function, < MOVE SELECT RETURN EXIT select Off. English - 26 Downloaded From Disc-Player.com Samsung Manuals... -
Page 27: Channel Set
- MFT(Manual Frequency Tunning) : You can tune up the channel frequency better using ◄► buttons. • In case of Delete (GREEN(B) button) : the channel information of selected PR(programme) will be removed. English - 27 Downloaded From Disc-Player.com Samsung Manuals... -
Page 28: Setting Up The Language Options
Press the ▲▼ buttons to select the desired system option, then press the OK or ► button. Press the ▲▼ buttons to select the desired item, then press the OK or ► button. English - 28 Downloaded From Disc-Player.com Samsung Manuals... -
Page 29: Auto Power Off Setting
DISC MENU button. The chapter menu for the selected Title will be displayed. The Automatic Chapter Creator function does not work during Timer Recording or when you turn the power off. English - 29 Downloaded From Disc-Player.com Samsung Manuals... -
Page 30: Ep Mode Time Setting
Press the ▲▼ buttons to select On, then press the OK or ► button. For using Anynet+ (HDMI CEC) Connect the HDD & DVD RECORDER to a Samsung TV with an HDMI cable. (See pages 22~23) Set the Anynet+ (HDMI CEC) to “On” on your HDD & DVD RECORDER. -
Page 31: Ez Record
: 6 Hours Your registration code is: XXXXXXXX Disc Manager Anynet+ (HDMI CEC) : Off To learn more visit www.divx.com/vod information, visit www.divx.com/vod Setup EZ Record : Off DivX(R) Registration SELECT RETURN EXIT English - 31 Downloaded From Disc-Player.com Samsung Manuals... -
Page 32: Setting Up The Audio Options
Select this only when your AV receiver (or AV amplifi er) have DTS decoder. MOVE SELECT RETURN EXIT When DTS soundtrack is played, sound does not output from AV Audio Output. English - 32 Downloaded From Disc-Player.com Samsung Manuals... - Page 33 “Dual L” and “Dual R” options can be selected from “Audio NICAM : On Setup V-Mode Compatibility : On Selection.” Audio Selection : Dual L Dual L Dual R MOVE SELECT RETURN EXIT English - 33 Downloaded From Disc-Player.com Samsung Manuals...
-
Page 34: Setting Up The Video Options
3D Noise Reduction : Off Timer Record HDMI Resolution : 576P Disc Manager • On : Provides a clear picture through noise reduction (for recording). Video Output : Component Setup MOVE SELECT RETURN EXIT English - 34 Downloaded From Disc-Player.com Samsung Manuals... -
Page 35: Output Selection
When the resolution is changed it may take a few seconds for a normal image to appear. If you set the HDMI output resolution 720P or 1080i, HDMI output provides better picture quality. English - 35 Downloaded From Disc-Player.com Samsung Manuals... -
Page 36: Video Output
The message “Press [Yes] to confi rm Progressive scan mode. Otherwise, press [No].” will appear. Press the ◄► buttons to select Yes, and then press the OK button. Set your TV to Progressive input (using the TV remote control.) English - 36 Downloaded From Disc-Player.com Samsung Manuals... - Page 37 Progressive mode, the mode will then need to be released. To release the Progressive mode, press the P.SCAN button on the front panel 3 times. The screen will recover after the PS indicator on the front panel display turns off. English - 37 Downloaded From Disc-Player.com Samsung Manuals...
-
Page 38: Setting Up The Parental Lock
The “Confi rm the password” message will be displayed. MOVE SELECT RETURN EXIT Enter your password again using the number buttons on the remote control. After Rating Level has been set, you can change the password. English - 38 Downloaded From Disc-Player.com Samsung Manuals... -
Page 39: Region Code (Dvd-Video Only)
Approx. 199 or Approx. 264 (EP: Extended) Approx. 64 (XP: Excellent Quality) DVD- Approx. 106 HR755 AUDIO (SP: Standard Quality) VIDEO Approx. 211 DVD- (LP: Long Playback) HR756 Approx. 316 or Approx. 421 (EP: Extended) English - 39 Downloaded From Disc-Player.com Samsung Manuals... -
Page 40: Playing A Disc
) button again, it will pick up where you left off. (Unless the disc is removed or the HDD & DVD RECORDER is unplugged, or if you press the STOP( ) button twice.) English - 40 Downloaded From Disc-Player.com Samsung Manuals... -
Page 41: Using The Disc Menu & Title Menu
Since only the information necessary for playing a desired scene is included in a playlist, even if that playlist is deleted, the original recording will not be deleted. (only VR mode) English - 41 Downloaded From Disc-Player.com Samsung Manuals... -
Page 42: Using The Playback Related Buttons
Title or marker (HDD/DVD-RAM/-RW(VR mode)). • If you press the SKIP ( ) button, it moves to the next chapter or track or marker (HDD/DVD-RAM/-RW(VR mode)). English - 42 Downloaded From Disc-Player.com Samsung Manuals... -
Page 43: Slow Motion Play
) button is pressed, the next frame will be activated. • To return to normal speed playback, press the PLAY ( ) button. Step motion operates only in the forward direction on DivX discs. English - 43 Downloaded From Disc-Player.com Samsung Manuals... -
Page 44: Using The Info Button
Press the ◄► buttons to select the desired subtitle language. The subtitle display may be different depending on the disc type. Some discs allow you to select the language for the disc menu only. English - 44 Downloaded From Disc-Player.com Samsung Manuals... -
Page 45: Selecting The Soundtracks & Audio Channels
This function is disc-dependent, and may not work on all DVDs. This function does not work when a DVD has not been recorded with a multi-camera angle system. Displays the current angle, total angle number. English - 45 Downloaded From Disc-Player.com Samsung Manuals... -
Page 46: Repeat Play
( ) will appear. You can also activate Normal Playback by pressing the EXIT( ) button. Audio CDs(CD-DA), MP3 discs and DivX discs do not support the Repeat A-B function. English - 46 Downloaded From Disc-Player.com Samsung Manuals... -
Page 47: Zooming-In
➞ X2 ➞ X4 HDD/DVD-VIDEO/ ➞ X2 ➞ normal size DVD-RAM/±RW/±R When the recording is done in EP mode, the zoom function is not supported except when the recording has been in V mode. English - 47 Downloaded From Disc-Player.com Samsung Manuals... -
Page 48: Using Markers
For example, if the 7th marker is cleared after ten markers are registered, the marker numbers after the eighth will automatically move ahead by one and the 8th marker becomes the 7th. English - 48 Downloaded From Disc-Player.com Samsung Manuals... -
Page 49: Using The Bookmarks
) button to start playing from the selected scene. Clearing a bookmark Press the MARKER button during playback. Press the ◄► buttons to select a bookmarked scene. Press the RED(A) button to delete the selected bookmark. English - 49 Downloaded From Disc-Player.com Samsung Manuals... -
Page 50: Playing An Audio Cd/Mp3
Play Mode ➃ Displays the current fi le type and fi le name. PREVIOUS/NEXT PAGE EXIT Display available buttons. Displays the current play index, total track number. Displays the track list (song list). English - 50 Downloaded From Disc-Player.com Samsung Manuals... -
Page 51: Playing An Mp3 Disc
• Repeat Track (CD (CD-DA)/MP3) • Repeat Folder (MP3) • Repeat All (CD (CD-DA)/MP3) • Random (CD (CD-DA)/MP3): The random option plays a disc’s tracks in random order. English - 51 Downloaded From Disc-Player.com Samsung Manuals... - Page 52 PREVIOUS/NEXT PAGE EXIT press the OK button. The selected tracks are played automatically. Playlist Title Length Y PLAYLIST E PLAYLIST01 ► 00:02:22 Y PLAYLIST MOVE SELECT CHECK EXIT English - 52 Downloaded From Disc-Player.com Samsung Manuals...
- Page 53 PLAYLIST01 TRACK04 4:03 The Music List will be displayed. TRACK02 3:57 ► 00:02:22 TRACK06 5:08 I TRACK04 TRACK01 4:19 k PLAYLIST01 Edit Playlist New Playlist Music List EXIT English - 53 Downloaded From Disc-Player.com Samsung Manuals...
- Page 54 006 Song 5.mp3 Photo 10.3MB Edit Sort Play Mode Contents PREVIOUS/NEXT PAGE CHECK EXIT This function is possible only when the disc contains the selected contents. Audio CD(CD-DA) is not available. English - 54 Downloaded From Disc-Player.com Samsung Manuals...
-
Page 55: Viewing A Picture
RED(A) button. • You can go to Photo List by pressing YELLOW(C) button. ◆ To stop the Rotate Rotate Rotate Off Photo List Press the GREEN(B), STOP( ) or RETURN button. RETURN EXIT English - 55 Downloaded From Disc-Player.com Samsung Manuals... - Page 56 Image 15.jpg Photo Image 16.jpg Press the OK or ► button. Edit Sort Slideshow Contents PREVIOUS/NEXT PAGE CHECK EXIT This function is possible only when the disc contains the selected contents. English - 56 Downloaded From Disc-Player.com Samsung Manuals...
-
Page 57: Playing A Divx
That is why Codec Type, Version and Higher resolution over specifi cation are not supported. You cannot play back the disc that is larger than a 720 x 576 pixel resolution. English - 57 Downloaded From Disc-Player.com Samsung Manuals... - Page 58 Title E ROOT DivX Press the OK or ► button. Music Photo Edit Sort Subtitle Enc. Contents CHECK EXIT This function is possible only when the disc contains the selected contents. English - 58 Downloaded From Disc-Player.com Samsung Manuals...
-
Page 59: Recordable Discs
DAO(Disc At Once) in a PC cannot be unfi nalised. - A DVD-RW disc that has been recorded in Video Mode of a different maker’s recorder cannot be unfi nalised. - A DVD±R disc cannot be unfi nalised. English - 59 Downloaded From Disc-Player.com Samsung Manuals... -
Page 60: Recording Formats
The chapter’s length (interval between chapters) varies according to the recording mode. • Simple editing (erasing titles/changing title name). DVD+RW • With DVD+RW discs, there is no difference between DVD-Video format(Video mode) and DVD-Video Recording format(VR mode). English - 60 Downloaded From Disc-Player.com Samsung Manuals... -
Page 61: Recording Mode
1GB = 1,000,000,000 bytes; actual formatted capacity may be less as the internal fi rmware uses a portion of the memory. The dual layer DVD±Rs have approximately double the capacity of single layer DVD±Rs. (See page 39) English - 61 Downloaded From Disc-Player.com Samsung Manuals... -
Page 62: Unrecordable Pictures
If the contents of the disc are copied to other media, the ID will be absent or wrong and the data will not be decryptable. English - 62 Downloaded From Disc-Player.com Samsung Manuals... -
Page 63: Recording Immediately
DV. (See page 65) Press the REC MODE button repeatedly, (or press the REC MODE button, then press the ▲▼ buttons) to select the recording speed (quality). ➞ SP ➞ LP ➞ EP ➞ XP English - 63 Downloaded From Disc-Player.com Samsung Manuals... - Page 64 Recording will stop automatically if a copy protected image is selected. DVD-RAM/±RW discs must be formatted before starting to record. Most new discs are sold unformatted. Do not use DVD-R authoring discs with this unit. English - 64 Downloaded From Disc-Player.com Samsung Manuals...
-
Page 65: Copying From A Camcorder
When using DVD-RAM/±RW/±R discs, the message “Updating the information of disc. Please wait for a moment” is displayed. To display playback related icons on the screen, press any direction button on the remote control. English - 65 Downloaded From Disc-Player.com Samsung Manuals... -
Page 66: Making A One Touch Recording (Otr)
) button. The message “Do you want to stop recording?” is displayed. Press the ◄► buttons to select Yes, then press the OK button. • • Or press the STOP ( ) button again. English - 66 Downloaded From Disc-Player.com Samsung Manuals... -
Page 67: Simultaneous Recording And Playback
) button once, playback screen disappears and the Title List screen appears. Pressing the MENU( ) button again, the recording in progress screen appears. Pressing the STOP( ) button once more will stop the recording. English - 67 Downloaded From Disc-Player.com Samsung Manuals... -
Page 68: Time Shift Function As A Live Signal
The Time Shift is available only when HDD mode is selected. You can use this function for up to maximum two hours. You can only play the contents by using the menu when the Time Shift is set to On. English - 68 Downloaded From Disc-Player.com Samsung Manuals... -
Page 69: Making A Timer Recording
- LP (low quality) : Select when a long recording time is required. - EP (extended) : Select when a longer recording time is required. - The dual layer DVD±Rs have approximately double the capacity of single layer DVD±Rs. (See page 39) English - 69 Downloaded From Disc-Player.com Samsung Manuals... - Page 70 HDD disk has no space to record. If you have set the Timer Recording using PDC, the fan can still operate and make a noise when the power is off. English - 70 Downloaded From Disc-Player.com Samsung Manuals...
-
Page 71: Editing The Scheduled List
HDD PR 01 JAN 01 21:00 22:00 HDD PR 01 JAN 01 23:15 23:45 HDD PR 01 JAN 02 17:30 18:30 Recordable Time HDD 108:14 SP Recorded List > MOVE SELECT RETURN EXIT English - 71 Downloaded From Disc-Player.com Samsung Manuals... -
Page 72: Deleting A Scheduled List
JAN 01 23:15 23:45 Press the EXIT ( ) button after fi nishing the operation. The Recordable Time HDD 108:14 SP Delete Recorded List Scheduled List screen will disappear. MOVE SELECT RETURN EXIT English - 72 Downloaded From Disc-Player.com Samsung Manuals... -
Page 73: Using The Video Plus+ Feature
Enter the Video Plus+ code for the programme you wish to record. Video Plus+ is a trademark of Gemstar Development Corporation. The Video Plus+ system is manufactured under licence from Gemstar Development Corporation. English - 73 Downloaded From Disc-Player.com Samsung Manuals... -
Page 74: Video Plus+ Extended
23:45 Timer rec was finished successfully . Press the ▲▼ buttons to select the number of the Recorded List, then press the OK button. Delete Delete All Scheduled List SELECT RETURN EXIT English - 74 Downloaded From Disc-Player.com Samsung Manuals... - Page 75 Delete All Scheduled List > MOVE SELECT RETURN EXIT Scheduled List Current Time 10:54 To Source Date Start Mode Add a list Recordable Time HDD 105:44 SP Recorded List SELECT RETURN EXIT English - 75 Downloaded From Disc-Player.com Samsung Manuals...
-
Page 76: Basic Editing (Title List)
The Rename screen is displayed. Select the desired characters using the ▲▼◄► buttons, press the OK button. • Back Space (RED(A) button) : Deletes and moves the cursor backwards by one position. English - 76 Downloaded From Disc-Player.com Samsung Manuals... -
Page 77: Locking (Protecting) A Title
If you want to cancel the Protection, select Off in step 5 and press the OK button. The key icon changes to the unlocked status. If you select “Select All” in the Edit menu, all title will be checked. English - 77 Downloaded From Disc-Player.com Samsung Manuals... -
Page 78: Deleting A Title
With DVD±R, titles are only deleted from the menu, however, the Title remains physically on the disc. If you select “Select All” in the Edit menu, all title will be checked. English - 78 Downloaded From Disc-Player.com Samsung Manuals... -
Page 79: Splitting A Section Of A Title (Split)
Split 1 Split 2 This title cannot be recovered after spliting. Do you want to split? 00:00:00 00:30:55 00:30:55 Select Split Return & PLAY/PAUSE SCAN MOVE SELECT RETURN EXIT < English - 79 Downloaded From Disc-Player.com Samsung Manuals... -
Page 80: Deleting A Section Of A Title (Partial Delete)
End point cannot be marked earlier than start point The section cannot be deleted when it includes a still picture. Press the EXIT ( ) button after the operation has fi nished. The Title List screen will disappear. English - 80 Downloaded From Disc-Player.com Samsung Manuals... -
Page 81: Using The Sort Function (Title List)
SELECT RETURN EXIT The Navigation function may not work on a disc that has not been recorded by this device. An edited title may not display the exact search time. English - 81 Downloaded From Disc-Player.com Samsung Manuals... -
Page 82: Select Contents
Press the ▲▼ buttons to select the contents you want to move, then CHECK EXIT Press the OK or ► button. This function is possible only when the disc contains the selected contents. English - 82 Downloaded From Disc-Player.com Samsung Manuals... -
Page 83: Advanced Editing (Playlist)
Press the ◄► button to select Return, then press the OK button to fi nish the operation. You can create up to 99 playlist entries. Depending on the kind of disc, the displayed screen may have a slight difference. English - 83 Downloaded From Disc-Player.com Samsung Manuals... -
Page 84: Playing Entries In The Playlist
Clear (YELLOW(C) button) : Deletes all the character inputs. • Save (BLUE(D) button) : Registers the character inputs. Press the BLUE(D) button to select Save. The changed title is displayed in the title fi eld of the selected playlist entry. English - 84 Downloaded From Disc-Player.com Samsung Manuals... -
Page 85: Editing A Scene For The Playlist
(PLAY ( 00:04:54 00:00:00 SEARCH ( ), SKIP ( Title List 1/3 ► 00:05:27 Start Change Return & PLAY/PAUSE SCAN # $ SKIP < MOVE SELECT RETURN EXIT English - 85 Downloaded From Disc-Player.com Samsung Manuals... - Page 86 The section you want to add is inserted prior to the scene Title List: 1/3 00:07:28 selected in step 4 of Adding a Scene. Start Return & PLAY/PAUSE SCAN # $ SKIP < MOVE SELECT RETURN EXIT English - 86 Downloaded From Disc-Player.com Samsung Manuals...
-
Page 87: Deleting A Playlist Entry From The Playlist
< You will be automatically returned to the Playlist screen after the delete operation has fi nished. If you select “Select All” in the Edit menu, all title will be checked. English - 87 Downloaded From Disc-Player.com Samsung Manuals... -
Page 88: Using The Sort (Playlist)
Press the OPEN/CLOSE button and place a recordable disc on the disc tray. Press the OPEN/CLOSE button to close the disc tray. Wait until LOAD disappears from the front panel display. Check that the disc has enough available space for the recording. English - 88 Downloaded From Disc-Player.com Samsung Manuals... - Page 89 • To cancel the copying in progress, press the RED(A) button. After a successful copy, “The title is successfully copied” message is displayed. Cancel Bar Type Channel The title is successfully copied. English - 89 Downloaded From Disc-Player.com Samsung Manuals...
-
Page 90: Copying From Dvd To Hdd
You cannot copy anything else on fi nalised DVD±R and DVD- RW(V mode) mode. You cannot copy a DVD-VIDEO to HDD. Contents Copy Specifi cations Contents Recorded Video Title Supported Copy Protected Title Not supported Copy Once Title Not supported English - 90 Downloaded From Disc-Player.com Samsung Manuals... -
Page 91: Copying Mp3, Jpeg Or Divx
If you don’t want to copy a certain one of the checked folders, Start Copy New Folder EXIT simply select that entry and press MARKER button to deselect it until a checkmark disappears. English - 91 Downloaded From Disc-Player.com Samsung Manuals... - Page 92 The disc that has Video recording or has title dubbing from HDD can’t be copied. • If the disc is fi nalised through Disc Manager, it can be compatible with PC as a disc with a UDF fi le system. English - 92 Downloaded From Disc-Player.com Samsung Manuals...
- Page 93 Save (BLUE(D) button): Registers the character inputs. Edit Sort Play Mode Contents PREVIOUS/NEXT PAGE CHECK EXIT Press the BLUE(D) button to select Save. The changed fi le name is displayed on the selected entry. English - 93 Downloaded From Disc-Player.com Samsung Manuals...
-
Page 94: Disc Manager
Disc Protection Info Not Protected button. Current Rec. Mode VR-Mode Press the ◄► buttons to select On, then press the OK button. Rename Protection Delete All Format < MOVE SELECT RETURN EXIT English - 94 Downloaded From Disc-Player.com Samsung Manuals... -
Page 95: Delete All Title Lists
All title lists, DivX lists, music lists or photo lists are deleted. Used Space 000:39 ( 1.68 GB) Available Space 065:19 XP ( 231.01 GB) All playlists will also be deleted. Do you want to continue? Delete Format < MOVE SELECT RETURN EXIT English - 95 Downloaded From Disc-Player.com Samsung Manuals... -
Page 96: Formatting A Disc
DVD-VR and DVD-V are defi ned according to their recording format. DVD-VR DVD-V DISC DVD-RAM/-RW DVD-RW/DVD-R • With DVD+RW discs, there is no difference between DVD-Video format (Video mode) and DVD-Video Recording format (VR mode). English - 96 Downloaded From Disc-Player.com Samsung Manuals... -
Page 97: Finalising A Disc
Data on the disc will be damaged if the recorder is powered off during fi nalisation process. You can fi nalise the disc automatically using EZ Record. (See page 31) English - 97 Downloaded From Disc-Player.com Samsung Manuals... - Page 98 A DVD-RW can be fi nalised or unfi nalised in VR mode. Finalise Unfi nalise Mark DVD-RW(VR:F) DVD-RW(VR) Additional recording, Additional recording, deletion, editing, and Operation deletion, editing, and protection are protection are possible. impossible. English - 98 Downloaded From Disc-Player.com Samsung Manuals...
-
Page 99: Troubleshooting
Checkpoint 1 You cannot use this operation or If your product malfunctions, go through the function due to one of the following checkpoints below before contacting a Samsung reasons: authorised service centre. (1) Your DVD disc restricts it. (2) Your DVD disc does not support this... -
Page 100: Timer Recording
Audio Output HDMI output Jitter. Options menu. (See pages 32~33) Check your TV system setup correctly. Checkpoint 1 Checkpoint 2 Please refer to the user’s manual of your TV. English - 100 Downloaded From Disc-Player.com Samsung Manuals... -
Page 101: Remote Control Unit
Plug your HDD &DVD RECORDER off and Checkpoint 2 Checkpoint 3 If the problem still persists, contact a nearby Samsung service centre. English - 101 Downloaded From Disc-Player.com Samsung Manuals... - Page 102 For DVD discs, audio signals recorded at 96 kHz sampling frequency are converted into and Audio Output output at 48 kHz. Disc Type AUDIO CD(CD-DA) Analog Audio Output 48 / 96 kHz 44,1 kHz Digital Audio Output 48 kHz 44,1 kHz English - 102 Downloaded From Disc-Player.com Samsung Manuals...
- Page 103 Samsung,its subsidiaries and distributors shall not 2. Samsung ’s obligations are limited to the repair or, be liable for indirect or consequential loss or any at its discretion,replacement of the product or the damage to records,compact discs,videos or audio defective part.
- Page 104 Contact SAMSUNG WORLD WIDE If you have any questions or comments relating to Samsung products, please contact the SAMSUNG customer care centre. Region Country Customer Care Centre Web Site Downloaded From Disc-Player.com Samsung Manuals...
- Page 105 Business users should contact their supplier and check the terms and conditions of the purchase contract. This product should not be mixed with other commercial wastes for disposal. English AK68-01370A Downloaded From Disc-Player.com Samsung Manuals...