Table of Contents
Advertisement
Available languages
Available languages
Quick Links
Advertisement
Table of Contents

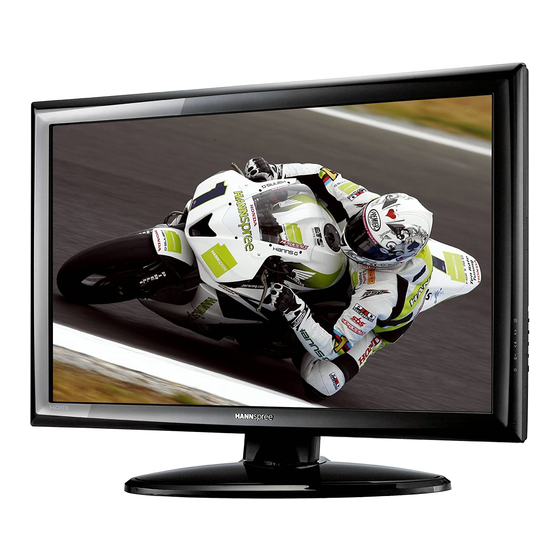
Summary of Contents for HANNspree HF287H
-
Page 2: Table Of Contents
Contents of the Package Installation and Removal Making Connections Control Buttons Quick setup 快速安裝指南 快速安装指南 T F T L C D M O N I T O R クイックセットアップ Schnellanleitung Instructions rapides Instrucciones rápidas Istruzioni veloci Instalação rápida Snelle installatie 빠른... -
Page 3: Contents Of The Package
Contents of the Package LCD Monitor (Reference only, the real feature is depended on selected model) Screen Base Accessory Power Cord VGA Cable Audio Cable HDMI to DVI-D Cable screw X 3 & Allen key User’s Manual (Optional) Quick Start Guide Service Manual... -
Page 4: Installation And Removal
Installation and Removal INSTALL & REMOVE INSTALLATION: Turn the monitor over and set it upside down. Align the monitor to the slots on the stand. Please note that the longer edge of the stand should be facing forward. Securely mount the monitor onto the stand using the supplied screws and Allen key. Check the underside of the stand to ensure that the monitor has been firmly installed to the stand and that the screws do not loosen. -
Page 5: Making Connections
Making Connections Earphone Audio Input VGA Input HDMI Input HDMI Input Power AC Input... - Page 6 Making Connections A/V DRIVES...
-
Page 7: Control Buttons
Control Buttons Menu / Return Brightness adjustment button /▲ [-] Volume adjustment button / ▼[+] Input source change / Enter Power Button Power Indicator... -
Page 8: Quick Setup
Quick setup 1. Power on the computer and monitor. 2. Start the operating system. 3. Insert the CD-ROM into the CD drive on your computer. The CD-ROM will automatically execute and display the Main Menu. 4. From the Main Menu, click on the options you would like to perform and follow the directions on the screen. -
Page 9: 快速安裝指南
快速安裝指南 1. 啟動電腦和顯示器。 2. 啟動作業系統。 3. 放入光碟到電腦的光碟機。光碟片將自動執行並顯示主選單。 4. 在主選單中按下你要執行的選項,並依照螢幕所列的方法執行。 疑難排除 狀況 檢查項目 • • 沒有畫面 檢查螢幕電源是否開啟。 • • LED 電源指示燈不亮 檢查電源線是否與螢幕適當連接。 • 使用另外的裝置來檢查電源插座是否正常供電。 • • 沒有畫面 確定電腦不是處於省電模式下。 • LED 電源指示燈呈現橘色 (移動滑鼠或在鍵盤上任意按下一個鍵來喚醒電腦) • 檢查電腦或視訊來源設備的電源是否打開。 • 檢查視訊訊號線是否適當連接。 警告:為減少電擊或設備損壞的風險: 不要使電源線的接地插頭失效,附加的接地是項重要的安全功能。 電源線要插入隨時都可輕易使用的接地電源插座。 要中斷顯示器的連接請從電源插座上拔下插頭。... -
Page 10: 快速安装指南
快速安装指南 开启计算机和显示器。 启活操作系统。 将CD-ROM插入您计算机的光驱中。此CD-ROM将自动执行开显示主菜单。 在主菜单中单击要执行的选项,然后遵照屏幕上的指示进行。 疑难排除 状况 检查项目 • • 没有画面 检查屏幕电源是否开启。 • • LED 电源指示灯不亮 检查电源线是否与屏幕适当连接。 • 使用另外的装置来检查电源插座是否正常供电。 • • 没有画面 确定计算机不是处于省电模式下。 • LED 电源指示灯呈现橘色 (移动鼠标或在键盘上任意按下一个键来唤醒计算机) • 检查计算机或视讯来源设备的电源是否打开。 • 检查视讯讯号线是否适当连接。 警告:为减少电击或产品损坏的风险: 不要使电源线的接地插头失效。接地插头是一项重要的安全功能。 将电源线插入一个随手可击的接地插座。 要切断显示器的电源时,请从电源插座中拔出电源线。... -
Page 11: クイックセットアップ
クイックセットアップ コンピュータとモニタの電源を入れます。 オペレーティングシステムを起動します。 同梱の CD-ROM をコンピュータの CD ドライブに挿入します。CD-ROM が自動的に起動し、 [Main Menu](メイン メニュー)が表示されます。 4. [Main Menu] から、オプションを選択し、画面の指示に従って操作を続けます。 トラブルシューティング 問題 チェック項目 • • 画像が表示されない 画面の電源がオンまたはオンになっているかチェックします。 • • 電源 LED が点灯しない 電源コードがアダプタに適切に接続されているか確認します。 • テスタでコンセントに電源が正常に供給されているか確認します。 • • 画像が表示されない コンピュータが省電力モードに入っていないことを確認します。 • 電源 LED がオレンジ色 (マウスを動かしたりキーを操作すると、コンピュータは活動状態 に点灯している... -
Page 12: Schnellanleitung
Schnellanleitung Schalten Sie den Computer und den Monitor ein. Legen Sie die CD-Rom in das CD-ROM Laufwerk ein. Das Programm startet automatisch. Sollte diese Funktion abgeschaltet sein, öffnen Sie den Arbeitsplatz und doppelklicken Sie auf das CD-Rom-Laufwerkssymbol. Vom Hauptmenü ausgehend, klicken Sie auf die gewünschten Funktionen und folgen Sie den Anweisungen am Bildschirm. -
Page 13: Instructions Rapides
Instructions rapides Mettez en marche l‘ordinateur et le moniteur. Insérez le CD-Rom dans le lecteur de CD-ROM. Le programme démarre automatiquement. Si cette fonction est désactivée, ouvrez le poste de travail et double-cliquez sur l‘icône du lecteur de CD-Rom. Depuis le menu principal, cliquez sur les fonctions souhaitées et suivez les instructions à l‘écran. Suppression de problèmes Problems check items... -
Page 14: Instrucciones Rápidas
Instrucciones rápidas 1. Active el ordenador y el monitor. 2. Introduzca la unidad de CD-Rom y la unidad de CD-ROM. El programa arranca automáticamente. Si estuviera desactivada esta función, abra el puesto de trabajo y haga doble clic en el símbolo de la unidad de CD-Rom. -
Page 15: Istruzioni Veloci
Istruzioni veloci 1. Accenedete il monitor ed il computer. 2. Inserite il CD-Rom. Il programma parte automaticamente. Se questa funzione non dovesse esserci. Aprite la sessione di lavoro e fate un doppio click sul simbolo CD-Rom. 3. Partendo dal menù principale cliccate sulle funzioni desiderate e seguite le istruzioni che vi appaiono sullo schermo. -
Page 16: Instalação Rápida
Instalação rápida 1. Ligue o computador e o monitor. 2. Inicie o sistema operativo. 3. Introduza o CD na unidade de CD-ROM do seu computador. O CD-ROM é automaticamente executado sendo apresentado o menu principal. 4. No menu principal, clique nas opções que pretende e siga as instruções apresentadas no ecrã. Resolução de problemas Problema Verifique os seguintes itens... -
Page 17: Snelle Installatie
Snelle installatie 1. Zet de computer en de monitor aan. 2. Start het besturingssysteem. 3. Plaats de cd-rom in het cd-station van uw computer. De cd-rom wordt automatisch gestart en geeft het hoofdmenu weer. 4. Klik in het hoofdmenu op de opties die u wilt uitvoeren en volg de instructies op het scherm. Probleemoplossing Problemen Controleer de onderdelen... -
Page 18: 빠른 설치
빠른 설치 1. 컴퓨터와 모니터의 전원을 켭니다. 2. 운영 체제를 시작합니다. 3. CD-ROM 을 컴퓨터의 CD 드라이브에 넣습니다. CD-ROM 이 자동으로 실행되고 주 메 뉴가 표시됩니다. 4. 주 메뉴에서 실행할 옵션을 클릭하고 화면의 지시를 따릅니다. 문제 해결 문제 점검 항목 •... -
Page 19: Быстрая Настройка
Быстрая настройка 1. Включить питание компьютера и монитора. 2. Запустить операционную систему. 3. Вставить CD-ROM в CD-привод на вашем компьютере. Диск CD-ROM будет автоматически исполнять и выводить на дисплей главное меню (Main Menu). 4. Из Main Menu щелкнуть по опции, которую вы хотели бы выполнить, и следовать указаниям на...


