Table of Contents
Advertisement
Quick Links
Advertisement
Table of Contents

Related Manuals for Acesonic KOD-920


Summary of Contents for Acesonic KOD-920
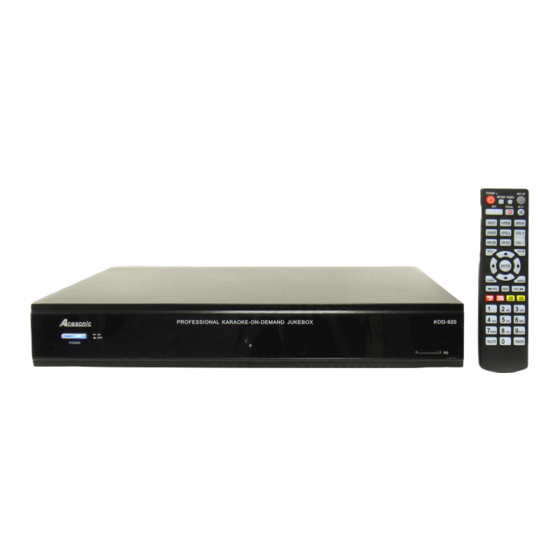
- Page 1 KOD-920 PROFESSIONAL KARAOKE-ON-DEMAND JUKEBOX USER MANUAL CAUTION: To ensure your player will work at its best, read this www.acesonic.com manual carefully before attempting to operate the machine. Keep this manual in a safe place for future reference.
-
Page 2: Table Of Contents
CONTENTS Contents ------------------------------------------------------------------------------------------- 1 Characteristic ------------------------------------------------------------------------------- 2-3 Accessories ------------------------------------------------------------------------------------- 4 Panel ------------------------------------------------------------------------------------------------ 5 How To Connect ------------------------------------------------------------------------------ 6 Remote Control ------------------------------------------------------------------------------- 7 Dual Screen Mode --------------------------------------------------------------------- 8-12 Single Screen Mode ---------------------------------------------------------------- 12-13 Non-karaoke Play Mode ---------------------------------------------------------- 14-18 How To Add Songs ------------------------------------------------------------------ 19-21 How To Delete Songs -------------------------------------------------------------- 22-23 Trouble Shooting ---------------------------------------------------------------------------- 24 Notes --------------------------------------------------------------------------------------------- 24... -
Page 3: Characteristic
CHARACTERISTIC KOD-920 is a multi-function professional HARD DRIVE karaoke player. ● KOD920 maintains ease of use but is much more powerful than ever.The following Powerful Features will really impress you and make you have never experienced such easier and faster and humanized operation of the karaoke machine on the market. -
Page 4: Characteristic
CHARACTERISTIC Support mouse, remote control, touch screen ● Standard Accessories: mouse and remote control; Option accessory: 17 or 19 inch touch screen or normal computer monitor by using VGA/COM port to connect. Chinese and English operation interface ● Allow you switch between Traditional Chinese, Simple Chinese and English Operation System. -
Page 5: Accessories
ACCESSORIES Please make sure the following accessories are included in the box: USB Cable Remote Control USER GUIDE AV Cable User Guide... -
Page 6: Panel
2. Remote Signal Sensor - to receive the command signal from remote. 3. SD Card Slot - to insert SD Card. * Might not able to read some of the HDSC cards. Rear Panel View MODEL : KOD-920 PROFESSIONAL KARAOKE-ON-DEMAND JUKEBOX VIDEO 1... -
Page 7: How To Connect
S-VIDEO VGA CABLE Video Audio-Left Audio-Right Tv's Component 2. In dual screen mode, the Touch Screen Connection: Please contact ACESONIC to purchase touch screen. *Note: only Acesonic's Touch screen works on KOD-920. Component Touch Screen Cable Touch Screen 3. USB Connection: to edit/add songs only. -
Page 8: Remote Control
REMOTE CONTROL DOUBIE SINGLE BUTTON FUNCTION NAME SCREEN SCREEN √ √ POWER The machine will turn on /off. Show the flower picture and applause √ √ APPLAUSE sound. POWER SET UP APPLAUSE THEMES Switch to different OSD display and different √... -
Page 9: Dual Screen Mode
Dual-Screen mode On-Screen-Display interface operation Press [MENU] button to access main menu, see following picture: 1.Singer: Search /select songs by singer name, search singer by the initial letter of singer name. 1.1 Press [1] button or click "1 singer", display the type of singers list. For example 1-1 Warm tips: ※... - Page 10 Dual-Screen mode 5. Language Warm tips: ① You can click " Select songs by Songs Language. " to delete while type a wrong initial letter. 5. 1 Press [ 5 ] button or click ② The above Spell function can be "5.Language"...
- Page 11 DOUBLE PLAY MODE Dual-Screen mode 7. Song No: Select songs by input song number. 7.1 Press [7] button or click "7.Song No" to enter select songs by number menu, as following picture 7-1: 7.2 Song No must be 5 digits. 7.3 When input effective song number, press [RES.] button on OSD or [ENTER] button on Remote Control...
- Page 12 Dual-Screen mode already exsit, system will login into as administraoter, you can see the this account. list of user account and you can User account switching: Switching to delete the useless accounts. different user 11. Reserved List: Exit: to return to previous screen Display reserved list in this menu.
-
Page 13: Single Screen Mode
Single Screen play mode : Begins playing a song that is 2. Spelling: stopped or paused. 2.1 Press [ ] button to select : Pause a song that is playing. "spelling", and then press [ENTER] Applause: Press [Applause], applause button or press [2] button to enter will be sounded automatically. - Page 14 Single Screen play mode 6. New song: Press [ ] button to select "New song", and press [ENTER] button or press [3] button to enter new song list. Then display the added songs by user. Warm tips: In any menu Press [RETURN] to return the previous menu, press [MENU] button to exit directly.
-
Page 15: Non-Karaoke Play Mode
NON-KARAOKE PLAY MODE [RETURN] button to exit "file" menu. In karaoke mode, press [SETUP] button on remote control and input the You can save photos music and ● 、 password 888888 then press [ENTER] to video files to the root content of Hard exit karaoke mode, and then switch to Disc / SD card, or put them in the the non-karaoke(SETUP) mode. - Page 16 NON-KARAOKE PLAY MODE 3.1 Enter "VDIEO" menu, video files will be play automatically, press ] button to select songs. 3.2 When the video is playing, press [NEXT] button ,TV screen displays the song preview and then press ] button and [ENTER] button to select the song.
- Page 17 NON-KARAOKE PLAY MODE ad_pic folder: Includes the data of 51st folder; 52101-52999 can be put ● advertising picture. in the 52nd folder and so on. Each folder can be loaded 1000 songs at SysPack.sfl: Font file. ● most. See the detailed instructions in Picpack.dat: is a date file for display ●...
- Page 18 NON-KARAOKE PLAY MODE ※ Only can copy a single file, not a Step 1. Select the song or folder you want to rename, and press folder. ※ Unable to copy a file that gets the [MENU] button to open "rename" menu interface, and move cursor same name in other folder you to "rename", then press [ENTER]...
- Page 19 Enter button to start folder. loading songs from SD card to Press the button [MENU] to open KOD-920. the screen will show "properties" menu, and move cursor to the complete message while the "properties", then press [ENTER] button process done.
-
Page 20: How To Add Songs
HOW TO ADD SONGS You can add songs easilly to KOD 1.2 How to Enter USB mode while machine through SD card and USB machine is in Karaoke Mode: Mode. Make sure the AV cable is connected firmly between KOD machine and TV, I. - Page 21 HOW TO ADD SONGS Note: Please don't do anything in the 3. Operating instructions of add song” is replication process! Otherwise, saved in the folder “Toolfile” that is in data will be lost easily. root directory of HD. Open the folder→ copy the file “Createsonglist&photo.rar”...
- Page 22 HOW TO ADD SONGS III.Trouble shooting: Phenomenon Solution Check whether the format of added songs is compatible with KOD Machine Playing format ? Added songs Check whether the song number of added songs in SD is the same as the song can't play number in HD.
-
Page 23: How To Delete Songs
HOW TO DELETE SONGS There are 2 ways to delete songs: 1) Delete songs by USB mode. 2) Delete songs by KOD machine. I.DELETE SONGS BY USB MODE: 1. You can delete song file of HD in PC. Enter USB mode according to the steps in "Chapter 05 V. Add songs through USB mode operation". - Page 24 HOW TO DELETE SONGS 4.Press [ , ] button to move cursor, and moves the cursor to "Delete". 5.Press [ENTER] button, and then TV screen display the prompt menu. 6.Press [ ] button to move cursor to select "yes" in the prompt menu, then press [ENTER] button to delete.
-
Page 25: Trouble Shooting
TROUBLE SHOOTING Phenomenon Solution Remove the obstacles in the path between of the remote and the player. ? Remote control Point the remote control directly at the remote sensor on the player. doesn't work Make sure the batteries are inserted,insetted correctly, not out of power. Move closer to the machine. -
Page 26: Specification
Characteristics ± Video Out Up-p(V) 1.0 0.2 Output Impedance(Ω) 75Ω Power Requirements 100-240V~ Power Consumption 35W MAX General Machine Dimensions 492mm X 390mm X 121mm Weight 4 KG Acesonic Corp. 161 S. 8th Ave. City of Industry CA,U.S Sale:(626)820-0645 Technicals:(626)820-0670...