
Related Manuals for Jøtul C 550 Rockland


Summary of Contents for Jøtul C 550 Rockland
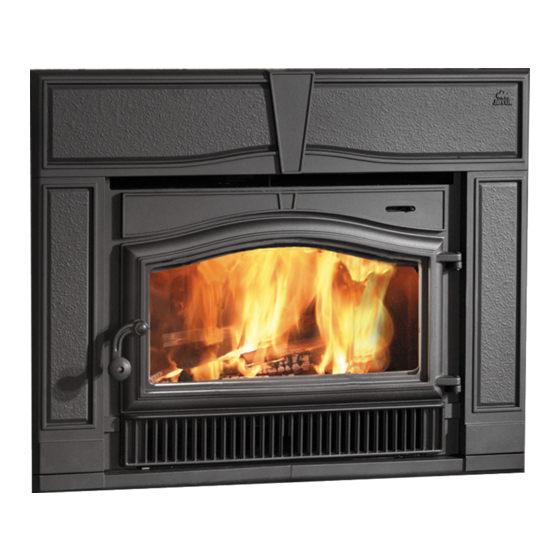
- Page 1 Jøtul C 550 Rockland Jøtul C 550 Rockland Fireplace Insert Installation and Operating Instructions for the United States & Canada Keep these instructions for future reference.
- Page 2 Jøtul C 550 Rockland NOTICE: YOU SHOULD CONSULT THE AUTHORITY HAVING JURISDICTION IN YOUR LOCALE (SUCH AS MUNICIPAL BUILDING DEPARTMENT, FIRE DEPARTMENT, FIRE PREVENTIOIN BUREAU, ETC.) BEFORE INSTALLATION TO DETERMINE THE NEED TO OBTAIN A PERMIT.
-
Page 3: Table Of Contents
The serial number and manufacturing date are Specifications located on the permanent label on the back of Jøtul C 550 Rockland Fireplace Insert ..... 6 the firebox and also at the front of the blower compartment. You may also wish to attach your sales receipt to this manual for future reference. -
Page 4: Standards And Safety Notices Standards / Codes
Jøtul C 550 Rockland Installation and Operation Instructions for USA/Canada Installation et fonctionnement pour Canada SAFETY NOTICE: IF THIS SOLID FUEL ROOM HEATER IS NOT PROPERLY INSTALLED, A HOUSE FIRE MAY RESULT. FOR YOUR SAFETY, FOLLOW THE INSTALLATION DIRECTIONS. CONTACT LOCAL BUILDING OR FIRE OFFICIALS ABOUT RESTRICTIONS AND INSTALLATION INSPECTION REQUIREMENTS IN YOUR AREA. -
Page 5: Safety Notices
Jøtul C 550 Rockland Installation Safety Notices Preparation • BURN SOLID WOOD FUEL ONLY We strongly urge you to have your authorized Jøtul • DO NOT USE CHEMICALS OR FLUIDS TO START dealer install your new Jøtul C 550 Fireplace Insert. -
Page 6: Specifications
Jøtul C 550 Rockland Jøtul C 550 Rockland Specifications Performance The Jøtul C 550 Rockland Fireplace Insert meets U.S. Fuel: up to 24” Logs EPA emission limits for wood heaters sold after Heat Output 65,000 BTU/Hr. July 1990, and is tested and listed to ANSI/UL 1482, Heating Capacity up to 2000 sq. -
Page 7: Installation
Installation Factory-Built Fireplace Requirements Masonry Fireplace Requirements The Jøtul C 550 Rockland may be installed into a • The entire fireplace and chimney must be cleaned factory-built fireplace with the following conditions: and inspected to NFPA 211 Level II standards before installation. -
Page 8: Hearth Protection
Jøtul C 550 Rockland Hearth Protection Requirements Factory-Built Fireplace Requirements, cont’d. The floor area in front of fireplace insert must be • The convection chamber/louvers of the zero- protected from live sparks and radiant heat. clearance fireplace MUST NOT be blocked off. The •... - Page 9 Jøtul C 550 Rockland Mantel Clearances Clearance to Combustible Materials Clearance reduction to mantel construction may be • There may be no combustible materials located made in conformance to NFPA 211 or CAN/CSA B365. anywhere within 36” (914 mm) of the front of the fireplace insert.
-
Page 10: Chimney Connection
Jøtul C 550 Rockland Chimney Connection Requirements U U U U U .S .S .S .S .S..Only R Only R Only R equir equir emen emen Only R Only Requir equir equiremen emen ements: C C C C C anada R... - Page 11 Jøtul C 550 Rockland Fireplace Chimney Preparation 1. 1. 1. 1. 1. Remove the existing damper and linkage compo- nents from the fireplace. Alternatively, you can wire the damper plate to lock it in the open position. Thoroughly clean the firebox and smokeshelf area with a wire brush.
-
Page 12: Firebox Installation
Jøtul C 550 Rockland Installing the Fireplace Insert AC power receptacle harness assembly Power Cord Orientation 1. Determine to which side the blower power cord Inlet Tab #8 x 5/8 will be routed. DO NOT ROUTE THE POWER CORD Phillips screw IN FRONT OF THE FIREPLACE. -
Page 13: Surround Assembly
Jøtul C 550 Rockland Figure 13. Left Breastplate Right Breastplate Surround Panel assembly viewed from backside. Alignment Set Screw T T T T T ools R ools R ools R ools R ools Requir equir equir equir equired: • 10 mm socket or wrench... -
Page 14: Operation
Jøtul C 550 Rockland Operation Air Control Settings A single lever regulates the Primary Air flow that Read the following section carefully before building a controls the intensity of the fire and consequent fire in your fireplace insert.. heat output and burn time. This lever is located... -
Page 15: Starting / Maintaining The Fire
Jøtul C 550 Rockland Starting and Maintaining a Fire Burn only solid wood directly on the bottom plate of the stove. Do not elevate the fire in any way. Andirons 1. Set the Air Control Lever in the full open position. 2. -
Page 16: Blower
Jøtul C 550 Rockland It is also important to remember that chimney size, temperature and height all affect draft which in WARNING ! turn affects the formation of creosote. An exterior THIS BLOWER MUST BE chimney, whether masonry or prefabricated steel,... -
Page 17: Maintenance
Jøtul C 550 Rockland Maintenance Glass Replacement Always operate the doors slowly and cautiously to avoid cracking or breaking the glass. Never use the Ash Removal door to push wood into the firebox. If the glass becomes cracked or broken follow the replacement Always wear stove gloves when handling ashes. -
Page 18: General Maintenance
Jøtul C 550 Rockland General Maintenance Regular maintenance will assure proper perfor- Canada Installations (Full Reline): mance and prolong the life of your fireplace insert.. The chimney liner can be swept directly into a The following procedures do not take long and are bucket placed under the flue outlet, with removal of generally inexpensive. - Page 19 Jøtul C 550 Rockland Gasket Replacement See the chart below for replacement gasket specifi- cations. See also figs. 19-20 for locations. 1. Remove the old gasket material with a pliers and thoroughly clean the channel with a wire brush. 2. Lay out the new gasket around the channel to determine length.
-
Page 20: Illustrated Parts Breakdown Parts List
Jøtul C 550 Rockland Jøtul C 550 Rockland Illustrated Parts Diagram Figure 20. -
Page 21: Parts List
Jøtul C 550 Rockland Jøtul C 550 Rockland Parts List No..Description Description Description Description Description P P P P P ar ar ar ar art t t t t Number Number Number Number Number No.. -
Page 22: Miscellaneous Replacement Parts
Jøtul C 550 Rockland Appendix A Alternate Hearth Protection Door Knob Installation All hearth protection materials must be noncombustible; The Door Knob components are included in a i.e: metal, brick, stone, or mineral fiber boards. Any combus- separate bag contained within the Miscellaneous Kit tible material may not be used. -
Page 23: Baffle Assembly
Jøtul C 550 Rockland Jøtul C 550 Options Extended Surround Panel, Matte Black Paint 156432 Extended Surround Panel, Jøtul Iron Paint 156433 Mantel Heat Shield 156448 Jøtul C 550 Replacement Assemblies Front Plate Asy. inc. gasket / Matte Black Paint 156482 Front Plate Asy. - Page 24 Jøtul C 550 Rockland This appliance must be installed in conformance with local and national building regulations. It is important that the these instructions be carefully read and understood before beginning the installation. Jøtul pursues a policy of continual product development. Consequently, products may differ in specification, color or type of accessories from those illustrated or described in various publications.