Samsung ML-2250 Series User Manual
Ml-2250 series laser printers
Hide thumbs
Also See for ML-2250 Series:
- Technical instructions (7 pages) ,
- Manual del usuario (201 pages) ,
- User manual (170 pages)
Table of Contents
Advertisement
Advertisement
Table of Contents
Troubleshooting

Related Manuals for Samsung ML-2250 Series


Summary of Contents for Samsung ML-2250 Series
- Page 2 This manual is provided for information purposes only. All information included herein is subject to change without notice. Samsung Electronics is not responsible for any changes, direct or indirect, arising from or related to the use of this manual. © 2004 Samsung Electronics Co., Ltd. All rights reserved.
-
Page 3: Table Of Contents
ONTENTS NTRODUCTION Chapter 1: Special Features ..........1.2 Printer Components ..........1.5 Front View ............. 1.5 Rear View ............1.6 Understanding the Control Panel ......1.7 On Line/Error and Toner Save LEDs ....1.7 Cancel button ..........1.8 ETTING RINTER Chapter 2: Unpacking ............ - Page 4 SING RINT ATERIALS Chapter 3: Choosing Paper and Other Materials ....... 3.2 Sizes and Capacities ........3.3 Guidelines for Paper and Special Materials ..3.4 Selecting the Output Location ........ 3.5 Printing to the Top Output Tray (Face down) ..3.5 Printing to the Rear Output Tray (Face up) ..
- Page 5 Setting Graphic Properties ........4.22 Using Output Options .......... 4.25 Using the Status Monitor ........4.26 Installing Status Monitor ......... 4.26 Reinstalling Status Monitor ......4.27 Removing Status Monitor ........ 4.27 Opening the Troubleshooting Guide ....4.27 Changing the Status Monitor Program Setting ..4.28 Setting Up a Locally Shared Printer .......
- Page 6 SING INDOWS CRIPT RIVER Appendix A: Installing PS Drivers ..........A.2 Installing PS Drivers ........A.2 Reinstalling PS Drivers ........A.3 Removing PS Drivers ........A.3 Using PS Printer Driver Features ......A.4 Accessing Printer Properties ......A.4 SING RINTER IN INUX Appendix B: Installing the Printer Driver ........
- Page 7 PECIFICATIONS Appendix E: Printer Specifications ..........E.2 Paper Specifications ..........E.3 Overview ............E.3 Supported Sizes of Paper ......... E.4 Guidelines for Using Paper ....... E.5 Paper Specifications ........E.6 Paper Output Capacity ........E.6 Printer and Paper Storage Environment ..... E.7 Envelopes ............
- Page 8 Important Precautions and Safety Information When using this machine, these basic safety precautions should always be followed to reduce risk of fire, electric shock, and injury to people: Read and understand all instructions. Use common sense whenever operating electrical appliances. Follow all warnings and instructions marked on the machine and in the literature accompanying the machine.
- Page 9 Unplug the machine from the PC and AC wall outlet, and refer servicing to qualified service personnel under the following conditions: • When any part of the power cord, plug, or connecting cable is damaged or frayed. • If liquid has been spilled into the machine. •...
-
Page 10: Laser Safety Statement
Environmental and Safety Consideration Laser Safety Statement The printer is certified in the U.S. to conform to the requirements of DHHS 21 CFR, chapter 1 Subchapter J for Class I(1) laser products, and elsewhere, is certified as a Class I laser product conforming to the requirements of IEC 825. Class I laser products are not considered to be hazardous. -
Page 11: Ozone Safety
However, it is advisable that the machine be operated in a well ventilated area. If you need additional information about ozone, please contact your nearest Samsung dealer. Power Saver This printer contains advanced energy conservation technology that reduces power consumption when it is not in active use. - Page 12 Canadian Radio Interference Regulations This digital apparatus does not exceed the Class B limits for radio noise emissions from digital apparatus as set out in the interference-causing equipment standard entitled “Digital Apparatus”, ICES-003 of the Industry and Science Canada. Cet appareil numérique respecte les limites de bruits radioélectriques applicables aux appareils numériques de Classe B prescrites dans la norme sur le matériel brouilleur: “Appareils Numériques”, ICES-003 édictée par l’Industrie et Sciences Canada.
- Page 13 Directive 1999/5/EC. The product has been designed to work with the national PSTNs and compatible PBXs of European countries. In the event of problems, you should contact the Euro QA Lab of Samsung Electronics Co., Ltd. in the first instance.
-
Page 14: Regulatory Compliance Statements
Wireless devices that may be in your system are only qualified for use in the European Union or associated areas if a CE mark with a Notified Body Registration Number and the Alert Symbol is on the system label. The power output of the wireless device or devices that may be embedded in your printer is well below the RF exposure limits as set by the European Commission through the R&TTE directive. - Page 15 This transmitter must not be collocated or operated in conjunction with any other antenna or transmitter. Some circumstances require restrictions in wireless devices. Examples of common restrictions are listed below: Radio frequency wireless communication can interfere with equipment on commercial aircraft. Current aviation regulations require wireless devices to be turned off while traveling in an airplane.
- Page 18 NTRODUCTION Congratulations on the purchase of your printer! This chapter includes: • Special Features • Printer Components • Understanding the Control Panel...
-
Page 19: Introduction
Special Features Your new printer is equipped with special features that improve the print quality, giving you a competitive edge. You can: Print with excellent quality and high speed • You can print at up to 1200 dpi effective output. See page 4.22. - Page 20 Save time and money • This printer allows you to use Toner Save mode to save toner. See page 4.9. • You can print multiple pages on one single sheet of paper to save paper ( N-Up printing ). See page 4.11. •...
- Page 21 Printer Features The table below lists a general overview of features supported by your printer. (S: Standard, O: Option) Features ML-2250 ML-2251N ML-2252W IEEE 1284 Parallel USB 2.0 Network Interface (Ethernet 10/100 Base TX) Wireless LAN (802.11b Wireless LAN) PostScript Emulation NTRODUCTION...
-
Page 22: Printer Components
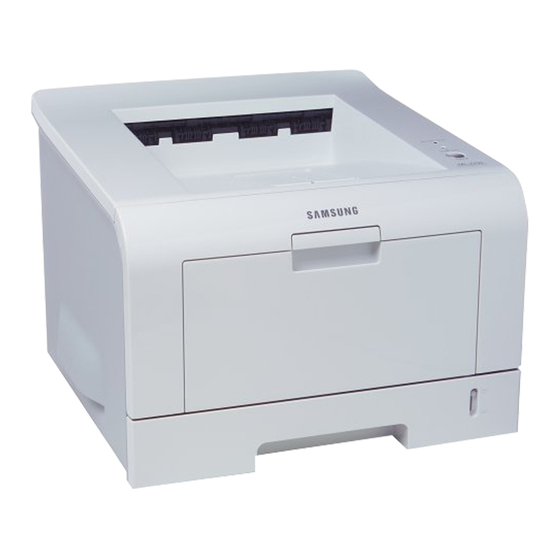
Printer Components Front View Output Support Front Cover Top Output Tray (Face down) Control Panel Control Board Cover Toner Cartridge Tray1 (250-sheet paper feeder) Optional Tray 2 (250-sheet paper Power feeder) Switch Multi-Purpose Tray Paper Level Indicator NTRODUCTION... -
Page 23: Rear View
Rear View Top Output Tray Rear Output Tray (Face down) (Face up) Control Board Cover (Open to install optional accessories.) Power Receptacle Network Port (ML-2250:Option USB Port ML-2251N, ML-2252W: Standard) Parallel Port Wireless Network Antenna Port Optional Tray2 (ML-2250, ML-2251N:Option Cable Connector ML-2252W:Standard) *The figure above shows a ML-2252W. -
Page 24: Understanding The Control Panel
Understanding the Control Panel On Line/Error and Toner Save LEDs Description If the On Line/Error lights green, the printer is ready to print. If the On Line/Error lights red, the printer is experiencing an error, such as jammed paper, no paper, open cover, or uninstalled toner cartridge. -
Page 25: Cancel Button
Description If the On Line/Error and Toner Save LEDs blink, your system has some problem. To solve the problem, see “Troubleshooting Error Messages” on page 6.20. Cancel button Function Description Printing demo page In Ready mode, press and hold this button for about 2 seconds until all LEDs blink slowly, and release. -
Page 26: Setting U P Your Printer
ETTING RINTER This chapter provides step by step information on setting up your printer. This chapter includes: • Unpacking • Installing the Toner Cartridge • Loading Paper • Connecting a Printer Cable • Turning the Printer On • Printing a Demo Page •... -
Page 27: Unpacking
Unpacking Remove the Printer and all accessories from the packing carton. Make sure that the printer has been packed with the following items: Toner Cartridge Power Cord CD-ROM Quick Install Guide OTES • If any items are missing or damaged, notify your dealer immediately. -
Page 28: Selecting A Location
Selecting a Location Select a level, stable place with adequate space for air circulation. Allow extra space for opening covers and tray(s). The area should be well-ventilated and away from direct sunlight or sources of heat, cold, and humidity. See the image below for clearance space. -
Page 29: Installing The Toner Cartridge
Installing the Toner Cartridge Grasp the front cover and pull it toward you to open. : Because the printer is very light, it may move when you use it; for example, when opening/closing the tray or installing/ removing the toner cartridge. Be careful not to move the printer. Remove the toner cartridge from its bag and remove the paper covering the cartridge. - Page 30 Gently shake the cartridge from side to side to distribute the toner evenly inside the cartridge. AUTIONS • To prevent damage, do not expose the toner cartridge to light for more than a few minutes. Cover it with a piece of paper if left exposed for more than a few minutes and keep it in a flat and clean place.
- Page 31 Grasp the handle and insert the cartridge into the printer until it snaps into place. Close the front cover. Make sure that the cover is securely closed. : When printing text at 5% coverage, you can expect a toner cartridge life of approximately 5,000 pages. ETTING RINTER...
-
Page 32: Loading Paper
Loading Paper You can load approximately 250 sheets of paper in the tray. Pull the tray out of the printer. Prepare a stack of paper for loading by flexing or fanning the paper back and forth. Straighten the edges on a level surface. - Page 33 You can load previously printed paper. The printed side should be facing up with an uncurled edge on top. If you experience problems with paper feed, turn the paper around. Make sure that all four corners are flat in the tray. : If you want to change the paper size in the tray, see “Changing the Paper Size in the Paper Tray”...
-
Page 34: Changing The Paper Size In The Paper Tray
Changing the Paper Size in the Paper Tray To load longer sizes of paper, you need to adjust the paper guides to extend the paper tray. Pressing and unlatching the guide lock, slide the paper length guide out completely to extend the paper tray to its full length. - Page 35 For the paper smaller than Letter, adjust the front paper length guide. Pinching the paper width guide as shown, move it toward the stack of paper until it lightly touches the side of the stack. OTES • Do not push the paper width guide far enough to cause the materials to warp.
-
Page 36: Connecting A Printer Cable
Connecting a Printer Cable For Local Printing To print from your computer in a local environment, you need to connect your printer to the computer with either a parallel interface cable or a Universal Serial Bus (USB) cable. Using a Parallel Cable : To connect the printer to the parallel port of the computer requires a certified parallel cable. - Page 37 Using a USB Cable : Connecting the printer to the USB port of the computer requires a certified USB cable. You will need to buy a USB 2.0 compliant cable that is within 3 m in length. Make sure that both the printer and the computer are turned off.
-
Page 38: For Network Printing
For Network Printing You can attach your ML-2251N or ML-2252W printer to a network using an Ethernet cable (UTP cable with RJ.45 connector). The ML-2252W also has a network antenna which allows you to use a wireless LAN interface. If you are an ML-2250 user, you need to install the optional network interface card. - Page 39 Supported Operating Systems Item Requirements Network Interface 10/100 Base-TX (standard for ML-2251N and ML-2252W) or 802.11b Wireless LAN (standard for ML-2252W) Network Operating • Novell NetWare 4.x, 5.x, 6.x System • Windows 95/98/Me/NT 4.0/2000/XP • Unix AT&T, BSD4.3, HP-UX, SUN OS, SOLARIS, SCO •...
-
Page 40: Turning The Printer On
Turning the Printer On Plug the power cord into the power receptacle on the back of the printer. Plug the other end into a properly grounded AC outlet and turn on the printer using the power switch. To the AC outlet AUTIONS •... -
Page 41: Printing A Demo Page
Printing a Demo Page Print a demo page to make sure that the printer is operating correctly. Hold down the Cancel button for about 2 seconds to print a demo page. A demo page showing the printer’s features and capabilities prints out. -
Page 42: Installing Printer Software
Acrobat Reader to view the User’s Guide. If you are printing from Windows: You can install the following printer software using the CD-ROM. • Samsung Proprietary printer driver for Windows. Use this driver to take full advantage of your printer’s features. See page 2.19. -
Page 43: Printer Driver Features
• Paper source selection • Paper size, orientation and media type • number of copies The table below lists a general overview of features supported by your printer drivers. Samsung Proprietary PostScript printer driver Driver Feature Win 9x Win 9x 2000/XP NT4.0... -
Page 44: Installing Printer Software In Windows
Installing Printer Software in Windows System Requirements Verify the following: • At least 32 MB (Windows 9x/Me), 64 MB (Windows 2000/NT), 128 MB (Windows XP) or more of RAM is installed on your PC. • There is at least 300 MB of free disk space on your PC. •... - Page 45 After selecting the language and the component(s), click Next. •View User’s Guide: Opens Samsung ML-2250 Series User’s Guide. If your computer doesn’t have Adobe Acrobat, click on this option and it will automatically install Adobe Acrobat Reader for you.
-
Page 46: Changing The Display Language
To register yourself as a user of Samsung Printers, select the checkbox and click Finish. You are now accessed to the Samsung web site. OTES • When you want to use your machine with the parallel cable, remove the USB cable and connect the parallel cable. Then reinstall the printer driver;... -
Page 47: Reinstalling Printer Software
Reinstalling Printer Software Repair is required if your installation fails. From the Start menu, select Programs. Select Samsung ML-2250 Series, and then Maintenance. Select Repair. : If your machine is not connected to the computer, the following window will appear. -
Page 48: Removing Printer Software
If not, click No to reprint it. When the reinstallation is done, click Finish. Removing Printer Software From the Start menu, select Programs. Select Samsung ML-2250 Series, and then Maintenance. Select Remove. Then you will see a component list so that you can remove any of them individually. -
Page 49: Viewing The User's Guide
After installing the printer software, you can view User’s Guide in PDF format at any time from your Windows desktop. From the Start menu, select Programs. Select Samsung ML-2250 Series and View User’s Guide. Adobe Acrobat automatically runs and then the User’s Guide opens. -
Page 50: Using Print Materials
SING RINT ATERIALS This chapter will help you understand types of paper you can use with your printer and how to properly load paper in the different paper trays for the best print quality. This chapter includes: • Choosing Paper and Other Materials •... -
Page 51: Choosing Paper And Other Materials
Choosing Paper and Other Materials You can print on a variety of print materials, such as plain paper, envelopes, labels, transparencies, and so on. See “Paper Specifications” on page E.3. To get the best possible print quality, use only high-quality copier-grade paper. When you choose print materials, consider the following: •... -
Page 52: Sizes And Capacities
Sizes and Capacities Input Source/Capacity Size Tray1 or optional Multi-Purpose Tray2 Tray Plain Paper Letter (216 x 279 mm) Legal (216 x 356 mm) Executive (184 x 267 mm) Oficio (216 x 343 mm) Folio (216 x 330 mm) A4 (210 x 297 mm) JIS B5 (182 x 257 mm) ISO B5 (176 x 250 mm) A5 (148 x 210 mm) -
Page 53: Guidelines For Paper And Special Materials
Guidelines for Paper and Special Materials When selecting or loading paper, envelopes, or other special materials, keep these guidelines in mind: • Attempting to print on damp, curled, wrinkled, or torn paper can cause paper jams and poor print quality. •... -
Page 54: Selecting The Output Location
Selecting the Output Location The printer has two output locations; the rear output tray and the top output tray. Top output tray Rear output tray To use the top output tray, be sure that the rear output tray is closed. To use the rear output tray, open it. OTES •... -
Page 55: Printing To The Rear Output Tray (Face Up)
Printing to the Rear Output Tray (Face up) The printer always prints to the rear output tray if it is open. Paper comes out of the printer face-up, and each time a sheet of paper comes out, it falls down from the printer. Printing from the Multi-Purpose Tray to the rear output tray provides a straight paper path. -
Page 56: Loading Paper
If you do not want to use the rear output tray, close the tray. The pages will stack on the top output tray. Loading Paper Proper paper loading helps prevent paper jams and ensure trouble-free printing. Do not remove the paper tray while a job is printing. -
Page 57: Using Tray1 Or The Optional Tray2
Using Tray1 or the Optional Tray2 Tray1 and the optional Tray2 can hold up to 250 sheets of paper. See “Sizes and Capacities” on page 3.3 for acceptable paper size and capacities of each tray. Tray1 Optional Tray2 Load a stack of paper into the tray and print. For details about loading paper in Tray1 or the optional Tray2, see “Loading Paper”... - Page 58 • Load only one size of print material at a time in the Multi-Purpose Tray. • To prevent paper jams, do not add paper when there is still paper in the Multi-Purpose Tray. This also applies to other types of print materials. •...
- Page 59 Prepare a stack of paper for loading by flexing or fanning the paper back and forth. Straighten the edges on a level surface. Place paper on the centre of the tray with the print side face up. Pay attention to the paper limit mark on the left inside wall of the tray.
- Page 60 Slide the paper width guide and adjust it against the stack of print material without bending. : Your printer cannot automatically detect the size of paper loaded in the Multi-Purpose Tray. Loading the Multi-Purpose Tray with the correct paper size allows you to select paper by size rather than paper source when you print from your software application.
-
Page 61: Using The Manual Feed Mode
Using the Manual Feed Mode If you select Manual Feed in the Source option when changing print settings, you can manually load a sheet of print material in the Multi-Purpose Tray. Manually loading paper can be helpful when you want to check the print quality after each page is printed. - Page 62 Open the rear output tray. When you print a document, you must select Manual Feed for Source from the software application, and then select the correct paper size and type. Press the Cancel button on the printer to start feeding. Printing is started.
-
Page 63: Printing On Envelopes
Printing on Envelopes Guidelines • Only use envelopes recommended for laser printers. Before loading envelopes into the Multi-Purpose Tray, make sure that they are undamaged and are not stuck together. • Do not feed stamped envelopes. • Never use envelopes with clasps, snaps, windows, coated lining, or self-stick adhesives. - Page 64 Flex or fan the edge of the envelope stack to separate the pages before loading. Load the envelopes onto the Multi-Purpose Tray with the flap side down. The stamp area is on the left side and the end of the envelope with the stamp area enters the tray first.
- Page 65 When you print on envelopes, select the appropriate paper source, type, and size in the software application. For details, see page 4.7. After printing, close the Multi-Purpose Tray and the rear output tray. 3.16 SING RINT ATERIALS...
-
Page 66: Printing On Labels
Printing on Labels Guidelines • Only use labels recommended for laser printers. • Verify that the labels’ adhesive material can tolerate fusing temperature of 205°C (400°F) for 0.1 second. • Make sure that there is no exposed adhesive material between the labels. Exposed areas can cause labels to peel off during printing, which can cause paper jams. - Page 67 Adjust the guide to fit the width of the sheet of labels. When you print on labels, select the appropriate paper source, type, and size in the software application. For details, see page 4.7. After printing, close the Multi-Purpose Tray and the rear output tray.
-
Page 68: Printing On Transparencies
Printing on Transparencies Guidelines • Only use transparencies recommended for use in laser printers. • Ensure that transparencies are not wrinkled, curled, or have any torn edges. • Hold the transparencies by the edges and avoid touching the print side. Oils deposited on the transparency can cause print quality problems. - Page 69 Adjust the guide to fit the width of the transparencies. When you print on transparencies, select the appropriate paper source, type, and size in the software application. For details, see page 4.7. After printing, close the Multi-Purpose Tray and the rear output tray.
-
Page 70: Printing On Card Stock Or Custom-Sized Materials
Printing on Card Stock or Custom-sized Materials Postcards, 3.5 by 5.83 in. (index) cards and other custom-sized materials can be printed with your printer. The minimum size is 76 by 127 mm (3 by 5 in.) and the maximum size is 216 by 356 mm (8.5 by 14 in.). - Page 71 Adjust the guide to fit the width of the material stack. When you print, select the appropriate paper source, type, and size in the software application. For details, see page 4.7. : If the size of your print material is not listed in the Size Paper tab of the printer driver properties, click the box in the Custom button and set the size manually.
-
Page 72: Printing On Preprinted Paper
Printing on Preprinted Paper Preprinted paper is paper that has some type of printing placed on it before it is sent through the printer (paper that has a preprinted logo at the top of the page, for example). Guidelines • Letterheads must be printed with heat-resistant ink that will not melt, vaporize, or release hazardous emissions when subjected to the printer’s fusing temperature of 400 °F (205 °C) for 0.1 second. - Page 73 When you print, select the appropriate paper source, type, and size in the software application. For details, see page 4.7. 3.24 SING RINT ATERIALS...
-
Page 74: Printing Tasks
RINTING ASKS This chapter explains printing options and common printing tasks. This chapter includes: • Printing a Document • Setting Paper Properties • Using the Toner Save Mode • Printing Multiple Pages on One Sheet of Paper (N-Up Printing) • Printing a Reduced or Enlarged Document •... -
Page 75: Printing A Document
Printing a Document The following procedure describes the general steps required for printing from various Windows applications. The exact steps for printing a document may vary depending on the application programme you are using. Refer to the User’s Guide of your software application for the exact printing procedure. - Page 76 Landscape Portrait From the Paper tab, select the paper source, size and type. For further details, see page 4.7. Click other tabs on the top of the Samsung ML-2250 Series Properties window to access other features, if needed. RINTING ASKS...
- Page 77 2. For Windows 95/98/Me/NT 4.0/2000, select Settings and then Printers. Printers and Faxes . For Windows XP, select Samsung ML-2250 Series printer. 3. Select the 4. Click the right mouse button on the printer icon and: • In Window 95/98/Me, select Properties.
-
Page 78: Cancelling A Print Job
To stop a print job from the Printers folder: From the Windows Start menu, select Settings. Select Printers to open the Printers window, and double-click the Samsung ML-2250 Series icon. From the Document menu, select Cancel Printing (Windows 9x/Me) or Cancel (Windows NT 4.0/2000/XP). -
Page 79: Using A Favorite Setting
Using a Favorite Setting The Favorites option, which is visible on each properties tab, allows you to save the current properties settings for future use. To save a Favorites item: Change the settings as needed on each tab. Enter a name for the item in the Favorites input box. Click Save. -
Page 80: Setting Paper Properties
Setting Paper Properties Use the following options to set the basic paper handling needs when you access the printer properties. See page 4.2 for more information about accessing printer properties. Click the Paper tab to access various paper properties. Property Description Copies allows you to choose the number of Copies... - Page 81 Property Description Make sure that Source is set to the Source corresponding paper tray. The Manual Feed source is used when printing to special materials. You have to load one sheet at a time into the Multi-Purpose Tray. See page 3.12. If the paper source is set to Auto Select, the printer automatically picks up print materials according to the following order:...
-
Page 82: Using The Toner Save Mode
Using the Toner Save Mode Toner Save mode allows the printer to use less toner on each page. Using this mode will extend the life of your toner cartridge and reduce your cost per page, but will reduce the print quality. This setting is not available with the 1200 dpi setting. - Page 83 From the software application When you change the print settings from your software application, access the printer properties. See page 4.2. Click the Graphics tab, and select the Toner Save option. You can select from: • Printer Setting: If you select this option, the Toner Save feature is determined by the setting you’ve made on the control panel of the printer.
-
Page 84: Printing Multiple Pages On One Sheet Of Paper (N-Up Printing)
Printing Multiple Pages on One Sheet of Paper (N-Up Printing) You can select the number of pages to print on a single sheet of paper. To print more than one page per sheet, the pages will appear decreased in size and arranged on the sheet. You can print up to 16 pages on one sheet. -
Page 85: Printing A Reduced Or Enlarged Document
Click the Paper tab and select the paper source, size, and type. Click OK and print the document. Printing a Reduced or Enlarged Document You can scale your print job on a page. When you change the print settings from your software application, access the printer properties. -
Page 86: Fitting Your Document To A Selected Paper Size
Fitting Your Document to a Selected Paper Size This printer feature allows you to scale your print job to any selected paper size regardless of the digital document size. This can be useful when you want to check fine details on a small document. -
Page 87: Printing Posters
Printing Posters This feature allows you to print a single-page document onto 4, 9 or 16 sheets of paper, for the purpose of pasting the sheets together to form one poster-size document. To change the print settings from your software application, access the printer properties. -
Page 88: Using Watermarks
Specify an overlap in millimeters or inches to make it easier to reconstruct the resulting poster. 0.15 inches 0.15 inches Click the Paper tab and select the paper source, size and type. Click OK and print the document. You can complete the poster by reconstructing the resulting pages. -
Page 89: Creating A Watermark
Click the Extras tab, and select the desired watermark in the Watermark drop-down list. You will see the selected watermark in the preview image. Preview image Preview image Click OK and start printing. Creating a Watermark To change the print settings from your software application, access the printer properties. -
Page 90: Editing A Watermark
Select the desired watermark options. You can select the font name, style, and size, and grayscale level from the Font Attributes section and set the angle of the watermark from the Message Angle section. Click Add to add a new watermark to the list. When you finish editing, click Ok and start printing. -
Page 91: Using Overlays
Using Overlays What is an Overlay? An overlay is text and/or images stored in the computer hard disk drive (HDD) as a special file format that can be printed on Dear ABC any document. Overlays are often used to take the place of preprinted forms and letterhead paper. - Page 92 In the Edit Overlays window, click Create Overlay. In the Create Overlay window, type a name of up to eight characters in the File name box. Select the destination path, if necessary. (The default is C:\FormOver). Click Save. You will see the name in Overlay List. Click OK or Yes until you complete creating.
-
Page 93: Using A Page Overlay
Using a Page Overlay After an overlay has been created, it is ready to be printed with your document. To print an overlay with a document: Create or open the document you want to print. To change the print settings from your software application, access the printer properties. -
Page 94: Deleting A Page Overlay
If necessary, click Confirm Page Overlay When Printing. If this box is checked, a message window will appear each time you submit a document for printing, asking you to confirm your wish to print an overlay on your document. Answering Yes to the window means that the selected overlay will be printed with your document. -
Page 95: Setting Graphic Properties
Setting Graphic Properties Use the following graphic options to adjust the print quality for your specific printing needs. See page 4.2 for more information about accessing printer properties. Click the Graphics tab to display the properties shown below. Property Description You can select the printing resolution by choosing from 1200 dpi (Best) or 600 dpi (Normal). - Page 96 Property Description Some printed characters or images appear to have jagged or uneven edges. Set this Image Mode option to improve the print quality of your text and image, and make the characters and images appear smoother. The Image Mode option is only available when you select 600 dpi (Normal) in the Resolution option.
- Page 97 Property Description TrueType Options This option determines what the driver tells the printer about how to image the text in your document. Select the appropriate setting according to the status of your document. • Download as Bit Image: When this option is selected, the driver will download the font data as bitmap images.
-
Page 98: Using Output Options
Using Output Options You can select options for output of your document. See page 4.2 for more information about accessing printer properties. Click the Extras tab to access the Output Options feature. Option Description You can set in what sequence the pages will be printed. -
Page 99: Using The Status Monitor
Using the Status Monitor If an error occurs while printing, the Status Monitor window appears, showing the error. • The Status Monitor program can only be used if you connect the printer to your computer with the USB cable, or on the network. •... -
Page 100: Reinstalling Status Monitor
When removing is completed, click Finish. Opening the Troubleshooting Guide Double click the Status monitor icon on the Windows task bar. Double click this icon. Or, from Programs from Start, Samsung ML-2250 Series , and Troubleshooting guide. 4.27 RINTING ASKS... -
Page 101: Changing The Status Monitor Program Setting
Changing the Status Monitor Program Setting The following window opens when you click the Status monitor icon on the Windows task bar and select Option. • Display when job is finished for network printer shows the Status monitor balloon when your job is complete. •... -
Page 102: Setting Up A Locally Shared Printer
Windows 9x/Me/XP/NT 4.0/2000 network printer connection. Printing Across a Network Whether the printer is locally connected or network-connected, you need to install the ML-2250 series printer software on each computer that will print documents to the printer. In Windows 9x/Me Setting Up the Host Computer Start Windows. -
Page 103: In Windows Nt 4.0/2000/Xp
Select the port you want, check the Reconnect at log on box, and click OK. From the Start menu, select Settings and then Printers. Double-click your printer icon. From the Printer menu, select Properties. From the Details tab, select the printer port and click OK. In Windows NT 4.0/2000/XP Setting Up the Host Computer Start Windows. - Page 104 Setting Up the Client Computer Right-click the Windows Start button and select Explorer. Open your network folder in the left column. Click the shared name. For Windows NT 4.0/2000, select Settings and Printers from the Start menu. For Windows XP, select Printers and Faxes from the Start menu.
- Page 105 4.32 RINTING ASKS...
-
Page 106: Our Printer
AINTAINING OUR PRINTER This chapter provides suggestions for high-quality and economical printing and information for maintaining the toner cartridge and the printer. This chapter includes: • Maintaining the Toner Cartridge • Cleaning the Printer • Printing Configuration Pages • Consumables and Replacement Parts... -
Page 107: Maintaining The Toner Cartridge
Maintaining the Toner Cartridge Toner cartridge storage To get the maximum results from the toner cartridge, keep the following guidelines in mind. • Do not remove the toner cartridge from its package until ready for use. • Do not refill the toner cartridge. The printer warranty does not cover damage caused by using a refilled cartridge. -
Page 108: Redistributing Toner
Redistributing Toner When toner is low, faded or light areas may appear on a printed page. You may be able to temporarily improve the print quality by redistributing the toner. The following procedures may allow you to finish the current print job before replacing the toner cartridge. - Page 109 Gently shake the toner cartridge from side to side five or six times to redistribute the toner. : If toner gets on your clothing, wipe it off with a dry cloth and wash clothing in cold water. Hot water sets toner into fabric. Reinsert the toner cartridge into the printer.
-
Page 110: Replacing The Toner Cartridge
Replacing the Toner Cartridge If the print remains light after redistributing the toner (see page 5.3), replace the toner cartridge. Remove the old cartridge and install a new toner cartridge. See “Installing the Toner Cartridge” on page 2.4. Cleaning the Printer To maintain print quality, follow the cleaning procedures below each time the toner cartridge is replaced or if print quality problems occur. - Page 111 Open the front cover. Pull the toner cartridge and remove it from the printer. With a dry, lint-free cloth, wipe away any dust and spilled toner from the toner cartridge area and the toner cartridge cavity. : To prevent damage to the toner cartridge, do not expose it to light for more than a few minutes.
- Page 112 Reinsert the toner cartridge and close the cover. Make sure that the cover is securely closed. If it is not firmly closed, printing errors may occur when you print. Plug in the power cord, and turn the printer on. Printing a cleaning sheet Your printer can be set to print out a cleaning sheet automatically every 500 print pages.
-
Page 113: Printing Configuration Pages
Ensure that the printer is turned on and in the Ready mode with paper loaded in the tray. Press and hold down the Cancel button on the control panel for about 6 seconds. Configuration pages print out. Samsung ML-2250 Series AINTAINING OUR PRINTER... -
Page 114: Consumables And Replacement Parts
Approx. 60,000 pages Fuser Unit Approx. 80,000 pages To purchase consumables and replacement parts, contact a Samsung dealer or the place where you bought your product. We strongly recommend that items be installed by trained service personnel. AINTAINING OUR PRINTER... - Page 115 5.10 AINTAINING OUR PRINTER...
-
Page 116: Solving Problems
OLVING PROBLEMS This chapter provides helpful information for what to do if you encounter an error while using your printer. This chapter includes: • Troubleshooting Checklist • Solving General Printing Problems • Clearing Paper Jams • Solving Print Quality Problems •... -
Page 117: Troubleshooting Checklist
Troubleshooting Checklist If the printer is not working properly, perform the series of checks in the list below. If the printer fails to adequately pass a checklist item, follow the corresponding troubleshooting suggestions. Check Solution Print a demo page to verify •... -
Page 118: Solving General Printing Problems
The printer is not Select Samsung ML-2250 Series or selected as the default Samsung ML-2250 Series PS as your printer. default printer. Check the printer for the • The printer cover is not closed. - Page 119 From the Start menu, choose Settings the Spooling Setting may and Printers. Right-click the Samsung be set incorrectly. ML-2250 Series printer icon, choose Properties, click the Details tab, and then choose the Spool Settings button. Select the desired spool setting.
- Page 120 Problem Possible Cause Solution The paper There is too much paper Remove excess paper from the tray. keeps jamming. in the paper tray. If printing on special materials, use the Multi-Purpose Tray. An incorrect type of Use only paper that meets the paper is being used.
- Page 121 Problem Possible Cause Solution The illustrations The setting in the Print the document with selecting print incorrectly software application is Download as Bit Image in the in Adobe wrong. Advanced Options window of the graphic Illustrator. properties. : If you have any printing problem after your printer prints about 60,000 TTENTION pages, you must contact the customer service to replace the transfer roller.
-
Page 122: Clearing Paper Jams
Clearing Paper Jams Occasionally, paper can jam during a print job. Some causes include: • The tray is loaded improperly or overfilled. • The tray has been pulled out during a print job. • The front cover has been opened during a print job. •... - Page 123 Remove any misfed paper by pulling it out by the visible edge. Make sure that all of the paper is properly aligned in the tray. : If the jammed paper is not visible or if there is resistance when you pull the paper, remove the tray from the printer and carefully pull the jammed paper free from the printer.
- Page 124 In the Optional Tray2 Pull the optional Tray2 out of the printer. If you see the jammed paper, remove the paper from the tray. OLVING PROBLEMS...
- Page 125 If you cannot find the jammed paper in Tray2, pull Tray1 half way out of the printer, and remove the paper. Slide the trays back into the printer. Open and close the front cover. Printing can now be resumed. In the Multi-Purpose Tray Open the Multi-Purpose Tray.
-
Page 126: Around The Toner Cartridge
Around the Toner Cartridge Open and close the front cover, and the jammed paper automatically exits the printer. If not, continue to Step 2. Open the front cover and remove the toner cartridge. : To prevent damage to the toner cartridge, do not AUTION expose it to light for more than a few minutes. -
Page 127: In The Paper Exit Area
Check that there is no other paper in the printer. Reinstall the toner cartridge, and then close the front cover. Printing can now be resumed. In the Paper Exit Area If a long portion of the paper is visible, pull it straight out. If not, continue to Step 2. -
Page 128: Tips For Avoiding Paper Jams When Printing On The A5-Sized Paper
If paper jams frequently occur when you print on the A5-sized paper: Open the input tray and load paper into the tray as shown below. Open the Samsung ML-2250 Series Properties window, set the paper size to A5 (148x210 mm) from the Paper tab. 6.13 OLVING PROBLEMS... -
Page 129: Tips For Avoiding Paper Jams
From the Orientation option of the Layout tab, set the Rotate option to 90º. Select 90 degrees. Click. Click OK to start printing. Tips for Avoiding Paper Jams By selecting the correct paper types, most paper jams can be avoided. If a paper jam occurs, follow the steps outlined in “Clearing Paper Jams”... -
Page 130: Solving Print Quality Problems
Solving Print Quality Problems If the inside of the printer is dirty, or paper is improperly loaded, print quality maybe reduced. See the table below to troubleshoot the problem. Problem Solution Light or faded If a vertical white streak or faded area appears on the page: print •... - Page 131 Problem Solution Vertical lines If black vertical streaks appear on the page: • The drum inside the toner cartridge has probably been AaBbCc scratched. Install a new toner cartridge. AaBbCc AaBbCc AaBbCc AaBbCc Gray background If the amount of background shading becomes unacceptable, the procedures below may fix the problem.
- Page 132 Problem Solution Background Background scatter results from bits of toner distributed on the printed page. scatter • The paper may be too damp. Try printing with a different batch of paper. Do not open packages of paper until necessary so that the paper does not absorb too much moisture.
- Page 133 Problem Solution Wrinkles or Ensure that the paper is loaded properly. creases • Check the paper type and quality. See “Paper Specifications” on page E.3. • Open the rear cover and try printing to the rear output tray (face-up). • Turn over the stack of paper in the paper tray. Also try rotating the paper 180°...
- Page 134 Problem Solution Character Voids Character voids are white areas within the parts of characters that should be solid black: • If you are using transparencies, try another type of transparency. Because of the composition of the transparency, some character voids are normal. •...
-
Page 135: Troubleshooting Error Messages
Troubleshooting Error Messages When the printer experiences an error, the control panel will indicate an error message with the indicator lights. Find the light pattern below that matches the printer light pattern and follow the solutions to clear the error. LED status legend symbol for “light off”... -
Page 136: Common Windows Problems
Common Windows Problems Problem Possible Cause and Solution “File in Use” message Exit all software applications. Remove all software from the appears during installation. StartUp Group, then restart Windows. Reinstall the printer driver. “Error Writing to LPTx” • Ensure that the cables are connected correctly, and the message appears. -
Page 137: Troubleshooting Ps Errors
Troubleshooting PS Errors The following situations are PS language specific and may occur when several printer languages are being used. : To receive a printed or screen displayed message when PS errors occur, open the Print Options window and click the desired selection next to the PostScript errors section. -
Page 138: Common Linux Problems
Common Linux Problems Problem Possible Cause and Solution I can’t change settings in You need to have administrator privileges to be able to affect the configuration tool. global settings. I am using the KDE Maybe you do not have the GTK libraries installed. These desktop but the usually come with most Linux distributions, but you may have configuration tool and LLPR... - Page 139 Problem Possible Cause and Solution I am using BSD lpr Legacy BSD lpr systems have a hard limitation on the length (Slackware, Debian, older of the option string that can be passed to the printing system. distributions) and some As such, if you selected a number of different options, the options chosen in LLPR limitation length of the options may be exceeded and some of don’t seem to take effect.
- Page 140 Problem Possible Cause and Solution I have CUPS and some There may be some local options defined in your ~/.lpoptions options (such as N-up) file, which is manipulated by the lpoptions command. These seem to be always enabled options will always be used if not overridden by LLPR settings. even though I don’t pick To get rid of all options for a printer, run the following them in LLPR.
- Page 141 6.26 OLVING PROBLEMS...
- Page 142 SING INDOWS CRIPT RIVER If you want to use the PostScript driver provided with your system CD-ROM to print a document, use the information in this Appendix. This chapter includes: • Installing PS Drivers • Using PS Printer Driver Features : You need to install an optional PS DIMM for using the PostScript driver.
-
Page 143: Using Windows Post Script Driver
Installing PS Drivers PPDs, in combination with the PostScript driver, access the printer features and allow the computer to communicate with the printer. An installation programme for the PPDs is provided on the supplied software CD-ROM. : For PostScript printing, an optional PS DIMM should be installed into the printer. -
Page 144: Reinstalling Ps Drivers
Click Printer(PostScript) and then click Next. When the installation is complete, click Finish. Reinstalling PS Drivers From the Start menu, select Programs. Select Samsung ML-2250 Series, and then Maintenance. Click Repair. Click Printer(PostScript) and then click Next. When reinstallation is done, click Finish. -
Page 145: Using Ps Printer Driver Features
To open the properties window from an application: From the File menu, select Print to open the Print window. Make sure that Samsung ML-2250 Series PS is selected in the Name drop-down list. Click Properties to open the properties window. - Page 146 SING RINTER IN INUX You can use your printer in a Linux environment. This chapter includes: • Installing the Printer Driver • Using the Configuration Tool • Changing LLPR Properties...
-
Page 147: Using Your Printer In Linux
Installing the Printer Driver System Requirements Supported OS • Redhat 6.2/7.0/7.1 and above • Linux Mandrake 7.1/8.0 and above • SuSE 6.4/7.0/7.1 and above • Debian 2.2 and above • Caldera OpenLinux 2.3/2.4 and above • Turbo Linux 6.0 and above •... - Page 148 Insert the printer software CD-ROM. The CD-ROM automatically runs. : If the CD-ROM does not automatically run, click the icon at the bottom of the window. When the Terminal screen appears, type in: cd /mnt/cdrom (the CD-ROM directory) [root@local /root]# ./setup.sh [root@local cdrom]# Select the installation type, either Recommended or...
- Page 149 The printer driver installation begins. When the installation is completed, click Start. The Linux Printer Configuration window opens. Click the Add Printer icon on the tool bar at the top of the window. : Depending on the printing system in use, the Administrator Login window may appear.
- Page 150 Click the Connection tab and ensure that the printer port is set properly. If not, change the device setting. You can use the Settings tab and the Queue tab to view the printer’s current settings. If necessary, you can change the settings.
-
Page 151: Changing The Printer Connection Method
Changing the Printer Connection Method If you change the printer connection method from USB to parallel or vice versa while in use, you must re-configure your Linux printer by adding the printer to your system. Take the following steps: Make sure that you connect the printer to your computer. Turn both the computer and the printer on. -
Page 152: Uninstalling The Printer Driver
Uninstalling the Printer Driver From the Startup Menu icon at the bottom of the desktop, select Other and then Configuration Tool. You can also access the Linux Printer Configuration window by typing “linux-config” in the Terminal screen. In the Linux Printer Configuration window, select the Uninstall command from the File menu. -
Page 153: Using The Configuration Tool
Click OK to begin uninstallation. When the uninstallation is complete, click Finished. Using the Configuration Tool The configuration tool accesses administrative tasks, including adding and removing a new printer, and changing their global settings. Regular users can also run it to easily inspect job queues, examine the printer properties and change their local preferences. - Page 154 The Info tab shows general information about the printer. If you are an Internet user, you can click Go to the Web page for this printer to access the web page. Click the Jobs tab to inspect and manage the job queue for the selected printer.
-
Page 155: Changing Llpr Properties
Changing LLPR Properties You can fine tune the printer’s properties by opening the LLPR Properties window. To open the LLPR Properties window: From the application you are using, select the Print command. When the Linux LPR window opens, click Properties. Click Properties. - Page 156 The LLPR Properties window opens. The following six tabs are at the top of the window: • General - allows you to change the paper size, the paper type, the paper source, the orientation of the documents; enables the duplex feature, adds start and end banners, and changes the number of pages per sheet.
- Page 157 MEMO B.12 SING RINTER IN INUX...
- Page 158 RINTING PPLICATIONS While your printer is primarily a Windows printer, you can also print from a DOS software Programme using the Remote Control Panel utility provided in the supplied software CD-ROM. This chapter includes: • About the Remote Control Panel •...
-
Page 159: Appendix C: Printing From Dos Applications
About the Remote Control Panel DOS users have access to many printer features through specific DOS printer drivers; however, many software manufactures do not develop printer drivers for their software programmes. Your printer provides the software control panel for improved printer control when DOS printer drivers are not available or when certain print settings are not available through DOS software programmes. -
Page 160: Reinstalling Remote Control Panel
Click Remote Control Panel and then click Next. When the installation is complete, click Finish. Reinstalling Remote Control Panel From the Start menu, select Programs. Select Samsung ML-2250 Series, and then Maintenance. Click Repair. Click Remote Control Panel and then click Next. -
Page 161: Selecting Print Settings
Control Panel. Starting the Remote Control Panel From the Start menu, select Programs. Select Samsung ML-2250 Series and then Remote Control Panel. The Remote Control Panel window allows you to access all the information you need when using your printer. If necessary, click the other tabs on the top of the window to access other features. -
Page 162: Using The Remote Control Panel Tabs
Using the Remote Control Panel Tabs The Remote Control Panel allows you to access the following features: Printing Tab In this tab, you can configure general settings for printing. • Paper Size sets the paper size. • Orientation determines how the output is printed on the page. - Page 163 Config Tab You can configure various printer features. • Emulation selects the emulation for printing a document. The factory default is Auto. • Power Save determines the length of time the printer waits after a job is printed before it goes to a reduced power state. If the printer is used frequently, select OFF which keeps the printer ready to print with the minimum warm-up time.
- Page 164 Job Tab You can set options for improving the quality of your print job. • Toner Density determines the toner density of the page. The default value is Medium. • Paper Type provides the printer with information about the type of paper to be used for a print job. For the best result, set this to the paper type you loaded in the tray of the printer.
- Page 165 Test Tab This tab allows you to print a resident page to test your printer’s performance. • Self Test prints a configuration sheet. A list of the user default settings and the amount of printer memory available prints. • Demo Page prints a demonstration page. It shows the printer features and specifications.
- Page 166 PCL Tab In this tab, you can configure various settings for PCL emulation. • Typeface allows you to select the desired typeface. This setting is ignored when the software application specifies a font. • Symbol Set determines the symbol set. A symbol set is a set of alphabetic and numeric characters, punctuation, and special symbols used when printing with a selected font.
- Page 167 Flash Font and Macro Tab This tab allows you to add fonts and macros to the Flash memory of the printer. • Fonts adds or deletes fonts. You can also print the font sample list. • Macros adds or deletes macros. You can also activate (Enable macro) or deactivate (Disable macro) them.
- Page 168 PS 3 Tab You can configure various settings for PostScript 3 emulation. • Print error information determines whether or not the printer prints the error information page when an error occurs while processing a job. Select ON to print the page, otherwise select OFF.
- Page 169 EPSON/IBM Tab You can configure various settings for EPSON/IBM emulation. • Font allows you to select the desired font. • International character set allows you to select a character set of the desired language. • Character Table selects the character sets. •...
- Page 170 Your printer is a full-featured laser printer that has been optimised to meet most of your printing needs. Recognizing that each user may have different requirements, however, Samsung makes several options available to enhance the printer’s capabilities. This chapter includes: •...
-
Page 171: Installing Printer Options
Precautions When Installing Printer Options DISCONNECT THE POWER CORD: Never remove the printer control board while the printer is plugged in. To avoid the possibility of an electrical shock, always disconnect the power cord when installing or removing ANY internal or external printer option. -
Page 172: Installing Memory And Postscript Dimms
Installing Memory and PostScript DIMMs Additional printer memory and the PostScript option are provided on DIMMs (Dual In-line Memory Modules). This procedure is applicable to either option. Turn the printer power off and unplug all cables from the printer. Remove the two screws on the back of the printer. Open the control board cover. - Page 173 Locate the memory DIMM slot (the upper slot) and the PS DIMM slot (the lower slot) on the control board. They are not interchangeable. Memory DIMM PS DIMM To install the memory DIMM, continue with Step 5. To install the PS DIMM, go to Step 6. Hold the memory DIMM so that the notch and the connection point are aligned with the slot as shown, and insert it all the way into the upper slot.
- Page 174 Hold the PS DIMM so that the notch and the connection point are aligned with the slot as shown, and insert it all the way into the lower slot. Close the control board cover. Tighten the two screws. Reconnect the power cord and printer cable, and turn the printer on.
-
Page 175: Removing The Memory Or Ps Dimm
Removing the Memory or PS DIMM Follow steps 1 through 3 on page D.3 to access the control board. Push the clips at each end of the connector slot away from the DIMM. Place the DIMM in its original packaging or wrap it with paper and store it in a box. -
Page 176: Installing A Network Card
Installing a Network Card : When you purchase the wired/wireless network interface card, the antenna connected to the card is not separated from the card depending on your country. To use your printer on a network, your printer must be equipped with a network interface card. - Page 177 Open the control board cover. Remove the two screws and the bracket from the control board. You can discard the old bracket. Insert the front of the network interface card to the corresponding slot of the machine. : If you are installing the wireless network interface card, unfasten the antenna.
- Page 178 Make sure that the connector on the card is properly placed on the connector of the board. Push the card firmly. Fasten the two supplied screws. Close the control board cover. Tighten the two screws. NSTALLING RINTER PTIONS...
- Page 179 If you purchase the network interface card supporting the wireless LAN interface, insert the antenna counterclockwise, as shown. Plug one end of the Ethernet cable into the Ethernet network port on the Printer and the other end of the cable into a network LAN connection.
-
Page 180: Installing An Optional Paper Tray
Installing an Optional Paper Tray You can increase the paper handling capacity of your printer by installing an optional Tray2. The optional paper tray consists of two components; the support unit and the paper tray. Support unit Paper tray Turn off the printer and unplug all cables from the printer. Remove the tape fastening the interface cable from the bottom of the support unit. - Page 181 Align the printer with the support unit and lower it into place on the tabs. Plug the cable into the connector on the back of the printer. Load paper in Tray2. For information about loading paper in the tray, see page 2.7. Reconnect the power cord and cables and then turn the printer on.
-
Page 182: Specifications
PECIFICATIONS This chapter includes: • Printer Specifications • Paper Specifications... -
Page 183: Printer Specifications
Printer Specifications Item Specifications and Description Up to 20 ppm in A4 (22 ppm in Letter) Print Speed Resolution Up to 1200 x 1200 dpi effective output First Printing Time 10 seconds Warm-up Time Less than 40 seconds AC 110 ~ 127 V (USA, Canada) / 220 ~ 240 V (Others) Power Rating 50 / 60 Hz 400 W average during operation... -
Page 184: Paper Specifications
This may be the result of improper handling, unacceptable temperature and humidity levels, or other variables over which Samsung has no control. • Before purchasing large quantities of paper, ensure that the paper meets the requirements specified in this User’s Guide. -
Page 185: Supported Sizes Of Paper
Supported Sizes of Paper Tray1/ Weight Dimensions Capacity Tray2 216 X 279 mm Letter (8.5 X 11 in.) 210 X 297 mm (8.3 X 11.7 in.) 148 x 210 mm (5.8 x 8.2 in.) 184 X 267 mm Executive (7.25 X 10.5 in.) 250 sheets of 75 216 X 356 mm 60 to 90 g/m... -
Page 186: Guidelines For Using Paper
Guidelines for Using Paper For the best result, use conventional 75 g/m (20 lb) paper. Ensure that the paper is of good quality, and free of cuts, nicks, tears, spots, loose particles, dust, wrinkles, voids, and curled or bent edges. If you are unsure of what type of paper you are loading, such as bond or recycled paper, check the label on the package. -
Page 187: Paper Specifications
Paper Specifications Category Specifications Acid Content 5.5 ~ 8.0 pH Caliper 0.094 ~ 0.18 mm (3.0 ~ 7.0 mils) Curl in Ream Flat within 5 mm (0.02 in.) Cut with sharp blades with no visible Cut Edge Conditions fray. Must not scorch, melt, offset, or release Fusing Compatibility hazardous emissions when heated to 205 °C (400 °F) for 0.1 second. -
Page 188: Printer And Paper Storage Environment
Printer and Paper Storage Environment Paper storage environment conditions directly affect the feed operation. Ideally, the printer and paper storage environment should be at or near room temperature, and not too dry or humid. Remember that paper is hygroscopic; it absorbs and loses moisture rapidly. Heat works with humidity to damage paper. -
Page 189: Envelopes
Envelopes Envelope construction is critical. Envelope fold lines can vary considerably, not only between manufacturers, but also within a box from the same manufacturer. Successful printing on envelopes depends upon the quality of the envelopes. When selecting envelopes, consider the following components: •... - Page 190 Envelopes with Double Side Seams Double side-seam construction has vertical seams at both ends of the envelope rather than diagonal seams. This style may be more likely to wrinkle. Be sure the seam extends all the way to the corner of the envelope as illustrated below. Correct Incorrect Envelopes with Adhesive Strips or Flaps...
-
Page 191: Labels
Labels AUTIONS • To avoid damaging the printer, use only labels recommended for laser printers. • To prevent serious jams, always use the Multi-Purpose Tray to print labels and always use the rear output tray. • Never print on the same sheet of labels more than once and never print on a partial sheet of labels. - Page 192 NDEX install printer driver for Linux B.2 cancel, print job 4.5 printer driver for Windows 2.17 card stock, print 3.21 printer options D.1 cleaning sheet, print 5.7 PS Drivers A.2 components 1.5 Remote Control Panel C.2 configuration page, print 5.8 software 2.19 connect toner cartridge 2.4...
- Page 193 problem, solving checklist 6.2 paper general 6.3 choose 3.2 Linux 6.23 load 2.7 paper jams 6.7 sizes and capacities 3.3 print quality 6.15 specifications E.3 PS errors 6.22 paper jam Windows 6.21 around the toner cartridge 6.11 PS DIMM, install D.3 in the paper exit area 6.12 in the paper feed area Multi-Purpose Tray 6.10...
- Page 194 uninstall Linux B.7 unpack 2.2 USB cable, connect 2.12 watermarks, use 4.15...
- Page 195 Visit us at: www.samsungprinter.com Home Rev.1.06...