
Related Manuals for Samsung ML-2251N/XAA


Summary of Contents for Samsung ML-2251N/XAA
-
Page 1: Table Of Contents
LASER PRINTER ML-2250 Series ML-2250/XAA, ML-2251N/XAA, ML-2252W/XAA Basic Model : ML-2210/ML-2251N SERVICE Manual LASER PRINTER CONTENTS 1. Precautions 2. Reference Information 3. Specifications 4. Summary of product 5. Disassembly and Reassembly 6. Alignment and Adjustments 7. Troubleshooting 8. Exploded Views and Parts List 9. -
Page 2: Precautions
High voltages and lasers inside this product are dangerous. This printer should only be serviced by a suitably trained and qualified service engineer. (2) Use only Samsung replacement parts There are no user serviceable parts inside the printer. Do not make any unauthorized changes or additions to the printer, these could cause the printer to malfunction and create electric shock or fire haz-ards. -
Page 3: Caution For Safety
Take care not to cut or damage the power cable or plugs when moving the machine. (9) Use caution during thunder or lightening storms. Samsung recommend that this machine be disconnected from the power source when such weather conditions are expected. Do not touch the machine or the power cord if it is still connected to the wall socket in these weather conditions. -
Page 4: Handling Precautions
1.2.4 Assembly / Disassembly Precautions Replace parts carefully, always use Samsung parts. Take care to note the exact location of parts and also cable routing before dismantling any part of the machine. Ensure all parts and cables are replaced correctly. -
Page 5: Disregarding This Warning May Cause Bodily Injury
Precautions 1.2.5 Disregarding this warning may cause bodily injury (1) Be careful with the high temperature part. The fuser unit works at a high temperature. Use caution when working on the printer. Wait for the fuser to cool down before disassembly. (2) Do not put finger or hair into the rotating parts. -
Page 6: Esd Precautions
Precautions 1.3 ESD Precautions Certain semiconductor devices can be easily damaged by static electricity. Such components are commonly called “Electrostatically Sensitive (ES) Devices”, or ESDs. Examples of typical ESDs are: integrated circuits, some field effect transistors, and semiconductor “chip” components. The techniques outlined below should be followed to help reduce the incidence of component damage caused by static electricity. -
Page 7: Reference Information
• Cotton Swab Standard : Test equipment to diagnose the Laser Standard : For general home use, for medical service. printer supplied by Samsung Electronics. • Cleaning Equipments Standard : An IPA(Isopropyl Alcohol)dry wipe tissue or a gentle neutral detergent and lint-free cloth. -
Page 8: Acronyms And Abbreviations
Copier) Enhanced Capability Port Isopropy Alcohol Engine Control Unit Inter Process CommunicationEPP Enhanced parallel Port EEPROM Electronically Erasable Programmable Read Only Memory Images Per Minute Electro Magnetic Interference Image Transfer Belt Electro photographic local area network Traninung Manual Samsung Electronics... - Page 9 Light Emitting Diode SCF/SCT Second Cassette Feeder/Second Cassette Tray Laser Scanning Unit SMPS Switching Mode Power Supply Megabyte SPGP Samsung Printer Graphic Megahertz Processor MPBF Mean Prints Between Failure Samsung Printer Language MPF/MPT Multi Purpose Feeder/Multi Spool Simultaneous Peripheral Operation...
-
Page 10: Select A Location For The Printer
- Away from the direct airflow of air conditioners, heaters, or ventilators - Free of extreme fluctuations of temperature, sunlight, or humidity - Clean, dry, and free of dust 100 mm 100 mm (3.9 in.) (3.9 in.) 552 mm(21.7 in.) Traninung Manual Samsung Electronics... -
Page 11: Sample Tests Patterns
The life of the toner cartridge, developer cartridge and printing speed are measured with the pattern shown below (5%). The 5% and 2% samples are reproduced reduced to 70% of the actual A4 size. 2.4.1 A4 5% Pattern Traninung Manual Samsung Electronics... - Page 12 REFERENCE INFORMATION 2.4.2 A4 2% Pattern Traninung Manual Samsung Electronics...
-
Page 13: A4 Iso 19752 Standard Pattern
REFERENCE INFORMATION 2.4.3 A4 ISO 19752 Standard Pattern This test page is reproduced at 70% of the normal A4 size Traninung Manual Samsung Electronics... -
Page 14: Wireless Lan
Most of the main wireless networking companies are attending including such companies as Lucent Technologies, Cisco, Intel/Symbol, 3Com, Enterasys (Cabletron), Compaq, IBM, Nokia, Dell, Philips, Samsung Electronics, Sony, Intersil, etc.. This mark certifies mutual compatibility amongst the product of these companies. Wi-Fi (IEEE 802.1) is certified as a standard of the wireless LAN market. -
Page 15: Specifications
76mmx127mm (3"x5") Margin(Top/Bottom/ 4mm, 4mm, 4mm, 4mm Left/Right) * Print speed will be affected by Operating System used, computing performance, application software, connecting method, media type, media size and job complexity. ** Sound Pressure Level, ISO 7779 Service Manual Samsung Electronics... - Page 16 3. Second Cassette Feeder : 16~24lb (60 to 90g/•) Paper Output Capacity Max151 sheet 1. Face-Down :150 sheet , 2. Face-Up : 1 sheet Stacker 1. Face-Down : YES , 2. Face-Up : NO Offset Output Sensor Paper Paper Size Media Type Paper Full Service Manual Samsung Electronics...
-
Page 17: Controller Specification
Demo Mode Press the Demo key for 2 seconds Configuration Mode Press the Demo key for 6 seconds Cleaning Mode Press the Demo key for 10 seconds Service Mode Press the Demo key when power on Service Manual Samsung Electronics... -
Page 18: Software Specifications
3)Output Options : - Print Order, - Reprint When Jammed 4)Favorites Printer 1)Printer Configuration : - High Altitude Correction, Power Save => Time Delay About 1) Buy Supplies 2) Samsung Website 3.4 Consumable Specifications Item ML-2250 Series ML-2250 ML-2251N/ML-2252W Toner Cartridge Type... -
Page 19: Option Specifications
Mean Time To Repair 30 min MPBF Mean Paper Between Failure 30,000 sheet Life Cycle 150,000 sheet or 5 years Service Service Item & 1. Transfer Roller : 60K pages Period 2. Fuser Unit : 80K pages Service Manual Samsung Electronics... - Page 20 Specifications MEMO Service Manual Samsung Electronics...
-
Page 21: Summary Of Product
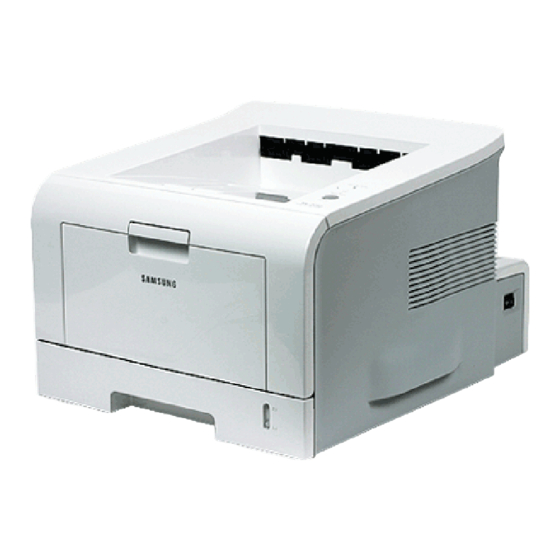
This chapter describes the functions and operating principals of the main components. 4.1 Printer Components 4.1.1 Front View Top output tray (Face down) Control Panel Output Support Front Cover Power switch Multi Purpose Feeder Paper level indicator Tray Service Manual Samsung Electronics... -
Page 22: Rear View
Summary of Product 4.1.2 Rear View Rear output tray (Face up) Power receptacle USB port Parallel port Service Manual Samsung Electronics... -
Page 23: Control Panel
If you press this button once again this LED is off and the Toner Save mode is disabled. If the On Line/Error and Toner Save LEDs blink at the same time your system has experi- enced an internal problems. Refer to Section 6.6 Service Manual Samsung Electronics... - Page 24 In Manual Feed mode it is not possible to cancel the print job by pressing this button. Toner Save mode on/off In Ready mode, press this button to turn the Toner Save mode on or off. Service Manual Samsung Electronics...
-
Page 25: System Construction
(2) Memory parts (Flash Rom containing the control program and DRAM for working memory) (3) Engine interface parts (motor control, fuser control, HVPS control, sensors etc) (4) PC Interface (USB , Parallel, Network – wired and wireless) (5) Bus, DMA and I/O handling ii) Operators panel iii) PC Interface Service Manual Samsung Electronics... - Page 26 Summary of Product 4.2.2 System Layout L S U Fuser Toner Cartridge EXIT Sensor MP Sensor MP Sensor Cassette Fuser Manual Feeder LSU(Laser Scan Unit) Transfer Roller Toner Cartridge Service Manual Samsung Electronics...
-
Page 27: Paper Feed
4.2.5 Driver Ass'y Power is provided to the paper drive assembly under the control of the main PWA. The main motor powers the paper feed, toner cartridge, fuser unit and all pick-up, feed and exit rollers. Service Manual Samsung Electronics... -
Page 28: Thermistor And Thermostat
There are two methods of fusing toner onto the paper: the existing heat lamp process and the Q-PID process developed by Samsung. ML2250 export models, both 110V and 220V, use the heat lamp process. This consists of a heat lamp, heat roller, pressure roller, thermistor and thermostat. By use of heat and pressure toner is caused to melt and adhere to the paper surface in order to complete the printing process. -
Page 29: Toner Cartridge
- Management of waste toner: Collected using an electro-static process and retained within the toner cartridge --> no waste toner to dispose of. - OPC Drum protecting Shutter: No. - Classifying device for toner cartridge: ID is classified by interruption of the frame channel. Service Manual Samsung Electronics... - Page 30 PARALLEL PORT SINGLE TERMINATION NETWORK(ST1284) U23 LOW VOLTAGE IEEE 161284 TRANSLATING TRANSCEIVER(161284) U22 VIDEO X-TAL(19.6MHz) OSC3 USB 2.0(NET2270) U25 USB X-TAL(30MHz) OSC4 LOW VOLTAGE OCTAL D-TYPE FLIP-FLOP(74LVX273) U14, U19 LOW VOLTAGE BIDIRECTIONAL TRANSCEIVER(74LCX245) U10 FLASH MEMOTY(29LV160DB) U13 Service Manual 4-10 Samsung Electronics...
-
Page 31: Flash Memory
It stores the system program, this can be updated by downloading the system program through the PC Interface. In export models PCL fonts are also sred in the flash memory. • Capacity :2M Byte • Access Time :70 nsec Service Manual 4-11 Samsung Electronics... -
Page 32: Sensor Input Circuit
The main motor drives the paper feed, developing unit, Fuser and Exit ass'y. It is driven by software which controls the acceleration, constant speed and deceleration profiles. The Motor is driven using an A3977 driver IC. Service Manual 4-12 Samsung Electronics... - Page 33 If the two conditions are not satisfied, the error shown in the table below occurs. Error Type Description DCU Display Value Polygon Motor Error When the polygon motor speed doesn't become steady Hsync Error The polygon motor speed is steady but the Hsync is not generated Service Manual 4-13 Samsung Electronics...
- Page 34 The HVPS part uses the 24V and outputs the high voltage for THV/MHV/BIAS and the outputted high voltage is supplied to the toner, OPC cartridge and transfer roller. Service Manual 4-14 Samsung Electronics...
- Page 35 - Output Voltage Rise Time : 50 ms Max - Output Voltage Fall Time : 50 ms Max - Output Loading range : 10 MΩ ~ 1000 MΩ - Output Control Signal (BIAS-PWM) : the CPU is HV output when PWM is low. Service Manual 4-15 Samsung Electronics...
- Page 36 3) Consumption Power Item System (+3.3V) (+5V) (24V) Stand-By 1.0 A 0.07A 0.4 A AVG : 55 Wh PRINTING 1.0 A 0.14A 2.0 A AVG : 280 Wh Service Manual Training Manual 4-16 4-16 Samsung Electronics Samsung Electronics...
- Page 37 *The paper exists between the feed sensor and the exit sensor. JAM 2 -After the trailing edge of the paper passes the feed sensor the trailing edge of the paper does not pass the exit sensor within a certain time. Service Manual 4-17 Samsung Electronics...
- Page 38 Summary of Product MEMO Service Manual 4-18 Samsung Electronics...
-
Page 39: Disassembly And Reassembly
3. Unplug the power cord. 4. Use a flat and clean surface. 5. Replace only with authorized components. 6. Do not force plastic-material components. 7. Make sure all components are in their proper position. Service Manual Samsung Electronics... -
Page 40: Front Cover
Maintaining Print Quality. • To prevent damage to the toner cartridge, do not expose it to light for more than a few minutes. Front Cover 3. Release the hinges by pulling inwards as shown in "A" below Service Manual Samsung Electronics... - Page 41 5.3 MP-Tray Ass’y 1. Open the Tray Ass’y 2. Carefully bend the clear plastic hinge supports ( ) to release them from the guide hooks. Push the Front cover side outwards to release the MP Tray hinge. Service Manual Samsung Electronics...
-
Page 42: Rear Cover
2. Remove the Cover Face up in the direction of arrow. Use Driver Cover Face up Note. To make Disassembly and Reassembly simpler. • Disassembly - Switch in OFF Position • Reassembly – Switch in ON position Service Manual Samsung Electronics... -
Page 43: Top Cover
- Front Cover - Rear Cover 2. Remove four screws securing the Top Cover Ass’y, as shown below. Exit Roller Take Care. When removing or refitting the top cover take care not to damage the Exit Roller. Service Manual Samsung Electronics... -
Page 44: Middle Cover
Top Latch Side Cover(LH) 2. Remove the two screws and release the latches from the Frame Ass’y in the direction of the arrow, then remove the side cover(RH). Bottom Latches Top Latch Side Cover(RH) Bottom Latches Service Manual Samsung Electronics... -
Page 45: Exit Roller
1. Before you remove the Exit Roller, you should 2. Remove the Exit Gear, Bearing and Exit Roller remove: as shown below. - Front Cover - Rear Cover Exit Gear Bearing - Side Cover(LH, RH) - Top Cover Service Manual Samsung Electronics... - Page 46 2. Release 1 screw and remove the SMPS shield Engine Shield Ass'y SMPS Shield 3. Remove the twelve screws securing from the Engine Shield Ass'y and unplug the all connectors. Then take the Engine Shield Ass'y. Engine Shield Ass’y Service Manual Samsung Electronics...
- Page 47 2. Unplug one connector and remove three screws then take the Inlet Bracket out. Inlet Bracket 5. Remove the six screws and take the Main Board. Main PBA 3. Remove the two screws and remove the Network Board. Memory Board Service Manual Samsung Electronics...
- Page 48 6. Remove seven screw and take out the SMPS 7. If you only need to remove the optional memory Unit. modules or the network card this can be chieved by removing ONLY the Option Cover. SMPS Coin Screws Memory Board Service Manual 5-10 Samsung Electronics...
- Page 49 5. Remove four screws securing the Fuser Cover and two screws securing the Guide Input to dismantle the fuser unit.. 3. Remove the two screws securing the Thermostat. Then lift the Thermostat out. Claw Fuser Cover Thermostat Service Manual 5-11 Samsung Electronics...
- Page 50 1. Before you remove the Fan, you should remove: - Front Cover - Rear Cover - Side Cover(RH) - Top Cover 2. Unplug one connector from the SMPS and remove one screw as shown below. Then take out the Fan. Service Manual 5-12 Samsung Electronics...
- Page 51 3. Unplug the two connectors From the LSU, as remove: shown below. - Front Cover - Rear Cover - Side Cover(RH) Connector - Top Cover 2. Remove the four screws securing the LSU and remove it. Service Manual 5-13 Samsung Electronics...
- Page 52 2. Remove six screws from the Drive Ass'y. Caution The six screws have numbers stamped into the Drive Ass’y base plate. When refitting the Drive Ass’y tighten the screws the order they are numbered. Drive Ass’y Service Manual 5-14 Samsung Electronics...
- Page 53 5. Unlatch the two transfer roller vushes and remove them as shown below. Transfer Roller Bush Bush-Spring Spring 3. Unplug the PTL Holder connector then remove the PTL Holder and PTL Lens, as shown below. PTL Holder, PTL Lens Service Manual 5-15 Samsung Electronics...
- Page 54 3. Remove the four screws from the MP Ass’y and take it out. 5. Remove the three screw from the Feed Bracket and take it out. MP Ass y Feed Gear2 6. Remove the Feed Gear2, as shown below. Feed Gear2 Service Manual 5-16 Samsung Electronics...
- Page 55 Disassembly and Reassembly 7. Remove the Feed Gear1, as shown below. 8. Remove the Feed Roller and Feed Roller1, as shown below. Feed Roller Feed Gear1 Feed Roller1 Service Manual 5-17 Samsung Electronics...
- Page 56 2. Remove the Pick-Up Gear Ass’y as shown Pick-Up Solenoid below. Pick-Up Gear Ass’y Manual Solenoid 5. Remove the rubber pickup from the Pink-Up Roller, as shown below. 3. Remove the Pick-Up Ass’y as shown below. Rubber Pickup Pick-Up Ass’y Service Manual 5-18 Samsung Electronics...
- Page 57 4) Slide the Pickup Roller as far as possible to the side, until it is free from the white collar on the other end. 5) Rotate the Pickup Roller around the drive shaft until it can be removed. Service Manual 5-19 Samsung Electronics...
- Page 58 Disassembly and Reassembly MEMO Service Manual 5-20 Samsung Electronics...
-
Page 59: Alignment And Adjustments
PAPER JAM 0 PAPER JAM 1 PAPER JAM 2 LSU NOT READY DIAGNOSTIC DOWN SHIFT STOP MODE ENTER TO ENTER DIAGNOSTIC MODE, PUSH THREE BUTTONS SIMUL ANEOUSL AND TURN THE PRINTER POWER ON. SEC CODE : ML+5000 KC/XRX Service Manual Samsung Electronics... - Page 60 The front part of paper is jammed between the Exit sensor and Feed sensor. Paper Jam 2 The front part of paper is jammed just after passing through the Exit sensor. LSU Not Ready LSU Scanner Motor not ready or Hsync signal not output. Service Manual Samsung Electronics...
- Page 61 Caution : High voltage probe should be used. LSU Operating System The LSU scanning motor is started and the ‘ON’ LED is lit. When LSU motor is ready the 3 rd LED is lit. Pickup clutch on The main cassette Solenoid is tested. Service Manual Samsung Electronics...
- Page 62 Tests the Registration Sensor. The ‘ON’ LED indicates the sensor status. MP Pickup Test : Tests the MP pickup clutch. The ‘ON’ and ‘OFF’ LEDS indicate the clutch status. MP Sensor Test : Tests the MP Paper sensor The ‘ON’ LED indicates the sensor status. Service Manual Samsung Electronics...
- Page 63 Clean Print Refer ence adequate high PTL On PTL Off Fan On Fan Off Regi Regi Clutch Regi Clutch Off Clutch Regi Sensor Manual Sensor MP Pickup MP Pickup On MP Pickup Off MP Sensor MP Empty Service Manual Samsung Electronics...
- Page 64 Sensor the paper does not pass the exit sensor within a certain Empty Sensor time of the paper leading adge activating the exit sensor) <Jam2> L S U Fuser Toner Cartridge EXIT Sensor Empty Sensor <Jam1> Service Manual Samsung Electronics...
-
Page 65: Clearing Paper Jams
4) Close the rear output tray. Open and close the front cover. Printing can be resumed. Caution: paper jammed in this area is very close to the fuser. This can be extremely hot. Take care not to get burned. Service Manual Samsung Electronics... - Page 66 1) Open the front cover and remove the toner cartridge 2) Gently pull the paper toward you. 3) Check that there is no other paper in the printer. 4) Reinstall the toner cartridge, and then close the cover. Printing can be resumed. Service Manual Samsung Electronics...
-
Page 67: Tips For Avoiding Paper Jams
• Do not use creased, damp or highly curled paper. • Do not mix paper types in the input tray. • Use only recommended print media. • Ensure that the recommended print side is facing down when loading paper into the input tray. Service Manual Samsung Electronics... -
Page 68: Sample Pattern
Hold down the Cancel button for about 6 seconds to print the printer configuration. For ML2250 only the et configuration is printed (1 page). For ML2251N and ML2252W. both the set and network configuration pages are printed <Demo Page : ML-1710> <Demo Page : ML-1750> Service Manual 6-10 Samsung Electronics... - Page 69 Built-in 802.11b Wireless network (ML-2252W) www.samsungprinter.com e v e r y o n e ’ s i n v i t e d **AII other trademarks are the property of their respective owners. Samsung Electronics, AII rights reserved. Service Manual 6-11 Samsung Electronics...
-
Page 70: Printing A Cleaning Sheet
3) Your printer automatically picks up a sheet of paper from the tray and prints out a cleaning sheet with dust or toner particles on it. Note: The cartridge cleaning process takes some time. To stop printing, turn the power off. Service Manual 6-12 Samsung Electronics... -
Page 71: Consumables And Replacement Parts
1 second intervals. LSU Not Ready Error The printing is stop in the fad status, and the [Error] LED (green) and (HSYNC Error) the [Toner Save] LED are simultaneously flashing at 4 second intervals. Service Manual 6-13 Samsung Electronics... -
Page 72: Periodic Defective Image
L S U Fuser Toner Cartridge MP Sensor Transfer Roller OPC Drum L S U Fuser Toner Cartridge Heat Roller Charge Roller EXIT Sensor Empty Sensor Pressure Roller Supply Roller Developing Roller <Rollers Layout> Service Manual 6-14 Samsung Electronics... -
Page 73: Troubleshooting
Remove if found. 5. Contamination of the OPC drum. 5. If the problems are not solved, replace the toner cartridge. 6. Depression or deformation of the surface 6. Replace the transfer roller. of the transfer roller Service Manual Samsung Electronics... -
Page 74: Horizontal Black Band
If the roller's life is expired, transfer roller's life has expired. replace it. Note. Cleaning the inside of the set to remove excess toner particles or paper dust will reduce the occurrence of this problem.. Service Manual Samsung Electronics... -
Page 75: Light Image
Note if 1 and 2 do not resolve the problem and the problem persists replace the HVPS. 3. VD0 signal of the Main PBA is Low state. 3. Replace the LSU Unit or Main PBA. Service Manual Samsung Electronics... -
Page 76: Uneven Density
4. Is the movement(Up and Down) of 4. Clean the transfer roller bushes. the transfer roller smooth? 5. Is the HVPS normal? 5. Clean the high voltage charge terminals. If this does not resolve the problem replace the HVPS. Service Manual Samsung Electronics... - Page 77 Digital Printer OHP, a higher transfer voltage is required. Remember to set back to normal paper after Digital Printer use. Digital Printer Digital Printer Service Manual Samsung Electronics...
- Page 78 2. If the charge roller is contaminated, stains 2. If the charge roller is contaminated, run PC on the face of page will occur. Cleaning Mode Print 2 or 3 times. Digital Printer And perform Self-Test 2 or 3 times to remove contamination. Service Manual Samsung Electronics...
- Page 79 2. Abnormal solenoid. 1. See 7.1.15 above 2. Perform the engine self test using DCU (refer to code 6) to check if the Solenoid is normal. If the problem persists replace the engine PBA Service Manual Samsung Electronics...
-
Page 80: Wrong Print Position
6. If the paper feeds into the printer and Jam 0 occurs, 6. Check the SMPS PBA, Main PBA and all connections. use DCU to check feed sensor. Replace any faulty parts or the Service Manual Samsung Electronics... - Page 81 Check all ribs, claws and springs. • It occurs when the Spring of a Guide claw is broken or damaged. • It occurs when the Heat-Roller or Pressure-Roller is seriously contaminated with toner. Service Manual Samsung Electronics...
-
Page 82: Paper Rolled In The Fuser
Clean the surface of the rollers with IPA or water 2. Damaged or deformed ribs, claws or springs. 2. Check for damage or deformation of the print claws and the holder plate claws, and repair or replace as appropriate. Service Manual 7-10 Samsung Electronics... -
Page 83: Paper Rolled On The Opc Drum
Use the gearwheel at the side to rotate the OPC drum and pull the paper from the cassette. • Clean fingerprints on the OPC gently with soft tissue, taking care not to scratch the surface. Service Manual 7-11 Samsung Electronics... - Page 84 Replace the LSU or cable harness as required. 1. LSU cable or connector faulty. Replace a main board if the same error persists after 2. LSU motor is faulty. replacing the LSU. 3. Check the HSYNC signal. Service Manual 7-12 Samsung Electronics...
-
Page 85: Paper Empty
1. Deformed paper sensor actuator or faulty sensor. 1. Replace the defective actuator or sensor. 2. Main PBA is defective. Use DCU Diagnostic Test 08. 2. Replace the MAIN PBA as appropriate. 3. Faulty cables or connectors. Service Manual 7-13 Samsung Electronics... -
Page 86: Paper Empty Without Indication
2. The ‘hook Lever’ tab on the front cover may be damaged 2. Replace the front cover. or broken 3. Replace the Main PBA as necessary. 3. The sensor Switch on the main PBA may be defective. Service Manual 7-14 Samsung Electronics... - Page 87 2. Replace the cable or OPE Panel as necessary. cables between the main PBA and the OPE panel 3. The sensor switch on the main PBA may be faulty 3. Replace the main PBA if necessary. Service Manual 7-15 Samsung Electronics...
-
Page 88: Defective Motor Operation
2. Check OPE connector and harness. Replace the heard. OPE panel or cable. 3. After replacing SMPS lamps do not come on and no 3. Replace the main PBA panel. start up sounds are heard. Service Manual 7-16 Samsung Electronics... - Page 89 Use EDC diagnostic code 05 to test the LSU motor. 1. 24V stable - Replace LSU. 24V unstable replace 1. Check stability of 24V supply to LSU. SMPS, if the problem persists replace the main PBA. Service Manual 7-17 Samsung Electronics...
- Page 90 7.4 Toner Cartridge Service It is not guaranteed for the default caused by using other toner cartridge other than the cartridge supplied by the Samsung Electronic or caused by non-licensed refill production. 7.4.1 Precautions on Safe-keeping of Toner Cartridge Excessive exposure to direct light more than a few minutes may cause damage to the cartridge.
- Page 91 (a) Check that the terminals problem persists replace the (contact points) of the toner cartridge. cartridge and the set are clean. (b) Check that the terminals (contact points) of the toner cartridge and the set are not damaged. Service Manual 7-19 Samsung Electronics...
- Page 92 (contact point) of the toner toner cartridge is recycled over cartridge and the set are not 2 times. damaged. If ‘nearly empty’ cartridges are collected for re-use this is judged as recycling the toner cartridge. Service Manual 7-20 Samsung Electronics...
- Page 93 (a) Check if foreign substances are stuck to the terminal (point of contact) of the toner cartridge or set. (b) Check if the terminal assembly is normal. (Especially check the developer roller terminal.) Service Manual 7-21 Samsung Electronics...
- Page 94 9and perhaps even uninstalling their dri- vers) to ensure the printer works by itself. If you are using a USB hub try connecting directly to the back of the PC instead. Service Manual 7-22 Samsung Electronics...
- Page 95 Turn the PC and printer off, and reboot the system to print again. If not solved, double-click the printer in my computer If the regular fonts are not printed this time again. the cable must be defective so replace the cable with new one. Service Manual 7-23 Samsung Electronics...
-
Page 96: Abnormal Printing
2. Ensure that the correct driver is loaded. Use the driver supplied on the CD or downloaded from the Samsung web site. DO NOT use the Microsoft driver supplied with the Windows operating system. If the printer is a GDI or SPL type printer ensure that... -
Page 97: Spool Error
If there is a problem with the printer (out of toner, offline, out of paper etc.) the job may take a long time to delete as it must wait for a time out. Service Manual 7-25 Samsung Electronics... -
Page 98: Exploded Views And Parts List
8. Exploded Views and Parts List (Basic Model) 8-1. Main Assembly 8-2. Frame Assembly 8-3. MP Assembly 8-4. Fuser Unit Assembly 8-5. RX Driver Unit Assembly 8-6. Cassette Unit Assembly 8-7. SCF(Option Cassette Unit) Assembly... - Page 99 8.1 Main Assembly...
- Page 100 8.2 Frame Unit Assembly...
- Page 101 8.3 MP Assembly...
- Page 102 8.4 Fuser Unit Assembly...
- Page 103 8.5 RX Driver Unit Assembly...
- Page 104 8.6 Cassette Unit Assembly...
-
Page 105: Block Diagram
B LOCK DIAG R A M 9. Block Diagram Service Manual Samsung Electronics... -
Page 106: Connection Diagram
MOTOR MOTOR SMPS 24 VS 24 VS 3. 3V MP_EMPTY DCU DATA 24 VS DCU CLK LED READY HVP S THV_READ_ LED ERROR THV_PWM THV_EN BIAS_PWM MHV_PWM SENS OR LED TONERSAVE KEY_DEMO FUSER ON P_EXIT Service Manual 10-1 Samsung Electronics... - Page 107 Pin Name Pin Name Pin Name +5.0V GND Signal(P_REGI) Signal(Exit) Signal(Exit) LED READY LED ERROR LED TONER SAVE KEY DEMO FAN_CONNECTOR PIN MP_CONNECTOR PIN EXIT_CONNECTOR PIN Pin Name Pin Name Pin Name Signal(FAN) Signal(P_REGI) Signal(Exit) Service Manual 10-2 Samsung Electronics...
-
Page 108: Schematic Diagram
S C H E M ATIC DIAG R A M S 11. Schematic Diagrams 11.1 Main Circuit Diagram (1/9) Service Manual 11-1 Samsung Electronics This Document can not be used without Samsung’s authorization. - Page 109 S C H E M ATIC DIAG R A M S Main Circuit Diagram (2/9) Service Manual 11-2 Samsung Electronics This Document can not be used without Samsung’s authorization.
- Page 110 S C H E M ATIC DIAG R A M S Main Circuit Diagram (3/9) Service Manual 11-3 Samsung Electronics This Document can not be used without Samsung’s authorization.
- Page 111 S C H E M ATIC DIAG R A M S Main Circuit Diagram (4/9) Service Manual 11-4 Samsung Electronics This Document can not be used without Samsung’s authorization.
- Page 112 S C H E M ATIC DIAG R A M S Main Circuit Diagram (5/9) Service Manual 11-5 Samsung Electronics This Document can not be used without Samsung’s authorization.
- Page 113 S C H E M ATIC DIAG R A M S Main Circuit Diagram (6/9) Service Manual 11-6 Samsung Electronics This Document can not be used without Samsung’s authorization.
- Page 114 S C H E M ATIC DIAG R A M S Main Circuit Diagram (7/9) Service Manual 11-7 Samsung Electronics This Document can not be used without Samsung’s authorization.
- Page 115 S C H E M ATIC DIAG R A M S Main Circuit Diagram (8/9) Service Manual 11-8 Samsung Electronics This Document can not be used without Samsung’s authorization.
- Page 116 S C H E M ATIC DIAG R A M S Main Circuit Diagram (9/9) Service Manual 11-9 Samsung Electronics This Document can not be used without Samsung’s authorization.
- Page 117 C305 150KF D305 TH V R E 1N4148 1N4148 CN2-15 + 10 TH V_R EAD R308 ZD302 C 307 U94/C 2. 7VB M Y2A473J R310 200J Service Manual 11-10 Samsung Electronics This Document can not be used without Samsung’s authorization.
- Page 118 1/ 4W 10 25V47uF 24VS Q205 B1151- Y R224 100J R222 U 103 C 213 3. 9KJ R223 KA7805 25V47uF 1W 1KJ R 221 Q204 C 1008 Service Manual 11-11 Samsung Electronics This Document can not be used without Samsung’s authorization.
- Page 119 CON2-25 CON2-14 D GND CON6 CON2-1_ CON2-2_ ZD101 ZD102 ZD103 CON3-3 FEED SENSOR PAPER EMPTY OP102 OP101 OP103 KPI-512 KPI-512 SG-288 1W200V*3 CON3-1 D GND CON3-2 Service Manual 11-12 Samsung Electronics This Document can not be used without Samsung’s authorization.
- Page 120 CON2-25 CON2-14 D GND CON6 CON2-1_ CON2-2_ ZD101 ZD102 ZD103 CON3-3 FEED SENSOR PAPER EMPTY OP102 OP101 OP103 KPI-512 KPI-512 SG-288 1W200VX3 CON3-1 D GND CON3-2 Service Manual 11-13 Samsung Electronics This Document can not be used without Samsung’s authorization.
- Page 121 CON2-25 CON2-14 D GND CON6 CON2-1_ CON2-2_ ZD101 ZD102 ZD103 CON3-3 FEED SENSOR PAPER EMPTY OP102 OP101 OP103 KPI-512 KPI-512 SG-288 1W200VX3 CON3-1 D GND CON3-2 Service Manual 11-14 Samsung Electronics This Document can not be used without Samsung’s authorization.
- Page 122 ELECTRONICS This service manual is also provided on the web, © Samsung Electronics Co.,Ltd. May. 2005 the ITSELF system f Samsung Electronics Co., Ltd. Printed in Korea. http://itself.sec.samsung.co.kr VERSION NO. : 1.01 CODE : JC-0123D...