Table of Contents
Advertisement
AV Receiver
DTR-7.2
Instruction Manual
Thank you for purchasing the
Please read this manual thoroughly before making
connections and plugging in the unit. Following the
instructions in this manual will enable you to obtain
optimum performance and listening enjoyment
from your new AV Receiver. Please retain this
manual for future reference.
AV Receiver.
Contents
Before using
Facilities and connections
Setup and operation
Remote controller
Appendix
2
8
27
56
71
Advertisement
Table of Contents

Related Manuals for Integra DTR-7.2


Summary of Contents for Integra DTR-7.2
- Page 1 AV Receiver DTR-7.2 Instruction Manual Thank you for purchasing the Please read this manual thoroughly before making connections and plugging in the unit. Following the instructions in this manual will enable you to obtain optimum performance and listening enjoyment from your new AV Receiver. Please retain this manual for future reference.
-
Page 2: Before Using Important Safeguards
WARNING: TO REDUCE THE RISK OF FIRE OR ELECTRIC SHOCK, DO NOT EXPOSE THIS APPLIANCE TO RAIN OR MOISTURE. CAUTION: TO REDUCE THE RISK OF ELECTRIC SHOCK, DO NOT REMOVE COVER (OR BACK). NO USER-SERVICEABLE PARTS INSIDE. REFER SERVICING TO QUALIFIED SERVICE PERSONNEL. -
Page 3: Precautions
2. AC Fuse The fuse is located inside the chassis and is not user-serviceable. If power does not come on, contact your Integra/Onkyo authorized service sta- tion. 3. Care From time to time you should wipe the front and rear panels and the cabinet with a soft cloth. -
Page 4: Table Of Contents
Operating components not reached by the remote controller signals (IR IN/OUT) ... 25 If the remote controller signal does not reach the DTR-7.2 remote sensor ... 25 If the remote controller signal does not reach other components ... 25 Connecting the power ... 26 Setup and operation Setup menus ... - Page 5 Changing the audio mode ... 53 Enjoying the multichannel output ... 53 Enjoying music in the remote zone ... 54 Playing music using the buttons on the DTR-7.2 ... 54 Selecting an input source using the remote controller .. 54 Recording a source ... 55 To record the input source signal you are currently watching or listening to ...
-
Page 6: Features
(optical) I A-BUS Ready I 12 V Trigger Supplied accessories Check that the following accessories are supplied with the DTR-7.2. AM loop antenna × 1 Remote controller × 1 Batteries (AA, R6 or UM-3) × 2 I Pre Out Terminals for Front L/R, Center,... -
Page 7: Before Using This Unit
Placing the unit behind such doors may prevent proper remote controller operation. • If there is any obstacle between the remote controller and the remote control sensor, the remote controller will not operate. DTR-7.2 30˚ 30˚ Approx. 16 feet (5 meters) -
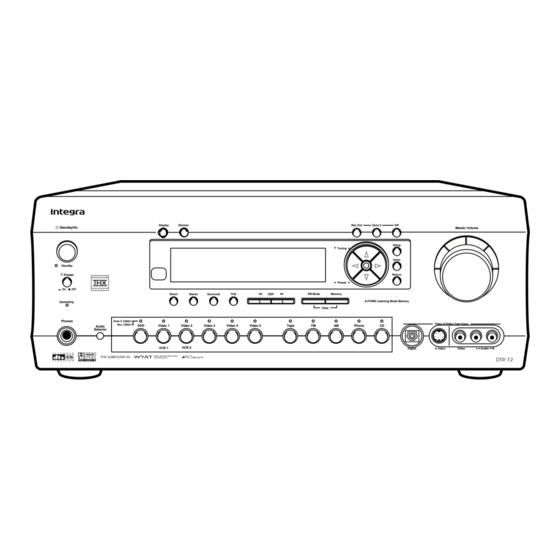
Page 8: Front Panel Facilities
Front panel facilities Here is an explanation of the controls and displays on the front panel of the DTR-7.2. Front panel Standby/On Standby Power O f f psampling Phones Zone Rec ( Audio Selector Direct Stereo Surround Front panel display... - Page 9 Turns on and off the main power supply for the DTR-7.2. Standby/On button [26] When this button is pressed with the main power switch turned on, the DTR-7.2 turns on and the display lights up. Press again to return the DTR-7.2 to the standby state. Standby indicator [7, 26] Lights when the DTR-7.2 is in the standby state and flashes when a...
-
Page 10: Remote Controller
SLEEP button [52] Sets the sleep function. The SLEEP button enables you to set the DTR-7.2 to turn off automatically after a specified time period. DIRECT MACRO button [68] For executing and programming the Direct Macro function. - Page 11 For operating other Integra/Onkyo components connected to the DTR-7.2 through the terminals. INPUT SELECTOR buttons [50] Selects an input source. Same as the input selector buttons on front panel of the DTR-7.2. The input source for each buttons is given here. DVD:DVD, CD:CD, V1:VIDEO1, V2:VIDEO2, V3:VIDEO3, V5:VIDEO5, TAP:TAPE, TUN:FM/AM, PH:PHONO.
-
Page 12: Rear Panel Facilities
REMOTE CONTROL COAXIAL Coaxial cable OPTICAL Optical fiber cable Optical digital input terminal An optical digital input terminal is equipped with a protection cap. When connecting, remove this cap. When not using, put the cap back on the terminal. DTR-7.2... - Page 13 • When connecting a VCR or other video component, make sure you connect the audio and video leads together (i.e., both to VIDEO 3). • The PHONO (PH) input jacks on the DTR-7.2 is designed for use with turntables that use moving magnet cartridges. RCA type...
- Page 14 The DTR-7.2 is supplied with AC mains outlets for connecting the power cords from other devices so that their power is supplied through the DTR-7.2. By doing this, you can use the Standby/On button on the DTR-7.2 to turn on and off the connected devices as well. Caution:...
- Page 15 Rear panel facilities IR IN/OUT If the DTR-7.2 is located inside a rack or cabinet that will not allow infrared beams to reach the IR sensor, you will need to connect a remote sensor to IR IN input to be able to use the remote controller.
-
Page 16: Connections
1. Connecting a turntable (PH) Using an RCA-type audio connection cable, connect the output terminal on the turntable to the PH input jacks on the DTR-7.2. Make sure that you properly connect the left channel to the L jack and the right channel to the R jack. -
Page 17: Connecting Your Video Components
If the device has a digital output jack as well, be sure to also connect it to either a DIGITAL INPUT (COAX) or DIGITAL INPUT (OPT) jack on the DTR-7.2 depending on the type of connector on the DVD player. - Page 18 Using an RCA-type video connection cable, connect the video output terminal (composite) on the device to the VIDEO 2 IN jacks on the DTR-7.2 and video input terminal to the VIDEO 2 OUT jacks. If there is an S video input/output terminal on the device, connect it to the S VIDEO 2 IN/OUT jack using an S video cable.
- Page 19 Using an RCA-type audio connection cable, connect the audio output terminal on the satellite tuner or television to the same VIDEO 3 (or 4) IN audio jacks on the DTR-7.2. Make sure that you properly connect the left channel to the L jack and the right channel to the R jack.
-
Page 20: Connecting Speakers
Pre-Amp out terminals. However, if you are unable to position two speakers in your listening environment, a single surround speaker can be used and the DTR-7.2 has an internal amplifier to power this speaker for your convenience. • Subwoofer Produces powerful and heavy bass. -
Page 21: Connecting Speakers
Caution: Connect only speakers with an impedance between 4 and 16 Ω to the DTR-7.2. If the impedance of even one speaker is between 4 and 6 Ω, be sure to set the speaker impedance setting accordingly (see page 29). -
Page 22: Connecting Antennas
Connecting antennas To use the tuner of DTR-7.2, it is necessary to prepare the supplied FM and AM antennas. • Adjustment and placement of the FM and AM antennas for better reception must be done while listening to a station broadcast. -
Page 23: Connecting An Fm Outdoor Antenna
Connecting antennas Connecting an FM outdoor antenna Please make sure that you follow the considerations: • Keep the antenna away from noise sources (neon signs, busy roads, etc.). • It is dangerous to put the antenna close to power lines. Keep it well away from power lines, transformers, etc. -
Page 24: Connecting The Remote Zone (Zone 2) Speakers
This other room or area is referred to as the remote zone (Zone 2), while the room where the DTR-7.2 is located is the main zone. In addition, the IR IN/OUT allows you to control the DTR- 7.2 from the remote zone (Zone 2) with the remote controller even... -
Page 25: Operating Components Not Reached By The Remote Controller Signals (Ir In/Out)
Remote Controller In the cabinet The IR IN input allows you to control the DTR-7.2 from the remote zone (Zone 2) with the remote controller even though the remote zone is physically separated. The diagram below shows how to make the proper connections for the remote zone. -
Page 26: Connecting The Power
To wall outlet To change the display of the input source from TAPE to If you connected an MD recorder to the TAPE jack on the DTR-7.2, you can have “MD” appear when the Tape source button is pressed. By changing the display, if an Onkyo MD recorder z-connected, the z system functions will become enabled. -
Page 27: Setup Menus
When making the various settings required to configure your DTR-7.2 optimally, you can either use the OSD menu that appears on your television monitor or you can use the display on the front of the DTR-7.2. The OSD menu is a settings menu that is displayed on your TV monitor. - Page 28 Setup menus Basic Menu Your DTR-7.2 is provided with a Basic Setup Menu for those who are not familiar with many of the advanced settings of an AV receiver or those who wish to watch movies and listen to music with the minimal amount of setup.
-
Page 29: Hardware Setup
|ENTER|Quit:|SETUP| The Hardware Setup menu will need to be set before you use your DTR-7.2 for the first time. Once you set the Speaker Impedance setting at the Hardware Setup menu, the setting will not be displayed again when you enter the Basic Menu. To change the setting at a later date, select the Advanced Menu to display the Hardware Setup menu. -
Page 30: Speaker Setup
Speaker Setup 1. Speaker Setup menu After you have installed the DTR-7.2, connected all the components, and determined the speaker layout, it is now time to perform the settings in the Speaker Setup menu for the optimum sound acoustics for your environment and speaker layout. -
Page 31: Speaker Distance Sub-Menu
Here you will enter the distance from each speaker to your normal listening position. This is important for the timing of the acoustics to create the proper sound space that the DTR-7.2 and today’s sound systems are able to produce. -
Page 32: Level Calibration Sub-Menu
Quit:|SETUP| Calibrating the speaker levels When this sub-menu is entered, the DTR-7.2 will emit a pink noise from the front left speaker. At this time, the Master volume automatically increases to the reference level (0dB). Remember the level of this noise and then press the that this can be adjusted to any level between –12 and 12... -
Page 33: Bass Peak Level (Bass Peak Level Manager) Sub-Menu
Speaker Setup 1-4. Bass Peak Level (Bass Peak Level Manager*) sub-menu Setting the bass peak level is important to keep your subwoofer from being damaged by preventing it from outputting over a set volume. If your subwoofer has a built-in limiter, set this setting to “Off.” Note: If your system does not include a subwoofer, this setting will set the bass peak level for your front speakers. -
Page 34: Input Setup
2. Input Setup menu This menu allows you to setup the various input sources available with the DTR-7.2. Each input source may have a great number of settings that are difficult to keep track of, so we recommend making a chart to record what you have set and for which component to prevent confusion later. -
Page 35: Multichannel Setup Sub-Menu
In such cases, try playing the source in the “DTS” selected. • The DTS indicator on the DTR-7.2 lights while a DTS source is played. When playback finishes and the DTS signal transmission stops, the DTR-7.2 remains in DTS mode and the DTS indicator remains lit. -
Page 36: Video Setup Sub-Menu
Input Setup 2-3. Video Setup sub-menu Advanced Menu 2.Input Setup Input:DVD 2-3.Video Setup Input:DVD a.Video :DVD b.Component Video :INPUT1 Quit:|SETUP| a. Video This setting allows you to match the audio from one component with the video from another. Therefore, you can set a video source to be displayed while the audio from another input source is heard. -
Page 37: Character Input Sub-Menu
Intelli Volume When switching input sources, you may find that the output level for different components or input sources connected to the DTR-7.2 is different even though the main volume setting is the same. Under normal circumstances, you would then have to change the volume setting each time you change the input source. -
Page 38: Listening Mode Preset Sub-Menu
Input Setup 2-6. Listening Mode Preset sub-menu With the DTR-7.2, you can set a different listening mode for each different signal type that comes from each input source. For example, if your DVD player also plays compact discs and the DVD video signal is Dolby Digital and the compact disc signal is PCM, then you can set a different listening mode for each. - Page 39 Input Setup Input source signals a. Analog/PCM Analog sources consist of LP records, FM and AM broadcasts, cassette tapes, and the such. PCM (Pulse Code Modulation) is one form of digital audio signals and is recorded directly onto compact discs and DVDs without compression. b.
-
Page 40: Trigger Setup Sub-Menu
This sub-menu allows you to make the required settings to turn on the output from the 12V TRIGGER terminal to control another component or device with the DTR-7.2 for each input source. a. Trigger A On: Select to activate the device connected to the 12V TRIGGER A terminal when the input source is selected. -
Page 41: Audio Adjust
Audio Adjust 3. Audio Adjust Setup menu Set the various parameters for the sound signals. Advanced Menu Basic Menu 3.Audio Adjust 3.Audio Adjust 1.Tone Control 1.Tone Control 2.Surround Speakers 3.Sound Effect 2.Surround Speakers 4.Delay 5.LFE Level 3.Sound Effect 6.Mono Setup 7.Theater-Dimensional 8.Surround Setup Advanced Menu... - Page 42 Relative Delay b. Center, c. Surr L/R, d. Surr Back Besides level and delay adjustments, the DTR-7.2 provides the ability to change or adjust the relative speaker position to fine tune the soundfield for the listener. This is accomplished using Onkyo’s unique Enhanced Spatial Positioning Algorithm.
- Page 43 Audio Adjust 3-6. Mono Setup The settings shown below are enabled when the listening mode is set to “Mono.” Parameter a Academy On, Off b Input Channel Auto L+R, Left, Right a) Academy Older monaural film mixes relied on high-frequency rolloff in presentation to sound properly balanced, so that excessive hiss from the grain structure of the film would not be heard.
- Page 44 This can be set to either “On” or “Off.” This parameter is only enabled for the THX listening mode. Also, this is set to “On” when the DTR-7.2 is turned on. b) Decoder Select the decoding mode for THX processes.
- Page 45 Audio Adjust 3-10. 3-11. 3-12. 3-13. 3-14. 3-15. Mono Movie Setup/Enhanced 7 Setup/Orchestra Setup/ Unplugged Setup/Studio-Mix Setup/TV Logic Setup When you set the parameters of this sub-menu and select Mono Movie, Enhanced 7, Orchestra, Unplugged, Studio-Mix, or TV Logic as the listening mode, the set parameters become enabled. Parameter a Front Effect Off, On...
-
Page 46: Preference
To not set a maximum volume, select “Off.” d. Power On Volume This sets a designated volume setting for the DTR-7.2 to be set every time that the power is turned on. This prevents the DTR-7.2 from being turned on while it is set to an extremely high volume and suddenly output very loud sounds. -
Page 47: Headphones Level Setup Sub-Menu
Preference 4-2. Headphones Level Setup sub-menu You can use this sub-menu to adjust the volume output from the headphones so that it matches the level output from the speakers. The headphone volume can be adjusted between –12 and +12 decibels. Advanced Menu 4.Preference 4-2.HeadphoneLevel Setup... -
Page 48: Listening To Radio Broadcasts
Listening to Radio Broadcasts One of the features of the DTR-7.2 that is most frequently used is its ability to play FM and AM broadcast radio stations. The DTR-7.2 provides a number of listening modes perfect for listening to the radio and getting the most out of your audio system. -
Page 49: Presetting A Radio Station
Enter Light Erasing a preset radio station This can only be performed at the DTR-7.2. 1. Press the AM or FM button and press the Preset / select the preset radio station that you want erase (see above). -
Page 50: Enjoying Music Or Videos With The Dtr-7.2
Phones Input source buttons Though the DTR-7.2 is often used to listen to the radio, it does not show you its true ability until it is used to play music or watch videos, DVDs, and the like. The DTR-7.2 has the latest in state-of- the-art features to play back today’s acoustic technologies with the... -
Page 51: Changing The Listening Mode
VCR 2 Input source buttons Changing the listening mode To change the listening mode during playback, press the listening mode buttons. The functions of the buttons on the DTR-7.2 and those on the remote controller are the same. DTR-7.2 Direct Stereo... -
Page 52: Switching The Display
FM/AM + Listening mode Adjusting the brightness of the front display You can adjust the brightness of the front display of the DTR-7.2 with DIMMER button on the remote controller or the Dimmer button on the DTR-7.2 front panel. DTR-7.2... -
Page 53: Changing The Audio Mode
Remote controller Audio Selector Auto (automatic detection): With this setting, the DTR-7.2 automatically detects whether the input signal is digital or analog. When a digital signal is not input, then the analog signal is played. Multich (Multichannel): Select this setting to play back the input from the component connected to the MULTI CHANNEL INPUT port. -
Page 54: Enjoying Music In The Remote Zone
VCR 2 Input source buttons Playing music using the buttons on the DTR-7.2 1. Press the Zone 2 button on the DTR-7.2. 2. Select a source. After pressing the Zone 2 button, you must press an input source button within 5 seconds. The Zone 2 indicator lights. -
Page 55: Recording A Source
Recording a source Rec Out Display Dimmer Rec Out Standby/On Tun ing Standby Power Preset O f f Direct Stereo Surround FM Mode Memory psampling A-FO RM Listening Mode Memory Clear Phones Zone Rec ( Video 1 Video 2 Video 3 Video 4 Video 5 Tape... -
Page 56: Using Remote Controller
For example, if you wish to select the CD input source at the DTR-7.2 with the remote controller, first press the RCVR MODE button to select the DTR-7.2 and then press the CD (INPUT SELECTOR) button. Calling up a preset radio station 1. -
Page 57: Controlling An Integra/Onkyo Cd Player
2. Press the desired operation button. The buttons shaded in the figure to the left are the operation CD MODE buttons that can be used to control an Integra/Onkyo compact disc player. Operation buttons: ON: Turns on and off the compact disc player (same as STDBY button on the remote controller). -
Page 58: Controlling An Integra/Onkyo Dvd Player
The DVD MODE button lights green. 2. Press the desired operation button. The buttons shaded in the figure to the left are the operation buttons that can be used to control an Integra/Onkyo DVD player. Operation buttons: ON: Turns the DVD player on and off STDBY: Turns the DVD player off. -
Page 59: Controlling An Integra/Onkyo Md Recorder
The MD MODE button lights green. STDBY 2. Press the desired operation button. The buttons shaded in the figure to the left are the operation buttons that can be used to control an Integra/Onkyo MD MD MODE recorder. Operation buttons: ON: Turns on and off the MD player (same as STDBY button on the remote controller). -
Page 60: Learning A Pre-Programming Code
DTR-7.2 with an cable. You will then operate the DVD player by pointing the remote controller at the remote control sensor on the DTR-7.2. You do not need to enter this code because it is factory preset. However, if the code has been changed to 601 or 613, then you will need to change it back to 600. -
Page 61: Pre-Programming Codes
BRAND SETTING No. DENON 602, 609 HITACHI KENWOOD MAGNAVOX 606, 613 MARANTZ MITSUBISHI 608, 613 INTEGRA/ONKYO 600, 601, 613 PANASONIC PIONEER PROSCAN SONY TOSHIBA YAMAHA 609, 614 ZENITH 613, 615 BRAND SETTING No. -
Page 62: Operating Your Programmed Remote Controller
0,1 to 9: Numeric keys ENTER: Confirm You may also use the following buttons: : Adjusts the volume at the DTR-7.2 MUTING: Activates the muting function at the DTR-7.2 Numeric keys ENTER CABLE MODE (Cable Mode) 1. Press the CABLE MODE button. -
Page 63: Vcr Mode (Vcr Mode)
0,1 to 9, +10: Numeric keys You may also use the following buttons: : Adjusts the volume at the DTR-7.2 MUTING: Activates the muting function at the DTR-7.2 TV MODE (TV Mode) 1. Press the TV MODE button. The TV button lights green. -
Page 64: Programming The Commands Of Remote Controllers For Other Devices Into The Remote Controller
Programming the commands of remote controllers for other devices into the remote controller 2 to 6 inches (5 to 15 cm ) HOME THEATER CONTROLLER RC-461M Programming procedure When programming the commands of another remote controller to the RC-461M remote controller, you must first decide under which MODE button you want the commands to be linked. -
Page 65: Programming The Commands Of Remote Controllers For Other Devices Into The Remote Controller
7. Operate the newly programmed buttons to make sure the learning function was performed properly. Notes: • The remote controller codes for Integra/Onkyo compact disc players, cassette tape decks, DVD players, and mini disc recorder have already been programmed into buttons on the remote controller. -
Page 66: Erasing The Programmed Command From One Button
Programming the commands of remote controllers for other devices into the remote controller HOME THEATER CONTROLLER RC-461M HOME THEATER CONTROLLER RC-461M Erasing the programmed command from one button SEND/LEARN You can only erase memorized commands and not preset ones. indicator 1. -
Page 67: Using A Macro Function
1. Point the remote controller at the DTR-7.2 and press the CD MODE button. 2. Press the MODE MACRO, and verify that the devices operate properly. -
Page 68: Programming The Direct Macro Function
Point the remote controller at the DTR-7.2 and press the DIRECT MACRO button. It may take a while for the macro to finish transmitting, so be sure to continue pointing the remote controller at the device until the SEND/ LEARN indicator turns off. -
Page 69: Erasing A Macro From The Mode Macro Button
Using a Macro function HOME THEATER CONTROLLER RC-461M DIRECT MACRO HOME THEATER CONTROLLER RC-461M Erasing a macro from the MODE MACRO button 1. Press and hold down the desired MODE button, press the MODE MACRO button, and then release both buttons. When you press the MODE button, it lights green and the SEND/LEARN indicator lights. -
Page 70: Erasing All Commands And Macros That Have Been Programmed
Using a Macro function HOME THEATER CONTROLLER RC-461M Macro mode programming memo: MACRO MODE MODE MACRO MACRO ↓ ↓ RCVR Operation 1 Operation 2 Operation 3 Operation 4 Operation 5 Operation 6 Operation 7 Operation 8 Operation 9 Operation 10 Operation 11 Operation 12 Operation 13... -
Page 71: Specifications
Specifications AMPLIFIER SECTION Continuous Average Power output (FTC) All channels: 100 watts per channel min. RMS at 8 ohms, 2 channels driven from 20 Hz to 20 kHz with no more than 0.08% total harmonic distortion. 130 watts min. RMS at 6 ohms, 2 channels driven from 1 kHz with no more than 0.1% total harmonic distortion. -
Page 72: Troubleshooting Guide
If a problem occurs while you are using the remote controller, first try to operate the controls on the front panel of the DTR-7.2 to make sure that it is not due to a malfunction (or worn out batteries) in the remote controller. -
Page 73: Video And Audio
* To reset the surround mode and other settings to the factory default settings, hold down the Video 1 button with the DTR-7.2 turned on and then press the Standby/On button. “CLEAR” appears in the front display and the DTR-7.2 enters the standby... - Page 74 Memo...
- Page 75 Memo...
- Page 76 Integra Division of ONKYO U.S.A. CORPORATION 18 Park Way, Upper Saddle River, N.J. 07458, U.S.A. Tel: 201-785-2600 Fax: 201-785-2650 http://www. integrahometheater.com Integra Division of ONKYO CORPORATION Sales & Product Planning Div. : 2-1, Nisshin-cho, Neyagawa-shi, OSAKA 572-8540, JAPAN Tel: 072-831-8111 Fax: 072-833-5222...