
Related Manuals for Schumacher SE-1555A


Summary of Contents for Schumacher SE-1555A
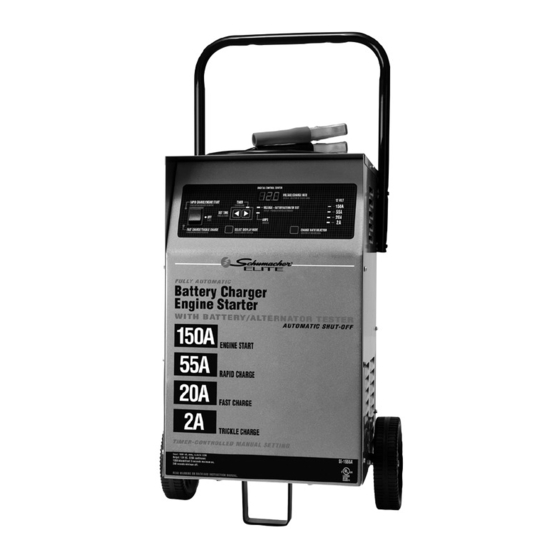
- Page 1 Model SE-1555A Automatic/Manual Battery Charger Volt: 12 Amps: 2, 20, 55, 150 owner’s MAnUAL 00-99-000810/0608...
-
Page 3: Important Safety Instructions
IMPORTANT SAFETY INSTRUCTIONS SAVE THESE INSTRUCTIONS – This manual contains important safety and operating instructions for battery charger Model SE-1555A. Do not expose charger to rain or snow. Use of an attachment not recommended or sold by the battery charger manufacturer may result in a risk of fire, electric shock, or injury to per- sons. -
Page 4: Personal Precautions
PERSONAL PRECAUTIONS Consider having someone close enough by to come to your aid when you work near a lead-acid battery. Have plenty of fresh water and soap nearby in case battery acid contacts skin, clothing, or eyes. Wear complete eye protection and clothing protection. Avoid touching eyes while working near battery. -
Page 5: Charger Location
CHARGER LOCATION Locate charger as far away from battery as DC cables permit. Never place charger directly above battery being charged; gases from bat- tery will corrode and damage charger. Never allow battery acid to drip on charger when reading electrolyte spe- cific gravity or filling battery. - Page 6 When disconnecting charger, turn switches to off, disconnect AC cord, remove clip from vehicle chassis, and then remove clip from battery termi- nal. See OPERATING INSTRUCTIONS for length of charge information. FOLLOW THESE STEPS WHEN BATTERY IS OUTSIDE VEHICLE. A SPARK NEAR THE BATTERY MAY CAUSE BATTERY EXPLOSION. TO REDUCE RISK OF A SPARK NEAR BATTERY: Check polarity of battery posts.
-
Page 7: Battery Charging - Ac Connections
BATTERY CHARGING - AC CONNECTIONS For all grounded cord-connected battery chargers: • GROUNDING AND AC POWER CORD CONNECTION INSTRUCTIONS – Charger should be grounded to reduce risk of electric shock. Charger is equipped with an electric cord having an equipment- grounding conductor and a grounding plug. - Page 8 Recommended minimum awg size for extension cords for this bat- tery charger. Length of Cord (7.6) (15.2) (30.5) (45.6) feet (m) Gauge Grounding Methods • •...
-
Page 9: Tools Needed
ASSEMBLY INSTRUCTIONS It is important to fully assemble your charger before use. Follow these instructions for easy assembly. PARTS TOOLS NEEDED Two, 10 -32 thread cut ting 3/8" wrench (for mounting screws foot) 5/16" wrench (for wheels) Four, 1/4-20 thread cutting screws Two wheels Hammer... - Page 10 Axle Assembly: Hold axle upright on floor or work surface. Then, using a hammer, tap one of the axle caps onto the top end of the axle. Be sure to tap the hub on straight. Slide both wheels onto the axle with the hubs facing inward. Tap the other axle cap onto the opposite end of the axle and place the axle assembly onto the bottom of the charger.
-
Page 11: To Set The Timer
OPERATING INSTRUCTIONS 10.1 SELECT CHARGE RATE The CHARGE RATE SELECTOR allows you to select the correct amp draw rate to match your charging needs. Read the following operating instructions for making the proper settings for charging a battery. When you first start charging a battery, the amp reading will be high. As the battery becomes charged, the reading will decrease. -
Page 12: Timer Hold
10.4 TIMER HOLD The Timer Hold feature overrides the timer allowing the charger to con- tinue charging for over 135 minutes. This feature is most often used when the charging rate is 2 amps. Using this feature requires closely monitor- ing the charge time and turning off the charger when the battery is fully charged. -
Page 13: Engine Start
Start the engine, and while it is at a fast idle, read the digital display. Note: The battery should be in a good state of charge before doing this test. 12V Alternator/Generator Display 15 volts or more See vehicle owner’s manual 15-14 volts Good condition 14-12.8 volts... -
Page 14: Maintenance Instructions
MAINTENANCE INSTRUCTIONS 11.1 Before performing maintenance, unplug and disconnect battery charger (see sections 6.7 or 7.6). 11.2 After use, use a dry cloth to wipe all battery corrosion and other dirt or oil from terminals, cords, and the charger case. 11.3 Servicing does not require opening unit, as there are no user-serviceable parts. -
Page 15: Troubleshooting
TROUBLESHOOTING PROBLEM POSSIBLE CAUSE SOLUTION Zero Amps on Digital Clips are not making a Check for poor connection Display. good connection. at battery. Make sure clamps and posts are clean. Battery may not want to 2 amp charge rate being accept a charge due to used. -
Page 16: Limited Warranty
LIMITED WARRANTY TO THE ORIGINAL PURCHASER AT RETAIL OF THIS PRODUCT. THIS LIMITED WARRANTY IS NOT TRANSFERABLE. Schumacher Electric Corporation warrants this battery charger for 3 years from date of purchase at retail against defective material or workmanship. If such should occur, the battery charger will be repaired or replaced at the option of the manufacturer. - Page 17 • •...
- Page 18 • •...
-
Page 19: Manual Del Usuario
Modelo SE-1555A Cargador de Baterías Automático/Manual Voltios: 12 Amperios: 2, 20, 55, MAnUAL DeL UsUArio • •... - Page 20 IMPORTANTE: LEA Y CONSERVE ESTE MANUAL DE INSTRUCCIONES Y SEGURIDAD. INSTRUCCIONES DE SEGURIDAD IMPORTANTES CONSERVE ESTAS INSTRUCCIONES – Este manual contiene instruc- ciones operativas y de seguridad importantes para el cargador de baterías Modelo SSC-1500A. No exponga el cargador a lluvia ni a nieve. El uso de un accesorio no recomendado o vendido por el fabricante del cargador de baterías podría ocasionar riesgo de incendio, descarga eléc- trica o lesión a las personas.
-
Page 21: Precauciones Personales
ESTAS INSTRUCCIONES ADEMÁS DE LAS PUBLICADAS POR EL FABRICANTE DE CUALqUIER EqUIPO qUE qUIERA USAR CERCA DE LA BATERÍA. REVISE LAS MARCAS DE PRECAUCIÓN DE ESTOS PRODUCTOS Y DEL MOTOR. PRECAUCIONES PERSONALES Considere tener a alguien que lo acompañe para asistirlo cuando trabaje cerca de una batería de plomo y ácido. -
Page 22: Ubicación Del Cargador
Agregue agua destilada en cada celda hasta que el ácido de la batería alcance el nivel especificado por el fabricante. Evite que se rebase. En el caso de una batería sin capas de celda desmontables, como las baterías de plomo y ácido reguladas por una válvula, siga atentamente las instruc- ciones de recarga del fabricante. -
Page 23: Siga Estos Pasos Cuando La Batería Esté Afuera Del Vehículo
Si el terminal negativo está conectado al chasis (como en la mayoría de los vehículos), véase (6.5). Si el terminal positivo es el que está conecta- do al chasis, véase (6.6). Para un vehículo de conexión a tierra negativa, conecte el sujetador POSITIVO (ROJO) desde el cargador de la batería hacia el terminal sin conexión a tierra POSITIVO (POS, P, +). -
Page 24: Carga De Bateria - Conexiones Ac
marítimo. CARGA DE BATERIA - CONEXIONES AC Para todo tipo de cargadores de baterías con conexión a tierra. • INSTRUCCIONES PARA LA CONEXIÓN DE CABLES DE CA Y A TIERRA - El cargador debe estar conectado a tierra para evitar el riesgo de una descarga eléctrica. - Page 25 Largo del cordon Ta- mano (7.6) (15.2) (30.5) (45.6) AWG del cordon • •...
-
Page 26: Instrucciones Para Ensamble
INSTRUCCIONES PARA ENSAMBLE Es importante ensamblar totalmente el cargador antes de usarlo. Siga estas instrucciones para ensamblaje fácil. HERRAMIENTAS PIEZAS NECESARIAS Dos tornillos cortadores de Llave de 3/8” (para montar el roscas 1-32 píe) Dos tornillos cortadores de Llave de 5/16” (para las rue- roscas 1/4-20 das) Dos ruedas... - Page 27 Ensamblaje del Eje: Mantenga el eje recto en el piso o superficie de trabajo. Luego, con mar- tillo, empuje uno de los cubos de eje sobre el extremo superior del eje. Asegúrese de empujar el cubo sobre el eje en forma recta. Deslice ambas ruedas sobre el eje con los cubos cara adentro.
-
Page 28: Instrucciones De Operación
Agarradera Vuelva a poner el cargador recto sobre su píe y ruedas. Verifique que el enganche y la varilla para fijar la agarradera estén instalados sobre la agarradera. Quite los dos tornillos superiores de cada lado del cargador. Alinee la agarradera en tal forma que los huecos de los tornillos queden alineados con los huecos de tornillo en cada lado del cargador de ruedas. - Page 29 posición de carga más baja si la lectura de voltaje es “OL” o si la lectura sigue superior a 14,2 voltios por más de 3 minutos. b. Al estar cargando a 20 amperios, la pantalla debe mostrar 15 amperios para una batería descargada y 7-8 amperios para una batería a plena carga.
- Page 30 10.6 Función Automática En modo automático, el cargador se para cuando la batería llega a plena carga. Después de que la carga esté completa, la unidad mantiene la batería a 13,4 voltios para evitar descarga espontánea. Para activar la función automática, primero conecte las pinzas a la batería y seleccione la tasa de carga deseada.
- Page 31 PANTALLA DE ALTERNADOR / GENERADOR DE 12V 15 voltios ó más Consulte el manual del dueño del vehículo 15-14 voltios Buenas condiciones 14-12.8 voltios Consulte el manual del dueño del vehículo 12.8 o menos Consulte con un técnico calificado NOTA: Si la pantalla digital lee menos de 12.8 voltios, el sistema de carga podría tener correas de ventilador flojas, o un regulador de voltaje o alternador defectuosos.
-
Page 32: Instrucciones De Mantenimiento
INSTRUCCIONES DE MANTENIMIENTO 11.1 Luego del uso, utilice un paño seco para limpiar la corrosión de la batería y la suciedad o aceite de los terminales, cables y la caja del cargador (6.7, 7.6). 11.2 Los cables se deben enrollar cuando el cargador no se esté utilizando para evitar dañarlos. -
Page 33: Solución De Problemas
SOLUCIÓN DE PROBLEMAS PROBLEMA POSIBLE CAUSA SOLUCIÓN No hay lectura en la Las pinzas no hacen buena Chequee por mala Pantalla Digital de conexión. conexión de batería. Amperios. Asegúrese que pinzas y Se está usando tasa de 2 postes estén limpios. amperios. -
Page 34: Garantía Limitada
ESTE PRODUCTO. ESTA GARANTÍA LIMITADA NO ES TRANSFER- IBLE. Schumacher Electric Corporation garantiza este cargador de baterías por tres años contado a partir de la fecha de compra, contra defectos de material o fabricación. Si tal cosa ocurre, el cargador de baterías será...