Table of Contents
Advertisement
Quick Links
Advertisement
Table of Contents

Related Manuals for BenQ C1020


Summary of Contents for BenQ C1020
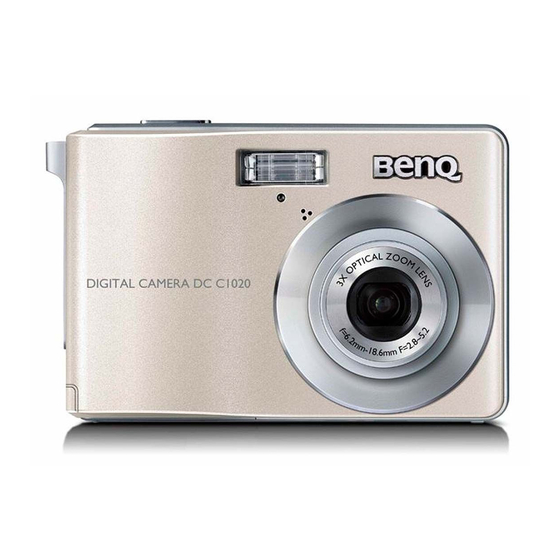
- Page 1 DC C1020 Digital Camera User Manual...
- Page 2 Copyright Copyright 2009 by BenQ Corporation. All rights reserved. No part of this document may be reproduced, transmitted, transcribed, stored in a retrieval system or translated into any language or computer language, in any form or by any means, electronic, mechanical, magnetic, optical, chemical, manual or otherwise, without the prior written permission of this company.
- Page 3 FCC Statement This equipment has been tested and found to comply with the limits for a Class B digital device, pursuant to Part 15 of the FCC Rules. These limits are designed to provide reasonable protection against harmful interference in a residential installation. This equipment generates, uses and can radiate radio frequency energy and, if not installed and used in accordance with the instructions, may cause harmful interference to radio communications.
- Page 4 Safety warning and notice Before operating the camera, please make sure that you read and fully understand the content in this section. If you ignore and violate all safety warning notices indicated in this section, the camera warranty may be void. Meanwhile, not only the camera but also you and all other people and things around you may be severely damaged, injured, or even placed in danger of death.
-
Page 5: Operating Environment
• Do not drop, knock, or shake the camera. A rude behavior of using the camera may damage the internal electronic circuit board, deform the lens shape, or make the lens unretractable. • Do not use harsh chemicals, cleaning solvents, or strong detergents to clean the camera. - Page 6 Do not hold the camera by excessive To avoid accidental falling, please attach force. Plus, be sure to protect the the hand strap to the camera and always camera from strong impacts. hold the camera by keeping the hand strap around your wrist. If the batteries suddenly depleted and When the camera is not in use, always caused the lens fail to retract, please...
-
Page 7: Table Of Contents
Table of Contents ..............1 1. Touring Your Camera ..........1 1.1 Checking the package contents ............2 1.2 Camera components ............2 1.2.1 Front view .............. 2 1.2.2 Rear view ............3 1.2.3 LED indicators ............ 4 2. Preparing Your Camera for Use ............ - Page 8 ..........17 3.7.2 Setting the metering .......... 17 3.7.3 Setting the white balance ............17 3.7.4 Setting the ISO ........17 3.7.5 Setting the EV compensation ............. 18 3.7.6 Setting the AEB ..........18 3.7.7 Setting the highlight ..........18 3.7.8 Setting the sharpness ..........
-
Page 9: Touring Your Camera
• All electronic accessories (such as USB cable) are designed to work with this BenQ digital camera model only. Do not use them with other digital camera models to avoid possible damage. -
Page 10: Camera Components
Microphone Self-timer LED If your BenQ camera’s lens remains extended after an involuntary shutdown, simply replace the batteries with new ones and restart your camera. Never force the lens inwards since this action will damage the camera and void the BenQ Warranty. -
Page 11: Led Indicators
1.2.3 LED indicators Indicator State Description No light The digital camera is off. Solid green The digital camera is ready to capture images. Blinking The digital camera is powering on and cannot focus or capture Status LED green video clips, or is in the power-saving mode. The flash is charging, or the USB communication/transfer is in progress. -
Page 12: Preparing Your Camera For Use
Preparing Your Camera for Use Installing the batteries You can use two AA batteries to power up the camera. Make sure that the power of the digital camera is off before removing the batteries. To insert the batteries: 1. Make sure the camera is turned off. 2. -
Page 13: Inserting And Removing An Sd Memory Card
Inserting and removing an SD memory card The camera is equipped with internal memory, allowing you to record video clips and capture images. You can also expand the memory capacity by using an optional SD (Secure Digital) memory card to store more files. 1. -
Page 14: Using The Camera
Using the Camera Navigator You can use the Navigator with four-way control and one button to access numerous controls of your camera. or Play (video playback only) Focus mode or left Down Flash mode or right / Toggle between different modes of displayed information LCD monitor information (capture mode) 9999... -
Page 15: Getting Started
• While the shutter is pressed down halfway, the AF area color changes to yellow-green, camera shake warning (appears only if the camera itself detects possible shaking), aperture, shutter speed and ISO setting are also shown on the screen. Getting started 3.3.1 Turning the power on / off 1. -
Page 16: Capture Mode
3.3.3 Capture mode 3.3.3.1 Getting started with capturing images Press down halfway. 1. Press [ ] for more than one second to turn on the camera. 2. Compose your image in the LCD monitor in the capture mode. 3. Press the shutter button down halfway (1), and then press it down fully (2). -
Page 17: Flash Mode
3.3.5 Flash mode The flash offers an additional light source (usually used in a low-light environment). You can capture an image using one of the following flash modes. Icon Mode Description Auto Flash The flash fires automatically based on the photographic conditions. Auto Anti Red- Reduces the red-eye phenomenon when capturing natural-looking images of people and animals in low-light conditions. -
Page 18: Menu Options
Icon Drive mode Description Burst Continuously takes pictures as long as you keep pressing the Shutter. The flash is always off in this mode. 3.3.7 Using the zoom function Your camera has a combination of optical and digital zoom functions that allows you to zoom in on far away subjects or zoom out for a wide angle shot. -
Page 19: Selecting The Shooting Mode
3.4.1.2 Selecting the shooting mode 1. Set the camera to the capture mode. 2. Press to show the shooting mode palette. 3. Use the four-way control to select a desired mode and press to confirm the setting. 4. Press to turn the shooting mode description on and off. Shooting mode Icon Mode... -
Page 20: Using The Menus
Shooting mode Icon Mode Description Sunset Captures the warmth and atmosphere (represented by hue) of sunrise or sunset. Voice Rec. Captures background sound only (no images or videos). When (Voice listening to the captured audio file later, you can see a unique icon that Record) appears on the screen and indicates that this is an audio file. -
Page 21: Capture Menu List (Movie)
Menu item Available settings Off / On Highlight (highlighted in the rectangular area surrounded by the four corners) (highlighted in the portrait area) (highlighted in the horizontal portrait area) Sharpness (High) / (Normal) / (Low) Effect Normal / B&W / Sepia / Negative / Vivid Red / Vivid Green / Vivid Blue Date Stamp Off / Date / Date &... -
Page 22: Setup Menu List
3.4.3.1 Setup menu list Menu item Functions Sounds [Shutter] Sets the shutter sound on and off. [Startup] Sets a type of the startup sound. [Operation] Sets the operation sound on and off. [Volume] Adjusts the volume of the shutter sound, startup sound, operation sound and playback sound. - Page 23 Menu item Functions TV Format You can review images on a television with an AV cable. TV Format should be set to either NTSC or PAL depending on your region. America, Japan, Taiwan and others [NTSC] China, Europe, Oceania and others [PAL] TV Format should be set to either NTSC or PAL depending on your region.
-
Page 24: Capturing Movie Clips
Capturing movie clips 1. Turn the power on, and set the camera to the Movie Record mode. 2. Compose the subject on the monitor. • Aim the focus area the subject. • The LCD monitor displays the available capturing time. 3. -
Page 25: Setting The Metering
3.7.2 Setting the metering There are 3 different light metering options available on your camera. Icon Mode Description Cen. Weight Light is measured from the entire shooting screen, but gives more importance to the values near the center. Matrix Selects an exposure based on readings from multiple points in the subject area Spot Selects an exposure based on a single reading taken from the center... -
Page 26: Setting The Aeb
Sets the exposure value manually to compensate for unusual lighting conditions such as indirect indoor lighting, dark backgrounds, and strong backlighting. 3.7.6 Setting the AEB Sets the auto exposure bracketing (AEB) to shoot 3 continuous images, each with a different exposure setting: correctly exposed, underexposed, and overexposed. -
Page 27: Setting The Date Stamp
Icon Mode Description Vivid Blue A vibrant blue tone is added to the image. 3.7.10 Setting the date stamp The Date Stamp function can be used to add a date to your pictures as you take them. 3.7.11 Setting S.S.F. With more sensibility and faster shutter speed to brighten up the pictures, effectively preventing blurred images caused by hand shaking or target movement, one can take good pictures with little effort. -
Page 28: Using Smile Catch
3.7.15 Using Smile Catch Smile Catch automatically captures the moment of a smile of your subject. 1. In the capture mode, press and select 2. The camera is tracking the face of your subject (a white frame shows). 3. Press the shutter to activate smile tracking, and then release the shutter immediately. The camera now is tracking the smile of your subject (a green frame shows). -
Page 29: Playback
Playback 01.15.2009 01.15.2009 01.15.2009 10/115 10/115 08:05 08:05 08:05 IMG 0064.JPG IMG 0064.JPG 1.25MB 1.25MB 1/200 1/200 F2.8 F2.8 • When the camera is off, press and hold for at least one second to enter the Playback mode. • In the Capture mode, press to enter the Playback mode. -
Page 30: Playing Back Images
3.8.1 Playing back images 1. Turn the power on, and set the camera to the playback mode. • The most recently captured image appears on the LCD monitor. • If there are no images stored, the message [No image] appears. 2. -
Page 31: Viewing In Thumbnail
• Press to zoom-out. • Press to return to the normal size. 4. Trim the image. • Press to set the image trimming. 5. Save the image. • Press again to trim the selected image and save it as a new one. 3.8.5 Viewing in thumbnail 1. -
Page 32: Deleting Multiple Files
• To delete all images, select [All] and press [ • To quickly delete the current display image: 1. Select the image you want to delete. 2. Press to show a confirmation. 3. Press to delete the current display image. •... -
Page 33: Other Playback Functions
2. Open the menu. • Press , then use [ ] / [ ] to select the playback menu. • Press [ ] / [ ] to select DPOF and press [ ] or 3. Press [ ] or [ ] to select , then press [Single]... -
Page 34: Pc Dependent Features
PC Dependent Features Bundled software The camera is supplied with the following software. To install the software, refer to the information supplied with respective CDs. ArcSoft Combines photo editing with creative enhancement and sharing PhotoImpression 5 tools that maximize your digital media experience. ArcSoft Creates multimedia presentations by combining photos and video VideoImpression 2... -
Page 35: Step 2: Download Images Or Video Clips
4.2.2 Step 2: Download images or video clips When the digital camera is turned on and connected to your computer, it is considered to be a disk drive, just like a floppy disk or CD. You can download (transfer) images by copying them from Removable Disk to your computer hard drive. -
Page 36: Troubleshooting
Troubleshooting Refer to the symptoms and solutions listed below before shipping your camera for service. If the problem persists, contact your local reseller or service center. Symptom Cause Solution The camera cannot be There is no battery or the battery is Insert the battery correctly. - Page 37 Symptom Cause Solution I cannot download The free space on the hard disk of Ensure that the hard disk has enough images. your computer is insufficient. space for running Windows and that the drive for loading image files has free space equal to or greater than the memory card in the camera.
-
Page 38: Specifications
Specifications Sensor SHARP 10 Mega Pixels, 1/2.3 inch CCD Zoom Optical: 3X Digital: Up to 4X (Capture) / Up to 5X (Playback) Lens f = 6.2 (W) ~ 18.6 (T) mm F: 2.8 (W) ~ 5.2 (T) (f = 37.5 ~ 112.5mm, 35mm equivalent) Focus Range Normal: 40cm ~ Infinity Macro: W = 15~60cm;... -
Page 39: Service Information
Service Information Technical Support For further services, product information, user manual, and news releases, visit the following web site: http://www.BenQ.com Service Information...