Furuno CI-68 Installation Manual
Doppler sonar current indicator
Hide thumbs
Also See for CI-68:
- Operator's manual (72 pages) ,
- Brochure & specs (2 pages) ,
- Operator's manual (64 pages)
Table of Contents
Advertisement
SAFETY INSTRUCTIONS .............................................................................................................i
SYSTEM CONFIGURATIONS.....................................................................................................iii
EQUIPMENT LISTS.....................................................................................................................iv
1. INSTALLATION OVERVIEW ................................................................................................1-1
1.1 Selection of Installation Site for Transducer....................................................................1-1
1.2 Ground ............................................................................................................................1-3
1.3 Changing Power Supply Voltage ....................................................................................1-5
2. MOUNTING ...........................................................................................................................2-1
2.1 Monitor Unit/Control Unit.................................................................................................2-1
2.2 Transceiver Unit ..............................................................................................................2-7
2.3 Junction Box (option) ......................................................................................................2-8
2.4 Transducer (Hull Unit) .....................................................................................................2-8
2.5 DC/AC Inverter..............................................................................................................2-12
3. WIRING .................................................................................................................................3-1
3.1 Wiring the Control Unit ....................................................................................................3-1
3.2 Wiring the Transceiver Unit.............................................................................................3-2
3.3 Connecting the Junction Box ..........................................................................................3-4
3.4 External Equipment.........................................................................................................3-6
3.5 DC/AC Inverter................................................................................................................3-8
4. ADJUSTMENTS....................................................................................................................4-1
4.1 [INSTALLATION] menu...................................................................................................4-1
4.2 Input/Output Data............................................................................................................4-8
4.3 External Noise and Interference Check ..........................................................................4-9
4.4 Setting Output Data.......................................................................................................4-12
4.5 DIP Switch Setting ........................................................................................................4-13
4.6 Sea Trial Check.............................................................................................................4-14
PACKING LIST ......................................................................................................................... A-1
OUTLINE DRAWINGS.............................................................................................................. D-1
INTERCONNECTION DIAGRAM ............................................................................................. S-1
All brand and product names are trademarks, registered trademarks or service marks of their respective holders.
Installation Manual
DOPPLER SONAR
CURRENT INDICATOR
www.furuno.com
CI-68
Advertisement
Table of Contents

Related Manuals for Furuno CI-68


Summary of Contents for Furuno CI-68
-
Page 1: Table Of Contents
Installation Manual DOPPLER SONAR CURRENT INDICATOR CI-68 SAFETY INSTRUCTIONS ......................i SYSTEM CONFIGURATIONS.....................iii EQUIPMENT LISTS........................iv 1. INSTALLATION OVERVIEW ....................1-1 1.1 Selection of Installation Site for Transducer..............1-1 1.2 Ground ..........................1-3 1.3 Changing Power Supply Voltage ..................1-5 2. MOUNTING ...........................2-1 2.1 Monitor Unit/Control Unit....................2-1 2.2 Transceiver Unit ......................2-7... - Page 2 : +81-(0)798-65-4200 A : NOV 2003 Printed in Japan All rights reserved. C : NOV . 15, 2011 Pub. No. IME-72520-C *00014802412* *00014802412* (AKMU ) CI-68 *00014802412* *00014802412* * 0 0 0 1 4 8 0 2 4 1 2 *...
-
Page 3: Safety Instructions
SAFETY INSTRUCTIONS Read these safety instructions before you operate the equipment. Indicates a condition that can cause death or serious WARNING injury if not avoided. Indicates a condition that can cause minor or moderate CAUTION injury if not avoided. Warning, Caution Mandatory Action Prohibitive Action WARNING... - Page 4 SAFETY INSTRUCTIONS CAUTION CAUTION CAUTION CAUTION Be sure that the power supply is The transducer cable must be handled compatible with the voltage rating of carefully, following the guidelines the equipment. below. Keep fuels and oils away from the cable. Locate the cable where it Connection of an incorrect power supply will not be damaged.
-
Page 5: System Configurations
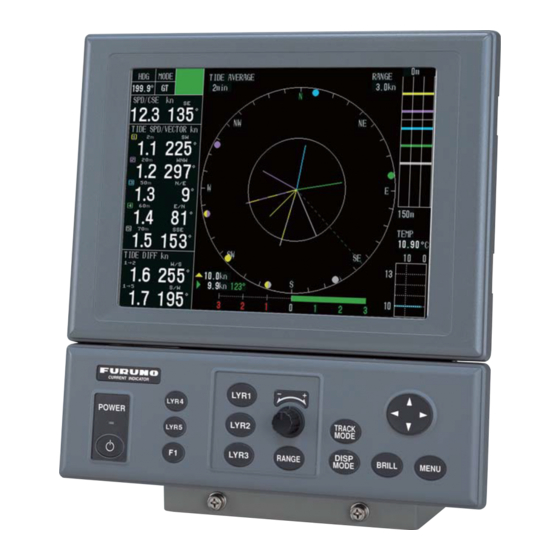
SYSTEM CONFIGURATIONS MONITOR UNIT MU-100C VGA Monitor (Local supply) CURRENT INDICATOR CURRENT INDICATOR LYR1 LYR1 LYR4 LYR4 POWER POWER LYR2 TRACK LYR2 MODE LYR5 LYR3 RANGE DISP MENU LYR3 RANGE BRILL MODE CONTROL UNIT CONTROL UNIT CI-6888 CI-6888 NMEA1 Output TRANSCEIVER UNIT CI-6810 NMEA1 Input... -
Page 6: Equipment Lists
EQIUIPMENT LISTS Standard Supply Name Type Code No. Remarks Control/Monitor CI-6888/MU-100C w/display unit Unit 1 set Control Unit CI-6888 no display unit Transceiver CI-6810 Unit CI-620-1-68 w/10 m cable Transducer 1 set Select one. CI-620-2-68 w/20 m cable Transducer CI-620-T-F Casing Thru-Hull Pipe CI-620-K-F... - Page 7 EQIUIPMENT LISTS Optional Supply Name Type Code No. Remarks Junction Box CI-630 1 set w/CP66-00703 000-146-086 000-146-087 10 m Z-6FVNV-SX-C Choose Cable (4P) 000-146-088 For junction box 15 m 3P+1P one. 000-146-089 20 m 000-146-090 30 m 66S1239*5M* 000-148-493 Between display unit and Cable Assembly control unit 66S1239*10M*...
- Page 8 EQIUIPMENT LISTS This page is intentionally left blank.
-
Page 9: Installation Overview
The Doppler Sonar Current Indicator CI-68 consists of a monitor unit (not supplied with black box type), control unit, transceiver unit, junction box and transducer (hull unit). To obtain absolute tide even in deep waters, the CI-68 must be supplied with the speed/course data (or position data) from navigation equipment (GPS) and heading data from a gyrocompass (via an A-D converter). - Page 10 CI-68 and other equipment are mounted near one another. For this reason, separate the transducer of the CI-68 as far as practical from other equipment which have high output power. If interference is un- avoidable due to limited mounting space, connect the interfering equipment to the built-in interference rejection circuit (two inputs) in the transceiver unit.
-
Page 11: Ground
1. INSTALLATION OVERVIEW Ground This equipment uses pulse signals which may cause interference to other electronic equipment such as a direction finder and radio receiver, if it is not grounded properly. It is strongly recommended to ground all cables referring to the guidelines below. a) Separate all units as far as possible from radio equipment. - Page 12 1. INSTALLATION OVERVIEW Monitor unit/Control unit Fix the ground wiresby the two wing nutsat the rear of the units. Transceiver unit This protection earth should be grounded securely. Fix copper strap (w=50 mm)to ground studs by the two wing nuts. Junction box Note: Ignore the protection grounding label at the fixing...
-
Page 13: Changing Power Supply Voltage
1. INSTALLATION OVERVIEW Changing Power Supply Voltage 1φ, 50/60 Hz AC power is supplied to the transceiver unit. The transformer tap is set at the factory according to customer’s order. If necessary, change jumper wires at the terminal board of the transceiver unit according to the input voltage. WARNING Turn off the power at the power supply before opening the cover. - Page 14 1. INSTALLATION OVERVIEW 4. Arrange jumper wires depending on the input power voltage, referring to the next page. 100 VDC C 120V 110V 100V 0V 120V 110V 100V 0V 200 VDC C 120V 110V 100V 0V 120V 110V 100V 0V Trans wiring For other voltages, see the sticker attached at inside of the transceiver unit.
-
Page 15: Mounting
MOUNTING Monitor Unit/Control Unit WARNING NOTICE Do not apply paint, anti-corrosive Turn off the power at the switchboard before beginning the sealant or contact spray to coating or installation. plastic parts of the equipment. Fire or electrical shock can result if Those items contain organic solvents that the power is left on. - Page 16 2. MOUNTING 2. Mounting the monitor unit together with the control unit Fasten the hanger at the rear of the monitor unit with four binding screws (M4x10). Bracket (rear view) CONT port Hanger (landscape-type) Mounting the monitor unit separately from the control unit 1) Dismount the coupling plate from the rear of the monitor unit to separate the monitor unit from control unit.
- Page 17 2. MOUNTING 5. Fasten the hanger (or monitor unit) to the mounting base with two upset screws. (Use the upper holes to tilt the monitor unit 20°; lower holes to tilt it 9°.) Use these holes to tiltmonitor unit 20°. Mounting base Use these holes to tilt monitor unit 9°.
- Page 18 2. MOUNTING Using the FP66-00601 1. Fasten the bracket to the control unit, using two pan head screws (M4x10). : Pan head screws 2. Fasten the bracket to the mounting location with four 4x16 tapping screws. Using the FP06-01120 1. Fasten the mounting plate to the mounting location with two 5x20 tapping screws. 2.
- Page 19 2. MOUNTING Flush mounting See the outline drawing at the back of this manual. Monitor unit/control unit The optional flush mount kit OP06-16 is required. Type: OP06-16, Code No.: 006-556-300 Name Type Code. No. Fixing metal 06-021-1311 100-279-611 Tapping screw 5x20 000-802-840 Hex.
- Page 20 2. MOUNTING 2. Fasten the fixing metal to the monitor unit with four hex. bolts (M4x12). Hex. bolts CONT port Fixing metal Monitor unit, rear view 3. Attach the waterproofing cap (MJ-10C, supplied as the installation materials) to the CONT port at the back of the monitor unit. 4.
-
Page 21: Transceiver Unit
2. MOUNTING Transceiver Unit Mounting considerations • Since the transceiver unit generates heat, install it in a dry, well-ventilated place. The cooling fans at the top of the unit must not be obstructed, to allow heat to escape. • This unit is designed for bulkhead mounting to permit dissipation of heat. If bulkhead mounting is absolutely impossible, mount the unit on the floor leaving at least 50 mm clearance between it and the floor to permit dissipation of heat. -
Page 22: Junction Box (Option)
2. MOUNTING Junction Box (option) Mounting considerations The junction box forms a joint between the transducer and the transceiver unit. Install it referring to the guidelines below. • Keep the junction box away from noise-emitting electrical machinery, i.e., electric gen- erator, radio transmitter, TV, etc. - Page 23 2. MOUNTING Mounting the transducer for steel hull vessels To mount the transducer for steel hull vessels, the optional transducer casing (CI-620- T-S) and thru-hull pipe (CI-620-K-S) are required. 1. Select a mounting place on the hull bottom. (Since the transducer cable is com- paratively thick, select a mounting place for the thru-hull pipe where the cable can be easily led into the cable gland.) 2.
- Page 24 2. MOUNTING 8. Pass the transducer cable through the thru-hull pipe. Tighten the cable gland, leaving 0.5 to 1 m of slack in the cable below the cable gland. Flange with piping holes Welding Hull bottom Thru-hull pipe Rubber gasket Flat washer Gland Thru-hull pipe for steel hull...
- Page 25 2. MOUNTING 7. Fix the transducer to the fixing flange. Fixing plate Transducer Dimple to bow Transducer and fixing flange 8. Pass the transducer cable through the thru-hull pipe. Tighten the cable gland, leaving 0.5 to 1.0 m of slack in the cable below the cable gland. To tighten the cable gland 1) Tighten the gland securely by using the wrench.
-
Page 26: Dc/Ac Inverter
2. MOUNTING DC/AC Inverter If the power supply is 24 VDC, the DC-AC inverter is required. This unit is designed for the bulkhead mounting and weights 15 kg, reinforce the mounting location if nec- essary. The cable entrances must be faced downward. Note: Mount this unit in a well-ventilated place to prevent heat build up inside the cab- inet. -
Page 27: Wiring
WIRING See the interconnection diagram at the back of this manual. Wiring the Control Unit 3.1.1 Connection with the transceiver unit Attach the connector of the control unit to the cable (66S1238) from the transceiver unit as below. To J11 on the PCP Board 66P3920 Cable 66S1238... -
Page 28: Wiring The Transceiver Unit
3. WIRING Wiring the Transceiver Unit LOG-ALM Gyro NMEA1 RX input NMEA2 RX Gyro Transducer cable NMEA2 NMEA1 TX output KP. OUT Control unit cable (66S1238) AUXTX* LOG200_2 LOG200_1 ON_OFF* KP.IN2 Power cable KP. IN1 *1: Contact alarm signal *2: CIF/NMEA/Current *3: When connecting the cable from the junction box, reverse the direction of the clam Transceiver unit, bottom view Fabricating DPYC-2.5 and DPYCY-2.5 (Japanese Industrial Standards) or... - Page 29 3. WIRING Remove the sheath. FV1.25-4 Fold back the shield on the armor. Vinyl tube Anticorrosive sheath 35 mm 25 mm Transducer cable 1 Earth terminal Connect the crimp-on lug of the shield wire here. BEAM1 Black BEAM2 Temperature sensor, Blue BEAM3 Lay armor in cable Green...
-
Page 30: Connecting The Junction Box
3. WIRING Connecting the Junction Box The transducer cable is connected to the junction box with an extension cable. After making the connection, seal the cable gland with putty for watertightness. Transducer cable (66S1066, no armor) Cut to suitable length considering location on terminal board. Vinyl sheath FV1.25-4 FV2-P4... - Page 31 3. WIRING Shield Outer shield RED GRN Clamp vinyl sheath by cable gland. Armor Transducer Copper strap 4P cable cable After clamping cable, seal cable gland with putty for watertightness. Vinyl tape Junction box, inside view...
-
Page 32: External Equipment
3. WIRING External Equipment A gyrocompass, NMEA equipment, LOG pulse and KP signal are connected to the 66P3926(PPW8) transceiver unit. Use the connectors attached to the PCN Board (66P3924) in the transceiv- er unit. Also, the opener is supplied as instal- 66P3923(PTX8) lation materials for the transceiver unit. - Page 33 3. WIRING Use TB3 to input/output GYRO signal. Cut off the internal shield and sheath. Vinyl tape Armor 8 to 9 TTYCY-4S Use TB4 to input/output the following Cut off the internal signal. shield and sheath. Vinyl tape Armor • Alarm signal Output 8 to 9 •...
-
Page 34: Dc/Ac Inverter
3. WIRING DC/AC Inverter Use the DPYCY-6 (Japanese Industrial Standards) cable to connect the DC-AC in- verter from the ship’s power supply within 5 m. For outputting 100VAC, use the DPY- CY-2.5 cable. DPYCY-2.5/6 Armor Vinyl Sheath Vinyl Sheath Ø = DPYCY-2.5: 11.7 mm DPYCY-6: 15.2 mm... -
Page 35: Adjustments
ADJUSTMENTS [INSTALLATION] menu 4.1.1 [I/O] sub menu 1. Press the MENU key. 2. Press to move the cursor to the top of the menu. 3. Press several times to show the message "PRESS FUNC KEY TO OPEN IN- STALLATION MENU." Note: Press the MENU key to open the menu other than the INSTALLATION menu. - Page 36 4. ADJUSTMENTS NMEA2/CIF FORMAT Choose format of equipment connected to NMEA2/CIF port. The choices are [NMEA] and [CIF]. When selecting [NMEA] here, the sentences are output with the NMEA ver- sion selected at [NMEA VERSION]. The baud rate is fixed to 4800 bps. To choose CIF, set the jumper switch J4 on the PCN Board (66P3924) to CIF.
- Page 37 Calibrate ship’s speed in the ground tracking mode. (setting range: -12.8 to 2.7 (%)) True speed should be calculated at the sea trial. Calibration value is obtained as fol- lows: True speed - (CI-68-measured speed) Calibration value (%) = X 100...
- Page 38 4. ADJUSTMENTS WT SPD CALIB Calibrate ship’s speed in the water tracking mode. In general, enter the same value as the [GT SPD CALIB]. (-12.8 to 12.7 (%)) BEARING CALIB Calibrate bearing offset angle of the transducer. When the transducer’s fore-aft axis is deviated to starboard from the ship’s fore-aft line, set a positive angle.
- Page 39 CSE CALIB MODE : MANUAL CSE CALIB EXEC : Course made good by ext. navaid (GPS) Course made good by CI-68 plus Gyro Start Point (F1 key pressed) Course calibration angle 2 nm (approx.) (Calibrated to fit these two Lead run courses made good) 8.
- Page 40 4. ADJUSTMENTS value is not retained in the memory; it is reset to zero when the power is turned off.) 5 minutes (half way) Start Point (F1 key pressed) Lead run Off the track by 5 to Calibrated to equalize 10 °...
- Page 41 4. ADJUSTMENTS BTM TRACK BEAM Choose sounding beam to use to detect bottom. The choices are [B1] (Beam 1), [B2], [B3] and [ALL]. PULSE LENGTH Choose pulse length to use in the water tracking mode. The choices are [NORMAL] and [LONG]. PWR REDUCTION Choose [LOW] to reduce output power.
-
Page 42: Input/Output Data
4. ADJUSTMENTS Input/Output Data 4.2.1 NMEA Input Sentences NMEA Input Sentences Talker Format Information Time (UTC), Date GPS ship’s speed, Bearing, Own ship’s position LC ship’s speed, Bearing, Own ship’s position, Time difference Own ship’s position (L/L), Ship’s speed Own ship’s position (L/L) GP、... -
Page 43: External Noise And Interference Check
4. ADJUSTMENTS 4.2.3 CIF Input/output sentences Input sentences Data No. Information System Time Positioning data (L/L) 24、28 Ship’s speed bearing data 44、48 Depth data Water temperature data Priority Information Priority (No.) Positioning data 28>24 Ship’s speed bearing data 48>44 Output sentences Data No. -
Page 44: Suppressing Interference
4. ADJUSTMENTS CI-68 CI-6888 VOL. 6651201-XX.XX MEM. SIO. Noise Level -5, -6, -7 TVG ON (Beam1, CI-6810 VOL. 6651202-XX.XX Beam2, Beam3 BEAM3 BEAM1 BEAM2 TBL. in that order) (PORT) (STBD) (BOW) MEM. 1 2 3 4 5 6 7 8 ANA. - Page 45 4. ADJUSTMENTS 5 to 15 V less than 1 V Keying pulse needed If the level is out of the ratings or KP output circuit is not provided, take the measures shown on the next two pages to prevent equipment malfunction. Buffer circuit for positive-going KP CI-6810 5 to 15V...
-
Page 46: Setting Output Data
4. ADJUSTMENTS Output When outputting keying pulse to PCN (66P3924) suppress interference to other TB-4 ultrasound equipment, take the 220 Ω TX trigger pulse from TB4 (KP OUT), which is the KP terminal CR12 KP OUT for external output. Setting Output Data You can select data output from TB2-#1 and #2 on the terminal board by the setting on the PCN Board 66P3924. -
Page 47: Dip Switch Setting
4. ADJUSTMENTS DIP Switch Setting 4.5.1 Tide calculation response If the tide calculation response is too slow, set the DIP switch S1 on the PON Board 66P3924 appropriately. Default DIP # Function Setting Minute constant Normal Slow selection (current (Normal setting. (When current speed response time for Minute constant: 0.05... -
Page 48: Sea Trial Check
3. Calculate true ship’s speed (1) from the data of the milepost test and ship’s speed of the CI-68 from that of the distance run (2). 4. If the error between (1) and (2) is more than ± (1%+0.1 kn), correct it referring to the [GT SPD CALIB] on page 4-3. - Page 49 4. ADJUSTMENTS 4-15...
- Page 50 4. ADJUSTMENTS Table 2: Ship’s Speed Test TIME Remarks TIME Remarks (kn) (kn) SHIP NUMBER SHIP NUMBER DEPTH DEPTH TEST SITE TEST SITE WIND SPEED WIND SPEED (ms) (ms) COURSE COURSE 4-16...
- Page 51 4. ADJUSTMENTS 4-17...
- Page 52 4. ADJUSTMENTS This page is intentionally left blank. 4-18...
- Page 60 Takahashi T...
- Page 69 D-10...
- Page 71 D-12...
- Page 72 D-13...
- Page 74 D-15...
-
Page 75: Interconnection Diagram
200/220/230/240VAC 1φ,50/60Hz DC-ACインバータ DC-AC INVERTER DPYCY-6 24VDC TR-2451 W=50 WEA-1004 100VAC(MAX.5A) IV-8sq. 注記 *1)造船所手配。 *2)オプション。 *3)コネクタは工場で取付済み。 *4)ケーブルクランプでアースする。 DRAWN TITLE CI-68 T.YAMASAKI 22/Mar/2011 CHECKED 名称 カラー潮流計 NOTE H.MAKI 22/Mar/2011 *1: SHIPYARD SUPPLY. APPROVED 相互結線図 Y.NISHIYAMA 22/Mar/2011 *2: OPTION. SCALE MASS NAME DOPPLER SONAR CURRENT INDICATOR *3: CONNECTOR PLUG FITTED AT FACTORY.