Table of Contents
Advertisement
Quick Links
Advertisement
Table of Contents
Troubleshooting

Related Manuals for IBM IL1210


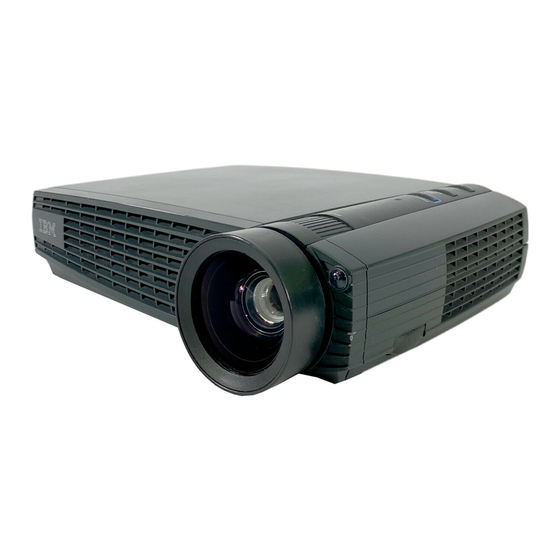
Summary of Contents for IBM IL1210
- Page 1 IBM MicroPortable Projector User’s Guide...
- Page 3 IBM MicroPortable Projector User’s Guide...
- Page 4 “Appendix G. Product warranties and notices” on page 51. First Edition (April 2001) © Copyright International Business Machines Corporation 2001. All rights reserved. US Government Users Restricted Rights – Use, duplication or disclosure restricted by GSA ADP Schedule Contract with IBM Corp.
-
Page 5: Table Of Contents
. 17 . 17 Appendix G. Product warranties and . 17 notices . . 18 IBM Statement of Limited Warranty . . 19 Part 1 - General Terms . 20 Part 2 - Country-unique Terms . . 22 Trademarks . - Page 6 IBM MicroPortable Projector: User’s Guide...
-
Page 7: Safety: Read First
Avant d’installer ce produit, lisez les consignes de sécurité. Vor der Installation dieses Produkts die Sicherheitshinweise lesen. Prima di installare questo prodotto, leggere le Informazioni sulla Sicurezza. Lees voordat u dit product installeert eerst de veiligheidsvoorschriften. © Copyright IBM Corp. 2001... - Page 8 Antes de instalar este produto, leia as Informações sobre Segurança. Pred inštaláciou tohto zariadenia si pečítaje Bezpečnostné predpisy. Antes de instalar este producto lea la información de seguridad. Läs säkerhetsinformationen innan du installerar den här produkten. iL1210 IBM MicroPortable Projector: User’s Guide...
-
Page 9: About This Book
Registering your option Thank you for purchasing OPTIONS by IBM. Please take a few moments to register your product and provide us with information that will help IBM to better serve you in the future. Your feedback is valuable to us in developing products and services that are important to you, as well as in developing better ways to communicate with you. - Page 10 IBM MicroPortable Projector: User’s Guide...
-
Page 11: Chapter 1. Installation And User's Guide
Image resolution The XGA resolution of the iL1210 projected image is 1024 x 768. The projector is compatible with screen resolutions up to 1280 x 1024. If your computer screen resolution is higher than 1280 x 1024, reset it to a lower resolution before you connect the projector. -
Page 12: Unpacking The Projector
Unpacking the projector The projector comes with the items shown in the following illustration. Check to make sure that all items are included. Contact your dealer immediately if anything is missing. If you are experienced in setting up presentation systems, use the Quick Start card that was included with this option. -
Page 13: Usage Guidelines
The bright light might harm your eyes. Attention: Follow these guidelines for handling the projector. v Do not block the grills on the projector. Restricting the airflow can cause it to overheat and turn off. If this happens, you must wait one minute before attempting to turn it back on. -
Page 14: Setting Up The Projector
1. Place the projector on a flat surface. v The projector must be within 3 meters (10 feet) of your power source and within 1.8 meters (6 feet) of your computer. v If you want to project from behind a translucent screen, set up the projector behind the screen. - Page 15 DANGER Electrical current from power, telephone, and communication cables is hazardous. To avoid a shock hazard: — Do not connect or disconnect any cables or perform installation, maintenance, or reconfiguration of this product during an electrical storm. — Connect all power cords to a properly wired outlet. —...
- Page 16 Note: If you are connecting the projector to a computer, make sure that the distance between the computer and the projector is 6 feet or less. 1 Computer 2 Video 3 Power cord 4 Power switch iL1210 IBM MicroPortable Projector: User’s Guide...
-
Page 17: Connecting A Computer To The Projector
Connecting a computer to the projector The projector comes with an analog computer cable. If your computer has a digital output port, you can use the optional digital computer cable, which is sold separately. See “Accessories” on page 28 for ordering information. - Page 18 Press Fn F7 on your IBM ThinkPad Activation commands for some mobile computers are listed in Appendix 2. If you are connecting the projector to an older Macintosh computer that does not have a 15-pin connector, you must use a Mac adapter between the computer and the projector.
-
Page 19: Connecting A Video Player
Attention: Your video player might also have a Video Out connector for a coaxial cable connection. DO NOT use this to connect to the projector. 1. Plug the yellow composite video cable connector into the Video Out connector on your video player. This connector might be labeled To Monitor. - Page 20 Use the following procedure to start the projector and adjust the image. 1. Remove the lens cap. 2. Plug the power cord into the side of the projector, and then plug it into an electrical outlet. A surge-protected power strip is recommended. Always use the power cord that was included with the projector.
- Page 21 3. Press the Power switch on the back of the projector. The fans start to run, and the LED on the top of the projector lights green until the startup screen displays. It takes about one minute for the image to achieve full brightness.
- Page 22 IBM MicroPortable Projector: User’s Guide...
-
Page 23: Chapter 2. Using The Projector
If the image is not displayed completely, zoom the image, adjust the height of the projector, or center the image by adjusting its horizontal or vertical position. Be sure the projector is at a 90-degree angle to the screen. See ‘‘horizontal position on page 21 and ‘‘veritcal position’’ on page 22. - Page 24 To raise the projector: 1. Press and hold the elevator button 1 (see the following illustration). 2. Raise the projector to the height that you want, then release the button to lock the elevator foot 2 into position. iL1210 IBM MicroPortable Projector: User’s Guide...
-
Page 25: Using The Remote Control
(25 feet). If you point the remote control at the projection screen, the distance to the screen and back to the projector must be less than or equal to 7.6 meters (25 feet) or less. For best results, point the remote control directly at the projector. -
Page 26: Using The Keypad And Remote Control Buttons
Source (keypad only) or data and video (remote control only) When you have more than one source (computer and video) connected to the projector, select between them by pressing the Source button on the keypad or the Data or Video button on the remote control. -
Page 27: Keystone (Remote Only)
See “Connecting a computer to the projector” on page 7. Up/down arrow buttons Use these buttons to navigate through and make adjustments to the on-screen menus. See “Using the on-screen menus” on page 18. Chapter 2. Using the projector... -
Page 28: Using The On-Screen Menus
Using the on-screen menus The projector has menus that enable you to make image adjustments and change a variety of settings. These adjustments are not available directly from the keypad. Note: Some menu items might be unavailable at certain times (grayed out or dimmed). -
Page 29: Display Menu
Use the up and down arrows to highlight Contrast, press Menu/Select, use the arrows to adjust the contrast; then press Menu/Select to accept your changes. Tint The tint adjusts the red-green color balance in the projected image. Chapter 2. Using the projector... -
Page 30: Image Menu For Computer Sources
Enhanced for Widescreen TVs. This option yields more detail than Widescreen Letterbox. Native reduces the Standard size to match the height of Enhanced iL1210 IBM MicroPortable Projector: User’s Guide... - Page 31 Menu/Select. Manual tracking The projector adjusts tracking automatically to match the video signal from your computer. However, if the display shows evenly spaced, fuzzy, vertical lines or if the projected image is too wide or too narrow for the screen, try turning Auto Image off then back on again.
-
Page 32: Image Menu For Video Sources
Widescreen TVs. This option yields more detail than Widescreen Letterbox. Native reduces the Standard size to match the height of Enhanced Widescreen. Highlight Resize, press Menu/Select, use the up or down arrows to cycle through the options, then press Menu/Select. iL1210 IBM MicroPortable Projector: User’s Guide... -
Page 33: Control Menu
Video standard (video sources only) When Video is set to Auto, the projector attempts to pick the video standard (NTSC, NTSC 4.43, PAL, or SECAM) automatically based on the input signal it receives. (The video standard options may vary depending on your region of the world.) If the projector is unable to detect the correct standard, the... -
Page 34: Advanced Menu
Menu/Select again to access the Advanced menu. Rear projection When you turn Rear Projection on, the projector reverses the image so you can project from behind a translucent screen. Highlight Rear Projection, press Menu/Select, then press the up or down arrow buttons to turn this feature off and on. -
Page 35: Status Menu
Control Panel and adjust the resolution in the Display tab. See your computer’s user’s guide for details. Source Indicates the active source, Data-Analog, Data-Digital, Composite video, or S-video. Version Indicates the projector software version. This information is useful when contacting Technical Support. Chapter 2. Using the projector... - Page 36 IBM MicroPortable Projector: User’s Guide...
-
Page 37: Copyright Ibm Corp
Appendix A. Product specifications Specifications The iL1210 Projector must be operated and stored within the temperature and humidity ranges specified. Temperature Operating Non-operating Altitude Operating Non-operating Humidity Operating and non-operating Dimensions 6.25 x 8.25 x 2 inches (15.9 x 21.0 x 5.1 cm) Weight 2.9 lbs. -
Page 38: Accessories
Accessories There are many accessories available for your projector and new ones are added frequently. Please refer to http://www.infocus.com/ and select from the many accessories for you to purchase. iL1210 IBM MicroPortable Projector: User’s Guide... -
Page 39: Appendix B. Maintenance And Troubleshooting
Abrasive cleaners, solvents or other harsh chemicals might scratch the lens. 2. Lightly wipe the cleaning cloth over the lens in a circular motion. 3. If you do not intend to use the projector immediately, replace the lens cap. CAUTION: The following label indicates a hot surface nearby. -
Page 40: Replacing The Projection Lamp
Replacing the projection lamp WARNING: To avoid burns, allow the projector to cool for at least 30 minutes before you open the lamp access grill. Never extract the lamp module while the projector is operating. The lamp hour counter in the Status menu counts the number of hours the lamp has been in use. - Page 41 4. Pull the yellow tab 1 on the lamp module. WARNING: Be extremely careful when removing the lamp module. In the unlikely event that the bulb breaks, small glass fragments might be generated. The lamp module is designed to contain these fragments, but use caution when removing the lamp module.
- Page 42 5. Loosen the captive screw on the lamp module. WARNING: Never operate the projector with the lamp access grill removed. This disrupts the air flow and causes the projector to overheat. iL1210 IBM MicroPortable Projector: User’s Guide...
- Page 43 11. Plug in the power cord and press the Power switch to turn the projector back on. 12. To reset the lamp hour counter in the Status menu, press and hold the reset button, then press the menu/select button (while still holding down the reset button) for 10 seconds.
-
Page 44: Replacing The Batteries In The Remote Control
4. Install two new AAA alkaline batteries. Make sure you install each battery in the correct direction. 5. Insert the hooks on the battery door into the remote control and press the tab to re-install the door. iL1210 IBM MicroPortable Projector: User’s Guide... -
Page 45: Using The Security Lock
Using the security lock The projector has a security connector to use with a computer lock system. Go to http://www.compu-lock.com for ordering information. Refer to the information that comes with the lock for instructions on how to secure it to the projector. -
Page 46: Troubleshooting
Make sure that the power cord is also properly connected to the projector. v If the projector is plugged into a power strip, make sure the power strip is turned on. v Make sure the projector is turned on. - Page 47 Problem: Image is out of focus. v Turn the projection lens to focus the image. v Make sure the projection screen is at least 1.5 m (5 feet) from the projector. v Check the projection lens to see if it needs cleaning.
- Page 48 Replace the lamp as described in “Replacing the projection lamp” on page 30. Problem: The lamp shuts off. v A minor power surge may cause the lamp to shut off. Unplug the projector, wait at least a minute, then plug it back in.
-
Page 49: Appendix C. Portable And Mobile Computer Activation
Appendix C. Portable and mobile computer activation Many mobile computers do not automatically turn on their external video port when a projector is connected. Activation commands for some mobile computers are listed in the following table. (If your computer is not listed or the given command does not work, refer to the computer documentation for the appropriate command.) On many mobile computers, the activation... - Page 50 Data General Data General Walkabout Datavue DEC** Dell** Digital* Dolch Epson Everex* For-A iL1210 IBM MicroPortable Projector: User’s Guide Key command to Key command to activate port deactivate port see Mac Portable and Mac PowerBook automatic automatic FN-F6 FN-F6 automatic...
- Page 51 FN-F2, select auto or simultaneous Ctrl-Alt-Tab Hitachi FN-F7 Honeywell FN-F10 Hyundai setup screen option IBM 970* automatic IBM ThinkPad** reboot, enter setup menu FN-F7, select choice from setup menu FN-F1, select choice FN-F5, select choice PS/2 SC select choice (such...
- Page 52 Tandy** Tangent Texas Instruments* Top-Link* ** Toshiba* ** Twinhead* WinBook Wyse Zenith** iL1210 IBM MicroPortable Projector: User’s Guide Key command to Key command to activate port deactivate port SW2 On-Off-Off-Off SW2 Off-On-On-On setup screen option setup screen option setup screen option...
- Page 53 Computer Key command to activate port FN-F1 Zeos ** Ctrl-Shift-D FN-F1 * These manufacturers have models that automatically send video to the external CRT port when some type of display device is attached. ** These manufacturers offer more than one key command depending on the computer model.
- Page 54 IBM MicroPortable Projector: User’s Guide...
-
Page 55: Appendix D. Using Video Mirroring
If this happens, perform the following steps: 1. Turn off video mirroring. 2. Open the monitor control panel. 3. Move the white menu bar to Monitor 2 to set the projector as the primary monitor. 4. Restart the PowerBook computer. - Page 56 IBM MicroPortable Projector: User’s Guide...
-
Page 57: Appendix E. Projected Image Size
Use the following graph and table to help you determine projected image sizes. (106.7m) (91.4m) (76.2m) (61m) (45.7m) (30.48m) (15.2m) © Copyright IBM Corp. 2001 maximum image size (1.5m) (3m) (4.6m) Distance to Screen (feet) minimum image size (6.1m) (7.6m) - Page 58 213.4 c (84 in) 229.6 c (90 in) 254 c (100 in) 304.8 c (120 in) 381 c (150 in) iL1210 IBM MicroPortable Projector: User’s Guide Image width Maximum distance 121.9 c (48 in) 2.59 m (8.5 ft.) 147.3 c (58 in) 3.1 m (10.2 ft.)
-
Page 59: Appendix F. Help And Service Information
During the warranty period, assistance for replacement or exchange of defective components is available. In addition, if your IBM option is installed in an IBM computer, you might be entitled to service at your location. Your technical support representative can help you determine the best alternative. - Page 60 HelpCenter phone list on the IBM support Web page at http://www.ibm.com/pc/support If the number is not provided, contact your IBM reseller or IBM marketing representative. Response time may vary depending on the number and nature of the calls received.
-
Page 61: Appendix G. Product Warranties And Notices
If a Machine does not function as warranted during the warranty period, and IBM or your reseller are unable to either 1) make it do so or 2) replace it with one that is at least functionally equivalent, you may return it to your place of purchase and your money will be refunded. - Page 62 Machine set-up and installation, will be provided WITHOUT WARRANTIES OF ANY KIND. Warranty Service To obtain warranty service for a Machine, contact IBM or your reseller. If you do not register your Machine with IBM, you may be required to present proof of purchase.
- Page 63 IBM or your reseller of changes in a Machine’s location. IBM is responsible for loss of, or damage to, your Machine while it is 1) in IBM’s possession or 2) in transit in those cases where IBM is responsible for the transportation charges.
-
Page 64: Part 2 - Country-Unique Terms
EXCLUSION MAY NOT APPLY TO YOU. Governing Law Both you and IBM consent to the application of the laws of the country in which you acquired the Machine to govern, interpret, and enforce all of your and IBM’s rights, duties, and obligations arising from, or relating in any manner to, the subject matter of this Agreement, without regard to conflict of law principles. - Page 65 Limitation of Liability: The following is added to this Section: Where IBM is in breach of a condition or warranty implied by the Trade Practices Act 1974 or other similar legislation, IBM’s liability is limited to the repair or replacement of the goods or the supply of equivalent goods.
- Page 66 2. as to any other actual damage arising in any situation involving nonperformance by IBM pursuant to, or in any way related to the subject of this Statement of Limited Warranty, IBM’s liability will be limited to the charge paid by you for the individual Machine that is the subject of the claim.
- Page 67 PEOPLE’S REPUBLIC OF CHINA (PRC) Governing Law: The following replaces this Section: Both you and IBM consent to the application of the laws of the State of New York (except when local law requires otherwise) to govern, interpret, and enforce all your and IBM’s rights, duties, and obligations arising from, or relating in any manner to, the subject matter of this Agreement, without regard to conflict of law principles.
- Page 68 (1) an IBM reseller approved to perform warranty service or (2) from IBM. If you purchase an IBM Machine in a Middle Eastern or African country, you may obtain warranty service for that Machine from the IBM entity within the...
- Page 69 The minimum warranty period for Machines is six months. In case IBM or your reseller is unable to repair an IBM Machine, you can alternatively ask for a partial refund as far as justified by the reduced value of the unrepaired Machine or ask for a cancellation of the respective agreement for such Machine and get your money refunded.
- Page 70 Section: In such instances, regardless of the basis on which you are entitled to claim damages from IBM, IBM is liable for no more than: (items 1 and 2 unchanged). IRELAND Extent of Warranty: The following is added to this Section:...
- Page 71 The following item is added to this paragraph: 3. breach of IBM’s obligations implied by Section 12 of the Sale of Goods Act 1979 or Section 2 of the Supply of Goods and Services Act 1982.
- Page 72 IBM may use or distribute any of the information you supply in any way it believes appropriate without incurring any obligation to you. Any references in this publication to non-IBM Web sites are provided for convenience only and do not in any manner serve as an endorsement of those Web sites.
-
Page 73: Trademarks
Properly shielded and grounded cables and connectors must be used in order to meet FCC emission limits. IBM is not responsible for any radio or television interference caused by using other than recommended cables and connectors or by unauthorized changes or modifications to this equipment. - Page 74 Directive 89/366/ECC on the approximation of the laws of the Member States relating to electromagnetic compatibility. IBM cannot accept responsibility for any failure to satisfy the protection requirements resulting from a non-recommended modification of the product, including the fitting of non-IBM option cards.
- Page 75 IBM ne peut accepter aucune responsabilité pour le manquement aux exigences de protection résultant d’une modification non recommandée du produit, y compris l’installation de cartes autres que les cartes IBM. Ce produit a été testé et il satisfait les conditions de l’équipement informatique de Classe A en vertu de CISPR22/Standard européen EN 55022.
- Page 76 IBM no puede aceptar responsabilidad alguna si este producto deja de satisfacer dichos requisitos de protección como resultado de una modificación no recomendada del producto, incluyendo el ajuste de tarjetas de opción que no sean IBM. Este producto ha sido probado y satisface los límites para Equipos Informáticos Clase A de conformidad con el Estándar CISPR22 y el Estándar...
- Page 77 Appendix G. Product warranties and notices...
- Page 78 IBM MicroPortable Projector: User’s Guide...
- Page 80 Part Number: 33L3459 Printed in the United States of America on recycled paper containing 10% recovered post-consumer fiber. (1P) P/N: 33L3459...