Table of Contents
Advertisement
Advertisement
Table of Contents

Related Manuals for Hyundai HCP3000


Summary of Contents for Hyundai HCP3000
- Page 1 Gas-Powered Pressure Washer User Manual...
- Page 2 ©2011 Hyundai Power Equipment. All Rights Reserved. Licensed by Hyundai Corporation, Korea. HCP3000-0711-02...
- Page 5 Thank you for purchasing this Hyundai Power Equipment Pressure Washer. Please register this product in order to ensure warranty service in the future. This manual covers the safety, operation and maintenance procedures for the HCP3000. All information in this publication is based on the latest product information available at the time of print.
- Page 6 Warranty Information Warranty service, operation assistance and product support is provided by Midland International Inc., a licensed manufacturer of Hyundai Power Equipment. www.powerbyhyundai.com TECHNICAL ASSISTANCE 1-855-706-8475 CUSTOMER SERVICE 1-877-528-3772 (toll-free) SALES 1-503-534-3684 Component Certifications This product contains components certified by the following agency:...
-
Page 7: Table Of Contents
TABLE OF CONTENTS 1.0 - OPERATION SAFETY 1.1 - Operation Safety 1.2 - Water Safety Guidelines 1.3 - Maintenance Safety 2.0 - COMPONENTS 2.1 - Identification 2.2 - Assembly 3.0 - PRE-OPERATION INSPECTION 3.1 - Engine Oil Check 3.2 - Pump Oil Check 3.3 - Fuel Level Check 3.4 - Air Filter Check 4.0 - OPERATION... -
Page 8: Operation Safety
1.0 - SAFETY 1.1 - Operation Safety • Always perform a pre-operation check before starting the engine. • Properly clean and maintain the equipment. • Operate the Pressure Washer according to instructions for safe and dependable service. • Read user manual carefully before operating this product! Failure to do so may result in serious harm to the user and to the equipment. -
Page 9: Water Safety Guidelines
1.2 - Water Safety Guidelines • Keep all protective components in place - do not remove guards or shields from any part of the engine • Use caution near the engine - do not soak or expose the casing to a constant flow of water • Do not operate while wearing open-toed shoes • Do not over-extend while using the spray wand - use caution when... -
Page 10: Identification
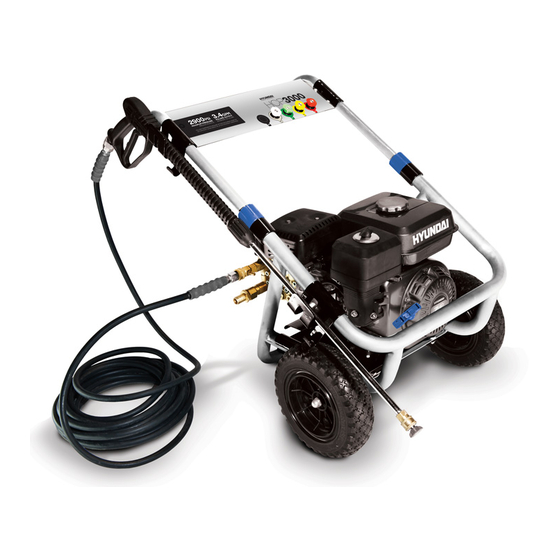
2.0 - COMPONENTS AND ASSEMBLY 2.1 - Identification of Components... -
Page 12: Assembly
Before using this Pressure Washer, make sure that the detatchable components have been properly assembled. If any parts show signs of damage or are missing, do not proceed with use. Contact Hyundai Power Equipment to request a repalcement immediately. Do not attempt to assemble or connect any components while the engine is running. - Page 13 2. Assemble Gun - Insert wand extention into the opening at the end of the spray gun. Ensure that threads are properly positioned before twisting until tight. Do not overtighten wand extention. 3. Connect Hose to Spray Gun - Pull back the quick-connector and insert into the base of the spray gun.
- Page 14 4. Connect Water Main - Water inlet is located next to the air filter assembly. Firmly connect the water hose before turning on at the source. 5. Add Engine Oil - Open oil inlet located opposite the recoil starter handle. Remove the dipstick and pour in the supplied oil with a funnel.
- Page 15 6. Check Pump Oil (see section 3.2). If necessary, add oil - Oil inlet is located across from the output opening. Rotate screw and apply oil using a funnel. Do not operate without oil. Reservoir can hold maximum 11 fl.oz of 10W30 oil - do not over fill. 7.
-
Page 16: Pre-Operation Inspection
3.0 Pre-Operation Inspect all components for damage and to ensure that none are missing. If you require a replacement, do not operate this equipment until all parts are present and in proper working order. Do not modify or create accessories for this equipment. Using modified components may result in damage to this equipment and may void the warranty. -
Page 17: Pump Oil Check
3.2 - Pump Oil Check 1. Ensure the pressure washer is on a level surface. 2. Inspect pump oil by checking oil level indicator 3. The window should be filled past the midway point indicated by a red dot. If the oil level is below the red dot, add more oil to the pump. 3.3 - Fuel Level Check 1. -
Page 18: Air Filter Check
flames or sparks in the area where the Pressure Washer is being refueled or where gasoline is stored. Do not overfill the tank. Be careful not to spill fuel when refueling. Wipe up any spilled gasoline and let the area dry before starting the engine. -
Page 19: Operation
4.0 - OPERATION 4.1 - Connecting the Water Source 1. Water supply should be from a regular tap or clean water tank - do not use hot water. When using a regular garden hose, allow water to flow for approximately 30 seconds to clear out debris and air pockets. 2. -
Page 20: Stopping The Engine
If recoil starter is hard to pull due to built-up pressure inside the hose, remove the nozzle and press handle trigger while pulling the recil starter. Do not allow the recoil starter to snap back. Return it slowly by hand. 4. -
Page 21: Using The Pressure Washer
hold the trigger down until all pressure is released before starting up again. Attempting to start the engine without releasing the pressure can severely damage your pressure washer. Failure to release built-up pressure may result in startup difficulties and permanent damage to pump and other components. 4.4 - Using the Pressure Washer Wear safety goggles and pay close attention to where the spray wand is aimed. -
Page 22: Using Quicknozzles
Do not use the angle nozzles when using a soap detergent. Use the detergent nozzle to avoid detergent and foam buildup and to ensure an even spray. Detergent reservoir is not included with the HCP3000 pressure washer. 1. Insert detergent suction hose into detergent container. -
Page 23: Maintenance
5.1 - Importance of Maintenance Proper maintenance ensures safe, economical and trouble-free operation. Improper maintenance may cause the Pressure Washer to malfunction and can lead to serious injuries. Contact Hyundai Power Customer Support if you have any maintenance questions. 5.2 - Maintenance Schedule... -
Page 24: General Inspection
5.3 - General Inspection 1. Look for fuel leaks around the fuel tank, fuel hose, fuel valve and carburetor. Close the fuel valve and repair leaks immediately. 2. Look and listen for exhaust leaks while the engine is running. Have all the leaks repaired before continuing operation. -
Page 25: Oil Maintenance
5.5 - Oil Change and Oil Drainage Used motor oil can cause skin irritations if left in long-tern contact with skin. Wash hands thoroughly with soap and water after handling oil. Do not dispose of used oil in drains or on soil. Local service shops provide environmentally-friendly disposal methods. -
Page 26: Spark Plug Service
5.6 - Spark Plug Service Do not rinse spark plug in water. Follow guidelines and be careful not to overtighten the spark plug. Tighten ½ turn when installing a new spark plug. Tighten ¼ turn when re-installing an old spark plug. 1. -
Page 27: Fuel Sediment Cup
5.7 - Fuel Sediment Cup Service 1. Switch fuel valve to the OFF position. 2. Unscrew the sediment cup using a wrench and remove the O-ring. 3. Wash the cup and O-ring in a non-flammable solvent and dry thoroughly. 4. Place the O-ring in the fuel valve, then attach sediment cup. Tighten securely. -
Page 28: Handling And Storage
5.8 - Handling and Storage HANDLING 1. Turn off the engine switch and the fuel valve when transporting the Pressure Washer set. 2. Do not touch engine or pump until the engine has cooled down. 3. Keep the Pressure Washer at a level position in order to prevent fuel spills. -
Page 29: Troubleshooting
6.0 - TROUBLESHOOTING Common issues can be fixed by following the instructions in this guide. If the unit will not function after following these instructions, contact technical support before attempting to use or repair the product. ISSUE CAUSE ACTION Engine oil is too heavy Replace with recommended oil Engine cranks slowly... -
Page 30: Specifications
7.0 - SPECIFICATIONS HCP3000 Max. Pressure 3000PSI Max. GPM Oil Capacity 12 fl. oz. (10W30) 7 HP, Single Cylinder, forced air cooling, 3,600RPM, Type 4-stroke, OHV 25 deg tilt, air cooled Displacement (cm 208cc Ignition mode Non-contact transistor Starting mode... -
Page 31: Warranty
Warranty service must be performed by a Hyundai-authorized service dealer. If you feel your equipment is malfunctioning due to a defect, simply contact our customer support center for technical advice, to file a... - Page 32 Normal wear and tear, such as but not limited to fading of painted or plated surfaces, sheet peeling and other natural deterioration. Damage caused by a lack of maintenance as described in the Hyundai User Manual. Consumable parts: Hyundai does not warrant deterioration of the following unless needed as a part for another warranted repair: Spark plugs, fuel filters, air cleaner elements, clutch discs, tires, wheel bearings, starter ropes, cables, belts, oil and grease.
- Page 33 11. Items not supplied by Hyundai, such as, but not limited to, external wiring, filters, etc. 12. The use of non-genuine Hyundai parts and accessories. 13. Repairs made during the warranty period without first obtaining a case number form Hyundai.
- Page 34 TO OBTAIN WARRANTY SERVICE FOR PARTS OR ACCESSORIES: You must, at your expense, take the Hyundai Power Equipment accessory, or replacement part, or the Hyundai Power Equipment product on which the accessory or replacement part is installed, and proof of purchase to any authorized Hyundai Power Equipment dealer, distributor or distributor’s dealer in the...