Table of Contents
Advertisement
Quick Links
Advertisement
Table of Contents

Related Manuals for Sagem FAX 3150


Summary of Contents for Sagem FAX 3150
- Page 1 User Manual...
-
Page 2: Dear Customer
In buying this device you have chosen a quality product With the installation guide on the following pages, you can made by Sagem. Their device fulfils the most varied re- start using your machine quickly and easily. Detailed de- quirements for private use or in your office and business scriptions can be found in the following sections of this everyday. -
Page 3: Installation Guide
Installation Guide Loading Paper Requirements Before you can receive documents or make copies, you must load paper into the device. Please use only appropri- Contained in the Packing ate paper in standard format A4 · 210¦×¦297 millimetre 1 Device ‚ Device ·... -
Page 4: Extending The Printout And Fax Outlet Tray
4 Place the cover back on the paper tray. Push the paper Connecting the Telephone Handset tray into the device all the way to the stopping point. Type 3 (mit Telefon) (LF¦3155, LF¦3175) Connecting the Handset Plug one end of the spiral cable into the socket on the tel- ephone handset. -
Page 5: Connecting The Telephone Cable
5 Only after completely pull off the protection strip lo- Connecting the Mains Cable cated on the left side of the cartridge. Power Type at Setup Location Check whether the power type of your machine (in- dicated on the type plate) matches the power type available at the setup location. -
Page 6: Table Of Contents
Overview 4 Lists and Reports 41 Function List 41 List of the available functions....page 29 42 Printing Fax Journal 42 Printing fax journal........page 29 Overview of the Menu Functions 43 Printing the Telephone Book 43 Printing the telephone book...... page 29 The following functions are available on your device. -
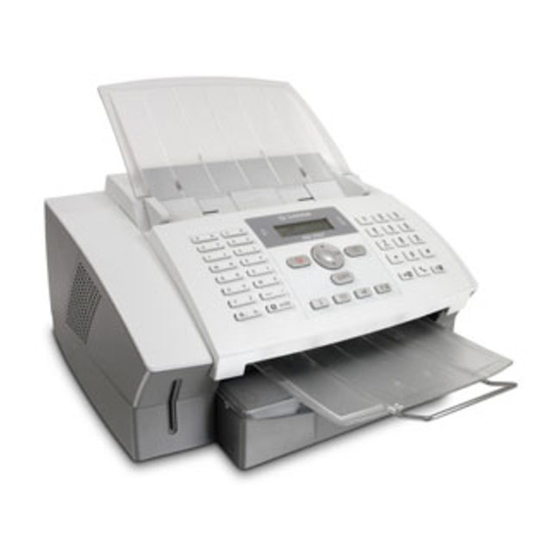
Page 7: Device Overview
‚ Toner cartridge Device Overview Außenansicht Tonerkartusche 1 Cover ‚ Cover 2 Document Support ƒ Document support 3 Document Feed Slot „ Document feed slot 4 Document Guide … Document guide 5 Panel with Display † Panel with display 6 Document Outlet ‡... -
Page 8: Panel With Display
Panel with Display Help ¨—Print list of functions, jobs, settings / printing fax jour- nal or telephone book / Sudoku: printing a game / printing Letter Keypad Keys (A—Z)—Telephone book register: Calling up tele- the fax templates phone book entries / entering letters. Entering capital let- _—Calling up the SMS menu (function is not support- ters by pressing and holding ú... -
Page 9: General Safety Information
General Safety Infor- Power Supply Check whether the power type of your device Check whether the power type of your device (indicated mation on the type plate) matches the power type available at the setup location. Use only the power and telephones cables supplied. Your machine has been tested in conformity with stand- Use only the power and telephones cables supplied. - Page 10 Table of Contents Deleting SMS Messages ........... 19 Modifying the Settings ..........19 Sending Text2Fax ............ 19 Dear customer, ............2 5 Fun and Games........ 20 About this User Manual ..........2 Sudoku ..............20 Installation Guide ........3 6 PC Connection ........ 21 Contained in the Packing ..........
-
Page 11: Telephone Functions
1 Telephone Func- Outside Line Access Code Error In rare cases, the outside line access code may be a different number or a two-digit number. For older tions telephone systems, the outside line access code can be R (= Flash). Press Rø to enter this outside line ac- (LF¦3155, LF¦3175) cess code. -
Page 12: Groups
6 Enter the number using the number pad. Edit Group 7 Confirm with OK. 1 Press am. 2 Using [ select MODIFY . 8 Select the speed for fax transmissions to this recipient. Normally you can select the highest speed. Set a lower 3 Confirm with OK. -
Page 13: Fax
2 Fax 2 Push the document guide inwards, so that it lies level on the documents. Help 3 · Fax Journal Press ¨, 3 and OK to print the fax journal of the last 30 transmissions. Loading Documents Do not insert any documents into the machine that... -
Page 14: Manually Sending A Fax
Manually Sending a Fax You can also call the groups by pressing am and select using [ SEARCH . 1 Insert the document. 3 You can enter additional groups or individual numbers. 2 Enter the desired number using the numeric keypad or Press À. -
Page 15: Fax Polling
4 Enter the four-digit PIN code. the stored faxes. 5 Confirm with OK. Memory Sagem The fax memory can store up to 100 pages (LF¦3150, 6 Use [ to select whether you would like to turn the LF¦3155) or 400 pages (LF¦3170, LF¦3175). Follow the function on or off. -
Page 16: Jobs
Polling Send of Faxes Printing a Job 1 Press OK, 54 and OK. 1 Insert the document. 2 Press OK, 23 and OK. 2 Using [ select the job that you would like to print out. 3 Using [ select SIMPLE or MULTIPLE . With the setting SIMPLE , the document can be polled only 3 Confirm with OK. -
Page 17: Copier
4 Select the desired resolution using [. You have a 3 Copier higher resolution available to you for copying than you have for fax transmissions. RESOL.:FAST —For documents without drawings or Inserting Documents details. Document Formats RESOL.:QUALITY —For documents with small print Use documents with size A4 ·... -
Page 18: Sms
7 Press À. 4 SMS 8 Enter further telephone numbers. Between the individ- ual recipients, press À. You can enter up to 10 recip- Function is not supported in all countries and networks (Function is not supported in all countries and networks) ients. -
Page 19: Changing Transmitting And Receiving Numbers
Deleting SMS Messages Switching Notification Tone On/Off Switching Notification Tone On/Off You will hear a notification tone whenever an SMS mes- SMS Deletion Introduction Your device can store up to 30 SMS messages. If the mes- sage has arrived. You have the option of turning this func- sage memory is full, the device cannot receive any more tion off. -
Page 20: Fun And Games
6 Using [ select the difficulty level. 5 Fun and Games 7 Confirm with OK. 8 Enter, how many copies of the Sudoku you would like Sudoku to print (maximum 9 copies). 9 Confirm with OK. Help 7 · Sudoku You can also print a new Sudoku by pressing ¨, 7 10 Using [ select if you would like to print the solution. -
Page 21: Pc Connection
6 PC Connection 1 Close all open programs and applications before begin- ning the installation process. Place the installation CD in the CD-ROM drive of your computer. The program Type 4 (PC) (LF¦3170, LF¦3175) will start automatically. If the program does not start automatically, select Requirements the CD-ROM drive in the Windows Explorer and start the program Setup.exe with a double-... -
Page 22: Using Companion Suite
5 Next you will be asked to accept the licensing condi- 8 Only after the restart, connect the device to your PC tions. Click on Yes. with a typical USB cable. The USB port of your device can be found on the rear side. 9 Your device is detected as a new peripheral device and 6 The program can now commence with the installation. -
Page 23: Editing The Telephone Book
Editing the Telephone Book Add a Group 1 Enter the name of the group. Introduction With Companion Suite LL, you can edit the telephone 2 Click on Select the members to add new entries to book entries of the device and in the Windows address the group. -
Page 24: Modifying The Settings
Modifying the Settings Displaying the Toner Level Displaying the Toner Level Click on Status. The toner level of the toner cartridge is Settings on the Device indicated by a percentile value between 100 percent (full) 1 Click on the Settings button to modify the basic set- and 0 percent (empty). - Page 25 1 Insert the documents face down into the document 2 Open the photo processing or graphics application feeder. The lower most document will be fed in first. which supports the TWAIN driver. Select the TWAIN You can insert up to 20 documents at a time. Scanner Driver as your scanner.
-
Page 26: Uninstalling The Software
Uninstalling the Software 1 Close all open programs and applications before begin- ning the uninstall process. Load the uninstall program by clicking on Start > Programs > Companion Suite LL > Companion Suite LL > Uninstall in the Start menu. Your computer will now prepare for the uninstall process. -
Page 27: Settings
7 Settings 4 Enter the name using the keys (A—Z). Enter capital letters by pressing and holding ú Help 5 · Settings button. You can enter special characters using ½. Press ¨, 5 and OK to print a list of all settings of your device. -
Page 28: Set Resolution
Set Resolution Switching Transmission Report Custom settings /default settings On/Off The changed settings are stored as new default set- tings. If you select a special function for a one-time Transmission Report After every transmission, the device prints out a transmis- process, take care to restore the default settings or sion report. -
Page 29: Setting The Number Of Rings
Setting the Ring Tones EXT/Answering machine Mode EXT/Answering machine Mode You should set the device to this mode if you have addition- al devices connected to the EXT socket of your device. If an Adjusting Volume Level 1 Press OK, 18 and OK. additionally connected answering machine receives a call, your device will check to determine whether or not the in- 2 Select the desired volume level using [. -
Page 30: Telephone Lines And Additional Devices
8 Telephone Lines DSL Connection In the event that you use a DSL modem: Connect the ma- and Additional chine after the modem. For additional information, please consult the operating manual of your DSL system. Devices ISDN Connection ISDN Connection Your device is an analogue fax device (Group 3). -
Page 31: Using Additional Telephones (Easylink)
Using Additional Telephones (Ea- sylink) Easylink With the Easylink function you can control your device with additional telephones. To use this function, addition- al telephones must be set to the tone dialling mode (DT- MF/MFV tones) (for this purpose see the operating man- ual of your additional telephone). -
Page 32: Service
9 Service Carefully remove the toner cartridge from the de- vice so that no toner dust spills out. Take care where you place the toner cartridge, escaping ton- er dust may soil the surface. Changing the Toner Cartridge Store opened or used toner cartridges in their Original Consumable Materials Use only original consumable materials. -
Page 33: Restart The Recharging Process
10 Wait until INSERTCARD appears on the display. Displaying the Toner Level Push the Plug’n’Print card of the new toner cartridge Toner Level Memory 2 into the opening on the left side next to the paper tray, Whenever you insert a new toner cartridge, you must with the contacts facing to the left. -
Page 34: Fixing A Document Jam
3 Carefully pull out the paper. Cleaning Cleaning Unplug the machine from the power socket before cleaning it. Use a soft, lint-free cloth. Never use liq- uid or easily flammable cleansers (sprays, abrasives, polishes, alcohol, etc.). Do not allow any moisture to reach the interior of the fax machine. - Page 35 Problems with Faxing No fax transmission Check the installation of the device. Check that the device is connected to the mains. No dial tone when lifting the headset Connect the telephone cable to the socket marked LINE. Insert the telephone plug into your PTT line socket. If possible test your device in another telephone line before you contact technical customer services.
- Page 36 Problems with the PC Message on the PC: No connection to the printer Check the installation of the device. Check whether the USB cable is connected and the Companion Suite LL software is installed on to the PC. Check whether the device is installed in the printer menu of the PC as Laser Printer Scanner.
-
Page 37: 10 Glossary
10 Glossary Chain Dialling see Combining Numbers CLIP Additional Devices Calling Line Identification Presentation (see Calling Line You can connect additional devices to your device, such as Identification) answering machines, telephones, charge meters and com- puter modems; these can be connected either in series or in CLIR parallel. - Page 38 Fax Groups Fax machines are classified in terms of internationally LED: Light Emitting Diode standardised fax groups based on their transfer type and Memory speed. Connections between two devices of different If there is no paper or toner in your device, the device will groups is possible;...
- Page 39 Transfer Speed Random Access Memory CCITT/ITU has published international standards for the transmission of data over telephone lines. All short names Resolution begin with V, so these are also referred to as V standards. Number of dots per inch (dpi). For sending and receiving The most important transmission speeds for fax transmis- faxes, the resolution options available are Normal, Fine, sions are: V.17 –...
-
Page 40: 11 Appendix
Scan width............210¦mm Scan width Horizontal resolution Horizontal resolution........8 dots/mm At the beginning of April 2002, SAGEM SA bought the Vertical resolution ....Standard: 3,85 lines/mm Vertical resolution Standard PHILIPS fax business unit. SAGEM SA is now the Euro- ............. Fine: 7,7 lines/mm... -
Page 41: Declaration Of Conformity (Doc)
B Exclusions From Guarantee SAGEM shall have no liability under the guarantee in re- spect of: • damage, defects breakdown or malfunction due to: The CE symbol confirms conformity with the EU direc- - failure to properly follow the installation process and in- tives that apply to the device. - Page 42 Sagem. The information contained herein is de- ted for recycling or disposed of with waste not intended for signed only for use with this product. Sagem is not respon- recycling, depending on the requirements in your country. sible, if this information is applied to other devices.
-
Page 44: Customer Information
LF 3150 · 3155 · 3170 · 3175 27, rue Leblanc · 75015 Paris · FRANCE Tél. : +33 1 58 11 77 00 · Fax : +33 1 58 11 77 50 · www.sagem.com GB · INT Limited company · Capital 300.272.000 Euros · 480 108 158 RCS PARIS...