Table of Contents
Advertisement
Available languages
Available languages
Advertisement
Chapters
Table of Contents

Related Manuals for Pantech Verizon Jest 2


Summary of Contents for Pantech Verizon Jest 2
- Page 1 USER USER USER USER USER GUIDE GUIDE GUIDE GUIDE GUIDE...
- Page 2 User Guide...
-
Page 3: Table Of Contents
CHAPTER 1. BEFORE USING CALL WAITING FUNCTION ..................36 CALLING A NUMBER FROM CONTACTS ..............36 BEFORE USING ....................7 ADJUSTING VOLUME ..................... 36 HANDSET DESCRIPTIONS ..................8 CALLER ID FUNCTION .................... 37 KEY DESCRIPTIONS ....................8 VIBRATE MODE ...................... 37 DISPLAY INDICATORS .................... 12 SPEAKERPHONE MODE .................. - Page 4 SPEED DIALS ......................58 DISPLAY SETTINGS ....................92 IN CASE OF EMERGENCY ..................59 PHONE SETTINGS ....................96 MY NAME CARD ....................61 CALL SETTINGS ....................106 MEMORY ......................109 RECENT CALLS ....................63 USB MODE ......................112 MISSED ........................63 PHONE INFO ......................
- Page 5 SENT ........................137 DRAFTS ........................ 138 ERASE ALL ......................139 BEFORE USING VOICE MAIL......................139 MOBILE IM ......................140 This chapter provides important information about using the JEST 2 including: MOBILE EMAIL ....................140 SETTINGS ......................140 Handset Descriptions Key Descriptions CHAPTER 7.
-
Page 6: Handset Descriptions
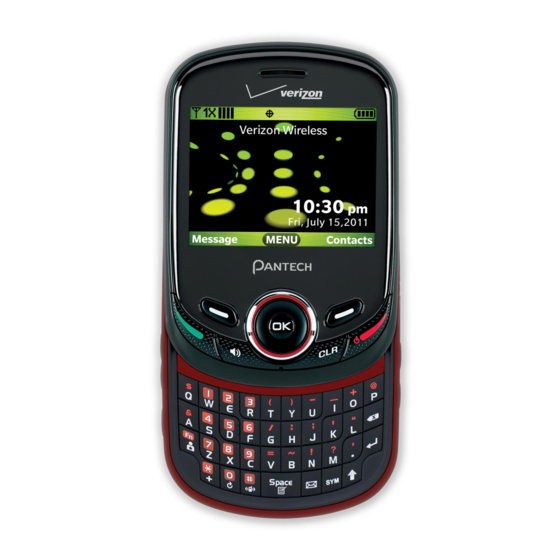
HANDSET DESCRIPTIONS 6. Vibration Mode Key: From the home screen, press and hold to turn Vibration Mode on or off. 7. Notepad + Key: Press to access the Notepad + menu or to add a space between characters. 8. TXT Composer Key: Press to access the New TXT Message Composer. 9. - Page 7 HANDSET DESCRIPTIONS *. Internal Antenna Area Correct Incorrect Holding the device by the internal antenna area might affect the quality of calls. 20. Wrist Strap Eyelet: Accessory eyelet (attach optional straps and lanyards - purchased separately). 21. External Speaker: Music, Ringtones and Sounds are played through the speaker.
-
Page 8: Display Indicators
DISPLAY INDICATORS Icon Icon Descriptions TTY: TTY mode is active. Icon Icon Descriptions 1X Signal Strength: Indicates your phone is in the CDMA 1X network. Voice Call: A call is in progress. More bars indicate a stronger signal. * No icon indicates the phone is in idle mode. D Signal Strength: Indicates your phone is receiving digital data. - Page 9 Icon Icon Descriptions New Contact Icons Mobile 1 Message Tone AVR Listening: Indicates AVR listening. Home Group SIM Card: Indicates SIM Card installed. Business Home Address All Sounds Off: All sounds are set to off. Mobile 2 Work Address Alarm Only: Phone will alert you only with an alarm tone. Company Vibrate Only: Indicates the Ringer Volume is set to Vibrate On.
-
Page 10: Install Sim Card
INSTALL SIM CARD Message Icons Your phone comes with an installed SIM Card that enables you to make and receive Sent Message, Delivery Corrupt Message calls and text messages while traveling outside of the U.S. in supported destinations. Failed Should your SIM Card be lost or damaged, please follow these instructions to install a Message Locked Pending Message Sent new SIM Card:... -
Page 11: Remove Sim Card
REMOVE SIM CARD 5. Insert the battery so that the metal contacts on the battery align with the metal contacts on your phone and press until you hear the “click”. 1. Remove the battery cover and remove the battery. 2. Pull the SIM Card from the SIM Card holder. Correct Incorrect 6. -
Page 12: Install Battery
INSTALL BATTERY REMOVE BATTERY 1. Insert your finger tip into the slot (1), then push down on 1. To remove the battery cover, insert your finger tip into the top of the battery cover and slide it off to remove (2). slot (1), then push down on top of the battery cover and slide it off (2). -
Page 13: Using A Microsd Tm Card
USING A microSD CARD A microSD card stores sounds, videos, images, photos, music, and other files. INSTALLING A microSD CARD Correct Incorrect To install your microSD card: 1. Remove the cover of micro SD Card Slot. 2. Press the microSD card into the slot with the gold contacts facing up. -
Page 14: Basic Operation
• Store the discharged battery in a cool, dark, and dry place. • Purchase a new battery when its operating time gradually decreases after fully charging. • Properly and promptly dispose of the battery according to local laws. BASIC OPERATION •... -
Page 15: Turning The Phone On/Off
TURNING THE PHONE ON/OFF This manual assumes that Display Themes is set to Green Nomad, and Menu Layout set to Grid, which are the default settings. TURNING THE PHONE ON 1. Press and hold the END/POWER Key until the display turns on. USING THE TASK BAR The Task Bar is an alternative way to cycle through menus, requiring fewer key presses. -
Page 16: Menu Summary
MENU SUMMARY Main Menu DEPTH DEPTH DEPTH 5. Media Center 2. Picture & Video 1. Get New Pictures Main Menu DEPTH DEPTH DEPTH 2. My Pictures 1. Contacts 1. New Contact 3. My Videos 2. Contact List 3. Backup Assistant 4. - Page 17 Main Menu DEPTH DEPTH DEPTH Main Menu DEPTH DEPTH DEPTH 9. Settings & Tools 5. Sounds Settings 3. Alert Sounds 1. TXT Message 9. Settings & Tools 7. Phone Settings 1. Airplane Mode 2. Multimedia Message 2. Set Shortcuts 1. Set My Shortcuts 3.
-
Page 18: Making A Call
Main Menu DEPTH DEPTH DEPTH Main Menu DEPTH DEPTH DEPTH 9. Settings & Tools *. Phone Info 1. My Number 1. CDMA Number 9. Settings & Tools 7. Phone Settings #. NAM Selection 1. Auto NAM 2. GSM Number 2. Change NAM 2. -
Page 19: Missed Call Notification
2. To ignore incoming calls, press the Right Soft Key [Ignore]. 4. Enter additional number(s). 5. Press the SEND Key to dial or press the Left Soft Key [Save] to save. 3. To end a call, press the END/POWER Key Answer Options is set to “Auto with... -
Page 20: Call Waiting Function
• Vibrate Only If one of the people you called hangs up during your call, you and the remaining caller stay connected. If you initiated the call and are the first to hang up, all three calls will • Low Medium Low Medium Medium High... -
Page 21: Available Options During A Call
AVAILABLE OPTIONS DURING A CALL 2. The call connects. 3. The phone maintains Emergency Mode for 5 minutes in CDMA mode. After the During a phone call, you can access the following features by pressing the Right Soft 5 minutes, the phone returns to Lock Mode. [Options]: Messaging: To access the Messages Menu during a call. -
Page 22: Memory Function
To remove the assigned contacts from Favorites: 1. Slide the phone up and press the Favorites Key 2. Select the desired contact and press the Right Soft Key [Options]. MEMORY FUNCTION 3. Press 1. Remove and select and press the Key. -
Page 23: Storing A Phone Number
STORING A PHONE NUMBER ADDING OR CHANGING GROUPS To organize your Contacts into groups: The Contact List stores up to 1000 entries. 1. Slide the phone up, press the Right Soft Key [Contacts], then highlight the ADDING A NEW CONTACT desired Contact entry. -
Page 24: Editing Contact Entries
EDITING CONTACT ENTRIES 3. Highlight Pic/Video, and press the Left Soft Key [Set]. 1. My Pictures 2. My Videos, then press the 4. Select Key. ADDING A PHONE NUMBER FROM IDLE MODE 5. Press the Directional Key up, down, left or right to select a picture or a 1. -
Page 25: Default Numbers
DEFAULT NUMBERS EDITING STORED NAMES 1. Slide the phone up, then press the Right Soft Key [Contacts]. The phone number saved when a Contact is created is the Default Number. If more 2. Highlight the Contact entry you want to edit, then press the Left Soft Key than one number is saved in a Contact entry, another number can be set as the Default Number. -
Page 26: Entering Letters, Numbers & Symbols
ENTERING LETTERS, NUMBERS & SYMBOLS 4. [ ] Symbols Key: Press to open the symbols list. 5. [ ] Caps Key: Press to select a letter case for the standard text [Abc] input Your device has a QWERTY Keypad that provides a superior typing experience on a small mode. -
Page 27: Chapter 4. Menu Function
THREE - TOUCH DIALING: 100-500: Slide the phone up, press the first and second digits, then press and hold the third digit of the number to dial. MENU FUNCTION 411: Speed Dial entry 411 (Directory Assistance) is already assigned. 211: Speed Dial entry 211 (Emergency call in GSM mode) is already assigned. -
Page 28: Contacts
NEW CONTACT The default setting is set to Messages. This option won’t be visible unless you change the setting. To add a new number to your Contact List: 2. Enter a name or part of a name in the Go To field at the bottom of the screen or Using this submenu, the number is saved as a new Contact. -
Page 29: Backup Assistant
BACKUP ASSISTANT TO CHANGE GROUP NAME 1. Slide the phone up, press the Key [MENU], then press Contacts, Backup Assistant is a wireless service that stores a copy of your Contact List to a secure web site. Groups. Contacts, 1. Slide the phone up, press the Key [MENU], then press 2. - Page 30 TO SEND A PICTURE MESSAGE TO A GROUP 4. Under Text, input your message and then press the Directional Key down. 5. Under Video, press the Left Soft Key Videos], select the video you would 1. Slide the phone up, press the Key [MENU], then press Contacts, like to send then press the...
-
Page 31: Speed Dials
IN CASE OF EMERGENCY 8. Under Subject, input a subject using the QWERTY Keypad. 9. Press the Right Soft Key [Options] to select from the following: Your phone has a special menu to organize your emergency contacts and personal Review, Save As Draft, Insert Quick... -
Page 32: In Case Of Emergency
TO UNASSIGN EMERGENCY CONTACTS 3. Select the Note you want to edit then press the Key [VIEW]. 1. Slide the phone up, press the Key [MENU], then press Contacts, 4. Press the Key [EDIT], edit the Note, then press the Key [SAVE]. -
Page 33: Recent Calls
MISSED Send via Picture Message: Allows you to send picture messages with the Name Card as • an attachment. Displays information about the 90 most recently missed calls. Place a call to a missed • Send via Video Message: Allows you to send video messages with the Name Card as an call by simply pressing the SEND Key attachment. -
Page 34: Dialed
Erase All: Deletes all entries from Received calls list. • Press the Send Key to place a call to the number. View Timers: Displays usage time. • Press the Right Soft Key [Options] to select: • Press the Left Soft Key [Message] to select: Save to Contacts : Save the contact. -
Page 35: View Timers
VIEW TIMERS VOICE COMMANDS Checks the usage time and manages your calls within the limit you set. To view 11 Your phone is equipped with an Advanced Voice Commands (AVC) feature. This feature timers (Last Call, All Calls, Received Calls, Dialed Calls, Roaming Calls, Transmit Data, allows you to make calls or use the phone’... - Page 36 2. If calling a contact from your Contact List, say Call <Name>. Your phone will Signal Strength Battery Level Volume Balance Minutes Payment My Number ask you to confirm the name you said. Say “Yes“ if it was repeated correctly. That phone number will be dialed.
- Page 37 2. Say “My Verizon”. you frequently experience false activations (when the phone recognizes a name you didn’t say), adjust the sensitivity toward More Sensitive. 3. Your phone will make a web connection. 1. Slide the phone up, press the Key [MENU], then press HELP 9.
-
Page 38: Calculator
2. Press the Right Soft Key [Settings] and then press Prompts. • Input 4 and then press the Directional Key down. • Input 2 and then press the to input (.). 3. Select Mode, 2. Audio playback Timeout, then press the Key. -
Page 39: Calendar
CALENDAR • Vibrate: Press the Left Soft Key or Off, and press the [Set] and select Key. • Event Type: Press the Left Soft Key [Set] and select a event type from the following, The Calendar tool provides easy and convenient access to your schedule. Simply store and press the Key. -
Page 40: E-Diary
1. Slide the phone up, press the Key [MENU], then press 9. Settings & Tools, Blackboard Essay Letter Tools, Calendar. 5. Press the Right Soft Key [Options] then press 1. Preview to preview the 2. Choose the event then press the Key [VIEW]. -
Page 41: Alarm Clock
ALARM CLOCK TURN ON/OFF THE ALARM SETTING 1. Slide the phone up, press the Key [MENU], then press 9. Settings & Tools, The Alarm Clock tool allows you to set up to three alarms. When you set an alarm, the current time is displayed on the top of the home screen. -
Page 42: World Clock
DAYLIGHT SAVING TIME (DST) SETTING 2. To start the stop watch, press the Key [START]. 3. To pause it, press the Key [STOP]. 1. Slide the phone up, press the Key [MENU], then press 9. Settings & Tools, 4. To resume it, press the Key [START]. -
Page 43: Usb Mass Storage
USB MASS STORAGE SEND SAVED MEMO To send a saved memo: USB Mass Storage allows you to transfer files to or from your PC. 1. Slide the phone up, press the Key [MENU], then press 9. Settings & Tools, 1. Slide the phone up, press the Key [MENU], then press 9. -
Page 44: My Verizon
MY VERIZON of other devices to determine their compatibility with this phone. There may be restrictions on using Bluetooth technology in some locations. Check with your local To access your Verizon account information: authorities or Verizon Wireless. If you want more information on this function, visit the 1. - Page 45 SETTINGS You do not need to input the passkey for pairing when the passkey of the Bluetooth headset or hands-free kit is 0000. MY PHONE NAME 6. The handset will prompt you with the following message on the LCD screen: To edit the Bluetooth®...
- Page 46 AUTO PAIR HANDSFREE CALL SOUNDS To set Auto Pair Handsfree On/Off: To set ringtones for types of incoming calls: 1. Slide the phone up, press the Key [MENU], then press CALL RINGTONE 9. Settings & Tools, Bluetooth. 1. Slide the phone up, press the Key [MENU], then press 2.
-
Page 47: Sounds Settings
9. Settings & Tools, 1. Slide the phone up, press the Key [MENU], then press • Vibrate: Press the Directional Key up or down to select or Off, then press the Key [SET]. 5. Sounds Settings, 6. Digit Dial Readout. •... -
Page 48: Display Settings
OPEN/CLOSE SOUNDS • FONT TYPE: Select Font, Sleek Modern Font Dandy Round Font, then press [SET]. Press the Left Soft Key [Preview] to preview the selected font type, or To set the phone to sound a tone when the slider is open or closed: press the Right Soft Key [Skip] to go to the next setting. - Page 49 BACKLIGHT 2. To preview the selected main menu layout, press the Left Soft Key To set the duration for backlight illumination of the Main Screen and Keypad: [Preview]. 1. Slide the phone up, press the Key [MENU], then press 9. Settings & Tools, Grid is the default setting for this device.
- Page 50 CLOCK FORMAT 3. Select the desired option, then press the Key [SET]. To choose the kind of clock to be displayed on the LCD screen: From idle mode, pressing the Key to unlock the keypad and pressing the 1. Slide the phone up, press the Key [MENU], then press Directional Key right will display the...
- Page 51 9. Settings & Tools, 7. Phone Settings, 2. Set Shortcuts, 9. Settings & Tools, 7. Phone Settings, 3.Voice Commands Settings. 2. Set Directional Keys. 2. Press Sensitivity. 2. Select UP Directional Key, LEFT Directional Key DOWN Directional More Sensitive, Automatic Less Sensitive, then press the 3.
-
Page 52: Phone Settings
• Mode: Select the voice command system mode from the following: 3. Press the Key [SAVE] to save and exit. - Prompts: For handset to prompt for required information. The “Time & Date” menu is set by the network environment automatically. The menu - Readout+Alerts: For handset to prompt for required information and readout the disappears when the network mode is set to CDMA mode, or the device acquires contents of the screen and phone alerts. - Page 53 2. Enter the four-digit lock code and press the Key. 6. Press the Key [SET]. 3. Press 1. Edit Codes. In emergency mode, the settings of Restrictions does not apply. 4. Select one of the following settings, then press the Key.
- Page 54 3. Press 5. Restore Phone. 1. Slide the phone up, press the Key [MENU], then press 4. A confirmation message appears in the display, select Yes, and then press 9. Settings & Tools, 7. Phone Settings, 9. SIM Security. Key. 2.
-
Page 55: Call Settings
NAM SELECTION • Auto with Handsfree is available only when a headset or handsfree device is connected. Enables Auto NAM (Number Assignment Modules) or manually selects a NAM. • To answer incoming calls, press the Send Key AUTO NAM AUTO RETRY Automatically switches the phone to proper NAM when you have multiple NAM To set a period of time the phone waits before automatically redialing when an registrations. -
Page 56: Memory
MEMORY 1. Slide the phone up, press the Key [MENU], then press 9. Settings & Tools, 8. Call Settings, 5. Voice Privacy. SAVE OPTIONS 2. Select or Off, then press the Key [SET]. To select whether to save to Phone Memory or to Card Memory when saving files: DTMF TONES 1. - Page 57 2. Press 1. Card Memory Usage, then press the Right Soft Key [Options]. If you have selected Contacts, you can select View, 2. Copy 3. Erase after pressing the Right Soft Key [Options]. 3. Press 1. Format card, enter your 4-digit lock code and press the Key.
-
Page 58: Usb Mode
USB MODE *. Phone Info, 2. SW/HW Version. Software Version PRL Version ERI Version Browser Version You can use a USB data cable to transfer data between the device and a compatible PC. Media Center Version MSUI Version HW Version MEID Important: To activate your device for data transfer, select... -
Page 59: Global Phone
OPERATING SYSTEM • DISPLAY THEMES: Select White, Knight Green Nomad, then press the Key [SET] or To view information about your phone’ s operating system: press the Right Soft Key [Skip] to go to the next setting. To preview the selected display theme, press the Left Soft Key [Preview]. -
Page 60: Media Center
MEDIA CENTER Your phone provides a unique feature - Media Center - that enables you to download ringtones, wallpapers, games and more from your network to your phone. Please contact your service provider for the availability of these services. Music & Tones Picture &... -
Page 61: Music & Tones
MUSIC & TONES • Ringtone: Set as a ringtone. A confirmation message appears. 2. Contact ID: The SET AS CONTACT ID • screen appears. Select the Contact you want to The Music & Tones menu allows you to manage ringtones, music and sound files. assign the ringtone to, then press the Key. - Page 62 NATIVE MUSIC PLAYER PLAYING MUSIC 1. With the phone closed, press the Key to unlock the keypad. Or slide the Playing Icon phone up, press the Key [MENU], then press 5. Media Center, Rhythm of Love Album Jacket information 1. Music & Tones, 3.
-
Page 63: Picture & Video
RECORDING NEW SOUNDS 2. Press 1. Get New Pictures, then follow the on screen prompts. 1. Slide the phone up, press the Key [MENU], then press 5. Media Center, The downloaded application will be included in the list when you access: 1. - Page 64 MY VIDEOS through the display screen. left or right to zoom in or out (except when resolution is The My Videos menu allows you to view all the videos you have recorded, store selected • Press the Directional Key set to 1600x1200). videos in your phone, send videos to the Online Album, delete videos and access •...
-
Page 65: Games
left or right to zoom in or out PLAYING DOWNLOADED GAMES • Press the Directional Key • Press the Right Soft Key [Options] and choose from the following and press the 5. Media Center, 1. Slide the phone up, press the Key [MENU], then press Key [SET]: Games. -
Page 66: Extras
5. Media Center, 1. Slide the phone up, press the Key [MENU], then press 5. Browse & Download. 1. Get New Applications, then press the 2. Select Key. MESSAGING 3. Follow the on-screen prompts. This chapter addresses Voicemail, TXT, Picture, Video, Voice EXTRAS Messaging functions including: DOWNLOADING NEW APPLICATIONS... -
Page 67: When A New Message Arrives
WHEN A NEW MESSAGE ARRIVES 6. Cancel Message: Cancel the message and select whether to save it in Drafts. 5. When completed, press the Key [SEND] to send the text message. 1. The following display appears when a new message When navigating through the Messaging menu, press the Right Soft Key... - Page 68 8. Under Subject, input the message subject. 7. Under Subject, input the message subject. 9. Press the Right Soft Key [Options] to access the following: 8. Press the Right Soft Key [Options] to access the following: • Preview: Shows the picture message before it is sent. •...
-
Page 69: Messages
8. Press the Right Soft Key [Options] to access the following: Erase Sent / Received: Allows you to delete unlocked sent and received messages. • • Erase Drafts: Allows you to delete unlocked messages stored in Drafts. • Review: Shows the voice message before it is sent. •... -
Page 70: Inbox
Extract Addresses: Allows you to extract contacts from the message, then you can save • Lock: Locks the messages. them to the Contact List, make a call or send the message. Unlock: Unlocks the messages. Message Info: Shows the message information. •... -
Page 71: Drafts
ERASE ALL 3. Press the Directional Key left or right to view the previous or next message. 4. To send the message, press the Key [SEND]. To erase all messages stored in your phone: 5. When navigating through the Sent menu, press the Right Soft Key 1. -
Page 72: Mobile Im
MOBILE IM INBOX VIEW 1. Select By Time Contact, then press the Key. Mobile IM menu allows you to send and receive instant messages using one of the following messenger services: • Time: Sorts received and sent messages into Inbox and Sent folders by time. Contact: Groups all received and sent messages by each contact. - Page 73 MULTIMEDIA AUTO RECEIVE SIGNATURE or Off, then press the 1. Select Key. Allows you to create a signature that can be automatically inserted at the end of each message. • Picture, Video and Voice messages are downloaded automatically. • Off: Picture, Video and Voice messages must be retrieved from the Inbox or by responding None 1.
-
Page 74: Chapter 7. Safety And Warranty
SAFETY AND WARRANTY This chapter addresses the safety guidelines and precautions to follow when operating your phone. Before operating your phone, please be aware of all the safety details. This chapter contains the terms and conditions of services and the warranty for your phone. Please review them thoroughly. Safety Information for Wireless FDA Consumer Update Handheld Phones... -
Page 75: Safety
SAFETY INFORMATION FOR WIRELESS HANDHELD PHONES Do not use the phone with a damaged antenna. If a damaged antenna comes into contact with the skin, a minor burn may result. Please contact your local READ THIS INFORMATION BEFORE USING YOUR HANDHELD dealer for replacement antenna. - Page 76 PACEMAKERS VEHICLES The Health Industry Manufacturers Association recommends that a minimum RF signals may affect improperly installed or inadequately shielded electronic separation of six (6”) inches be maintained between a handheld wireless systems in motor vehicles. Check with the manufacturer or its representative phone and a pacemaker to avoid potential interference with the pacemaker.
-
Page 77: Safety Information For Fcc Rf Exposure
SAFETY INFORMATION FOR FCC RF EXPOSURE Areas with a potentially explosive atmosphere are often, but not always, clearly marked. They include fueling areas such as gas stations; below deck on boats; WARNING! READ THIS INFORMATION BEFORE USING fuel or chemical transfer or storage facilities; vehicles using liquefied petroleum CAUTIONS gas (such as propane or butane);... -
Page 78: Sar Information
SAR INFORMATION guide, is 1.17 W/kg (Body-worn measurements differ among phone models, depending upon available accessories and FCC requirements). While there may THIS MODEL PHONE MEETS THE GOVERNMENT’S be differences between the SAR levels of various phones and at various positions, REQUIREMENTS FOR EXPOSURE TO RADIO WAVES. -
Page 79: Fda Consumer Update
We are committed to providing a selection of compatible devices for our determine if you hear any interfering noise. Consult your service provider about its customers who wear hearing aids. return and exchange policies and for information on hearing aid compatibility. THIS PHONE HAS A HAC RATING OF M3/T3 HOW WILL I KNOW IF MY HEARING AID WILL WORK WITH A PARTICULAR DIGITAL WIRELESS PHONE? - Page 80 associated with using wireless phones. There is no proof, however, that wireless FDA belongs to an interagency working group of the federal agencies that have phones are absolutely safe. Wireless phones emit low levels of radiofrequency responsibility for different aspects of RF safety to ensure coordinated efforts at the energy (RF) in the microwave range while being used.
- Page 81 RF is drastically lower because a person’ s RF exposure decreases rapidly with A combination of laboratory studies and epidemiological studies of people increasing distance from the source. The so-called “cordless phones, ” which have actually using wireless phones would provide some of the data that are needed. a base unit connected to the telephone wiring in a house, typically operate at far Lifetime animal exposure studies could be completed in a few years.
- Page 82 conducted through contracts to independent investigators. The initial research the Spatial-Peak Specific Absorption Rate (SAR) in the Human Body Due to will include both laboratory studies and studies of wireless phone users. The Wireless Communications Devices: Experimental Techniques, ” sets forth the first CRADA will also include a broad assessment of additional research needs in the consistent test methodology for measuring the rate at which RF is deposited context of the latest research developments around the world.
-
Page 83: Avoid Potential Hearing Loss
10. What about children using wireless phones? uses a “compatible” phone and a “compatible” hearing aid at the same time. This standard was approved by the IEEE in 2000. FDA continues to monitor the use The scientific evidence does not show a danger to users of wireless phones, of wireless phones for possible interactions with other medical devices. -
Page 84: Fcc Compliance Information
associated in some studies with tinnitus (a ringing in the ear), hypersensitivity to AMERICAN ACADEMY OF AUDIOLOGY sound and distorted hearing. Individual susceptibility to noise-induced hearing 11730 Plaza American Drive, Suite 300 loss and other potential hearing problems varies. Reston, VA 20190 The amount of sound produced by a portable audio device varies depending on Voice: 800-AAA-2336 the nature of the sound, the device, the device settings and the headphones. -
Page 85: 12 Month Limited Warranty
12 MONTH LIMITED WARRANTY (1) This device may not cause harmful interference, and Personal Communications Devices, LLC. (the “Company”) warrants to the original (2) This device must accept any interference received. Including interference that retail purchaser of this handheld portable cellular telephone, that should this may cause undesired operation. - Page 86 The Company disclaims liability for removal or reinstallation of the product, ANY IMPLIED WARRANTIES, INCLUDING ANY IMPLIED WARRANTY OF for geographic coverage, for inadequate signal reception by the antenna or for MERCHANTABILITY OR FITNESS FOR A PARTICULAR PURPOSE, SHALL BE LIMITED communications range or operation of the cellular system as a whole.
- Page 87 Guía del Usuario...
- Page 88 CAPITULO 1. ANTES DE USAR FUNCION DE LLAMADA EN ESPERA ..............37 LLAMADA DE UN NUMERO DE LA LISTA DE CONTACTOS ........38 BEFORE USING ....................7 AJUSTE DEL VOLUMEN ..................38 DESCRIPCIONES DEL TELEFONO ................8 FUNCION DE IDENTIFICACION DEL INTERLOCUTOR ..........39 DESCRIPCION DE LAS TECLAS...................8 MODO VIBRACION ....................
- Page 89 MARCADOS RAPIDOS .................... 63 AJUSTES DE LA PANTALLA .................. 101 EN CASO DE EMERGENCIA ..................64 AJUSTES DEL TELEFONO ..................106 MI TARJETA DE VISITAS ..................67 AJUSTES DE LLAMADA ..................119 MEMORIA ......................122 LLAMADAS RECIENTES ..................68 MODO USB ......................126 NO CONTESTADAS ....................
- Page 90 ENVIADOS......................156 BORRADORES ...................... 157 BORRAR TODOS ....................157 ANTES DE USAR BUZON ......................... 158 IM MOVIL ......................158 Este capítulo provee informaciones importantes sobre la utilización del JEST 2 incluyendo: E-MAIL MOVIL ..................... 159 AJUSTES....................... 159 Descripciones del Teléfono Descripciones de las Teclas CAPITULO 7.
-
Page 91: Descripciones Del Telefono
DESCRIPCIONES DEL TELEFONO 6. Tecla Modo de Vibración: En la pantalla inicial, presione y mantenga presionada para activar o desactivar el Modo Vibración. 7. Tecla Bloc de Notas+: Presione para acceder el menú Notepad + o para agregar un espacio entre caracteres. 8. - Page 92 DESCRIPCIONES DEL TELEFONO 25. Teclas de Volumen: Presione para ajustar el volumen maestro en la pantalla inicial, ajuste el volumen del auricular durante una llamada o ajustar el volumen cuando reproduzca música. 26. Tecla Mandos de Voz: Presione para acceder el menú MANDOS DE VOZ. *.
-
Page 93: Indicadores En La Pantalla
INDICADORES EN LA PANTALLA Icono Descripciones de los Iconos Icono Descripciones de los Iconos Sin Servicio: El teléfono no puede recibir la señal del sistema. Intensidad de la Señal 1X: Indica que su teléfono está en la red CDMA TTY: El modo TTY está activado. 1X. - Page 94 Icono Descripciones de los Iconos Iconos de Nuevos Contactos Nivel de la Batería: Nivel de carga de la batería – cuanto más barras, Móvil 1 Tono de Mensaje más carga. Residencia Grupo AVR Activado: El modo AVR está activado. Comercial Dirección Residencial Escucha AVR: Indica Escucha AVR.
-
Page 95: Instalacion De La Tarjeta Sim
INSTALACION DE LA TARJETA SIM Iconos de Mensajes Su teléfono es proveído con una Tarjeta SIM instalada que permite la realización y Mensaje Enviado, Falla al Mensaje Corrompido recepción de llamadas y mensajes de texto mientras esté viajando fuera de Estados Entregar Unidos en destinos soportados. -
Page 96: Remocion De La Tarjeta Sim
REMOCION DE LA TARJETA SIM 5. Inserte la batería de forma que los contactos metálicos sean alineados con los contactos metálicos en su teléfono y presione hasta oír que se encajó. 1. Remueva la tapa de la batería y remueva la batería. 2. -
Page 97: Instalacion De La Bateria
4. Alinee las lengüetas de la tapa con las ranuras en la parte trasera del dispositivo y desplace la tapa de la batería en la unidad hasta que sea fijada en el lugar. Correcto Incorrecto REMOCION DE LA BATERIA 1. Para remover la tapa de la batería, inserte la punta del dedo INSTALACION DE LA BATERIA en la ranura (1) y enseguida presione en la parte superior de 1. -
Page 98: Utilizacion De Una Tarjeta Microsd Tm
UTILIZACION DE UNA TARJETA microSD • Si el conector de la batería no estuviere adecuadamente alineado, podrán ocurrir daños al conector de carga y al teléfono podrá no ser cargado. Una tarjeta microSD almacena sonidos, vídeos, imágenes, fotos, música y otros •... -
Page 99: Operacion Basica
• Trate de mantener las baterías en temperaturas entre 0oC y 35oC. Si la batería es almacenada en lugares con temperaturas arriba o abajo del rango recomendado, déjela calentarse o enfriarse antes de usar. • Almacene la batería descargada en un lugar frío, oscuro y seco. •... -
Page 100: Para Encender/Apagar El Telefono
PARA ENCENDER/APAGAR EL TELEFONO 3. Para volver a la página anterior, presione la tecla CLR . Para salir del menú actual y volver a la pantalla inicial, presione la tecla FIN/ALIMENTACION . PARA ENCENDER EL TELEFONO 4. A partir de la pantalla inicial, presione la tecla 0 para desbloquear el teclado 1. -
Page 101: Cambio Rapido Entre Los Menus Principales
CAMBIO RAPIDO ENTRE LOS MENUS PRINCIPALES Menú Principal 2º. NIVEL 3º. NIVEL 4º. NIVEL Mientras un menú esté siendo accedido, usted puede cambiar rápidamente entre las 3. Llamadas Recientes 1. No Contestadas otras opciones del menú. 2. Recibidas 1. Desplace el teléfono hacia arriba y presione la Tecla 0 [MENU] y enseguida 3. - Page 102 Menú Principal 2º. NIVEL 3º. NIVEL 4º. NIVEL Menú Principal 2º. NIVEL 3º. NIVEL 4º. NIVEL 9. Ajustes y 1. Mi Verizon 9. Ajustes y 5. Ajustes de Sonidos 8. Conexión del Herramientas Dispositivo Herramientas 2. Volumen Maestro 9. Enciende/Apaga 1.
- Page 103 Menú Principal 2º. NIVEL 3º. NIVEL 4º. NIVEL Menú Principal 2º. NIVEL 3º. NIVEL 4º. NIVEL 9. Ajustes y 7. Ajustes del Teléfono 3. Ajustes de Mandos 1. Confirmación de 9. Ajustes y 7. Ajustes del Teléfono #. Selección NAM 1.
-
Page 104: Para Realizar Una Llamada
CONTESTAR LLAMADAS Menú Principal 2º. NIVEL 3º. NIVEL 4º. NIVEL 1. Cuando su teléfono suena o vibrar, desplace el teléfono hacia arriba o 9. Ajustes y *. Informaciones sobre el 1. Mi Número 1. Número CDMA Teléfono 2. Número GSM presione la Tecla 0 y la Tecla ENVIAR para contestar la llamada recibida. -
Page 105: Funcion De Espera/Pausa
FUNCION DE ESPERA/PAUSA REALIZACION DE UNA LLAMADA INTERNACIONAL 1. Desplace el teléfono hacia arriba y enseguida presione y mantenga presionada Las pausas son utilizadas para sistemas automatizados (es decir, buzón o tarjetas de la Tecla * . El carácter “+” necesario para llamadas internacionales será llamadas). -
Page 106: Llamada De Un Numero De La Lista De Contactos
FUNCION DE IDENTIFICACION DEL INTERLOCUTOR 1. Para contestar otra llamada, presione la Tecla ENVIAR . Este procedimiento coloca la primera llamada en espera. Para volver al primer interlocutor, Esta función exhibe el número de la persona que está llamando cuando su teléfono presione la Tecla ENVIAR nuevamente. -
Page 107: Opciones Disponibles Durante Una Llamada
OPCIONES DISPONIBLES DURANTE UNA LLAMADA REALIZACION DE UNA LLAMADA DE EMERGENCIA Durante una llamada telefónica, usted puede acceder las funciones siguientes La función E911 activa automáticamente el Modo Llamada de Emergencia cuando presionando la Tecla de Función Derecha [Opciones]: usted marca el número de emergencia programada, “911”. Esta función también opera en Modo Bloqueado y fuera del área de servicio. -
Page 108: Menu Favoritos
2. Inserte “FLORES” con el teclado QWERTY y presione la Tecla ENVIAR para conectar. FUNCION DE MEMORIA • Si el icono del Modo de Inserción Alfabética estuviere activado, solamente serán exhibidas letras mayúsculas. • Presionar la Tecla Cambiar Modo cambiará entre el Modo de Inserción Numérica Este capítulo abarca las funciones de memoria incluyendo e Inserción Alfabética. -
Page 109: Almacenamiento De Un Numero Telefonico
ALMACENAMIENTO DE UN NUMERO TELEFONICO Imagen/Vídeo Campanilla Tono de Mensaje Grupo Dirección Residencial Dirección de Trabajo Empresa Cargo La Lista de Contactos almacena hasta 1000 registros. Cumpleaños Notas ADICION DE UN NUEVO CONTACTO 4. Cambie los datos conforme la necesidad y enseguida presione la Tecla 0 1. -
Page 110: Edicion De Registros De Contactos
ADICION DE UN REGISTRO DE MARCADO RAPIDO Presione la Tecla de Función Izquierda [Reproducir] para oír una campanilla seleccionada o presione la Tecla de Función Derecha [Opciones] para visualizar las Para agregar un registro al grupo de Marcado Rápido: informaciones del archivo antes de presionar la tecla 0. 1. - Page 111 6. Si un número de teléfono ya haya sido atribuido al tipo seleccionado, 2. Seleccione el registro del Contacto que desea editar y enseguida presione la Sí seleccione para sustituir el registro existente y enseguida presione la Tecla Tecla de Función Izquierda [Editar].
-
Page 112: Numeros Estandar
INSERCION DE LETRAS, NUMEROS Y SIMBOLOS 4. Seleccione el número de teléfono de marcado rápido a ser borrado. 5. Presione la Tecla de Función Derecha [Opciones], seleccione 1. Remoción Su dispositivo tiene un Teclado QWERTY que proporciona una experiencia perfeccionada del Marcado Rápido y presione la Tecla 0. -
Page 113: Marcado Con Uno, Dos O Tres Toques
3. [ ] Tecla Espacio: Presione para aceptar una palabra y agregar un espacio MARCADO CON DOS TOQUES: mientras inserte letras. En el modo inactivo, presione para acceder el menú Bloc 10-94: Desplace el teléfono hacia arriba y enseguida presione el primer dígito y de Notas +. - Page 114 FUNCIONES DEL MENU Este capítulo abarca el acceso al menú y la utilización de sus funciones y recursos para personalizar su JEST CONTACTOS LLAMADAS HERRAMIENTAS AJUSTES RECIENTES My Verizon Nuevo Contacto Mandos de Voz MaMi Verizon Lista de Contactos No Contestadas Calculadora Volumen Maestro...
-
Page 115: Contactos
NUEVO CONTACTO Función Derecha [Contactos]. La lista de nombres existente en sus contactos será exhibida alfabéticamente. Para agregar un nuevo número a su Lista de Contactos: La configuración por defecto está configurado para Mensajes. Esta opción no será Utilizando este menú secundario, el número será grabado como un nuevo Contacto. visible a menos que cambie la configuración. -
Page 116: Asistente De Backup
2. Seleccione el grupo al cual usted desea agregar el contacto y después presione Si la tarjeta SIM no está instalada en su teléfono en el modo Solamente SIM, el mensaje que se muestra a continuación será exhibido en la pantalla LCD “NO la Tecla de Función Derecha [Opciones]. - Page 117 2. Seleccione el grupo para el cual desea enviar un mensaje y a seguir presione la 9. Presione la Tecla de Función Derecha [Opciones] para seleccionar entre las siguientes: Pré-visualizar, Grabar Como Borrador, Ingresar Texto Rápido, Tecla de Función Derecha [Opciones].
-
Page 118: Marcados Rapidos
MARCADOS RAPIDOS 9. Para enviar el Mensaje de Video, presione la Tecla 0[ENVIAR] o presione la Tecla ENVIAR En el modo inactivo, los llamados se pueden realizar para números almacenados en marcados rápidos desplazando el teléfono hacia arriba, presionando y manteniendo PARA ENVIAR UN MENSAJE DE VOZ A UN GRUPO presionada la tecla numérica de localización en el teclado. -
Page 119: En Caso De Emergencia
EN CASO DE EMERGENCIA 3. Para seleccionar un contacto en la Lista de Contactos, presione 1. De Contactos, seleccione el registro del Contacto y a seguir presione la Tecla Su teléfono tiene un menú especial para organizar sus contactos de emergencia e 0. -
Page 120: Mi Tarjeta De Visitas
MI TARJETA DE VISITAS 4. Ingrese las informaciones utilizando el Teclado QWERTY y a seguir presione la Tecla 0 [GRABAR]. Una Tarjeta de Visitas con el número del teléfono móvil será exhibida automáticamente. 5. Las informaciones ingresadas ahora se exhibirán en el lugar de Nota EDITAR MI TARJETA DE VISITAS Nota 2... -
Page 121: Llamadas Recientes
NO CONTESTADAS Detalles: Exhibe las informaciones de la llamada. Borrar: Borra la llamada de la lista de Llamadas Recibidas. Exhibe informaciones sobre las 90 llamadas no contestadas más recientes. Realice Bloquear/Desbloquear: Bloquea o desbloquea el registro. una llamada para un número de llamada no contestada apenas presionando la Tecla Borrar Todos: Borra todos los registros de la lista Llamadas Recibidas. -
Page 122: Bloqueadas
BLOQUEADAS Bloquear/Desbloquear: Bloquea o desbloquea el registro. Borrar Todos: Borra todos los registros de la lista Todas las Llamadas. Este menú será exhibido solamente cuando llamadas recibidas son restringidas en el Visualizar Timers: Exhibe el tiempo de uso. menú Restricciones. •... -
Page 123: Mandos De Voz
MANDOS DE VOZ pausadamente, pero no haga largas pausas entre los dígitos. Por favor, pronuncie un mando 1. Usted escuchará: y el menú Mandos de Voz Su teléfono viene equipado con una función Mandos de Voz Avanzados (AVC). Esta será exhibido. función permite que usted realice llamadas o utilice las funciones del teléfono utilizando apenas su voz. - Page 124 VERIFICAR <ITEM> REPRODUCIR <LISTA DE REPRODUCCIÓN> El mando Verificar permite que usted verifique las informaciones de estado para su Pronuncie “Reproducir” seguido por un título de la lista de reproducción y a seguir su teléfono. Usted puede pronunciar “Verificar” o “Verificar Estado”...
- Page 125 1. Desplace el teléfono hacia arriba, presione la Tecla 0 [MENU] y a seguir Voz permite que los usuarios mejoren dramáticamente la precisión del reconocimiento 9. Ajustes y Herramientas, Herramientas, 1. Mandos de Voz. después de adaptar sus voces. Los usuarios que alcanzan la precisión de reconocimiento de presione voz no encontrarán ninguna ventaja para realizar la función Adaptar Voz.
-
Page 126: Calculadora
necesarias y lectura de los contenidos de la pantalla y alarmas • Ingrese 2 y a seguir presione la Tecla para inserir (.). de teléfono. • Ingrese 5 y a seguir presione la Tecla 0 y se exhibirá la respuesta (9.5). - Lectura: Para que el teléfono exhiba el prompt para informaciones necesarias y 3. -
Page 127: Calendario
5. Presione la Tecla de Función Izquierda [Reiniciar] para borrar los campos. • Hora de Alarma: Presione la Tecla de Función Izquierda [CONFIRMAR] y seleccione la hora de alarma antes que de la realización del evento entre las opciones Presione la Tecla de Función Derecha [Cerrar] para retornar al menú... -
Page 128: Diario Electronico
VISUALIZACION DEL EVENTO GRABADO 3. En el campo Clima y Sentimiento, presione la Tecla de Función Izquierda [Confirmar] y enseguida seleccione uno de los íconos y presione la Tecla 0. 1. Desplace el teléfono hacia arriba, presione la Tecla 0 [MENU] y enseguida 4. -
Page 129: Reloj De Alarma
RELOJ DE ALARMA 2. Seleccione un Diario Electrónico y enseguida presione la Tecla de Función Derecha [Opciones]. La herramienta Reloj de alarma permite que usted configure hasta tres alarmas. 3. Seleccione 1. Enviar y presione la Tecla0, y enseguida componga un Cuando usted ajuste una alarma, la hora actual será... -
Page 130: Cronometro
CRONOMETRO [Reproducir] para reproducir una campanilla. Presione la Tecla 0 [CONFIRMAR] para seleccionar. Cuenta simultáneamente el tiempo de hasta ocho eventos diferentes. Para operar el 4. Presione la Tecla 0 [GRABAR] para ajustar la alarma. cronómetro: 1. Desplace el teléfono hacia arriba, presione la Tecla 0 [MENU] y enseguida ACTIVACION/DESACTIVACION DEL AJUSTE DE LA ALARMA presione 9. -
Page 131: Reloj Mundial
RELOJ MUNDIAL 2. Presione la Tecla de Función Izquierda [Nueva] para inserir una nueva nota. Para exhibir la hora y fecha en las ciudades pré-programadas: 3. Ingrese el texto para una nueva nota. 1. Desplace el teléfono hacia arriba, presione la Tecla 0 [MENU] y enseguida 4. -
Page 132: Almacenamiento En Lotes Usb
MI VERIZON BORRAR NOTAS GRABADAS Para borrar una nota grabada: Para acceder las informaciones da su cuenta Verizon: 1. Desplace el teléfono hacia arriba, presione la Tecla 0 [MENU] y enseguida 1. Desplace el teléfono hacia arriba, presione la Tecla 0 [MENU] y enseguida presione 9. - Page 133 soportando los siguientes perfiles: Audífono, Altavoz, Estéreo, Acceso a la Agenda 3. El teléfono exhibirá el mensaje que se indica a continuación en la pantalla LCD: Telefónica, Object Push Básica para Imagen vCard, VCalendar y Obtener Archivos. Para “AJUSTE EL DISPOSITIVO AL CUAL ESTE TELEFONO SI ESTA CONECTANDO EN asegurar la interoperacionalidad entre otros dispositivos que soportan la tecnología EL MODO DE DETECCION”.
- Page 134 OPCIONES 1. Desplace el teléfono hacia arriba, presione la Tecla 0 [MENU] y enseguida 9. Ajustes y Herramientas, Bluetooth. presione 1. Desplace el teléfono hacia arriba, presione la Tecla 0 [MENU] y enseguida 2. Presione la Tecla de Función Derecha [Opciones].
-
Page 135: Ajustes De Los Sonidos
AJUSTES DE LOS SONIDOS SONIDOS DE LAS LLAMADAS Para ajustar los tonos de campanilla para tipos de chamadas recibidas: CONFIGURACION FACIL TONO DE CAMPANILLA DE LLAMADA El menú Configuración Fácil permite que usted ajuste cinco estados para Ajustes de Sonidos con operación simples. 1. - Page 136 2. Seleccione 1. Mensaje de TEXTO, 2. Mensaje de Multimedia, 3. Buzón, VOLUMEN DEL TECLADO 4. Tono de Emergencia 5. Llamada No Contestada, y enseguida presione Para ajustar el volumen del teclado: la Tecla 0 . 1. Desplace el teléfono hacia arriba, presione la Tecla 0 [MENU] y enseguida 3.
- Page 137 AJUSTES DE LA PANTALLA • Bip de Minuto: Alerta a cada minuto durante una llamada. Conectar Llamada: Alerta cuando una llamada está conectada. • Permite que usted personalice la pantalla. • Actualización del Software: Alerta cuando una actualización del software está disponible. CONFIGURACION FACIL 3.
-
Page 138: Ajustes De La Pantalla
Dirección 1 para abajo para seleccionar el color de fuente deseado. seleccionado o presione la Tecla de Función Derecha [Saltar] para acceder el próximo ajuste. 3. Presione la Tecla de Dirección 1 para la izquierda o derecha para • TIPO DE FUENTE: Seleccione Fuente VZW,... - Page 139 3. Seleccione una pantalla deseada, y enseguida presione la Tecla 0 2. Ítems del Menú: Reinicia los Ítems del Menú para os Ítems iniciales del Menú. 3. Posiciones de los Ítems: Reinicia las Posiciones de los ítems para las Posiciones iniciales [CONFIRMAR].
-
Page 140: Ajustes Del Telefono
FORMATO DO RELOJ AJUSTE DE ACCESOS RAPIDOS Para seleccionar el tipo de reloj que se exhibirá en la pantalla LCD: Su teléfono ofrece la opción de asignar una tecla de acceso rápido (Tecla de Dirección 1. Desplace el teléfono hacia arriba, presione la Tecla 0 [MENU] y enseguida para la izquierda, hacia arriba, para abajo) para una función favorita o frecuentemente presione 9. - Page 141 AJUSTAR TECLAS DE DIRECCIÓN de hasta tres opciones y pronunciará una de cada vez. Usted puede controlar la frecuencia con que su teléfono solicitará la confirmación del nombre o número En el modo inactivo, usted pode especificar a función que accedió al presionar la Tecla reconocido.
- Page 142 ADAPTACION DE VOZ 3. Seleccione Modo, 2. Reproducir Audio 3. Límite de Tiempo, y enseguida presione la Tecla 0. La función Mandos de Voz es independiente del interlocutor, esto significa que • Modo: Seleccione el modo del sistema de mando de voz entre los que se indican a ningún entrenamiento o adaptación es necesaria.
- Page 143 HORA Y FECHA 2. Presione la Tecla de Dirección 1 hacia arriba o para abajo o ingrese el nombre del país en el campo Para, seleccionar el país deseado y enseguida presione AJUSTE DE HORA Y FECHA País Actual, la Tecla 0 [CONFIRMAR]. Para visualizar la opción ayuda para 1.
- Page 144 código de cuatro dígitos en el campo Ingrese el Nuevo Código. Ingrese el posible realizar llamadas de emergencia. Reingrese el Nuevo nuevo código de cuatro dígitos de nuevo en el campo 1. Desplace el teléfono hacia arriba, presione la Tecla 0 [MENU] y enseguida Código presione 9.
- Page 145 3. Presione 5. Recuperar Teléfono. 5. Ingrese el nuevo código PIN y Reingrese el código PIN, enseguida presione la Tecla 0[OK]. 4. Un mensaje de confirmación se exhibirá en la pantalla; seleccione Sí enseguida presione la Tecla 0. BLOQUEO DE LA TARJETA SIM 5.
- Page 146 1. Desplace el teléfono hacia arriba, presione la Tecla 0 [MENU] y enseguida 2. Seleccione 2. Cambiar NAM y enseguida presione la Tecla 0. 9. Ajustes y Herramientas, 7. Ajustes del Teléfono, presione 3. Seleccione NAM 1 NAM 2 y enseguida presione la Tecla 0 [CONFIRMAR]. *.
-
Page 147: Ajustes De Llamada
MODO TTY 2. Seleccione Activar Desactivar y enseguida presione la Tecla 0 [CONFIRMAR]. Usted pode acoplar un dispositivo TTY a su teléfono habilitando la comunicación con interlocutores utilizando un dispositivo TTY. Un teléfono con suporte TTY es capaz de TONOS DTMF traducir caracteres tecleados para voz. -
Page 148: Memoria
4. Seleccione el País deseado y presione la Tecla de Función Izquierda presione 9. Ajustes y Herramientas, Memoria, 2. Memoria del Teléfono. [Detalles]. • Código del País: Rellenado con base en la tabla de País de Referencia y la tabla MCC. 2. - Page 149 2. Seleccione 8. Mover Todos para la Tarjeta y enseguida presione la Tecla BORRADO Y MOVIMIENTO DE ARCHIVOS Para borrar archivos almacenados en la Tarjeta de Memoria o para mover archivos de 3. Seleccione y presione a tecla 0. la Tarjeta de Memoria a la Memoria del Teléfono: 1.
-
Page 150: Modo Usb
MODO USB VERSION DE SOFTWARE/HARDWARE Para visualizar las informaciones de Hardware/Software del su dispositivo: Usted puede utilizar un cable de datos USB para transferir datos entre el dispositivo y un 1. Desplace el teléfono hacia arriba, presione la Tecla 0 [MENU] y enseguida Ordenador compatible. -
Page 151: Global Phone
ASISTENTE DE CONFIGURACION VERIFICAR NUEVAS ACTUALIZACIONES Para verificar el Servidor de Download para nuevas actualizaciones del Software: El menú Tutorial de Configuración permite que usted ajuste los menús que se indican a 1. Desplace el teléfono hacia arriba, presione la Tecla 0 [MENU] y enseguida continuación para Ajustes y Herramientas con operaciones simples. -
Page 152: Centro De Medios
CENTRO DE MEDIOS Su teléfono ofrece una función exclusiva – CENTRO DE MEDIOS– que permite que usted haga downloads de campanillas, fondos de pantalla, juegos y mucho más de la red para su teléfono. Por favor, entre en contacto con su proveedor de servicios para certificarse sobre la disponibilidad de estos servicios. -
Page 153: Musica Y Tonos
MUSICA Y TONOS PARA ATRIBUIR MELODIAS O TONOS DESCARGADOS: 1. Desplace el teléfono hacia arriba, presione la Tecla 0 [MENU] y enseguida El menú Música y Tonos permiten que usted administre campanillas, archivos de Música y Tonos. 5. Centro de Medios, 1. - Page 154 1. Borrar 2. Bloquear 3. Desbloquear 4. Mover a la Tarjeta REPRODUCCION DE MUSICA 5. Mover al Teléfono 1. Con el teléfono cerrado, presione la Tecla 0 para desbloquear el teclado. O Ajustes de Músicas: Permite que usted ajuste las configuraciones del player que se indican •...
-
Page 155: Imagen Y Video
• Renombrar: Renombra el sonido. Identificación de Contacto: Se exhibirá la pantalla DEFINIR COMO CONTACTO. Seleccione • el Contacto que desea asignar a la campanilla y enseguida • Mover: Permite que usted mueva el sonido seleccionado para la tarjeta de memoria del presione la Tecla 0. - Page 156 Capturar Imagen: Captura una nueva imagen. • • Grabar Video: Graba un nuevo video. • Administración de Imágenes: Para administrar sus archivos de imagen con las opciones • Definir Como: Define el vídeo seleccionado como Papel de Pared o como una Identificación de Vídeo.
- Page 157 2. Apunte la lente de la cámara para el blanco. Usted pode verificar el • Presione la Tecla de Función Derecha [Opciones] y seleccione entre las siguientes opciones y pulse la tecla 0 [CONFIRMAR]: encuadramiento del video a través del visor de la pantalla. Resolución: 1600x1200 1280x960...
-
Page 158: Juegos
JUEGOS 1. Desplace el teléfono hacia arriba, presione la Tecla 0 [MENU] y enseguida 4. Internet Móvil. presione DOWNLOAD DE NUEVOS JUEGOS Acceso Rápido: Desplace el teléfono hacia arriba, presione la Tecla 0 [MENU], y Para descargar juegos y aplicaciones: enseguida presione 5. -
Page 159: Informaciones Del Centro De Medios
INFORMACIONES DEL CENTRO DE MEDIOS Para visualizar la Memoria de Aplicaciones, Memoria del Teléfono, Visualización de Registros y Informaciones de Ayuda: CENTRO DE MENSAJES 1. Desplace el teléfono hacia arriba, presione la Tecla 0 [MENU], y enseguida presione 5. Centro de Medios. -
Page 160: Cuando Se Recibe Un Nuevo Mensaje
CUANDO SE RECIBE UN NUEVO MENSAJE Agregar: Permite que usted agregue una Figura, Sonido, Tarjeta de Visitas, Dirección de Contactos. o Firma. 1. La pantalla que se indica a continuación será exhibida 4. Formatear Texto: Permite que usted edite Alineación, Tamaño de la Fuente, Estilo de la... - Page 161 5. Para Contactos: Graba el número o dirección de e-mail para la Lista de Contactos que arriba, presione la Tecla 0 [MENU] y enseguida presione Mensajes, usted ingresó en el campo Para. 1. Nuevo Mensaje. 4. En Texto, ingrese a su mensaje y enseguida presione la Tecla de Dirección 1 2.
-
Page 162: Mensajes
Nivel de Prioridad: Seleccione Alto Normal [Hecho]. Presione la Tecla de Dirección 1 hacia abajo. • y enseguida presione la Tecla 0. • Cancelar Mensaje: Cancela el mensaje y selecciona grabar o no en Borradores. 7. En Asunto, ingrese el asunto del mensaje. 9. - Page 163 [ABRIR] para visualizar el mensaje con pantalla llena o presione la Tecla de Fuente, Estilo de la Fuente, Color de la Fuente Color del Plan de Fondo. • Agregar Destinatario: Permite que usted agregue varios destinatarios en el campo Para. Función izquierda [Responder] para responder al remitente.
-
Page 164: Bandeja De Entrada
BANDEJA DE ENTRADA Administración de la Bandeja de Entrada: Permite que usted administre mensajes con las • opciones que se indican a continuación: Bandeja de Entrada Visualizar Bandeja de Entrada El menú se exhibirá cuando Borrar: Borra el mensaje. esté ajustado Horario. -
Page 165: Enviados
ENVIADOS BORRADORES Enviar Visualizar Bandeja de Entrada Borradores El menú se exhibirá cuando esté ajustado El menú administra los mensajes de borrador. Si la composición del Horario. Si Por Contacto estuviere ajustado, no será posible visualizar el menú mensaje se interrumpe por una llamada de voz u otros eventos, el mensaje en Enviados. -
Page 166: Buzon
BUZON E-MAIL MOVIL Este menú exhibe el número de nuevos buzones grabados en su bandeja de buzones. EMAIL MOVIL 1. Desplace el teléfono hacia arriba, presione la Tecla 0 [MENÚ] y enseguida El menú Email Móvil permite que usted envíe y reciba Emails utilizando el Navegador. presione Mensajería, 4. - Page 167 GRABAR MENSAJES ENVIADOS AUTOMATICAMENTE TEXTO RAPIDO 1. Seleccione Activar, Desactivar Prompt y enseguida presione la Tecla 0. Permite que usted crie un nuevo Texto Rápido o edite el Texto Rápido pre-definido. 1. Para crear un nuevo Texto Rápido, presione la Tecla de Función Derecha •...
- Page 168 FIRMA Permite que usted pueda crear una firma que puede ser automáticamente inserida al final de cada mensaje. SEGURIDAD Y GARANTIA 1. Para desactivar la función Firma, seleccione Ninguna y presione la Tecla 0. 2. Para ingresar una Firma, seleccione Personalizar, ingrese su firma en el campo Este capítulo trata sobre las directrices y precauciones de seguridad que de ingreso de texto y enseguida presione la Tecla 0.
-
Page 169: Informaciones De Seguridad Para Telefonos Portatiles
INFORMACIONES DE SEGURIDAD PARA TELEFONOS SEGURIDAD DE LA ANTENA PORTATILES INALAMBRICOS Utilice solamente la antena provista o una antena de sustitución aprobada. Antenas, modificaciones, o conexiones no autorizadas podrán perjudicar la LEA ESTAS INFORMACIONES ANTES DE UTILIZAR SU MOVIL calidad de la llamada, dañar el móvil o resultar en la violación de las reglas FCC. Por favor, contáctese con su revendedor local para reemplazo de la antena. - Page 170 DISPOSITIVOS ELECTRONICOS OTROS DISPOSITIVOS MEDICOS Su teléfono móvil es un radio transmisor y receptor baja potencia. Cuando está Si usted utiliza otro dispositivo médico personal, consulte al fabricante de su encendido (ON), recibe y también envía señales de radio frecuencia (RF). La dispositivo para determinar si están debidamente protegidos de energía de RF mayoría de los equipos electrónicos modernos están protegidos contra la energía externa.
-
Page 171: Informaciones De Seguridad Sobre La Exposicion A La
ÁREAS DE FUNDICION • NO maltrate el equipo. Evite golpes, agitaciones o colisiones. Cuando no esté utilizándolo, deje la unidad en posición plana para evitar posibles daños Para evitar la interferencia con operaciones de fundición, APAGUE su teléfono cuando causados por la instabilidad. se encuentre en una fundidora o en áreas con la disposición “Apagar el teléfono de dos vías. -
Page 172: Informaciones Sobre Sar
OPERACION DE LA UNIDAD CERCA DEL CUERPO La exposición estándar para los teléfonos móviles emplea una unidad de medida conocida como tasa de absorción específica o SAR. El límite SAR definido por Este dispositivo fue probado en cuanto a operaciones de la unidad cerca del la FCC es de 1,6W/kg.* Las pruebas de SAR se conducen cuando el teléfono cuerpo con la parte trasera del móvil, mantenga distancia de 2 cm del cuerpo. -
Page 173: Compatibilidad Con Aparatos De Audicion (Hac) Para Dispositivos
todos los niveles de SAR reportados como en cumplimiento con los normas de dispositivos de telecomunicación inalámbricos. El estándar para compatibilidad exposición de RF de la FCC. de móviles digitales con los aparatos de audición fue establecido por American National Standard Institute (ANSI) (Instituto Nacional de Estandarización La información de SAR en este modelo de teléfono se encuentra archivada en la Americana) C63.19. -
Page 174: Actualizacion Del Consumidor Segun La Fda
¿COMO SABER SI MI APARATO DE AUDICION OPERARA CON UN MOVIL DIGITAL Los teléfonos inalámbricos emiten bajos niveles de energía de radiofrecuencia ESPECIFICO? (RF) en el rango de las microondas cuando se utiliza. También emiten niveles muy Usted tal vez desee probar varios móviles para que seleccione aquel que mejor bajos de RF en modo inactivo. - Page 175 • Cooperar con los usuarios de teléfonos inalámbricos con la mejor información de teléfonos inalámbricos pueden exponer al usuario a energía de radiofrecuencia posible acerca de los efectos secundarios del uso del teléfono inalámbrico en la cuantificable (RF) por la corta distancia entre el teléfono y la cabeza del usuario. salud humana.
- Page 176 de teléfonos inalámbricos y cáncer cerebral primario, glioma meningioma, o de los EEUU y con grupos de investigadores en todo el mundo para asegurarse neuroma acústico, tumores cerebrales o de las glándulas salivales, leucemia, de que estudios de prioridad animal se llevan a cabo para tratar preguntas u otros canceres.
- Page 177 Instituto de Ingeniería Eléctrica y Electrónica (IEEE) y el Consejo Nacional de 9. ¿Qué precauciones se pueden tomar para reducir mi exposición a la energía de radiofrecuencia de mi teléfono inalámbrico? Protección y Medición de Radiación. La exposición límite toma en consideración la habilidad del cuerpo para eliminar calor del tejido que absorbe energía del Si existe un riesgo proveniente de estos productos –y en este punto no sabemos teléfono inalámbrico y que está...
-
Page 178: Para Evitar Perdida Potencial De La Audicion
2000. Ellos observaron que no existe evidencia de que el uso de un teléfono 12. ¿Dónde puedo encontrar información adicional? inalámbrico sea la causa de tumores cerebrales y otras causas de enfermedad. Su Para información adicional, favor de referirse a los siguientes recursos: recomendación de limitar el uso a niños fue estrictamente precautoria, no estaba •... - Page 179 potenciales problemas de audición varía. ACADEMIA AMERICANA DE AUDIOLOGÍA La cantidad del sonido producido por un dispositivo de audio portátil varía 11730 Plaza American Drive, Suite 300 dependiendo de la naturaleza del sonido, del dispositivo, de los ajustes del Reston, VA 20190 dispositivo y de los audífonos.
-
Page 180: Informaciones De Conformidad Con La Fcc
INFORMACIONES DE CONFORMIDAD CON LA FCC ADVERTENCIA: • El usuario que realice cambios o modificaciones a la unidad sin la aprobación expresa del fabricante invalidará su autoridad para usar Este dispositivo cumple con el artículo 15 de las normas de la FCC. el equipo. -
Page 181: Garantia Limitada De 12 Meses
GARANTIA LIMITADA DE 12 MESES (f) Producto dañado por causas externas como un incendio, inundación, suciedad, arena, condiciones del clima, fuga de baterías, quema de fusible, robo o uso Personal Communications Devices, LLC. (la Compañía) garantiza al comprador inapropiado de cualquier fuente de electricidad. original de este teléfono celular móvil portátil, que en el evento de que este producto o cualesquiera de sus partes durante el uso y condiciones normales del La Compañía no declara su responsabilidad para la remoción o reinstalación del... - Page 182 Adicionalmente, para dirigirse a una estación de servicio de Garantía en su área, EN ESTADOS UNIDOS: Personal Communications Devices, LLC. puede llamar en los Estados Unidos al (800) 229-1235, y en Canadá al (800) 465- 555 Wireless Blvd. 9672 (en Ontario llame al 416-695- 3060). Hauppauge, NY 11788 1-800-229-1235 LA EXTENSION DE LA RESPONSABILIDAD DE LA COMPAÑIA DENTRO DE ESTA...