Table of Contents
Advertisement
Advertisement
Chapters
Table of Contents

Related Manuals for Pantech Jest


Summary of Contents for Pantech Jest
- Page 1 User Guide...
- Page 2 User Guide...
-
Page 3: Table Of Contents
CHAPTER 1. BEFORE USING ADJUSTING VOLUME .....................32 CALLER ID FUNCTION ....................33 BEFORE USING ....................8 VIBRATE MODE ......................33 INSIDE THE PACKAGE ....................8 SPEAKERPHONE MODE ..................33 HANDSET DESCRIPTIONS ..................9 USING AUTO KEYPAD LOCK FUNCTIONL ...............33 KEY DESCRIPTIONS ....................11 AVAILABLE OPTIONS DURING A CALL ..............33 DISPLAY INDICATORS ....................13 MAKING AN EMERGENCY CALL ................ - Page 4 RECENT CALLS .....................61 TOUCH KEY SETTINGS ..................107 RECENT CALLS ...................... 61 MEMORY ......................107 MISSED ......................... 61 USB MODE ......................110 RECEIVED ......................62 PHONE INFO ....................... 111 DIALED ........................63 SET - UP WIZARD ....................112 BLOCKED ....................... 63 CHAPTER 5.
- Page 5 SOCIAL NETWORKS .................... 142 MOBILE IM ......................143 BEFORE USING EMAIL ......................... 144 CHAT ........................144 This chapter provides important information about using the SETTINGS ......................144 JEST including: Inside the package CHAPTER 7. SAFETY AND WARRANTY Handset descriptions SAFETY ......................149 Key descriptions SAFETY INFORMATION FOR WIRELESS HANDHELD PHONES ......
-
Page 6: Inside The Package
INSIDE THE PACKAGE HANDSET DESCRIPTIONS This package should include all items pictured below. If any are missing or different, immediately contact the retailer where you purchased the phone. Attention: Ne pas exposer a des tempe atures élevées (140 /60 ). Ne pas démonter . -
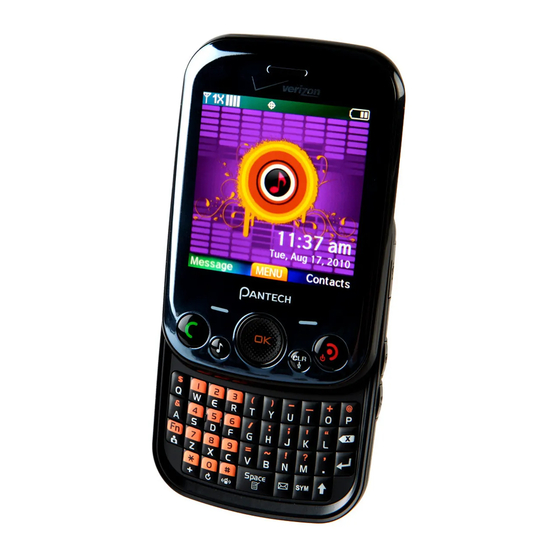
Page 7: Handset Descriptions
HANDSET DESCRIPTIONS KEY DESCRIPTIONS The following list correlates to the previous page’ s phone illustration. 1. [ ] Left Soft Key: Press to display the Message menu or access the function listed above the key. 2. [ ] SEND Key: Press to make or receive a call. From idle mode, press to access the All Calls list. -
Page 8: Display Indicators
13. OK Key: Allows you to access the menu screen. It also allows you to accept DISPLAY INDICATORS choices when navigating through a menu. Icon Icon Descriptions 14. Display Screen: Displays the digital clock, messages, phone status and 1X Signal Strength: Indicates your phone is in the CDMA 1X network. indicator icons. - Page 9 Icon Icon Descriptions Icon Icon Descriptions E911: Global Positioning Service (GPS) for E911 is set to On for emergency Speakerphone: Speakerphone mode is active. calls only. Missed Calls: Indicates you have missed calls. Location On: GPS is set to On for Location Service and E911 calls. Message: Indicates you have new messages.
-
Page 10: Install Battery
INSTALL BATTERY Message Icons 1. Insert your finger tip into the slot (1), then push down on Unread EMS Read MMS top of the battery cover and slide it off to remove (2). Read EMS Sent Message 2. Slide the battery into the slot (3) by aligning the contacts New/Unread Message Received Message and press down (4) until you hear the “click”. -
Page 11: Before Using
DO’S Data Jack (making sure to align the connector as it • Only use the battery and charger approved for use with the JEST appears in the image to the right) and the wall adapter • Only use the battery for its original purpose. -
Page 12: Using The Directional Key
Swipe left, right, up or down to scroll through menus or to access shortcuts from idle mode. BASIC OPERATION This chapter addresses and explains the basic features for JEST including: Turning the phone on/off Call waiting function Calling a number from contacts... -
Page 13: Turning The Phone On/Off
TURNING THE PHONE ON/OFF This manual assumes that Display Themes is set to Oceanic Delight, and Menu Layout is set to List, which are the default settings. TURNING THE PHONE ON 1. Press and hold the END Key until the display turns on. USING THE TASK BAR •... -
Page 14: Menu Summary
MENU SUMMARY Main Menu DEPTH DEPTH DEPTH 2. Messaging 3. Drafts Main Menu DEPTH DEPTH DEPTH 1. Media Center 1. Search 4. Voicemail 2. Music & Tones 1. Get New Ringtones 1. Get New Applications 5. Social Networks 1. Facebook 2. - Page 15 Main Menu DEPTH DEPTH DEPTH Main Menu DEPTH DEPTH DEPTH 7. Recent Calls 2. Received 9. Settings & Tools 5. Sounds Settings 9. Power On/Off 1. Power On 2. Power Off 3. Dialed 4. All 0. Open/Close Sound 5. View Timers 6.
-
Page 16: Making A Call
Main Menu DEPTH DEPTH DEPTH Main Menu DEPTH DEPTH DEPTH 9. Settings & Tools 7. Phone Settings 7. Security 1. Edit Codes #. Phone Info 1. My Number 2. Restrictions 2. SW/HW Version 3. Phone Lock Setting 4. Lock Phone Now 3. -
Page 17: Missed Call Notification
3. To end a call, press the END Key 1. Slide the phone up and enter the phone number. 2. Press the Right Soft Key [Options]. Answer Options is set to “Auto with Handsfree”, calls are answered automatically 3. Select Add 2-Sec Pause and press the OK Key. -
Page 18: Call Waiting Function
CALL WAITING FUNCTION CALLER ID FUNCTION If you are on a call and you receive another incoming call, you will hear a beep and the Caller ID displays the number of the person calling when your phone rings. If the caller’... -
Page 19: Making An Emergency Call
NEW MESSAGE VOICE PRIVACY To access the Messages Menu during a call: To turn the voice privacy feature On or Off: 1. Press the Right Soft Key [Options], with New Message highlighted, 1. Press the Right Soft Key [Options], select Voice Privacy and press the press the OK Key. -
Page 20: Memory Function
2. Enter “FLOWERS” with the QWERTY Keypad and press the SEND Key connect. • If the Alphabetical Entry Mode icon is turned on, only capital letters will be appeared. MEMORY FUNCTION • Pressing the Mode Change Key will change between Numeric Entry Mode and Alphabetical Entry Mode. -
Page 21: Storing A Phone Number
STORING A PHONE NUMBER ADDING OR CHANGING GROUPS To organize your Contacts into groups: The Contact List stores up to 1000 entries. 1. Slide the phone up, press the Right Soft Key [Contacts], then highlight ADDING A NEW CONTACT the desired Contact entry. 1. -
Page 22: Editing Contact Entries
3. Highlight Pic/Video, and press the Left Soft Key [Set]. EDITING CONTACT ENTRIES 4. Select 1. My Pictures 2. My Videos, then press the OK Key. ADDING A PHONE NUMBER FROM IDLE MODE 5. Swipe the Directional Key up, down, left or right to select a picture or a 1. -
Page 23: Default Numbers
4. Edit the phone number as necessary, and then press the OK Key [SAVE] to 2. Highlight the entry that has a speed dial to be deleted. update the contact entry. 3. Press the Left Soft Key [Edit]. 4. Highlight the phone number that has a speed dial to be deleted. EDITING STORED NAMES 5. -
Page 24: Entering Letters, Numbers & Symbols
ENTERING LETTERS, NUMBERS & SYMBOLS 4. [ ] Symbols Key: Press to open the symbols list. 5. [ ] Caps Key: Press to select a letter case for the standard text [Abc] input Your device has a QWERTY Keypad that provides a superior typing experience on a small mode. -
Page 25: Chapter 4. Menu Function
MENU FUNCTION 411: Speed Dial entry 411 (Directory Assistance) is already assigned. This chapter addresses accessing the menu and using its functions and features to customize your JEST CONTACTS RECENT CALLS TOOLS SETTINGS Voice Commands... -
Page 26: Contacts
NEW CONTACT Erase: Deletes the contact from your contact list. New TXT Message: Allows you to send a TXT Message to the contact. To add a new number to your Contact List: New Picture Message: Allows you to send a Picture Message to the contact. Using this submenu, the number is saved as a new Contact. -
Page 27: Groups
2. Press the Left Soft Key [New]. TO SEND A TXT MESSAGE TO A GROUP 3. Enter a new group name and press the OK Key [SAVE]. 1. Slide the phone up, press the [MENU], then press Contacts, Groups. TO ASSIGN PHONE NUMBER TO GROUP 2. -
Page 28: Speed Dials
Cancel Message. Soft Key [Options]. 3. Press 4. New Voice Message. These options will vary depending on the message contents chosen. 4. To record a new Voice Memo, press the OK Key to start recording, then press the 10. To send the Picture Message, press the OK Key [SEND] or press the SEND Key OK Key [STOP] to finish recording and save the voice memo. -
Page 29: In Case Of Emergency
press the OK Key. A confirmation message appears. Contact “Unassigned” appears if the location is available. TO RE-ASSIGN EMERGENCY CONTACTS 1. Slide the phone up, press the [MENU], then press Contacts, 6. In Case TO ERASE A SAVED SPEED DIAL Emergency. -
Page 30: Favorites
2. Select Personal Info and then press the OK Key [VIEW]. then press the OK Key [ASSIGN]. 3. Select Note Note 2 Note 3 and then press the OK Key [ADD]. 3. Select the contact you want to assign, then press the OK Key [MARK]. 4. -
Page 31: My Name Card
TO EDIT FAVORITE CONTACTS 3. Edit the My Name Card options and then press the OK Key [SAVE] to save your changes. 1. Slide the phone up and press the Task Bar Key , swipe the Directional Key left or right to scroll to FAVORITES, then press the OK Key. SEND MY NAME CARD Shortcut: From idle mode, slide the phone up, press the Favorites/Mode Change Key... -
Page 32: Recent Calls
3. Swipe the Directional Key up or down to select a desired device and press the OK RECENT CALLS Key [PAIR]. Please refer to page 85 for more details on Bluetooth. The Recent Calls menu is a list of the last phone numbers or Contact entries for calls you 4. -
Page 33: Received
View Timers: Displays usage time. DIALED • Press the Left Soft Key [Message] to select: Displays information about the 90 most recently dialed numbers. Place a call to a dialed TXT Message: Allows you to send a TXT Message to the contact. call by simply pressing the SEND Key Picture Message: Allows you to send a Picture Message to the contact. -
Page 34: All
Erase: Deletes the call from Blocked call list. After the 270 received, dialed or missed calls, the oldest call will automatically be Lock/Unlock: Locks or unlocks the entry. erased from the history. Erase All: Deletes all entries from Blocked call list. Shortcut: To view a quick list of all your calls, press the Send Key from idle mode. -
Page 35: Tools
VOICE COMMANDS 1. You will hear Please say a command and the Voice Commands menu will be displayed. Your phone is equipped with an Advanced Voice Commands (AVC) feature. This feature 2. If calling a contact from your Contact List, say Call <Name>. Your phone will allows you to make calls or use the phone’... - Page 36 1. You will hear Please say a command and the Voice Commands menu will be playlist for you. displayed. 1. You will hear Please say a command and the Voice Commands menu will be 2. Say “Check” followed immediately by one of the following items: displayed.
- Page 37 2. Press the Right Soft Key [Settings] and then press 1. Confirm Choices. • Train Voice: Requires that you make recordings of your voice to customize the voice recognition system. It will take a few minutes. Shortcut: From idle mode, press and hold the CLR Key to access the Voice •...
-
Page 38: Calculator
ABOUT TIP CALCULATOR Allows you to calculate the tip and determine how much each person should pay for 1. Slide the phone up, press the [MENU], then press 9. Settings & Tools, the bill. Tools, 1. Voice Commands. 1. Slide the phone up, press the [MENU], then press 9. - Page 39 END TIME minutes before 1 hour before 3 hours before 5 hours before 1 Day Before Use the keypad to set an end time and press the Left Soft Key for am/pm. 5. Press the OK Key [SAVE] to save it. The date of the event will be marked on START DATE your calendar.
-
Page 40: Self Icon
SELF ICON 7. Once saved, press the Right Soft Key [Options] to select one of the following and press the OK Key. Self Icon allows you to create your own Icons and Banners, and then display an • 1. Set As: Set the icon as 1. -
Page 41: E-Diary
Normal Fast Slow backgrounds: 5. Press the OK Key [SAVE] to save it. Blackboard Essay Letter 6. Once saved, press the Right Soft Key [Options] to select one of the 5. In each field, press the Right Soft Key [Options] then press 1. -
Page 42: Alarm Clock
ALARM CLOCK Tools, 7. Alarm Clock. 2. Highlight an Alarm (1, 2 or 3), then press the Right Soft Key [Options]. The Alarm Clock tool allows you to set up to three alarms. When you set an alarm, the current time is displayed at the top of the screen. When the alarm goes off, Alarm 1 (2 3. -
Page 43: World Clock
TO TIME UP TO TWENTY EVENTS AT ONCE The DST option will adjust clocks forward one hour. 1. To start the stop watch, press the OK Key [Start]. 5. Press the OK Key, then press the Right Soft Key [Exit] to return to the 2. -
Page 44: Usb Mass Storage
MY VERIZON If a note has a picture, video or voice attachment, the corresponding message window will be opened automatically. To access your Verizon account information: 4. Compose the message, then press the OK Key [SEND]. 1. Slide the phone up, press the [MENU], then press 9. -
Page 45: Add New Device
2. Press the Left Soft Key [Turn On/Turn Off]. A confirmation window 7. Once connected, you will see the device listed in the Bluetooth menu and the appears. Bluetooth device connected icon will appear at the top of the screen when connected to the Bluetooth device. -
Page 46: Sounds Settings
2. Press the Left Soft Key [Done]. If you want to send all the photos, press the Right SUPPORTED PROFILES Soft Key [Send All]. To view brief descriptions of the profiles supported by the phone: • Send Video: Allows you to send videos to a selected device. 1. -
Page 47: Call Sounds
• TEXT MESSAGE ALERT: Select Ring Only, Vibrate Only, Ring and Vibrate Be Silent then 5. Sounds Settings, 3. Alert Sounds. press the OK Key [SET] to save the setting or press the Right Soft Key 2. Select 1. TXT Message, 2. -
Page 48: Display Settings
2. Select DTMF, Cloud or Simple, then press the OK Key [SET]. DEVICE CONNECT Allows you to turn the Device Connect On or Off: DTMF is the default setting for this device. 1. Slide the phone up, press the [MENU], then press 9. -
Page 49: Eri Banner
• DISPLAY BACKLIGHT: Select Seconds, Seconds, 30 Seconds Always On, then press 1. Slide the phone up, press the [MENU], then press 9. Settings & Tools, the OK Key [SET] or press the Right Soft Key [Skip] to go to the 6. -
Page 50: Display Themes
4. To download other available pictures, press the Right Soft Key [Get New], 3. Press the Left Soft Key [Done] to return to Menu Settings, or press the Right Soft [Help] to view the help for Position Menu Items. then press 1. -
Page 51: Phone Settings
MENU FONT SIZE SET SHORTCUTS To set the menu font size: Your phone offers you the option of assigning a shortcut key (Directional Key left, right, up, and down) to a favorite or often-used function. 1. Slide the phone up, press the [MENU], then press 9. - Page 52 3. Select the desired option, then press the OK Key [SET]. CURRENT COUNTRY Allows you to set the country of your current location so that your phone works properly RESET DIRECTIONAL KEY SETTINGS while you travel. Use the following procedure to specify the default Directional Key settings. 1.
- Page 53 RESTRICTIONS • Unlocked: Phone is unlocked. • On Power Up: Phone will lock when it is turned on. Use the following procedure to configure Location Setting, Calls and Messages restrictions. LOCK PHONE NOW 1. Slide the phone up, press the [MENU], then press 9.
-
Page 54: Call Settings
2. Select one of the following settings, then press the OK Key [SET]. Any Key is the default setting for this device. • Automatic: Scans radio channels based on the Automatic setting. 3. Press the Left Soft Key [Done]. • Home Only: Network is available only within your home area or home affiliated area. -
Page 55: Touch Key Settings
TOUCH KEY SETTINGS If One Touch Dial is disabled, a speed dial call will function by entering the speed dial number on the QWERTY Keypad, and then press the SEND Key SENSITIVITY VOICE PRIVACY 1. Slide the phone up, press the [MENU], then press 9. - Page 56 PHONE MEMORY USAGE 2. Select Move All To Card, then press the OK Key. To check the available Phone Memory capacity, used capacity and total capacity: 3. Select and press the OK Key. 1. Slide the phone up, press the [MENU], then press 9.
-
Page 57: Usb Mode
• Media Sync Mode: Allows you to sync your phone music files with PC’s Windows Media 2. Swipe the Directional Key up or down to select Pictures, Videos, Player via USB data cable. Music, My Sounds Contacts, then press the OK Key. •... -
Page 58: Set - Up Wizard
ICON GLOSSARY 2. Select Set-up Wizard, then press the OK Key. • CALL SOUNDS: Select Ring Only, Vibrate Only, Ring and Vibrate Silent, then press To view all the icons and their meanings: the OK Key [SET] or press the Right Soft Key [Skip] to go to the next 1. -
Page 59: Chapter 5. Media Center
SEARCH 1. Slide the phone up, press the [MENU], then press 1. Media Center, Search. MEDIA CENTER USING A microSD CARD Y our phone provides a unique feature - Media Center - that enables you to download ringtones, wallpapers, games and more from your A microSD Card (sold separately) stores sounds, videos, images, photos, music and network to your phone. -
Page 60: Music & Tones
TO ASSIGN DOWNLOADED TUNES OR TONES: MUSIC & TONES 1. Slide the phone up, press the [MENU], then press 1. Media Center, The Music & Tones menu allows you to mange ringtones, music and sound files. It also 2. Music & Tones, 2. - Page 61 V CAST MUSIC I RHAPSODY ® • Manage My Music: Allows you to manage your music files with following options: Erase Lock Unlock Move To Card Move To Phone V CAST Music with Rhapsody® — V CAST Music with Rhapsody® is a digital music •...
- Page 62 6. To play the song, you can find it by selecting the My Library tab. ASSIGNING DOWNLOADED TUNES OR TONES To select a desired ringtone: V CAST Music with Rhapsody® will work with Windows Vista or XP. Not available for Mac or Linux. 1.
-
Page 63: My Sounds
RECORDING NEW SOUNDS • Home Screen: Returns to home screen without exiting the music player. • Repeat: Select Repeat All, Repeat One for the player’s repeat mode. 1. Slide the phone up, press the [MENU], then press 1. Media Center, •... -
Page 64: Picture & Video
• Get New Pictures: Download various pictures. 1. Slide the phone up, press the [MENU], then press 1. Media Center, • Manage Pictures: To manage your picture files with following options: 2. Music & Tones, 5. Sync Music. Erase Lock Unlock Move to Phone Move to Card... -
Page 65: Take Picture
4. Select and press the OK Key. A confirmation message appears. • File Info: Displays the following information about the selected video: File Name Date Time Duration Size TAKE PICTURE RECORD VIDEO 1. To access the camera, press the Camera Key . 1. -
Page 66: Games
GAMES Shortcut: Slide the phone up, press the [MENU], then press 1. Media Center, 5. Mobile Web. DOWNLOADING NEW GAMES 2. Follow the on-screen prompts. To download games and applications: 1. Slide the phone up, press the [MENU], then press 1. -
Page 67: Messaging Menu
3. Select one of the following options, then press the OK Key. App. Memory Phone Memory View Log Help MESSAGING MENU This chapter addresses Voicemail, TXT, Picture, Video, Voice Messaging functions including: When a new message arrives Erase All New Message Voicemail Messages Mobile IM... -
Page 68: Picture Message
WHEN A NEW MESSAGE ARRIVES PICTURE MESSAGE 1. Slide the phone up, press the [MENU], then press Messaging, 1. New 1. The following display appears when a new message arrives. Message. 2. To display the message, select View Now and then press 2. -
Page 69: Voice Message
• Remove Slide: Removes an inserted slide message. • Cancel Message: Cancel the message and select whether to save it in Drafts. • Cancel Message: Cancel the message and select whether to save it in Drafts. 9. When completed, press the OK Key [SEND] to send the video message. 10. -
Page 70: Messages
MESSAGES Unlock: Unlocks the messages. Mark as Read Mark as Unread: Marks the messages as read or unread. Messages menu is displayed when Messages View is set to By Contacts which • Sort Alphabetically Sort By Time: Sorts the list in alphabetical order or by time. is the default setting. -
Page 71: Inbox
INBOX Mark as Read: Marks the messages as read. Mark as Unread: Marks the messages as unread. Inbox menu is displayed when Messages View is set to Time. The Inbox • Sort By Sender: Sorts the list by sender. manages received text, picture, voice, video and web alert messages. •... -
Page 72: Drafts
5. When navigating through the Sent menu, press the Right Soft Key ERASE ALL [Options] to display the following available options. Options are dependent on To erase all messages stored in your phone: the message type and may be different from each field. 1. -
Page 73: Social Networks
SOCIAL NETWORKS 2. Select one of the following options, then press the OK Key. To view the help for MySpace, press the Right Soft Key [Help]. Social Networks menu allows you to set up your phone to send and receive •... -
Page 74: Email
• WL Messenger 2. Press the Left Soft Key [Settings] to display available menus. • Yahoo!® 3. Select one of the following menus, then press the OK Key. LAUNCHING MOBILE IM MESSAGES VIEW 1. Slide the phone up, press the [MENU], then press Messaging, 1. - Page 75 • Off: TXT messages are displayed by going into the Inbox, or by responding to the message 2. If is selected, enter a new callback number then press the OK Key. prompt. SIGNATURE MULTIMEDIA AUTO RECEIVE Allows you to create a signature that can be automatically inserted at the end of each 1.
-
Page 76: Chapter 7. Safety And Warranty
SAFETY INFORMATION FOR WIRELESS HANDHELD PHONES READ THIS INFORMATION BEFORE USING YOUR HANDHELD SAFETY AND WARRANTY PORTABLE CELLULAR TELEPHONE EXPOSURE TO RADIO FREQUENCY SIGNALS This chapter addresses the safety guidelines and precautions to follow Your wireless handheld portable telephone is a low power radio transmitter when operating your phone. - Page 77 Do not use the phone with a damaged antenna. If a damaged antenna comes PACEMAKERS into contact with the skin, a minor burn may result. Please contact your local The Health Industry Manufacturers Association recommends that a minimum dealer for replacement antenna. separation of six (6”) inches be maintained between a handheld wireless phone and a pacemaker to avoid potential interference with the pacemaker.
-
Page 78: Safety Information For Fcc Rf Exposure
systems in motor vehicles. Check with the manufacturer or its representative gas (such as propane or butane); areas where the air contains chemicals or regarding your vehicle. You should also consult the manufacturer of any equipment particles, such as grain, dust, or metal powders; and any other area where you that has been added to your vehicle. -
Page 79: Sar Information
States with its action in Report and Order FCC 96-326 adopted an updated safety based on standards that were developed by independent scientific organizations standard for human exposure to radio frequency electromagnetic energy emitted through periodic and thorough evaluation of scientific studies. The standards by FCC regulated transmitters. -
Page 80: Hearing Aid Compatibility (Hac) For Wireless
all reported SAR levels evaluated as in compliance with the FCC RF exposure of digital wireless phones with hearing aids is set forth in American National guidelines. Standard Institute (ANSI) standard C63.19. There are two sets of ANSI standards with ratings from one to four (four being the best rating): an “M” rating for SAR information on this model phone is on file with the FCC and can be found reduced interference making it easier to hear conversations on the phone when under the Display Grant section of... -
Page 81: Fda Consumer Update
FOR MORE INFORMATION ABOUT HEARING AIDS AND DIGITAL WIRELESS 2. What is FDA’ s role concerning the safety of wireless phones? PHONE Under the law, FDA does not review the safety of radiation-emitting consumer • FCC Hearing Aid Compatibility and Volume Control – products such as wireless phones before they can be sold, as it does with new http://www.fcc.gov/cgb/dro/hearing.html drugs or medical devices. - Page 82 the Federal Communications Commission (FCC). All phones that are sold in the of RF could accelerate the development of cancer in laboratory animals. However, United States must comply with FCC safety guidelines that limit RF exposure. many of the studies that showed increased tumor development used animals FCC relies on FDA and other health agencies for safety questions about wireless that had been genetically engineered or treated with cancer-causing chemicals phones.
- Page 83 this measurement, such as the angle at which the phone is held, or which model telephones is set at a Specific Absorption Rate (SAR) of 1.6 watts per kilogram of phone is used. (1.6 W/kg). The FCC limit is consistent with the safety standards developed by the Institute of Electrical and Electronic Engineering (IEEE) and the National 6.
- Page 84 9. What steps can I take to reduce my exposure to radiofrequency energy effects. Their recommendation to limit wireless phone use by children was strictly from my wireless phone? precautionary; it was not based on scientific evidence that any health hazard exists.
-
Page 85: Bluetooth
• FDA web page on wireless phones • Set the volume in a quiet environment and select the lowest volume at which you can hear adequately. (http://www.fda.gov/Radiation-EmittingProducts/ RadiationEmittingProductsandProcedures/ • When using headphones, turn the volume down if you cannot hear the people HomeBusinessandEntertainment/CellPhones/default.htm) speaking near you or if the person sitting next to you can hear what you are •... -
Page 86: Fcc Compliance Information
NATIONAL INSTITUTE ON DEAFNESS AND OTHER COMMUNICATION to provide reasonable protection against harmful Interference in a residential installation. This equipment generates, uses, and can radiate radio frequency DISORDERS NATIONAL INSTITUTES OF HEALTH energy and, if Not installed and used in accordance with the instructions, may 31 Center Drive, MSC 2320 cause harmful Interference to radio communications. -
Page 87: 12 Month Limited Warranty
12 MONTH LIMITED WARRANTY (f) Product damaged from external causes such as fire, flooding, dirt, sand, weather conditions, battery leakage, blown fuse, theft or improper usage of Personal Communications Devices, LLC. (the “Company”) warrants to the original any electrical source. retail purchaser of this handheld portable cellular telephone, that should this product or any part thereof during normal consumer usage and conditions, be The Company disclaims liability for removal or reinstallation of the product,... - Page 88 THE EXTENT OF THE COMPANY’S LIABILITY UNDER THIS WARRANTY IS LIMITED TO IN USA: Personal Communications Devices, LLC. THE REPAIR OR REPLACEMENT PROVIDED ABOVE AND, IN NO EVENT, SHALL THE 555 Wireless Blvd. COMPANY’S LAIBILITY EXCEED THE PURCHASE PRICE PAID BY PURCHASER FOR Hauppauge, NY 11788 THE PRODUCT.
- Page 89 NOTE...