Minelab CTX3030 Instruction Manual
Hide thumbs
Also See for CTX3030:
- Quick start manual (30 pages) ,
- Manual (15 pages) ,
- Getting started manual (57 pages)
Table of Contents
Advertisement
Quick Links
Advertisement
Table of Contents

Related Manuals for Minelab CTX3030


Summary of Contents for Minelab CTX3030
- Page 1 The Future of Discovery Instruction Manual...
- Page 2 Minelab®, CTX®, Smartfind™ 2, FBS 2®, Wi-Stream™, GPSi™, FindPoint®, GeoHunt™, GeoTrail™, XChange Your Detecting Connection™, Target Trace™, Ferrous-Coin Separation™, Ground-Coin Separation™ are trademarks of Minelab Electronics Pty. Ltd. Google Maps is a trademark of Google Inc. u-blox is a trademark of u-blox Holding AG.
-
Page 3: Table Of Contents
Table of Contents Contents CTX 3030 Detector ......................1 Control Panel ........................2 CTX 3030 Screens ......................3 Detect Screen ..............................3 Map Screen ..............................4 Menu Screen ..............................4 Status Bar ........................5 Active Mode Markers ..........................5 Patterns ................................5 Status Bar Summary ..........................6 Detect Screen .........................7 Detect Screen Content .......................... - Page 4 Function Buttons ......................19 Noise Cancel ...............................19 Open the Noise Cancel Quick Menu ..................19 Manual Noise Cancel........................20 Sensitivity ..............................21 Ground Balance ............................21 Open the Ground Balance Quick Menu ..................21 Enable Ground Balance ........................22 Perform Auto Ground Balance......................22 Audio ................................22 Open the Audio Quick Menu ......................23 Volume Gain............................23 Threshold Level ............................23 Volume Limit ............................24...
- Page 5 Modes Menu .........................32 Search Modes .............................32 Open the Modes Menu ...........................32 Select a Mode ............................32 Delete a Mode .............................33 Create a New Mode...........................33 Reset a Mode to Default ........................33 Edit a Mode ............................33 Open the Mode Settings Menu .....................34 Pattern 1 and Pattern 2 ..........................34 Open the Edit Type Menu .......................34 Edit Types ..............................35 Select an Edit Type ..........................35...
- Page 6 Language ..............................52 Reset the Language ...........................52 Wireless Audio Module ....................53 Connect the WM 10 ..........................53 Minelab XChange 2 .....................54 Communicating between CTX 3030 and your PC ...............54 System Requirements ..........................54 Install CTX 3030 XChange 2 on your PC ..................54 Start the CTX 3030 XChange 2 Application ...................54 Connect CTX 3030 to your PC ......................54...
- Page 7 Factory Presets ......................55 Modes ................................55 Audio ................................55 Other Settings.............................55 Batteries .........................56 BC 10 Battery Charger ..........................56 Recharge the Lithium-Ion Battery Pack ...................57 Replace the ‘AA’ Batteries ........................58 Accessories ........................60 Detector Care and Safety ...................61 GPS and Navigation ....................62 GPS ..................................62 Map ................................62 Navigation ..............................62 Detecting Basics ......................63...
-
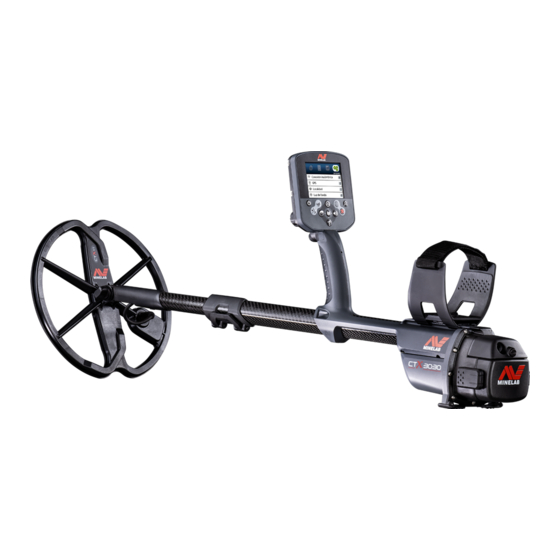
Page 8: Ctx 3030 Detector
CTX 3030 Detector CTX 3030 Detector For instructions on how to assemble your CTX 3030 refer to the Getting Started Guide supplied with the detector. 1/4“ Headphone Battery Pack † Module* Battery Latches Stand Armrest Strap Armrest Control Box Armrest Lock Handle Control Panel USB Connector... -
Page 9: Control Panel
Control Panel Control Panel Rear Speaker The control panel consists of the following: • Full color LCD screen • Push button keypad with 11 buttons Connection • Handle mounted trigger Trigger • USB connection • Rear speaker Trigger Press from the Detect/Map screens to activate the Pinpoint function. -
Page 10: Ctx 3030 Screens
CTX 3030 Screens CTX 3030 Screens The CTX 3030 graphical user interface (GUI) has three main screens: 1. Detect screen – where your detector status and detection results are displayed 2. Map screen – where location GPS functionality is displayed 3. -
Page 11: Map Screen
CTX 3030 Screens Map Screen Access the Map screen at any time by pressing the Map button. Figure 2 – Example Map screen Use the Map Screen to: 1. View your current location and GPS coordinates 2. View your GeoTrail, WayPoints, FindPoints and GeoHunts 3. -
Page 12: Status Bar
Status Bar Status Bar The Status Bar is displayed at the top of the Detect and Map screens and provides status information for the following functions: • Headphones • Wireless • GPS • Current Search Mode • Current Pattern • Time •... -
Page 13: Status Bar Summary
Status Bar Status Bar Summary Detector Headphones WM 10 Headphones Not Connected Connected Connected Headphones No icon On, Not Connected On and Connected Wireless No icon (flashing) On, No Fix On and Fixed No icon (flashing) Current Search Mode – numbered 1 to 10 Mode Pattern 1 Pattern 2... -
Page 14: Detect Screen
Detect Screen Detect Screen The Detect screen is the first screen you will see when you turn the detector on, and where you will spend the majority of your time. This screen graphically displays the discrimination patterns and target information. Detect At the top of the Detect screen is the Status Bar, which displays information about the current detector settings (page 5). -
Page 15: Ctx 3030 Discrimination
The different FE-CO properties can be displayed numerically and graphically on the Detect screen as well as being heard as distinctive audio tones based on these properties. The CTX 3030 utilizes Minelab’s unique scale of discrimination, which numerically represents a target’s ferrous and conductive properties on the same display (Figure 8). -
Page 16: Accept Or Reject A Target
Detect Screen Non-ferrous targets (e.g. pure gold, silver, copper and bronze) contain little or no magnetic material. Because they are not magnetic, nonferrous targets will generally display the Target cursor at the top of the Detect screen. High conductive targets (e.g. large silver coins, copper items) will cause the Target cursor to appear toward the right of the Detect screen. -
Page 17: Target Id Panel
Detect Screen Use the down arrow button to highlight your preferred Edit Frame size and press Select. You will be returned to the Detect screen and the Edit Frame size will be reset. Figure 9 – Identify Quick Menu Target ID Panel When an object is detected the Target ID panel will appear at the top of the screen showing the following information: •... -
Page 18: Navigation Tool
Detect Screen Figure 11 – Detect screen showing large Target ID panel Navigation Tool The Navigation Tool is optionally displayed (page 46) in the bottom left hand corner of the Detect screen and, when enabled, allows you to navigate to a WayPoint, FindPoint or the start or end point of a GeoHunt. -
Page 19: Pinpoint
Detect Screen Press and hold the Detect button to open the Detect Screen Quick Menu and enable Target Trace. Figure 12 – Target Trace showing two targets (coin and nail) Pinpoint The Pinpoint Gauge is optionally displayed at the bottom of the Detect screen (Figure 13) and graphically indicates the strength of the signal received during Pinpointing. -
Page 20: Using The Detect Button
Detect Screen Using the Detect Button Use the Detect button from any screen to access the Detect screen and view the Discrimination Patterns, and access the Detect menu. Press the Detect button to cycle between the two discrimination patterns Detect (see page 9). -
Page 21: Map Screen
Map Screen Map Screen The Map screen displays FindPoints, WayPoints, GeoHunts and GeoTrails in their relative geographic locations. It represents a default map dimension of 100 yards (or meters) in the east-west horizontal direction and 80 yards (or meters) in the north- south vertical direction. -
Page 22: Zoom Levels
Map Screen The following screen elements are optional and can be controlled through the Display menu: • Target ID Panel (page 10) • Sensitivity Panel (page 11) • Navigation Tool (page 11) • Names of GeoStore items (FindPoints, WayPoints) Figure 15 – Map screen showing optional elements For information on how to show and hide optional screen elements, see page 47. -
Page 23: Geotrail
Map Screen Your FindPoint information can be used for future reference within the detector and with the XChange 2 PC application (page 54). WayPoint A WayPoint is similar to a FindPoint with the exception that no detector related NOTE information is stored. The WayPoint is used to record a point of interest or location Target ID’s must be active (on the to which you may choose to return in the future. -
Page 24: Using The Map Button
Map Screen Using the Map Button Use the map button from any screen view the Map screen, cycle between zoom levels and access the Map Quick Menu. Press the Map button to cycle between zoom levels. Press and hold the Map button to display the map menu and initiate the following actions: •... -
Page 25: Control A Geohunt
Map Screen 3. Press the Select button to Save. A confirmation message will be displayed providing the name of the saved item. After a few seconds the message will disappear and you will be returned to the Map screen. Control a GeoHunt GeoHunt Status Icons To record a GeoHunt: 1. -
Page 26: Function Buttons
Function Buttons Function Buttons The CTX 3030 Control Panel has five function buttons as follows: • Noise Cancel • Sensitivity • Ground Balance • Audio • Menu/Select Noise Cancel Menu/Select Sensitivity Audio Ground Balance Figure 16 – CTX 3030 function buttons Each function button performs three actions depending on which screen is currently active, and whether you ‘press’... -
Page 27: Manual Noise Cancel
Function Buttons Perform Auto Noise Cancel Auto Noise Cancel is recommended. 1. Make sure there are no large targets or obvious sources of EMI close by, and hold the detector coil 12 inches (30 centimeters) above the ground (Figure 17). 2. -
Page 28: Sensitivity
Function Buttons Sensitivity Sensitivity controls the detector’s response to received signals. These signals can include desirable signals from nearby metal, as well as undesirable signals from electronic noise, and noise due to ground response. Increasing the sensitivity level Sensitivity may make targets more detectable but may also increase detector noise due to these noise influences. -
Page 29: Enable Ground Balance
Function Buttons Enable Ground Balance The Enable GB option toggles between on or off as indicated by the green tick in the check box to the right of the option. By default, the Enable GB option is selected when the menu opens, and the check box is empty indicating that Ground NOTES Balance is off. -
Page 30: Open The Audio Quick Menu
Function Buttons Open the Audio Quick Menu Press and hold the Audio button at any time to display the Audio Quick Menu and adjust your audio settings. The menu options are: • Volume Gain • Threshold Level • Volume Limit •... -
Page 31: Volume Limit
Function Buttons If the Threshold Level is too high, faint NOTE targets will be harder to hear above the A high Volume Limit will allow Threshold ‘hum’ . a greater difference between a small and large target. A low Volume Limit will reduce If the Threshold Level is too low, the slight the volume difference between variation caused by a small or deep target... -
Page 32: User Button
User Button User Button The purpose of the User button is to provide easy access to your favorite functions. There are nine different functions that can be assigned to the User button, and User Button once a function has been assigned, it will be activated each time the button is pressed. -
Page 33: Sensitivity Panel
User Button Sensitivity Panel Press to toggle the Sensitivity Panel on and off. Coordinate View Press to toggle the Latitude/Longitude coordinates on and off. Target ID Panel Press to toggle the Target ID Panel on and off. Assign a Function to the User Button 1. -
Page 34: Pinpoint
Pinpoint Pinpoint Pinpointing narrows down the location of a buried target, allowing you to determine its exact location before digging. Normally the CTX 3030 is a ‘motion’ detector; it must be moving over a target in order to detect it. When Pinpoint is activated, the CTX 3030 will operate as a non-motion detector, producing a constant audio response while the coil is held still over a target. - Page 35 Pinpoint Figure 22 – Pinpointing the target For more information on Pinpoint options, see page 42. CTX 3030 Instruction Manual...
-
Page 36: Ctx 3030 Menus
CTX 3030 Menus CTX 3030 Menus The Main Menu screen provides you with access to all of CTX 3030’s functions and settings. Press and hold the Menu button from the Detect or Map screens to display Menu/Select Button the top-level menu screen, or press to view the last used menu function. ʯ... -
Page 37: Menu Types
CTX 3030 Menus Menu Types Figure 25 – Menu and Quick Menu Figure 26 – Dialog and Progress Bar Menu Structure All functions and settings are grouped into four menu options: • Modes • GeoStore • Display • Options The following overviews provide a quick reference guide to each menu. More detailed information is provided from page 32 to page 48. -
Page 38: Display Menu Overview
CTX 3030 Menus GeoStore Menu Overview Options Sort Options View Actions FindPoints Distance FindPoint List Go to FindPoint/WayPoint WayPoints Time WayPoint List View GeoStore Menu Name Delete GeoHunts GeoHunt List Go to start Go to end Delete Display Menu Overview Options View Outcomes... -
Page 39: Modes Menu
Modes Menu Modes Menu Search Modes The CTX 3030 has up to ten search modes. These can be set up to suit particular Modes Menu detecting conditions, eliminating the need to adjust your detector for each different site you visit. Modes can be optimized for different target types, amounts of junk ʯ... -
Page 40: Delete A Mode
Modes Menu The detector will return to the Detect screen and your selected mode will be active. The mode number will be displayed on the Status Bar. Delete a Mode 1. From the Modes menu, use the down arrow button to highlight the mode of your choice and press Select. -
Page 41: Open The Mode Settings Menu
Modes Menu Mode Settings Mode Settings Each search mode has a number of mode specific functions which can be viewed ʯ Edit Discrimination Patterns and adjusted through the Mode Settings menu. These functions are as follows: ʯ Edit Tone ID Profile •... -
Page 42: Edit Types
Modes Menu Edit Types Manual Use Manual editing to manually move the Edit Frame around the Discrimination Pattern. You can use the Identify button to edit areas of the pattern to accept (white areas) or reject (grey areas) certain targets. Remember that using a larger Edit Frame will change the exact target coordinates plus one or two segments either side. -
Page 43: Tone Id Profile
Modes Menu Tone ID Profile Tone ID Range: 1, 2 FE/CO, 4 FE/CO, 35 FE, 50 CO or Combined ʯ Select/change the Tone ID Profile Type The Tone ID menu allows you to define how the tone of the audio varies when different target characteristics are detected. -
Page 44: Resize The Tone Id Profile
Modes Menu Resize the Tone ID Profile The Resize option allows you to manually resize each section of the Tone ID Profile. 1. From the Mode Settings menu, highlight the Tone ID Profile option and press Select. Your current Tone ID Profile will be displayed. 2. -
Page 45: Play Tone
As the coil is swept over a target, the target signal rises. At the peak of the target signal, audio is emitted. Minelab recommends initially learning how to operate the detector in the Factory Preset ‘Normal’ audio Response. -
Page 46: Normal
Modes Menu Normal Normal emits a short response to targets (almost a ‘beep’). Normal is recommended for general detecting conditions. It allows the greatest differentiation between the ground and a target, but has the potential to miss small targets in areas littered with objects producing target responses. -
Page 47: Turn Recovery Fast On/Off
1. From the Mode Settings menu, use the down arrow button to highlight the NOTE Recovery Fast option and press Select. Minelab recommends turning A green tick will appear in the check box indicating that Recovery Fast is on. Recovery Fast On when Trash 2. -
Page 48: Turn Seawater On/Off
Modes Menu Turn Seawater On/Off 1. From the Mode Settings menu, use the down arrow button to highlight the Seawater option and press Select. A green tick will appear in the check box indicating that the Seawater setting is on. NOTES 2. -
Page 49: Ferrous-Coin
Modes Menu Ferrous-Coin Ferrous-Coin improves the Target ID stability of coin type targets amongst ferrous targets in areas with low mineralization. This setting uses advanced signal processing techniques to minimize the blending of ferrous and coin type target signals even when they are on top of each other. Both targets will be more NOTE accurately identified and their cursors displayed simultaneously on the Detect The Ferrous-Coin setting may not... -
Page 50: Sizing
Modes Menu Figure 31 – Wide and narrow audio responses Sizing After activating the Sizing Pinpoint function the width of the audio response does not change. Activating the Sizing Pinpoint as you near the target allows you to manually control the width of the target response. Activating the Sizing Pinpoint whilst the coil is away from the target and then approaching the target from different directions allows the extent of the target to be determined. -
Page 51: Geostore Menu
GeoStore Menu GeoStore Menu The GeoStore menu allows you to store, sort and view up to 100 FindPoints, 100 WayPoints and 10 GeoHunts. Each time you save a FindPoint, WayPoint or GeoHunt, a name is automatically assigned to each item using the following naming GeoStore convention: •... -
Page 52: Go To Start/End Of A Geohunt
GeoStore Menu 3. Press Select. 4. Turn on the Navigation Tool (page 46) The map screen will be displayed showing a Destination icon, which represents your selected FindPoint or WayPoint. The Navigation Tool will indicate the direction and distance to your destination. Destination Icon Go to Start/End of a GeoHunt 1. -
Page 53: Display Menu
Display Menu Display Menu The Display menu is where you control which items you want to appear on the Map and Detect screens. Display Open the Display Menu ʯ Show or hide Detect screen 1. Press and hold the Menu button to display the Main Menu screen. items 2. -
Page 54: Show Or Hide Map Screen Items
Display Menu Show or Hide Map Screen Items 1. From the display menu, use the down arrow button to highlight the Map Screen option and press Select to open the Map menu. The Map options menu will be displayed with the following options: NOTE •... -
Page 55: Options Menu
Options Menu Options Menu The Options menu is where you can select and edit the following detector settings: • Wireless Options • GPS • Locality ʯ Enable Wireless • Backlight ʯ Connect Wireless • Pinpoint Lock ʯ Enable GPS ʯ Select location format for Open the Options Menu ʯ... -
Page 56: Location Format
Options Menu Location Format The Location Format provides the conversion of latitude and longitude coordinates. There are two available options: • D.MS – Degrees°minute’seconds” (e.g. 40° 45´ 3.6” N 73° 59´ 0.24” W) • D.M – Degrees°minute.decimal’ (e.g. 40° 45.06 , -73° 59.004’) GPS Time Sync GPS Time Sync sets the time based on information from the GPS. -
Page 57: Pinpoint Lock
Options Menu The options are: • Off – Backlight is always off • 10 seconds – Backlight turns on when button is pressed and automatically turns off after 10 seconds • 30 seconds – Backlight turns on when button is pressed and automatically turns off after 30 seconds •... -
Page 58: Reset The Ctx 3030
Reset the CTX 3030 Reset the CTX 3030 Reset ʯ Reset the GeoStore The CTX 3030 is delivered in its factory preset state and any changes made to the detector’s settings are saved automatically. These settings will remain until you ʯ... -
Page 59: Language
Reset the CTX 3030 Language The CTX 3030 Graphical User Interface (GUI) can be displayed in one of nine different languages (default US English). You will be prompted to select the detector language on initial startup, and when the detector reboots following a Reset All. The NOTE language can also be changed at any time using the Reset menu. -
Page 60: Wireless Audio Module
Wireless Audio Module Wireless Audio Module The Wireless Audio Module (WM 10) facilitates the use of wireless audio, using advanced WiStream technology to achieve clear sound with no perceivable time WARNING delay. It contains an internal loudspeaker and ¼” headphone socket for use with your choice of headphones. -
Page 61: Minelab Xchange 2
Start the CTX 3030 XChange 2 Application Double click the XChange 2 application icon on your desktop, or open your Start Menu and navigate to: All Programs > Minelab > XChange 2. Connect CTX 3030 to your PC XChange 2 Desktop Icon 1. -
Page 62: Factory Presets
Factory Presets Factory Presets Modes Coins Beach Relics Silver High Trash Pattern 1 New Coins New Coins Relics New Silver High Trash Pattern 2 All but 1 Metal All but 1 Metal All Metal All but 1 Metal All but 1 Metal Tone ID Profile 50 tone CO 50 tone CO... -
Page 63: Batteries
Batteries Batteries The CTX 3030 standard pack is supplied with two types of battery pack: 1. A sealed rechargeable Lithium-Ion (Li-Ion) smart battery, which comes with a WARNING charger (BC 10) that plugs into a conventional wall socket and a car cigarette Do not attempt to lighter socket. -
Page 64: Recharge The Lithium-Ion Battery Pack
Batteries Battery LED Indicator Power LED Indicator Figure 37 – BC 10 Front Panel Battery LED No battery plugged into charger Slow flashing green Battery is charging, normal operation Fast flashing red Charger error detected Steady on green Battery is fully charged Power LED No input power, charger is OFF Steady on green... -
Page 65: Replace The 'Aa' Batteries
Batteries Figure 39 – Recharge the Li-Ion battery 2. Insert the plug pack or car charger cable connector into the socket on the right hand side of the charger unit. 3. Plug the other end of the cable into the wall or car socket and turn on the switch. Leave the unit to fully recharge. -
Page 66: Battery Care And Safety
Do not disassemble or reconstruct the battery. Do not incinerate the battery. In the event of a fault, return the battery to a Minelab authorised service centre for repair. The use of unapproved components will VOID YOUR WARRANTY. There are no user serviceable parts within this battery pack. -
Page 67: Accessories
• Headphones • Waterproof Headphones If you would like to purchase any accessories for your CTX 3030 or any other Minelab product, please feel free to contact us directly or via your local Authorized Minelab dealer. CTX 3030 Instruction Manual... -
Page 68: Detector Care And Safety
Not all parts of the CTX 3030 are waterproof. Minelab recommends that prior to submersing in water, care is taken to ensure the battery seal (o-ring), the seal seating groove and the mating face of the battery are undamaged and kept clean. -
Page 69: Gps And Navigation
GPS and Navigation GPS and Navigation GPS Status Bar Icon The Global Positioning System (GPS) is a space-based satellite navigation system that provides location and time information from any location where there is an unobstructed line of sight to four or more GPS satellites. On the CTX 3030, GPS provides the capability to store location data relating to FindPoints and WayPoints, and to record GeoHunts. -
Page 70: Detecting Basics
Detecting Basics Detecting Basics Holding the Detector Thread your arm through the armrest and strap. Grasp the handle of the detector and rest your forearm in the armrest. The correct position of the armrest should allow you to comfortably grip the handle. Your elbow should sit just above the back of the armrest and the detector should feel like an extension of your forearm. - Page 71 Detecting Basics Though the coil assembly is rigid and durable, sudden jolts or bangs can cause random signals and inaccurate target IDs, as well as excessive wear and tear. Careful sweeping will ensure the coil performs to an optimum level at all times. Practice sweeping the coil over the ground in a side-to-side motion while slowly walking forward at the end of each sweep.
-
Page 72: Detector Sounds
Detecting Basics Detector Sounds Turn the detector on. The constant background ‘hum’ produced by the detector is called the Threshold (page 23). Variations in the Threshold allow you to hear very small and deep targets. It is also used to help distinguish between desired and undesired targets. - Page 73 Detecting Basics Each time you turn the detector on, the last detection screen used before shutting down will appear. For example, if the CTX 3030 was operating in the Detect screen when turned off, this screen will appear when the detector is turned back on. CTX 3030 Instruction Manual...
-
Page 74: Simple Detecting Exercise
Simple Detecting Exercise Simple Detecting Exercise Before attempting to recover real targets, it is important to understand how to interpret the audio and visual signals of the detector. 1. Gather a collection of different metal objects, e.g. various coins, gold and silver jewelry, a nail, pull-tab, brass button and aluminum foil. -
Page 75: Technical Specifications
Simultaneous Frequency Transmission ranging from 1.5–100 kHz expressively approved by Coil 11” Double D - Standard (accessory coils available) Minelab Electronics Pty Audio Output Internal Speaker, Headphones, WiStream Wireless Audio Ltd could void the user’s Liquid Crystal Display (LCD) Full color, 320 x 240 pixels, 2.83” x 2.12” (72 mm x 54 mm)