Table of Contents
Advertisement
Quick Links
Advertisement
Table of Contents

Related Manuals for Elation Rayzor Q7


Summary of Contents for Elation Rayzor Q7
- Page 1 RAYZOR Q 7™ User M anual 2 .0...
- Page 2 w w w . e l a t i o n l i g h t i n g . c o m RAYZOR Q 7 U ser M anual 2 .0 ™ ...
-
Page 3: Table Of Contents
w w w . e l a t i o n l i g h t i n g . c o m CONTENTS General Information……………………………………………………………………….……………... 4 Introduction……………………………………………………………………………….………. 4 Unpacking………………………………………………………..……………………….…..….. 4 Box Contents……………………………………...……………………………………………… 4 Customer Support…………………………………………….…………………….……………. 5 Warranty Registration………………………………………………………………….…..……. 5 Safety Instructions………………………………………………………......…………. -
Page 4: General Information
Congratulations, you have just purchased one of the most innovative and reliable lighting ™ fixtures on the market today! The RAYZOR Q7 has been designed to perform reliably for years when the guidelines in this booklet are followed. Please read and understand the instructions in this manual carefully and thoroughly before attempting to operate this unit. -
Page 5: Customer Support
WARRANTY REGISTRATION ™ The RAYZOR Q7 carries a two year (730 days) limited warranty. Please fill out the enclosed warranty card to validate your purchase. All returned service items whether under warranty or not, must be freight pre-paid and accompany a return authorization (R.A.) number. -
Page 6: Safety Instructions
If the power cord is damaged, replace it immediately with a new one of similar power rating. ™ Be sure to unplug the RAYZOR Q7 from the power outlet before performing any service related •... -
Page 7: General Guidelines
w w w . e l a t i o n l i g h t i n g . c o m 3. GENERAL GUIDELINES • NEVER OPEN THIS FIXTURE WHILE IN USE! • During the initial operation of this fixture, a light smoke or smell may emit from the interior of the fixture. -
Page 8: Features
w w w . e l a t i o n l i g h t i n g . c o m 4. FEATURES • 7 x 15W Quad Color RGBW LEDs • 100,000 Hour Rated LED Life •... -
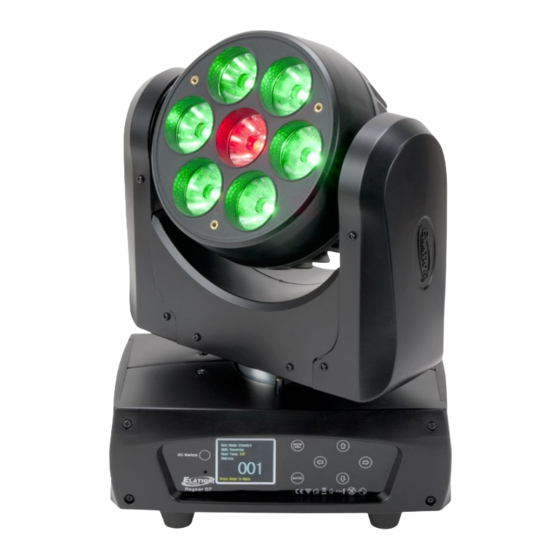
Page 9: Fixture Overview
w w w . e l a t i o n l i g h t i n g . c o m 5. FIXTURE OVERVIEW 1: LED Lens Assembly 2: DC Switch 3: Microphone 4: LCD Menu Control Display 5: Mode/Esc Button 6: ENTER Button 7: Left Button... - Page 10 w w w . e l a t i o n l i g h t i n g . c o m 1. LED Assembly – RGBW Quad LEDs comprise the LED assembly. 2. DC Switch – Controls menu and display power when disconnected from main power. 3.
-
Page 11: Mounting And Installation
w w w . e l a t i o n l i g h t i n g . c o m 6. MOUNTING AND INSTALLATION T he el ec tri c c onnec ti on m ust onl y b e c arri ed out b y a qu al if i ed el ec tri c i an. CAUTIONS •... -
Page 12: Mounting Points
w w w . e l a t i o n l i g h t i n g . c o m MOUNTING POINTS • Overhead mounting requires extensive experience, including amongst others calculating working load limits, installation material being used, and periodic safety inspection of all installation material and the device. -
Page 13: Securing
w w w . e l a t i o n l i g h t i n g . c o m SECURING • Secure the clamp to the bracket using a M12 screw fitted through the Ф13 center hole. •... -
Page 14: Understanding Dmx
The DMX controller knows to send data assigned to address 1 to that fixture no matter where it is located in the DMX chain. The RAYZOR Q7™ can be controlled via DMX-512 protocol. The RAYZOR Q7™ is a 64-channel DMX fixture. The DMX address is set electronically using the controls on the LCD menu. -
Page 15: Dmx Controller Connection
Connect the provided XLR cable to the female 3-pin XLR output of your controller and the other side to the male 3-pin XLR input of the RAYZOR Q7™ (Please refer to the diagram below.). You can chain multiple panels together through serial linking. The cable that should be used is two conductor, shielded DMX cable with XLR input and output connectors. -
Page 16: Dmx Terminator
w w w . e l a t i o n l i g h t i n g . c o m DMX-512 CONNECTION WITH DMX TERMINATOR A DMX terminator should be used in all DMX lines especially in longer runs. The use of a terminator may avoid erratic behavior in your DMX line. -
Page 17: Dmx Addressing
That means changing the settings of one channel will only affect the selected fixture. In the case of the RAYZOR Q7™, when in Extended 29 Channel mode (default can also be set to Basic 15 Channel and Standard 17 Channel modes), you should set the starting DMX address of the first unit to 1, the second unit to 30 (29 + 1), the third unit to 59 (29 + 30), the fourth unit to 88 (29 + 59) and so on. -
Page 18: Fixture Menu
. e l a t i o n l i g h t i n g . c o m 8. FIXTURE MENU ON-BOARD SYSTEM MENU The RAYZOR Q7™ comes with an easy to navigate system menu. The next section will detail the functions of each command in the system menu. LCD MENU CONTROL PANEL The control panel (see image below) located on back of the fixture allows you to access the main menu and make all necessary adjustments to the RAYZOR Q7™. -
Page 19: Menu Functions
w w w . e l a t i o n l i g h t i n g . c o m Set DMX Address A001~AXXX DMX Address Setting DMX Value ALL…… DMX Value Display FUNCTION Slave Mode Slave1, Slave2, Slave3 Slave Setting Auto Program... - Page 20 w w w . e l a t i o n l i g h t i n g . c o m RESET Reset All Reset All Settings FUNCTION Reset Pan/Tilt Reset Pan/Tilt Settings Auto Program, PAN, PAN-Fine, TILT, TILT-Fine, Move Speed, Strobe, Dimmer, Red-1, Green-1, Blue-1, White-1, Red-2, Test Channel...
-
Page 21: Function
w w w . e l a t i o n l i g h t i n g . c o m Auto Pro Part1 = Program 1 ~ 10 Program 1 Auto Pro Part2 = Program 1 ~ 10 Select Programs Select Program Program 2... - Page 22 w w w . e l a t i o n l i g h t i n g . c o m FUNCTION - DMX Value Display the DMX 512 value of each channel. 1. Tap MODE/ESC to access the main menu and tap ENTER. 2.
-
Page 23: Information
w w w . e l a t i o n l i g h t i n g . c o m INFORMATION - Time Information - Current Time Display the run time of the fixture from last power ON. The counter is reset after each time the device is powered OFF. - Page 24 w w w . e l a t i o n l i g h t i n g . c o m INFORMATION - Time Information - LastRun Password Display the timer password. (038) 1. Tap MODE/ESC to access main menu, tap UP/DOWN/LEFT/RIGHT until “Information”...
-
Page 25: Personality
w w w . e l a t i o n l i g h t i n g . c o m INFORMATION - Software Version Display the software version of the fixture. 1. Tap MODE/ESC to access main menu, tap UP/DOWN/LEFT/RIGHT until “Information”... - Page 26 w w w . e l a t i o n l i g h t i n g . c o m PERSONALITY - Status Settings - Pan Reverse Reverse the Pan movement, default is OFF. 1. Tap MODE/ESC to access the main menu, tap UP/DOWN/LEFT/RIGHT until “Personality”...
- Page 27 w w w . e l a t i o n l i g h t i n g . c o m PERSONALITY - Status Settings – Tilt Degree Select desired maximum degree of the Tilt movement, default is Tilt 270°. 1.
- Page 28 w w w . e l a t i o n l i g h t i n g . c o m PERSONALITY - Status Settings – Mic Sensitivity Select desired Microphone Sensitivity from 0% to 99%, default is 70%. 1.
- Page 29 w w w . e l a t i o n l i g h t i n g . c o m PERSONALITY - Service Setting - RDM PID With this function you can call up various submenus via RDM. This device is RDM ready.
- Page 30 w w w . e l a t i o n l i g h t i n g . c o m PERSONALITY - Display Setting – Shutoff Time Shut off the Control Panel display after 02 to 60 minutes, default is 05 minutes. 1.
- Page 31 w w w . e l a t i o n l i g h t i n g . c o m PERSONALITY – Display Setting - Disp Flash Control Panel display will flash if no DMX is signal is detected, default is OFF. 1.
-
Page 32: Reset Function
w w w . e l a t i o n l i g h t i n g . c o m PERSONALITY – Reset Default Restore factory settings function (ON or OFF), the default is OFF. 1. - Page 33 w w w . e l a t i o n l i g h t i n g . c o m EFFECT ADJUST – Manual Control Adjust the lamp more easily. All effects will be canceled, the shutter opens and the dimmer intensity will be set to 100 %.
-
Page 34: User Mode Setting
w w w . e l a t i o n l i g h t i n g . c o m USER MODE SETTING Select different channels list by different sequence. For example, after the user enter this manual, if select Auto Program = CH 22, means in this User’s mode, the “Dimmer”... -
Page 35: Edit Program
w w w . e l a t i o n l i g h t i n g . c o m EDIT PROGRAM – Select Program Select Auto Programs, default for Auto Pro Part1 is “Program 1”, for Auto Pro Part2 is “Program 2”, and for Auto Pro Part3 is “Program 3”. - Page 36 w w w . e l a t i o n l i g h t i n g . c o m EDIT PROGRAM – Edit Scenes Edit the scenes of the internal programs. 1. Tap MODE/ESC to access the main menu, tap UP/DOWN/LEFT/RIGHT until “Edit Program”...
- Page 37 w w w . e l a t i o n l i g h t i n g . c o m EDIT PROGRAM – Record Controller – Working With Built-In Program [continued] To start an Auto Program proceed as follows: 1.
- Page 38 w w w . e l a t i o n l i g h t i n g . c o m EDIT PROGRAM – Record Controller – Working With Built-In Program [continued] 4. Program Selection for Edit Program •...
- Page 39 w w w . e l a t i o n l i g h t i n g . c o m EDIT PROGRAM – Record Controller – Working With Built-In Program [continued] The 3 Slave groups run the Auto Program in certain time segments, as shown in the following picture: RAYZOR ...
-
Page 40: Dmx Channel Values
w w w . e l a t i o n l i g h t i n g . c o m 9. DMX CHANNEL FUNCTIONS AND VALUES RAYZOR Q 7 U ser M anual 2 .0 ... - Page 41 w w w . e l a t i o n l i g h t i n g . c o m RAYZOR Q 7 U ser M anual 2 .0 ™ ...
-
Page 42: Led Groups
w w w . e l a t i o n l i g h t i n g . c o m LED GROUPS RAYZOR Q 7 U ser M anual 2 .0 ™ ... -
Page 43: Error Message
If the error messages remain after performing 2 motor resets, only the channels that have errors will not work properly, all other channels will work normally. Please contact Elation Professional Customer Support for service. ®... -
Page 44: Snoot & Diffusion Filter Installation
w w w . e l a t i o n l i g h t i n g . c o m 11. SNOOT & DIFFUSION FILTER INSTALLATION SNOOT (SKU# RAY047-SNOOT) To install place on top of Lens assembly and fix three screws as shown in diagram below. DIFFUSION FILTER (SKU# RAY047-GFH) To install place on top of Lens assembly and fix three screws as shown in diagram below. -
Page 45: Cleaning And Maintenance
w w w . e l a t i o n l i g h t i n g . c o m 12. CLEANING AND MAINTENANCE CLEANING Frequent cleaning is recommended to insure proper function and an extended fixture life. •... -
Page 46: Photometric Data
w w w . e l a t i o n l i g h t i n g . c o m 13. PHOTOMETRIC DATA RAYZOR Q 7 U ser M anual 2 .0 ... -
Page 47: Dimensional Drawings
w w w . e l a t i o n l i g h t i n g . c o m 14. DIMENSIONAL DRAWINGS Please Note: Specifications and improvements in the design of this unit and this manual are subject to change without any prior written notice. RAYZOR ... -
Page 48: Circuit Schematic
w w w . e l a t i o n l i g h t i n g . c o m 15. CIRCUIT SCHEMATIC RAYZOR Q 7 U ser M anual 2 .0 ... -
Page 49: Warranty
B. For warranty service, send the product only to the Elation Professional® factory. All shipping charges must be pre-paid. If the requested repairs or service (including parts replacement) are within the terms of this warranty, Elation Professional®... -
Page 50: Technical Specifications
w w w . e l a t i o n l i g h t i n g . c o m 17. TECHNICAL SPECIFICATIONS Power supply Voltage Requirements AC 100 ~240V / 50Hz~60Hz Fuse Protection 250V / T3.15A Power Consumption 140 Watts Light Source... -
Page 51: Related Items & Accessories
w w w . e l a t i o n l i g h t i n g . c o m 18. RELATED ITEMS & ACCESSORIES ORDER CODE ITEM DESCRIPTION RAY047-SNOOT Snoot Lens Cover RAY047-GFH Diffusion Filter Holder RAYZOR ... - Page 52 Elation Professional 6122 S. Eastern Ave. Los Angeles, CA. 90040 323-582-3322 / 323-832-9142 fax www.elationlighting.com info@elationlighting.com Elation Professional B.V. Junostraat 2 6468 EW Kerkrade Netherlands Telephone: +31 45 546 85 66 Fax: +31 45 546 85 96 E-Mail: info@elationlighting.eu...