Elation Power Wash 575E Instruction Manual
Elation user manual lighting fixture power wash 575e
Hide thumbs
Also See for Power Wash 575E:
- User manual (54 pages) ,
- User manual (23 pages) ,
- User instructions (48 pages)
Table of Contents
Advertisement
Quick Links
Advertisement
Table of Contents

Related Manuals for Elation Power Wash 575E


Summary of Contents for Elation Power Wash 575E
- Page 1 Instruction Manual from software version 1.0 (instruction version 1.0)
- Page 2 This side is intentionally unlabelled. Elation Lighting www.elationlighting.com...
-
Page 3: Table Of Contents
Description of Device...7 1.1 Safety Instructions...8 Preparation and Installation...9 2.1 Mounting...9 2.1.1 Clamps ...9 POWER WASH 575E 2.2 Secure the POWER WASH 575E 2.3 Connections... 11 2.3.1 Power supply ... 11 2.3.2 DMX... 11 2.4 Fuse... 11 The Menu Field... 12 3.1 Adjust the DMX- Address... - Page 4 DMX Channel Selection (DMX Protocol)...22 Change the Lamp...24 5.1 Safety Regulations...24 5.2 Realize the Lamp Change ...24 Maintenance and Cleaning the POWER WASH 575E 6.1 Safety Regulations...25 6.2 Circumference and Interval (rule-of-thumb)...25 6.3 Cleaning the Optical System ...26 Technical Specification...26 Index ...30...
- Page 5 INTRODUCTION: Congratulations, you have just purchased one of the most innovative and reliable lighting fixtures on the market today! The Power Wash 575E™, has been designed to perform reliably for years when the guidelines in this booklet are followed. Please read and understand the instructions in this manual carefully and thoroughly before attempting to operate this unit.
- Page 6 WARRANTY REGISTRATION: The Power Wash 575E™ carries a two year (730 days) limited warranty. Please fill out the enclosed warranty card to validate your purchase. All returned service items whether under warranty or not, must be freight pre-paid and accompany a return authorization (R.A.) number. The R.A. number must be clearly written on the outside of the return package.
-
Page 7: Description Of Device
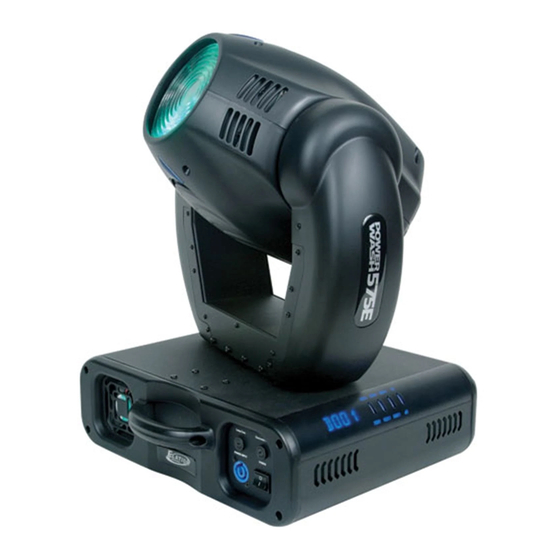
1 Description of Device 6. Software-Update connector 7. Microphone- Intensity 8. DMX- Input 9. DMX- Output 10. Fan (air inlet/outlet) Power On/Off 12. Mains supply (Powercon) 13. Fuse lamp 14. Fuse electronics 15. Carrying handles Elation Lighting DMX IN DMX OUT 1.Ground 2.Data - 3.Data +... -
Page 8: Safety Instructions
7. To allow a secure operation, follow also the Installation guide described in chapter 2. Operating the POWER WASH 575E like Safety cables or clamps/hooks can increase the risk of an accident. 8. Installation should be done by qualified staff only. You need to pay attention to the common rules of technology that are not explicitly mentioned in this manual. -
Page 9: Preparation And Installation
2 Preparation and Installation 2.1 Mounting POWER WASH The POWER WASH to the wall. It can also be operated while standing on the floor. Keep a safety distance of 0.5 m towards any easy inflammable materials (decoration etc.). Install a safety wire that can hold at least 10 times the weight of the fixture. Never use the carrying handles for secondary attachment. -
Page 10: Secure The Power Wash 575E
(each two opposite threads max. M10x20). POWER WASH 575E 2.2 Secure the POWER WASH 575E Regardless of the rigging of the POWER stipulated safety wire. Therefore you have to thread to safety wire through to two provided holes on the backside of the fixture and connect it with the truss- support. -
Page 11: Connections
The POWER WASH 575E wire fuses. Lamp: 230V / T 5A Electronic: 230V / T 1A Please see the printing on the POWER WASH 575E Attention: • Disconnect AC outlet before changing a fuse! • Use only the original declared fuse type! -
Page 12: The Menu Field
The Menu Field You’ll find the control board on the side part of the base. It allows you to make all necessary adjustments of the POWER Mode-key you get into the main menu. Afterwards you can navigate through the menu with the Up/Down-keys. Push the Enter-key to get in the next menu level or to confirm your settings. -
Page 13: Adjust The Dmx- Address
3. Use the Up/Down-keys to select the desired address. Confirm the setting by pressing the Enter-key (the display shows cancel. The DMX- Address is stored also while switching off the POWER WASH 575E Elation Lighting Calibration of the Zoom ZOOM... -
Page 14: The Test Program (Test)
(TEST) 3.2 The Test Program test The Test-Program allows you to run a complete self test procedure of all functions. Press Enter to confirm or Mode to cancel. 3.3 The Audio Program Audi The Audio-menu allows you to run a stand alone audio program. This chaser can run either fast or slow. -
Page 15: Reset (Rese)
(RESE) 3.5 Reset RESE Press the Enter-key to run a reset of all fixture functions ( display). 3.6 Running time of lamp and unit TIME By this option can read out three different running times of the fixture. Running time of the fixture (no destructible). POWR Running time of the lamp (erasable). -
Page 16: Special Functions (Spec)
3.10 Special Functions SPEC This menu allows you to enter further special functions of the POWER 575E. 575E. In detail they are: 3.10.1 Manual Drive MANU This function allows you to drive all the fixture functions manually. Select the desired function with the Up/Down-keys and confirm with Enter. Now choose the desired value with the Up/Down-keys and confirm again with Enter or cancel and return to the menu with the Mode-key. -
Page 17: 3Lamp Off Via Dmx
If you have chosen DMX or direct at the POWER WASH 575E 3.10.3 Lamp Off via DMX DLOF This function enables to switch off the lamp via DMX or not. Use the Up/Down-keys to select if you don't want this function. Press Enter to confirm or Mode to cancel and return to the menu. -
Page 18: 5Display
3.10.6 Fixture Temperature TEMP This function allows you to read out the actual temperature of the POWER WASH 575E POWER WASH 575E temperatures below 80°C are not critical. 80°C and more lead the lamp being switched off at a critical point. Please note for a save operation that the outside temperature should not exceed 45°C. -
Page 19: Adju
exceeds max. inside temperature, then the POWER 575E 575E In addition to these settings, you can set to fan speed to minimum via DMX (Special channel, DMX value 224..229). This will last until a tempera- ture of 90° is reached. 3.10.8 Adjustments and Calibrations ADJU By this function you can adjust and calibrate the positions of the different... -
Page 20: 9Default Settings (Dfse)
MAGE YELL 3.10.9 Default Settings DFSE Press Enter to reset all fixture personalities (not the adjusted functions) to the default values. On the display will appear faults are set. Function DMX Address Pan reverse Tilt reverse Automatic lamp on Lamp on via DMX Display Cooling fan Feedback... - Page 21 minutes after having switched off (lamp too hot). The message will appear on the display if the lamp doesn’t ignite within 20 seconds. The fixture will store this command and automatically ignite the lamp after 5 minutes. When igniting the lamp, the electronic ballast will examine whether the IG E lamp ignited or not.
-
Page 22: Dmx Channel Selection (Dmx Protocol)
4 DMX Channel Selection (DMX Protocol) Channel Function 1) PAN- 0 .. 530° coarse 2) PAN-fine Low- Pos ... High- Pos + 2,1° (16 Bit) 3) Tilt- 0 .. 285° coarse 4) Tilt-fine Low- Pos … High- Pos + 1,1° (16 Bit) 5) Color* open (fast) color 1, Brilliant Blue (fast) - Page 23 Channel Function Shutter open Lamp ON (ignition) 10) Dimmer Dimmer closed (0%) Dimmer 1%...99% Dimmer open (100%) 11) Beam- Open shape Shaper Frost 12) Zoom Zoom 0% - 100% 13) Special No function Audio CMY chaser slow Audio CMY chaser fast Rotating color chaser Color chaser C / C+1 slow –...
-
Page 24: Change The Lamp
• Wait min. 20 minutes after the last operation to cool down the fixture. • Don’t touch the bulb of the lamp with bare fingers (this can cause damages). • Before you put the POWER WASH 575E otherwise your retina can be hurt! 5.2 Realize the Lamp Change... -
Page 25: Power Wash 575E
6.1 Safety Regulations • Pull out the main plug! • Wait min. 20 minutes after the last operation to cool down the fixture. • Before you put the POWER WASH 575E otherwise your retina can be hurt! 6.2 Circumference and Interval (rule-of-thumb) The contamination of the fixture depends on the environment details. -
Page 26: Cleaning The Optical System
Two on the front side and two on the back side of the head. 4. Do the work as explained in the list above. 5. Before you put the POWER WASH 575E otherwise your retina can be hurt! 7 Technical Specification... - Page 27 Standard DMX-512, 3 pole XLR; [+] = Pin 3 [-] = Pin 2 [Ground] = Pin 1. The DMX- addressing starts at the DMX- address [001]. Pan / Tilt Pan- movement Tilt- movement Weights and measures Width of the base Length of the base height (head vertical) Weight (net)
- Page 28 2 YEAR (730 DAYS) LIMITED WARRANTY A. Elation Professionals Professionals products to be free of manufacturing defects in material and ® workmanship for a period of two years (730 days) from the date of purchase. This warranty shall be valid only if the product is purchased within the United States of America, including possessions and territories.
-
Page 29: Elation Lighting Www.elationlighting.com
F. No warranty, whether expressed or implied, is given or made with respect to any accessory supplied with products described above. Except to the extent prohibited by applicable law, all implied warranties made by Elation Professionals in connection ® with this product, including warranties of merchantability or fitness, are limited in duration to the warranty period set forth above. -
Page 30: Index
8 Index Audio... 11 BGV C1 ... 7 Circumference... 22 Cleaning ... 22 Description of Device... 5 DIN VDE 0711-217 ... 7 Display... 15 DMX ... 9 DMX- Adresse... 11 Error Messages... 18 Fan... 15 Fuse... 9 Injury of the retina... 6 Invert... -
Page 31: Elation Lighting Www.elationlighting.com
Elation Professional 4295 Charter Street Los Angeles, CA. 90058 323-582-3322 / 323-582-3108 fax www.ElationLighting.com / info@ElationLighitng.com Elation Lighting www.elationlighting.com...