
Related Manuals for GE ZIC36ON Series


Summary of Contents for GE ZIC36ON Series
- Page 1 GE Consumer Home Services Training TECHNICAL SERVICE GUIDE Monogram BMNF Refrigerators with Electronic Controls GEA01198 MODEL SERIES: ZIC36ON PUB # 31-9079 12/01...
- Page 2 If grounding wires, screws, straps, clips, nuts, or washers used to complete a path to ground are removed for service, they must be returned to their original position and properly fastened. GE Consumer Home Services Training Technical Service Guide Copyright © 2001 All rights reserved.
-
Page 3: Table Of Contents
TABLE OF CONTENTS TECHNICAL DATA ........................3 MODEL NOMENCLATURE ......................4 RATING PLATE ........................4 MINI-MANUAL .......................... 4 SERIAL NUMBER ........................5 COMPONENT AND CONNECTOR LOCATOR VIEWS .............. 6 CABINET........................... 9 Cabinet ..........................9 Machine Compartment ....................10 Door Closure Mechanism....................11 Fresh Food Door and Hinges ................... - Page 4 Table of Contents (cont.) Condenser Loop ......................33 Dryer ..........................34 Evaporator ........................34 Auxiliary Lines ........................ 35 Refrigerant Charge ......................35 DIAGNOSTIC MODE ....................... 36 DIAGNOSTIC FLOWCHARTS ....................37 PARTS LIST ........................... 47 WARRANTY ..........................57 – 2 –...
-
Page 5: Technical Data
TECHNICAL DATA IMPORTANT SAFETY NOTICE DISCONNECT POWER CORD BEFORE SERVICING This information is intended for use by individuals IMPORTANT - RECONNECT ALL GROUNDING DEVICES possessing adequate backgrounds of electrical, All parts of this appliance capable of conducting electrical current are grounded. If grounding wires, electronic and mechanical experience. -
Page 6: Model Nomenclature
MODEL NOMENCLATURE Z I C S 360 N M A LH Brand/Product Door Type Z - Monogram F - Flat R - Right L - Left Door Swing Style I - Built In Engineering A - Initial Design Configuration B - 1st Revision C - Bottom Mount C - 2nd Revision D - 3rd Revision... -
Page 7: Serial Number
SERIAL NUMBER The serial number consists of two letters, followed by six numerals. The two prefix letters of the serial number indicate the month and year the product was manufactured. The year of manu- facture does not correspond with the model year of the model number. Refrigerators using a number four (4) as the first digit of the serial number are designated as Celya production. -
Page 8: Component And Connector Locator Views
COMPONENT AND CONNECTOR LOCATOR VIEWS Compressor Dryer Condenser Fan Capillary Run Capacitor Woodpecker Clip Figure 1 - Machine Compartment – Side View Evaporator Thermistor Evaporator Defrost Overtemperature Thermostat Accumulator Defrost Heater Figure 2 - Evaporator – 6 –... - Page 9 Overload Capacitor PTCR Relay Figure 3 - Compressor Overload/PTCR Relay Main Control Water Filter Water Valve Board Cover Relay/Overload Cover Sabbath Switch Figure 4 - Machine Compartment Front View Evaporator Fan Motor Evaporator Fan Figure 5 - Connector Evaporator Fan –...
- Page 10 Main Control Board Sabbath Switch Door Switch Temperature Touch Panel Damper Cold Air Outlets Fresh Food Thermistors Air Duct P0003329 Figure 5 - Fresh Food Compartment Freezer Thermistor Icemaker Freezer Drawer Switch P0003376 Figure 6 - Freezer Compartment – 8 –...
-
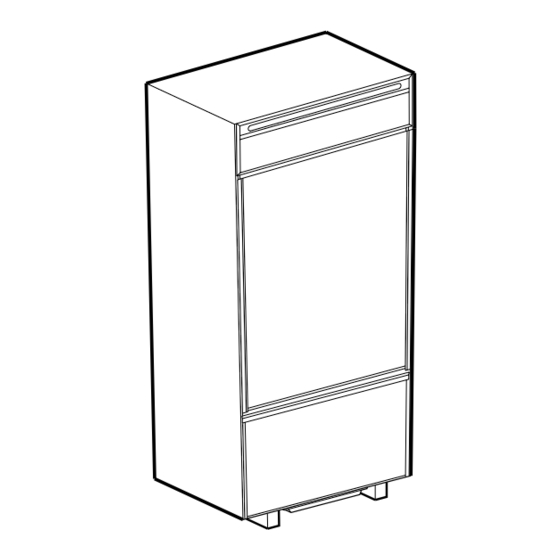
Page 11: Cabinet
CABINET Cabinet The outer case is made of galvanized steel. The fresh food and freezer liners are painted metal with a smooth finish. Individual fresh food and freezer compartments provide separation and enhanced individual control between the compartments. The metal liner provides a thermal break between the interior of the refrigerator and freezer compartments and reduces the transfer of heat from the room into the fresh food and freezer... - Page 12 Door Closure Mechanism The door closure mechanism uses a spring to provide positive door closure from 30 degrees. The door closure mechanism actuator arm has a spring attached to the rear and is supported by guide rollers on either side of the base channel. Spring The roller circumferences and the actuator arm detents are matched for smooth operation.
-
Page 13: Door Closure Mechanism
Fresh Food Door and Hinges WARNING: Use the appropriate safety equipment Center Hinge and lifting techniques. Caution: Use wood or a heavy plastic sheet to protect the floor where the door will be placed. Note: Unit must be removed from its installation to remove center hinge. -
Page 14: Rollers And Leveling
Green Power Light Feeler Arm To service the icemaker, refer to GE Publication 31-9063. Water Valve and Water Line The water valve is mounted to the side of the water filter bracket in the machine compartment. - Page 15 2. Raise the machine compartment cover panel. 3. Remove 2 Phillips screw attaching the water Water Valve valve cover. 4. Remove 2 Phillips screw attaching the water valve to the filter bracket. 5. Disconnect the wiring harness connector and 2 water lines from the water valve and remove. To Replace the Water Line from the Water Valve to the Fill Tube Grommet Note: Some water may leak from the water supply...
-
Page 16: Airflow
AIRFLOW Damper The fresh food compartment receives chilled air via an electronic damper that is positioned at the top rear of the fresh food compartment. The damper is controlled by the main control board and when open, allows the evaporator fan to push chilled air from the evaporator into the fresh food compartment. To remove the damper 1. -
Page 17: Evaporator Fan
Evaporator Fan Evaporator Fan Adjustment The position of the fan blade in relation to the shroud is critical. Refer to evaporator fan adjustment graphic for specifications. 5/16 +/- .03 If the fan shorts, it will damage the main control board. If the resistor on the main control board is burnt, you must replace the fan and the board (see photo). - Page 18 The evaporator fan utilizes a permanent magnet, 4-pole, DC motor that can operate at three different speeds: high, medium, and low (medium and low are the same speed, controlled by the main control board). The speed of the fan is controlled by the voltage output from the main control board. Voltage output from the control board to the fan is 12.6 VDC;...
- Page 19 White Wire (DC Common) The white wire is the DC common wire used for testing. During repairs, DC polarity must be observed. Reversing the DC polarity will cause a shorted motor and/or board. Red Wire (Supply) Each motor uses an internal electronic controller to operate the motor.
-
Page 20: Condenser Fan
To remove the fan Screws 1. Remove the drawer (see procedure). 2. Remove 5 screws securing the rear duct. 3. Disconnect the freezer light and light thermostat wiring and the remove duct. 4. Disconnect the wire connector from the fan motor. 5. -
Page 21: Drain Pan Fan
• Pre-Chill Operation Drain Pan Fan • Defrost Heater Operation The Monogram BMNF has an auxiliary evaporation fan located under the unit. The purpose of this fan • Dwell Period is to improve the evaporation rate of drain water • Post Dwell should extreme conditions occur. -
Page 22: Normal Operating Characteristics
Normal Operating Characteristics That Are Adaptive Defrost (Defrost Heater Operation) Different from Previous Models After 15 minutes of pre-chill operation, the main control board turns off the compressor, condenser • Evaporator fan running, without compressor or fan, and evaporator fan. condenser fan. -
Page 23: Defrost Heater
Defrost Heater Screws Caution: Use care to avoid scratching the finish on unit walls. The defrost heater is a single-calrod type, radiant heater mounted under the evaporator. To remove the defrost heater: 1. Remove the drawer (see procedure). 2. Remove upper right slide/support assembly by removing 3 Phillips screws. -
Page 24: Control System
CONTROL SYSTEM Temperature Control Assembly Touch Panel Touch Panel and Temperature Control Board The temperature control assembly is located at the top front of the fresh food compartment and contains the touch panel and temperature control board. P0003340 The temperature control board receives switched DC voltage from the main control board. -
Page 25: Main Control Board
Pin 1 J8 Compressor Pin 1 J9 Defrost Heater Comm. Tx/Rx J4 Pin 1 Comm. +12V Pin 2 Comm. Common Pin 3 Discrete Disp. Input 1 Pin 4 Pin 1 J11 Line Discrete Disp. Input 2 Pin 5 Damper - Blue J3 Pin 1 Damper - White Pin 2... - Page 26 t s i t s i a t l e t l t s i t s i a t l e t l t s i t s i a t l e t l t s i t s i a t l t s i d l l...
- Page 27 i g i l a t i g i l a t i g i . y l c t i c t i , l o n i l t a l t a l i t p t a l c t i c t i , l o...
-
Page 28: Main Control Board Locator Tables
Main Control Board Locator Tables t s i t s i t s i t s i t s i a t l o l l , ) . a t l – 26 –... - Page 29 a t l n i l a t l a t l n i l a t l a t l n i l a t l o l l a t l n i l a t l i g i l a t .
- Page 30 g i l c t i o l l g i l c t i Low Voltage DC 120 VAC GEA01194 – 28 –...
- Page 31 i g i l a t . y l a t l n i l a t l a t l n i l a t l a t l n i l a t l o l l a t l n i l a t l t s i...
-
Page 32: Thermistors
Thermistors This main control board uses input from 4 thermistors. These thermistors are located in the fresh food section, the freezer section, and on the evaporator. The main control board monitors the thermistors to determine the temperature in these areas of the unit and determines which components to run and when to run them based on this information. -
Page 33: Electrical System
ELECTRICAL SYSTEM Door and Drawer Switches The door switch (fresh food door or freezer drawer) closes when the door is open. When the door switch is closed, L1 is provided to the compartment light(s). The main control board receives L1 input on pin 6, J7 when the fresh food door switch is closed (door open). -
Page 34: Schematic
Schematic – 32 –... -
Page 35: Refrigeration System
REFRIGERATION SYSTEM COMPRESSOR CONDENSER The major components of the refrigeration system are a reciprocating-type compressor, condenser, condenser loop, dryer, and evaporator. These components, except for the condenser loop, are all replaceable separately. Compressor PROCESS TUBE DRYER The compressor is a reciprocating type. Refer to the mini-manual for the BTU/hour rating and the compressor capacity test specification. -
Page 36: Dryer
Dryer The dryer is positioned vertically in the center of the machine compartment. A copper process tube, connected to the inlet of the dryer, provides access to the high-pressure side of the refrigeration system. The capillary is connected to the outlet of the dryer. Replacement of filter dryer requires additional refrigerant when installed (0.5 oz). -
Page 37: Auxiliary Lines
16. Solder the suction line to the evaporator using silfos. Note: Mastic should be replaced on evaporator discharge line after replacing the evaporator. 17. Solder the capillary tube to the evaporator using silfos. 18. Install a replacement dryer. 19. Evacuate and recharge the system using currently accepted procedures. -
Page 38: Diagnostic Mode
Diagnostic Mode Enter the diagnostic mode by pressing both the freezer temperature pads (plus and minus) and the refrigerator temperature pads (plus and minus) simultaneously. All 4 pads must be held for approximately 3 seconds. Blinking “0’s” in both displays indicate the refrigerator has entered the test mode. -
Page 39: Diagnostic Flowcharts
Fresh Food Warm - Freezer Normal Check control settings and temperatures. Food at setting of 37 ˚F and 0 ˚F with no door Control settings Adjust settings and allow openings for 12 hours should be: require adjustment 24 hours to stabilize. Fresh food 34 ˚F to 42 ˚F Freezer -8 ˚F to +6 ˚F Control settings OK... - Page 40 Fresh Food Too Cold - Freezer Normal Check control settings and temperatures. Food at a setting of 37 ˚F and 0 ˚F with no Controls require Adjust setting and allow door openings for 12 hours should be: adjustment 24 hours to stabilize. Fresh food 34 ˚F to 42 ˚F Freezer -8 ˚F to +6 ˚F Control settings OK...
- Page 41 Fresh Food Warm - Freezer Warm Check control settings and temperatures. Control setting Adjust setting and allow Food at setting of 37 ˚F and 0 ˚F with no door openings for 12 hours should be: require adjustment 24 hours to stabilize. Fresh food 34 ˚F to 42 ˚F Freezer -8 ˚F to +6 ˚F Control settings OK...
- Page 42 Freezer Warm - Fresh Food Normal Check control settings and temperatures. Food at a setting of 37 ˚F and 0 ˚F with no Control settings Adjust settings and allow door openings for 12 hours should be: require adjustment. 24 hours to stabilize. Fresh food 34 ˚F to 42 ˚F.
- Page 43 Compressor Not Running Unplug refrigerator. Warm freezer thermistor to 70 ˚F. Connect power and set controls to 37 ˚F and 0 ˚F. Check for 120 VAC at connector J7-9 orange wire to Replace main Is the compressor running? terminal J8 white wire. control board.
- Page 44 Refrigerator Dead - No Sound, No Cooling Check house supply voltage. House wiring Are the interior lights on? Problem. Is 120 VAC present? Check for 120 VAC at 3-pin connector at the rear of the Repair or replace unit. power cord. Is 120 VAC present? Repair wiring connections at...
- Page 45 Damper Door Does Not Operate Push on damper door to check manual Remove blockage or movement. replace damper. Is the damper door stuck? Push damper door halfway closed. Unplug refrigerator to reset main control board. Set temperature controls to 37 ˚F and 0 ˚F. Reconnect power.
- Page 46 Heavy Frost on Evaporator Always check door ajar, customer usage - numerous door openings, etc. Unplug refrigerator. Unplug blue Verify thermistors are within connector from main board. Measure Check wiring proper range using between red wire on connector and orange connections.
- Page 47 Evaporator Fan Not Running Always check fan for obstruction first. Unplug refrigerator to reset main control board. Warm freezer thermistor to 70 ˚F. Set temperature controls to 37 ˚F and 0 ˚F. Reconnect power. At the evaporator fan connector, check for Unplug J2 connector on the main control board.
- Page 48 Condenser Fan Not Running Always check for obstruction first. Unplug refrigerator to reset main control board. Warm freezer thermistor to 70 ˚F and set temperature controls to 37 ˚ F and 0 ˚ F. Reconnect power. At the condenser fan connector, Unplug J2 connector on the main control check for 13 VDC from the red to board.
-
Page 49: Parts List
PARTS LIST – 47 –... - Page 50 – 48 –...
- Page 51 – 49 –...
- Page 52 – 50 –...
- Page 53 – 51 –...
- Page 54 View Description Part # PM MINI MANUAL 31-51357 USE & CARE MANUAL 49-60127 CUSTOM OPTIONS GUIDE 49-60136 DISH BUTTER ASM WR19X0035 BUCKET EGG WR32X1435 SENSOR TEMP WR55X10025 SCREW WR01X1826 DC FRESH FOOD FAN WR60X10051 SOCKET STRAIGHT LIGHT FZ WR02X10732 RING COMPRESSION FAN WR02X10509 SWITCH LIGHT FZ WR23X0427...
- Page 55 1539 BRKT COND FAN MOTOR LG WR02X10945 1541 BAFFLE CONDENSER LH WR17X11034 1546 FILTER BRACKET WR02X10946 1548 EVAPORATOR COVER 36" BM WR74X10097 1549 EVAPORATOR FAN COVER WR74X10098 1550 BRACKET DAMPER MTG WR17X11009 1551 SCREW IM STRAP, PAN WR01X5645 1553 WATER COLLECTOR WR17X11010 1557 HOOD HINGE MOUNT 36...
- Page 56 5225 SEAL, FRT VEG PAN GLASS WR14X10012 5226 BUTTON GLIDE WR01X10047 5227 SUPPORT, SLIDE LH WR72X10013 5232 BUSHING, SHOWCASE PIVOT WR01X10048 5245 FZ SLIDE/SUPPORT ASM LH WR72X10084 5261 MULLION BLOCK KIT BTM.MT WR49X10015 5308 FZ SLIDE/SUPPORT ASSY RH WR72X10014 5359 SCREW, TRUSS HD 1/4-20 X WR01X10049 5391...
- Page 57 7572 CAP/SUCTION TUBE ASM WR86X10016 7573 STUD SPRING FF DOOR WR01X10258 7579 HINGE TOP RH FF DOOR ASM WR13X10208 7582 CONDENSER MONOGRAM BM WR84X10030 7584 GASKET FF LIGHT TRIM WR38X10255 7589 HINGE BTM RH FF CASE ASM WR13X10209 7752 SCREW 12-24TT OHT .900 WR01X1845 7766 SPRING WHEEL #LE022C4...
- Page 58 Notes – 56 –...
-
Page 59: Warranty
WARRANTY YOUR MONOGRAM REFRIGERATOR WARRANTY Staple sales slip or cancelled check here. Proof of original purchase date is needed to obtain service under warranty. WHAT IS FULL TWO-YEAR WARRANTY For two years from date of original purchase, we will provide, free of charge, parts and service labor in COVERED your home to repair or replace any part of the refrigerator that fails because of a manufacturing defect.