Table of Contents
Advertisement
Advertisement
Table of Contents

Related Manuals for Huawei HG659b


Summary of Contents for Huawei HG659b
-
Page 1: User Guide
HG659b Home Gateway User Guide HUAWEI TECHNOLOGIES CO., LTD. - Page 2 HG659b Home Gateway V100R001 User Guide Issue 202674_01 Huawei Technologies Co., Ltd. provides customers with comprehensive technical support and service. Please feel free to contact our local office or company headquarters. Huawei Technologies Co., Ltd. Address: Huawei Industrial Base Bantian, Longgang...
- Page 3 Huawei Technologies Co., Ltd. and its affiliates ("Huawei"). The product described in this manual may include copyrighted software of Huawei and possible licensors. Customers shall not in any manner reproduce, distribute, modify, decompile, disassemble, decrypt, extract, reverse engineer, lease, assign, or sublicense the said software, unless such restrictions are prohibited by applicable laws or such actions are approved by respective copyright holders.
- Page 4 Privacy Policy To better understand how we protect your personal information, please see the privacy policy at http://consumer.huawei.com/privacy-policy.
-
Page 5: Table Of Contents
2 Hardware Installation ......... 6 2.1 Selecting an Installation Location ......6 2.2 Installing the HG659b on a DSL Broadband Service ... 7 2.3 Installing the HG659b on a Fibre Broadband Service . 8 2.4 Installing USB Mobile Broadband on the HG659b..9 2.5 Getting Started ........... - Page 6 On Windows 8 Desktop ........17 On Windows 8 Mobile ........... 17 On Google Android 4 ..........18 On Apple Mac OS X ..........18 On Apple iOS ............18 4.4 Changing Your WLAN Name and Password ....19 5 USB Device ............20 5.1 USB Storage Device ..........
- Page 7 9 Maintenance Guide ..........35 9.1 Changing the Web Management Page User Name and Password ..............35 9.2 Restoring Default Settings ........35 9.2.1 Using the Configuration Tool ......36 9.2.2 Using the Reset Button ........ 36 9.3 Changing the Web Management Page IP ....37 10 FAQs ...............
-
Page 8: Product Overview
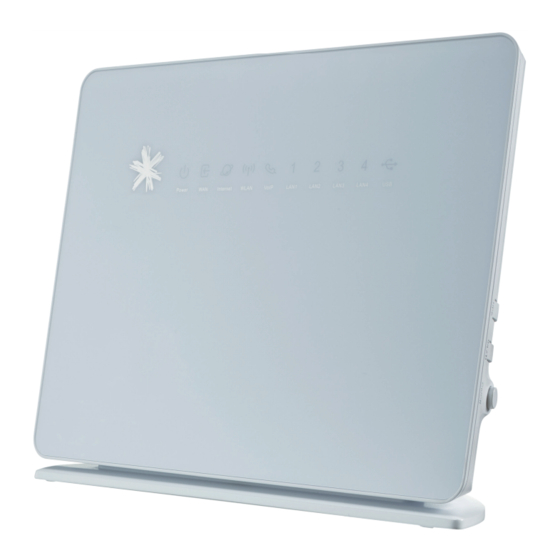
1 Product Overview 1.1 Ports and Buttons Number Port or Description Button Starts Wi-Fi protected setup (WPS) negotiation. WLAN Enables or disables the WLAN function. On/Off Powers the HG659b on or off. Power Connects to a power adapter. - Page 9 Button Reset Restores the HG659b to its default settings after you press and hold this button for 8 seconds to 10 seconds while the HG659b is powered on. CAUTION A reset will result in all custom data and settings being lost. Use with caution.
-
Page 10: Indicators
1.2 Indicators Indicator Status Description Power Steady The HG659b is powered on. The HG659b is powered off or faulty. Blinking A DSL connection is being activated. Steady A DSL connection has been set up and activated. A WAN connection has been set up. - Page 11 WAN has not been set up. The HG659b is powered off. WLAN Steady The HG659b has WLAN enabled, but is not transmitting data. Fast The HG659b has WLAN enabled, and Blinking data is being transmitted.
- Page 12 Indicator Status Description LAN1 ~ Steady The HG659b is connected to a device LAN4 properly. Blinking Data is being transmitted between the HG659b and the device connected. No connection is set up on the port. The HG659b is powered off.
-
Page 13: Hardware Installation
2 Hardware Installation 2.1 Selecting an Installation Location Place the HG659b on a well-ventilated even surface without exposure to direct sunlight. For the best possible performance, take note of the following: − Make sure there are no obstacles, such as concrete or wooden walls, between the computer and HG659b. -
Page 14: Installing The Hg659B On A Dsl Broadband Service
3. Telephone 4. HG659b 5. Power adapter 6. Desktop computer 7. Set-top Box 8. Laptop computer 9. Mobile phone 10. Tablet When setting up the HG659b for the first time, connect the HG659b to a computer using an Ethernet cable... -
Page 15: Installing The Hg659B On A Fibre Broadband Service
(ONT) installed in your premise. If you have subscribed to fibre broadband services, connect your HG659b WAN Ethernet port to your fibre company ONT using the blue Ethernet cable supplied. Connect your devices in the sequence indicated in the following figure. -
Page 16: Installing Usb Mobile Broadband On The Hg659B
If you wish to use 3G mobile broadband to access the Internet, plug in a supported 3G USB Mobile Broadband T-Stick into the USB interface in the rear of the HG659b. Connect your devices in the sequence indicated in the following figure. -
Page 17: Getting Started
2.5 Getting Started To power on the HG659b, press its power button. After the HG659b is powered on, the HG659b indicator turns on. If the indicators do not behave as expected, ensure that everything is plugged in correctly. -
Page 18: Setting Network Parameters
HG659b parameters. Before you log in to the HG659b web management page, ensure that the computer used for the login is connected to the HG659b and has been configured to automatically obtain an IP address or assigned with a static IP address. -
Page 19: Configuring A Wireless Account
I want to Set Up WLAN page used to configure the wireless account. The default SSID and WLAN Key printed on the HG659b's rear panel are unique and secure. If you do not want to change them, just turn the WLAN switch on. -
Page 20: Wireless Connection Setup
HG659b 4.1.1 Using the WLAN Button Press the WLAN button in the HG659b to enable or disable the WLAN. To ascertain whether the WLAN is enabled, view the WLAN indicator. The WLAN function is enabled by default. You can enable or disable the WLAN as follows: −... -
Page 21: Setting Up A Wireless Connection Using The Wps Button
The wireless device (laptop, tablet, or mobile phone) to connect to the HG659b is WPS-capable. The wireless network security mode of the HG659b is WPA2-PSK or WPA-PSK/WPA2-PSK, for the WPS function can be used only when the security mode of the WLAN is set to WPA2-PSK, or WPA-PSK/WPA2-PSK. - Page 22 HG659b for 1 second or more. The WPS button indicator blinks. When the WPS button indicator on the HG659b is steady on, a connection between the HG659b and wireless device is set up. The WPS button indicator is on for 300 seconds.
-
Page 23: Manually Setting Up A Wireless Connection
For details, see the network adapter's user guide. Before setting up a wireless connection, record the WLAN name and password of the HG659b. The default WLAN name and password are printed on the HG659b cover label. On Windows XP Step 1 Choose Start >... -
Page 24: On Windows 7
Step 4 In the wireless network list, check the WLAN connection status. If the status is Connected, the computer is wirelessly connected to the HG659b. On Windows 7 Step 1 Choose Start > Control Panel > Network and Internet >... -
Page 25: On Google Android 4
Step 3 In the displayed dialog box, enter the WLAN password and click Join. Note that the WLAN password is case sensitive. Step 4 When a check mark appears next to the HG659b's SSID, the device is connected to the wireless network. -
Page 26: Changing Your Wlan Name And Password
Step 4 In the displayed dialog box, enter the WLAN password and click Join. Note that the WLAN password is case sensitive. Step 5 When a check mark appears next to the HG659b's SSID, the device is connected to the wireless network. -
Page 27: Usb Device
USB storage devices use their USB ports to exchange data with other devices. You can connect a USB storage device to your HG659b and access the USB device from your computer. Both the USB drive and removable hard disk can connect to your HG659b. Your HG659b supports the following file systems for reading and writing. -
Page 28: Content Sharing
Accessing to FTP Server Through the User Name and Password Step 1 Connect the mobile storage device to the HG659b's USB port. Step 2 Enable the FTP server, and configure the FTP server settings. 1. Log in to the web management page. - Page 29 Accessing to FTP server Anonymously Step 1 Connect the portable storage device to the HG659b's USB port. Step 2 Enable the FTP server. 1. Log in to the web management page. 2. Choose Share > Storage Share. 3. In Service Settings, select Enable FTP for FTP server.
-
Page 30: Setting The Samba Access Permission
Setting the Samba Access Permission To prevent unauthorized users from accessing data stored in USB devices, you can set the Samba access permission for the HG659b. After this permission is set, only authorized users can access data stored in USB devices. - Page 31 Step 5 Enter \\192.168.1.254 in the address box, and then press Enter. If the access permission of the USB device is set, your identity will be authenticated. During the authentication, follow the onscreen instructions. When the authentication is successful, you will be able to access data stored in the USB device.
-
Page 32: Sharing A Usb Printer
5.4 Sharing a USB Printer HG659b supports USB printers. After you connect a USB printer to your HG659b through the USB port, and install the printer’s driver in your computer, you can access the printer from the Internet or internal network. - Page 33 Printer. 2. Choose Add Printer. 3. Choose Add a network, wireless or Bluetooth printer. The operating system will now attempt to independently make the printer connected locate. If the connected printer can not click The printer that I want isn't listed. be found, 5.
- Page 34 6. Select the model of the printer you want or click Have Disk to manually install the printer drive. Click OK. 7. Click Next. 8. Determine whether to set the printer as the default printer. Click Finish. On Windows 8 Desktop 1.
-
Page 35: Ip Telephony
3. Select IP Printer on the Printer Browser. 4. Set the printer information as follows: − Protocol: Internet Printing Protocol-IPP − Address: 192.168.1.254:631 − Queue: printers/myHG659bPrinter The printer name myHG659bPrinter is the customized name of the printer, which can be any text string up to 40 characters. -
Page 36: Configuring Voip
6.2 Configuring VoIP The HG659b supports VoIP. You can place VoIP calls after your phone is connected to the Phone port on the HG659b. To use the HG659b to place VoIP calls, ask your network service provider to activate VoIP services for you. -
Page 37: Placing A Voip Call
VoIP account, which is also your VoIP call number. Before placing a VoIP call, ensure that the HG659b has connected to the network. When the call is stablished, your VoIP call number is displayed on the called party's phone. -
Page 38: Iptv
STB is conneced to the LAN port on the HG659b. To use the HG659b to watch IPTV, ask your network service provider to activate IPTV services for you. By default, your network service provider will have all related parameters, such as the VLAN id, internet account and password, set for you. -
Page 39: Advanced Configuration
8.1 Parent Control 8.1.1 Controlling Computer Internet Access Your HG659b provides time control function. With this function, you can set limits on the duration of Internet usage. You can confine Internet access to specific computers or deprive specific computers of Internet access. -
Page 40: Configuring The Dmz
Step 6 Click Save. 8.2 Configuring the DMZ The HG659b supports Demilitarized Zone (DMZ), which is used to solve the problem that the external network equipped with a firewall cannot access the internal network server. After DMZ is enabled, the computer that is configured as a DMZ host is exposed to the Internet. -
Page 41: Configuring The Firewall
8.4 Configuring the Firewall The firewall can protect the terminal against malicious access on the WAN port and is used when the HG659b works in routing mode. To configure the firewall, do as follows: Step 1 Log in to the web management page. -
Page 42: Maintenance Guide
9.2 Restoring Default Settings If you restore the HG659b to its default settings, all customized user data will be lost. Use this function only when necessary. -
Page 43: Using The Configuration Tool
If you forget the login password to the web management page or could not access the web management page, use the Reset button on the HG659b rear panel to restore the HG659b to its default settings. Perform this operation with caution. After the HG659b is restored to its default settings, all custom data and settings will be lost, and the password will be restored to user. -
Page 44: Changing The Web Management
9.3 Changing the Web Management Page IP To make the login IP address easy to remember or from avoiding the IP address of the router conflict with other device in your home, you can change the IP address of the router after logging in to the web management page. -
Page 45: Faqs
10 FAQs How can I quickly restore the default settings of the HG659b? When the HG659b is powered on, press and hold the Reset button for 6 or more seconds, and then release it. The HG659b then automatically restarts and the default settings are restored. - Page 46 HG659b are connected properly. Step 2 Check whether the WLAN indicator of the HG659b is on. If the WLAN indicator is off, the WLAN function of the HG659b is disabled. If this is the case, enable the WLAN function. For details about how to enable the WLAN function, see section 5.1 "Enabling or Disabling the WLAN Function."...
- Page 47 If the HG659b cannot access other web sites, restore to the default settings of the HG659b. If the problem persists, contact your service provider. How do I improve the transmission quality of wireless signals? Step 1 Check the positions of the HG659b and computer. Ensure...
- Page 48 If the problem persists, contact your Internet Service Provider.
-
Page 49: Appendix
Password used to log in to admin the web-based configuration utility SSID used to access wireless network Check the label on the HG659b's rear panel WLAN key used to access wireless Check the label on the network HG659b's rear panel... -
Page 50: Technical Specifications
11.2 Technical Specifications Item Specification Power supply 12 V DC, 2 A Ambient temperature 0°C to 40°C (32°F to 104°F) for operation Dimensions (H × W × L) About 232 mm × 181 mm × 35 mm Weight < 350 g (Not including the power adapter) Relative humidity for... -
Page 51: For More Help
12 For More Help Please visit www.huaweidevice.com/worldwide/support/hotline for recently updated hotline and email address in your country or region. - Page 52 HUAWEI TECHNOLOGIES CO., LTD. Huawei Industrial Base Bantian, Longgang Shenzhen 518129 People's Republic of China www.huawei.com...