
Related Manuals for Huawei HG655b


Summary of Contents for Huawei HG655b
- Page 1 HUAWEI HG655b Home Gateway Quick Start 1 Introduction 1.1 Contents in the package HG655b Splitter Power Adapter DSL Cable Ethernet Cable User CD-ROM Warranty Card...
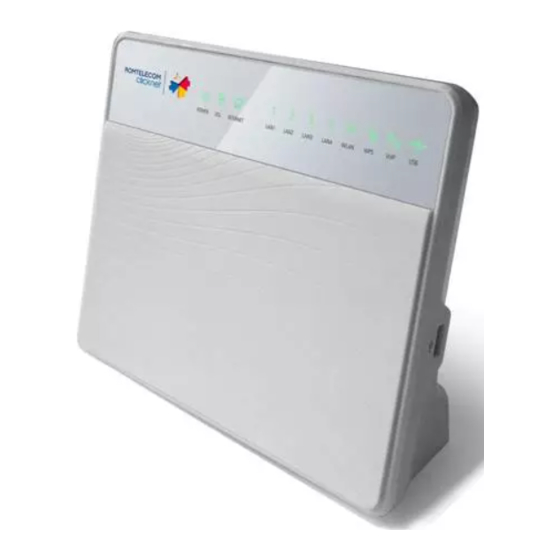
- Page 2 1.2 The Front Panel of the HG655b The front panel of the HG655b provides the following indicators: One power indicator: POWER One ADSL indicator: DSL One Internet indicator: INTERNET Four LAN indicators: LAN1, LAN2, LAN3, LAN4 One WLAN indicator: WLAN...
- Page 3 1.3 The Rear Panel of the HG655b The rear panel of the HG655b provides the following interfaces and buttons: One ADSL interface: DSL Two RJ-11 phone interfaces: PHONE2, PHONE1 Four LAN interfaces: LAN4, LAN3, LAN2, LAN1 One POWER interface: POWER 1.4 The Side Panel of the HG655b...
-
Page 4: Installation Guide
2 Installation Guide To connect the cables for installing the HG655b, do as follows: Telephone jack on the wall Splitter Telephone Set-top box Power adapter... - Page 5 PHONE LINE Step 2 Connect the DSL interface on the HG655b to the MODEM interface on the splitter with a telephone line. 2.2 Connecting telephones to the HG655b Connect a telephone to the PHONE1 or PHONE2 interface of the HG655b. The...
- Page 6 PHONE interface through splitter, refer to 2.1 Connecting the HG655b to the Fixed Network. 2.3 Connecting the PC to the HG655b Connect Ethernet interface on the computer to any of the four LAN interfaces on the rear panel of HG655b with an Ethernet cable.
- Page 7 2.4 Supplying Power to the HG655b Connect the power adapter to the power interface on the back of the HG655b and plug the power adapter into a wall outlet. After you power on the HG655b, the DSL indicator blinks (for less than three minutes), which indicates that the HG655b is being activated.
-
Page 8: Configuring The Hg655B
1. Connect the HG655b with your computer by using the Ethernet cable. 2. Configure the IP address of your computer to be in the same network segment as the HG655b. The default LAN IP address and subnet mask of the HG655b is 192.168.1.1 and 255.255.255.0. -
Page 9: Configuring The Wireless Network Connection
For details, refer to the procedure for enabling the embedded dial-up function described in Step 2 in section "Using the Embedded PPP Dial-Up Software of the HG655b to Get Online." The only difference is to select the Bridge mode not the Routing mode from the Connection mode drop-down combo box. -
Page 10: Configuring The Wireless Connection By The Web Page
If the wireless network adapter on your conputer can support the WPS function, you can connect your computer to the HG655b wirelessly as follows: Step 1 Press the WLAN button on the side panel of the HG655b and hold it for more than two seconds. - Page 11 Wait for a few seconds, and then you can see the Wi-Fi indicator turning red permanently on the front panel of the HG655b and the wireless icon on the corner to the right of the task bar of the PC.
-
Page 12: Trademarks And Permissions
Copyright © Huawei Technologies Co., Ltd. 2010. All rights reserved. Trademarks and Permissions , and are trademarks or registered trademarks of Huawei Technologies Co., Ltd. Other trademarks, product, service and company names mentioned are the property of their respective owners.