
Related Manuals for SATO TH2


Summary of Contents for SATO TH2
-
Page 1: Table Of Contents
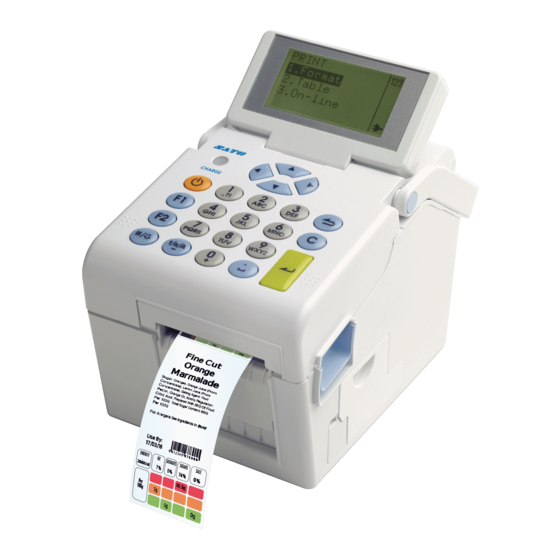
THE SATO TH2 RETAIL LABEL PRINTER USER GUIDE Help & Service for your SATO Printer Setting up your Printer The Keypad Loading the Label Roll Using the Dispenser Label Formats Printing Labels Charging the Battery Cleaning Procedures RS\Mktg\InstGuides\OOB\Mar11... - Page 2 Anti-Microbial Keypad Cover The casing of your TH2 is manufactured from anti-microbial material which dis- courages the growth of bacteria. A keypad cover with the same properties can be added to prevent ingress of food and dust into the keypad.
-
Page 3: Help & Service For Your Sato Printer
Ordering more labels The high quality TH2 labels are manufactured by SATO in the UK and have been especially developed to give the best results in the TH2 printer. These labels are relied upon by many household name stores in UK retail. -
Page 4: Setting Up Your Printer
Setting up your SATO Printer (1) Inside the box: - TH2 Retail Label Printer - Quick Guide - Mains AC Adaptor - Mains Cable Battery LCD Display Charge LED Top cover Carrying Handle Top Cover Label Out Open Latch DC Input... -
Page 5: Power Connection
Setting up your SATO Printer (2) Power Connection AC Adaptor 1. Plug the Mains Power Cable into the AC Adaptor Mains Power Cable 2. Plug the DC Output plug into it’s socket at the rear of the printer. Flat of the... - Page 6 Notes:...
-
Page 7: The Keypad
The Printer Keypad Power On: Power Power Off: Menu: Menu/Page Up Up 1 level: Delete Select Dispense Mode In Print Mode: Pause/Feed Feed Mode: Select Alphanumerics Full Stop/Space... -
Page 8: Loading The Label Roll
Loading the Label Roll SELECT THE TYPE OF LABEL THAT YOU WISH TO PRINT AND INSTALL INTO THE PRINTER AS FOLLOWS: 1. Push the handle fully back. Press the Cover Open Latch (1) and lift up the cover (2). Ensure that the cover is in the “up” position. Media Guides 2. - Page 9 4. Position the edges of the labels under the Label Guides and pull the end of the roll out of the front of the printer. 5. Close the top cover until it clicks into position. Power 6. Press the Power key for 1 second if the printer is turned off.
-
Page 10: Using The Dispenser
Using the Label Dispenser This feature will print and dispense a single label. As soon as the label is removed the printer will issue the next label. This procedure will set up the printer for dispenser use. 1. SWITCH TO THE DISPENSE MODE: - Press the <F1>... - Page 11 4. Thread the label backing paper underneath the black rollers and out of the front of the printer. 5. Close the Dispenser Cover until it locks into position. Tighten the label roll if it is slack. 6. Firmly close the Top Cover until it clicks into position.
-
Page 12: Label Formats
Printing Labels There are 13 common label formats provided with your TH2 printer. Select the function and label required from the table below. Label Formats Label Label Re- Function Label Type order Code Format No. P70010101601 Price, VAT & 1 x... - Page 13 Printer For- Label Re- Function Label Type mat No. order Code P7001010160 Price, Description 1 32 x 25 & Barcode P70010101571 Price, Description 45 x 47 & Barcode P70011017451 Price, Description 45x35 & Barcode P70010144711 Was/Now 28X33 pricing P70010109961 Was/Now 28X33 pricing P70010144861...
-
Page 14: Printing Labels
Printing Labels Printing labels is done by selection of the required label format and following the on- screen prompts. Label Format 9, text, price and barcode is used in this example. 1. Ensure that the printer is switched ON. (Hold the Power key for 1 second). Select the required label format number by scrolling the list or by entering the Format number. - Page 15 4. Input the Barcode data. The standard EAN13 code requires 12 digits. Press <ENTER> The 13th digit is calculated automatically. 5. Enter the required number of labels and press <ENTER>. Your labels will be printed immediately. NOTE that for safety reasons, there is no serrated edge to tear your labels.
-
Page 16: Charging The Battery
Optional Battery Installation & Charging Fitting the Battery Put the terminal end of the battery The battery can now be removed. into the compartment first. Push the battery inwards until it is locked in place by the Blue Locking Tab. Close the battery cover. Charging the Battery Removing the Battery Lower the Battery Compartment... -
Page 17: Cleaning Procedures
Cleaning Procedures Regular cleaning will ensure that your SATO printer always produces high quality labels. Please follow the procedure below each month. Switch off the printer. Ensure that the cover is in the Press the Cover Open Latch (1). “up” position. - Page 18 Label whole surface. Guides. Close the Top Cover and the printer is ready for use. For effective cleaning use SATO Cleaning wipes, Product Code Y70190103786 Assistance for your SATO Printer Call: 01255 252828 e-mail: techsupport@satouk.com...