Brother MFC-9140CDN Advanced User's Manual
Hide thumbs
Also See for MFC-9140CDN:
- User manual (243 pages) ,
- Basic user's manual (234 pages) ,
- Advanced user's manual (78 pages)
Table of Contents
Advertisement
Advertisement
Table of Contents

Related Manuals for Brother MFC-9140CDN


Summary of Contents for Brother MFC-9140CDN
- Page 1 Advanced User’s Guide MFC-9140CDN MFC-9340CDW Version 0 CHN-ENG...
- Page 2 Wi-Fi Direct™ Guide This Guide provides details on how to PDF file / Brother Solutions configure and use your Brother machine for Center (MFC-9340CDW) wireless printing directly from a mobile device supporting the Wi-Fi Direct™...
- Page 3 This Guide provides information for using PDF file / Brother Solutions AirPrint to print from OS X v10.7.x, 10.8.x Center and your iPhone, iPod touch, iPad, or other iOS device to your Brother machine without installing a printer driver. Visit us at http://solutions.brother.com/.
-
Page 4: Table Of Contents
Table of Contents General Setup Memory storage .....................1 Ecology features ....................1 Toner Save ......................1 Sleep Time ......................2 Deep Sleep mode ....................2 Touchscreen ......................3 Setting the backlight brightness...............3 Setting the Dim Timer for the backlight ............3 Dial Prefix ......................4 Setting up the prefix number ................4 Changing the prefix number ................4 Setting the Fax Logic (sending and receiving sequence) ........5 Security features... - Page 5 Sending a fax Additional sending options................... 15 Sending faxes using multiple settings ............15 Changing a 2-sided fax layout (MFC-9340CDW) ..........16 Contrast ......................17 Changing Fax Resolution ................17 Additional sending operations................18 Sending a fax manually ................. 18 Dual access ....................18 Broadcasting....................
- Page 6 Dialling and storing numbers Telephone line services ..................44 Caller ID (Caller IDentification) (not available in certain area).......44 Advantages of Caller ID.................44 Setup Method ....................45 Caller ID feature ....................45 Additional dialling operations ................46 Combining Address Book numbers ...............46 Additional ways to store numbers ................47 Storing Address Book numbers from Outgoing Calls ........47 Storing Address Book numbers from the Caller ID history ......47 Setting up Groups for Broadcasting ..............48...
- Page 7 Routine maintenance Checking the machine ..................64 Printing the test print..................64 Checking the Page Counters.................64 Checking the remaining life of toner cartridges ..........65 Checking the remaining life of parts .............. 65 Replacing periodic maintenance parts..............66 Packing and shipping the machine ..............67 Glossary Index...
-
Page 9: General Setup
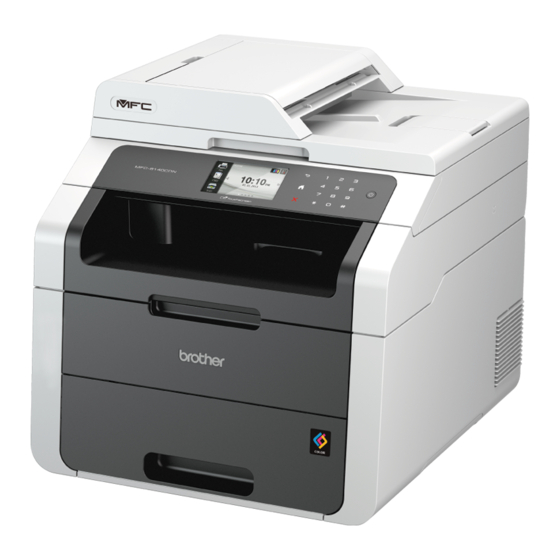
General Setup Ecology features NOTE Most of the illustrations in this User’s Guide show the MFC-9340CDW. Toner Save You can save toner using this feature. When Memory storage you set Toner Save to On, print appears lighter. The factory setting is Off. Your menu settings are stored permanently, and in the event of a power failure will not be Press... -
Page 10: Sleep Time
Chapter 1 Sleep Time Deep Sleep mode The Sleep Time setting can reduce power If the machine is in Sleep mode and does not consumption. When the machine is in Sleep receive any jobs for a certain length of time, mode (Power Save mode) it acts as though it the machine will go into Deep Sleep mode is turned off. -
Page 11: Touchscreen
General Setup Touchscreen Setting the Dim Timer for the backlight Setting the backlight You can set how long the Touchscreen LCD brightness backlight stays on after you go back to your Home screen. You can adjust the brightness of the Touchscreen LCD backlight. -
Page 12: Dial Prefix
Chapter 1 Dial Prefix Changing the prefix number The Dial Prefix setting will automatically dial a Press predefined number before every fax number you dial. For example: If your telephone Press All Settings. system requires a 9 to dial an outside number, use this setting to automatically dial Swipe up or down, or press a or b to 9 for every fax you send. -
Page 13: Setting The Fax Logic (Sending And Receiving Sequence)
General Setup Setting the Fax Logic Press (sending and receiving Press All Settings. sequence) Swipe up or down, or press a or b to display Fax. You can change the process of manual fax send or receive. If you often send or receive Press Fax. -
Page 14: Security Features
Fax TX and Fax RX are enabled. Color Print Page Limit Scan includes scan jobs via Brother iPrint&Scan. Print and Color Print include print jobs via AirPrint, Google Cloud Print and Brother iPrint&Scan. For MFC-9340CDW Available for Print, USB Direct Print and Copy. -
Page 15: Before You Begin To Use Secure Function Lock 2.0
Confirm New Password field. Type “vmachine’s IP address/” into 4 Click Submit. your browser’s address bar (where “machine’s IP address” is the IP address of the Brother machine). For example: v192.168.1.2/ NOTE You can find the machine’s IP address in... -
Page 16: Setting And Changing The Administrator Password
Chapter 2 Setting and changing the Changing the administrator password Administrator Password Click Administrator. You can configure these settings using a web Click Secure Function Lock. browser. To set up the web page, see Before you begin to use Secure Function Lock 2.0 Type a four-digit number for the on page 7. -
Page 17: Setting Up Restricted Users
Security features Setting up restricted users Setting up and changing the Public user mode You can set up users with restrictions and a password. You can set up to 25 restricted Public user mode restricts the functions that users. are available for all users who do not have a password. -
Page 18: Turning Secure Function Lock On/Off
Make a careful note of the administrator password. If you enter the wrong password, the Touchscreen will show Wrong Password. Enter the correct password. If you forget it, contact Brother customer service. Turning Secure Function Lock on Turning Secure Function Lock off... -
Page 19: Switching Users
Security features Switching Users Changing to the Public mode This setting allows you to switch between Press XXXXX registered restricted users or Public mode when Secure Function Lock is turned on. (Where xxxxx is the user’s name.) Changing to the restricted user mode Press Go to Public. -
Page 20: Setting Lock
Contact your Swipe up or down, or press a or b to administrator or Brother customer service. display General Setup. While the Setting Lock is On, you cannot access the machine settings. -
Page 21: Changing The Setting Lock Administrator Password
Security features Changing the Setting Lock Turning Setting Lock on/off administrator password If you enter the wrong password, the Touchscreen will show Wrong Password. Enter the correct password. Press Turning Setting Lock on Press All Settings. Swipe up or down, or press a or b to Press display General Setup. -
Page 22: Dial Restriction
Chapter 2 Dial Restriction Address Book restriction This feature is to prevent users from sending Press a fax or call to a wrong number by mistake. You can set the machine to restrict dialling Press All Settings. when you use the dial pad, Address Book and Shortcuts. -
Page 23: Sending A Fax
Sending a fax Additional sending Press Options. options Swipe up or down, or press a or b to display the setting you want, and then press the setting. Sending faxes using multiple Press the option you want. settings Do one of the following: Before you send a fax, you can change any ... -
Page 24: Changing A 2-Sided Fax Layout (Mfc-9340Cdw)
Chapter 3 Changing a 2-sided fax layout If your document is flipped on the Short edge, press 2-sided Scan: (MFC-9340CDW) Short Edge. You must choose a 2-sided scanning format Short edge before you send a 2-sided fax. The format you choose will depend on the layout of your Portrait Landscape... -
Page 25: Contrast
Sending a fax Contrast Changing Fax Resolution For most documents the default setting of The quality of a fax can be improved by Auto will give the best results. changing the Fax Resolution. Resolution can Auto automatically chooses the appropriate be changed for the next fax. -
Page 26: Additional Sending Operations
Chapter 3 Additional sending Dual access operations You can dial a number and start scanning the fax into memory—even when the machine is sending from memory, receiving faxes or Sending a fax manually printing computer data. The Touchscreen will show the new job number. Manual transmission The number of pages you can scan into the memory will vary depending on the data that... -
Page 27: Broadcasting
Sending a fax Broadcasting How to broadcast a fax Load your document. Broadcasting lets you send the same fax message to more than one fax number. You Do one of the following: can include Groups, Address Book numbers When Fax Preview is set to Off, and up to 50 manually dialled numbers in the same broadcast. - Page 28 Chapter 3 After you enter all the fax numbers by Cancelling a Broadcast in progress repeating steps f and g, press OK. While broadcasting you can cancel the fax currently being sent or the whole broadcast Press Fax Start. job. After the broadcast is finished, the machine will print a broadcast report to Press...
-
Page 29: Real Time Transmission
Sending a fax Real Time Transmission Overseas Mode When you are sending a fax, the machine will If you are having difficulty sending a fax scan the document into the memory before overseas due to a bad connection, then sending it. As soon as the telephone line is turning on Overseas Mode may help. -
Page 30: Delayed Fax
Chapter 3 Delayed Fax Delayed batch transmission You can store up to 50 faxes in the memory Before sending the delayed faxes, your to be sent within a twenty-four hour period. machine will help you economize by sorting all the faxes in the memory by destination and Load your document. -
Page 31: Checking And Cancelling Waiting Jobs
Sending a fax Checking and cancelling Setting your changes as the waiting jobs new default Check which jobs are still waiting in the You can save the fax settings for memory to be sent. If there are no jobs, the Fax Resolution, Contrast, Touchscreen will show No Jobs Waiting. -
Page 32: Restoring All Fax Settings To The Factory Settings
Chapter 3 Restoring all fax settings to Saving fax options as a the factory settings Shortcut You can restore all the fax settings you have You can store all the new fax options you use changed to the factory settings. These frequently by saving them as a Shortcut. -
Page 33: Electronic Cover Page
Sending a fax Electronic cover page Enter the pinyin using the keyboard on the Touchscreen. (To help you enter letters, see Basic User's Guide: You will need to have programmed your Entering Text.) Station ID in order to use this feature (see Press OK. - Page 34 Chapter 3 Composing your own comments Send a cover page for the next fax You can set up two comments of your own. If you want to send a cover page for the next fax, you can add the cover page. Press Do one of the following: ...
-
Page 35: Destination Display
Sending a fax Destination Display Using a printed cover page If you want a printed cover page you can write When you send a fax, the machine displays on, print the sample page and attach it to your the information from the Address Book or the fax. -
Page 36: Polling
Chapter 3 Polling If you are using the scanner glass, the Touchscreen will prompt you to choose one of the following options: Polling lets you set up your machine so other Press Yes to scan another page. people can receive faxes from you, but they Go to step i. - Page 37 Secure polling lets you restrict who can get the documents you set up to be polled. Secure polling only works with Brother fax machines. If another person wants to retrieve a fax from your machine they will have to enter the secure code.
-
Page 38: Receiving A Fax
Receiving a fax Memory Receive Do one of the following: Press Manual to enter the Options forwarding fax number (up to 20 characters) using the keyboard on Memory Receive lets you receive faxes while the Touchscreen (see you are away from the machine. Basic User's Guide: Entering Text). -
Page 39: Fax Storage
Receiving a fax Fax Storage Changing Memory Receive Options The Fax Storage feature lets you store your received faxes in the machine’s memory. You If received faxes are in your machine’s can retrieve stored fax messages from a fax memory when you change the Memory machine at another location using the remote Receive operations, the Touchscreen will ask retrieval commands (see Retrieving fax... -
Page 40: Turning Off Memory Receive Options
Chapter 4 Turning off Memory Receive The Touchscreen will ask you this question: Options Send Fax to PC? • If you press Yes, faxes in the memory will be sent to your computer before Press the setting changes. You will be asked if you want to turn on Backup Print. -
Page 41: Remote Retrieval
Receiving a fax Remote retrieval NOTE You can change your code at any time. To You can call your machine from any touch- make your code inactive, press and hold tone phone or fax machine and then use the at step g to restore the default setting remote access code and remote commands –... -
Page 42: Remote Fax Commands
Chapter 4 Remote fax commands Follow the commands in the table to access features when you are away from the machine. When you call the machine and enter your remote access code (3 digits followed by l), the system will give two short beeps and you must enter a remote command. -
Page 43: Retrieving Fax Messages
Receiving a fax Retrieving fax messages Changing the Fax Forwarding number You can call your machine from any touch- tone telephone or fax machine and have your You can change your fax forwarding number fax messages sent to another machine. from another touch-tone telephone or fax Before you use this feature, you have to turn machine. -
Page 44: Additional Receiving Operations
Chapter 4 Additional receiving 2-sided printing for Fax mode operations Your machine prints received faxes on both sides of the paper when 2-sided is set to Printing a reduced incoming Use A4 sized paper for this function (60 to 105 g/m If you choose On, the machine reduces each page of an incoming fax to fit on one page of Press... -
Page 45: Setting The Fax Receive Stamp
Receiving a fax Setting the Fax Receive Setting the Print Density Stamp You can adjust the Print Density setting to make your printed pages darker or lighter. You can set the machine to print the received date and time at the top centre of each received fax page. -
Page 46: Printing A Fax From The Memory
Chapter 4 Printing a fax from the Out of Paper Reception memory As soon as the paper tray becomes empty during fax reception, the Touchscreen shows If you choose Fax Storage, you can still No Paper. Load paper in the paper tray (see print a fax from the memory when you are at Basic User's Guide: Loading paper and print your machine (see Fax Storage on page 31). -
Page 47: Avoiding Incoming Fax/Call From Specific Numbers
Receiving a fax Avoiding incoming Fax/Call Deleting blocking list numbers from specific numbers Press If you do not want to receive a fax/call from specific numbers, you can register the Press All Settings. numbers to the list. The machine can store up Swipe up or down, or press a or b to to 100 fax/telephone numbers. - Page 48 Chapter 4 Printing the blocking list Press Press All Settings. Swipe up or down, or press a or b to display Fax. Press Fax. Swipe up or down, or press a or b to display Setup Receive. Press Setup Receive. Swipe up or down, or press a or b to display Anti-Junk Fax.
-
Page 49: Polling
Secure polling only works with Brother fax pay for the call. It also lets you call somebody machines. If you want to get a fax from a else’s fax machine and receive a fax from it,... - Page 50 Chapter 4 Delayed polling Sequential polling Delayed polling lets you set the machine to Sequential polling lets you request begin polling receive at a later time. You can documents from several fax machines in one only set up one delayed polling operation. operation.
- Page 51 Receiving a fax You can add numbers to the broadcast Stop Polling in the following ways: To cancel the polling process, press while Press Add Number and enter a the machine is dialling. number using the keyboard on the To cancel all sequential polling receive jobs, Touchscreen.
-
Page 52: Dialling And Storing Numbers
• Please switch your mode following in certain area) instructions of the Setup Method. Contact your local telephone company or Brother Caller ID is a telephone service that allows Customer Service in the case that the the subscriber to see a display of the caller’s feature does not work normally. -
Page 53: Setup Method
Dialling and storing numbers Setup Method Caller ID feature The Caller ID feature lets you use the Caller ID subscriber service offered by many local Press telephone companies. Call your telephone company for details. This service shows the Press All Settings. telephone number, or name if it is available, Swipe up or down, or press a or b to of your caller as the line rings. -
Page 54: Additional Dialling Operations
(see Basic User's Guide: Storing Numbers). For example, you might have stored ‘01632’ in Address Book: Brother 1 and ‘960555’ in Address Book: Brother 2. You can use them both to dial ‘01632-960555’ if you press the... -
Page 55: Additional Ways To Store Numbers
Dialling and storing numbers Additional ways to Storing Address Book numbers from the Caller ID store numbers history Storing Address Book If you have the Caller ID subscriber service numbers from Outgoing Calls from your telephone company, you can also store Address Book numbers from incoming calls in the Caller ID history. -
Page 56: Setting Up Groups For Broadcasting
Chapter 5 Setting up Groups for Add Address Book numbers to the Group by pressing them to display a red Broadcasting checkmark. Press OK. A Group, which can be stored in the Address Book, allows you to send the same fax Read and confirm the displayed list of message to many fax numbers by pressing names and numbers you have chosen,... - Page 57 Dialling and storing numbers Changing a Group name Deleting a Group Press (Fax). Press (Fax). Press Address Book. Press Address Book. Press Edit. Press Edit. Press Change. Press Delete. Swipe up or down, or press a or b to Swipe up or down, or press a or b to display the Group you want.
- Page 58 Chapter 5 Adding or deleting Group members Press (Fax). Press Address Book. Press Edit. Press Change. Swipe up or down, or press a or b to display the Group you want. Press the Group name. Swipe up or down, or press a or b to display Add/Delete.
-
Page 59: Printing Reports
Printing reports Fax reports Swipe up or down, or press a or b to choose an interval. If you choose Every 50 Faxes, go to step m. Press on the Touchscreen to set up the 6, 12, 24 hours, 2 or 7 days Transmission Verification Report and the Journal Period. -
Page 60: Reports
Chapter 6 Reports How to print a report The following reports are available: Press 1 XMIT Verify Displays the Transmission Verification Press All Settings. Report for your last outgoing 200 faxes Swipe up or down, or press a or b to and prints the last report. -
Page 61: Making Copies
Making copies Copy settings Improving copy quality You can choose from a range of quality You can change the copy settings for the next settings. The factory setting is Auto. copy. Auto These settings are temporary. The machine returns to its default settings one minute after Auto is the recommended mode for copying. -
Page 62: Enlarging Or Reducing Copies
Chapter 7 Enlarging or reducing copies 100%* To enlarge or reduce the next copy follow 200% these steps: 141% A5A4 104% EXELTR Load your document. 97% LTRA4 94% A4LTR Press (Copy). 91% Full Page 85% LTREXE Enter the number of copies you want. 83% LGLA4 Press Options. -
Page 63: 2-Sided Copying
ADF. the following options before you can start Portrait 2-sided copying. The layout of your document determines which 2-sided copy layout you 2–sidedi2–sided should choose. MFC-9140CDN Portrait 1–sidedi2–sided Long Edge Flip 1–sidedi2–sided Long Edge Flip ... - Page 64 Chapter 7 Landscape Swipe up or down, or press a or b to display the following layout options: 2–sidedi2–sided Off, 2-sided2-sided 1-sided2-sided Long Edge Flip, 2-sided1-sided Long Edge Flip 1-sided2-sided Short Edge Flip, 1–sidedi2–sided Long Edge Flip 2-sided1-sided Short Edge Flip For MFC-9340CDW Press the option you want.
-
Page 65: Adjusting Density And Contrast
Making copies Adjusting Density and Contrast Contrast Adjust the contrast to help an image look sharper and more vivid. Load your document. Density Adjust the copy density to make copies Press (Copy). darker or lighter. Load your document. Enter the number of copies. Press Options. -
Page 66: Sorting Copies
Chapter 7 Sorting copies Making N in 1 copies (page layout) You can sort multiple copies. Pages will be sorted in the order 1 2 3, 1 2 3, 1 2 3, and so You can reduce the amount of paper used when copying by using the N in 1 copy feature. - Page 67 Making copies If you are using the scanner glass, go If you are copying from the scanner to step k. glass: Place your document face down in the After the machine scans the page, press direction shown in the illustration: Scan to scan the next page.
-
Page 68: In 1 Id Copy
Chapter 7 2 in 1 ID Copy Press Colour Start or Mono Start. The machine starts scanning one side of the identification card. You can copy both sides of your identification card onto one page, keeping the original card After the machine has scanned one size. -
Page 69: Adjusting The Colour Saturation
Making copies Adjusting the Colour Making 2-sided N in 1 copies Saturation (MFC-9340CDW) You can change the default setting for colour When you make 2-sided N in 1 copies from a saturation. 2-sided document, you must choose a layout option in 2-sided Copy Page Layout. Load your document. -
Page 70: Removing Background Colour
Chapter 7 Removing Background Select 2in1(P), 2in1(L), 4in1(P) or 4in1(L) in Page Layout (see Colour Making N in 1 copies (page layout) on page 58). Remove Background Colour removes the background colour of the document when Swipe up or down, or press a or b to copying. -
Page 71: Saving Copy Options As A Shortcut
Making copies Saving copy options as a Saving paper Shortcut You can use the Paper Save preset to reduce the amount of paper consumed for copies. You can store the copy options you use most Paper Save uses the 4 in 1 layout and 2-sided often by saving them as a Shortcut. -
Page 72: Routine Maintenance
Routine maintenance Checking the machine Checking the Page Counters You can see the machine’s Page Counters Printing the test print for copies, printed pages, reports and lists, faxes or a summary total. You can print a Test Print page to check your print quality. -
Page 73: Checking The Remaining Life Of Toner Cartridges
Routine maintenance Checking the remaining life of Checking the remaining life of toner cartridges parts You can see the approximate remaining life You can see the machine’s parts life on the of the toner cartridges. Touchscreen. Press Press Press Toner Life. Press All Settings. -
Page 74: Replacing Periodic Maintenance Parts
The Fuser Unit and PF Kit parts listed in the table must be replaced after printing approximately 50,000 pages . Contact Brother customer service when these messages appear on the Touchscreen. Touchscreen Description message Replace the fuser unit. -
Page 75: Packing And Shipping The Machine
Routine maintenance Packing and shipping Press and hold down to turn off the the machine machine. Leave the machine turned off for at least 10 minutes to cool down. Disconnect all the cables, and then WARNING unplug the power cord from the electrical socket. - Page 76 Wrap the machine in a plastic bag, then Place the packing material (2) marked place it on the bottom packing material “R” on the right of the machine. Place (1). the packing material (3) marked “L” on the left of the machine. Place the AC power cord and printed materials in the original carton as shown in the illustration.
-
Page 77: B Glossary
Glossary This is a comprehensive list of features and terms that appear in Brother manuals. Availability of these features depends on the model you purchased. Batch Transmission 3.7 in. (93.4 mm) Touchscreen LCD and Touchpanel As a cost saving feature, all delayed faxes... - Page 78 F/T Ring Time Manual fax The length of time that the Brother When you press Hook to hear the machine fast double-rings (when the receiving fax machine answer before you Receive Mode setting is Fax/Tel) to notify press Fax Start to begin transmission.
- Page 79 Glossary Out of Paper Reception Remote Retrieval Access The ability to access your machine Receives faxes into the machine’s remotely from a touch tone telephone. memory when the machine is out of paper. Overseas Mode Resolution Makes temporary changes to the fax The number of vertical and horizontal lines tones to accommodate noise and static on per inch.
- Page 80 User Settings List A printed report that shows the current settings of the machine. Xmit Report (Transmission Verification Report) A listing for each transmission, that shows its date, time and number.
-
Page 81: Index
Index Numerics Copy 2 in 1 ID Copy ........60 2-sided ..........55 2-sided copy ..........55 button ........... 53 contrast ..........57 Density ..........57 Enlarge/Reduce ........54 Address Book N in 1 (page layout) ......58 broadcasting .........19 quality ........... 53 using Groups ........19 saving paper ......... - Page 82 Fax codes Machine information changing ..........33 checking remaining life of parts .... 65 remote access code ......33 page counts .......... 64 Fax forwarding Macintosh changing remotely ......34 See Software User's Guide. programming a number ......30 Maintenance, routine ....... 64 Fax storage ..........31 checking the remaining life of parts ..
- Page 83 ® Quality Windows copying ..........53 See Software User's Guide. Wireless Network See Quick Setup Guide and Network User's Guide. Reducing copies ...........54 incoming faxes ........36 Remote retrieval ........33 access code ..........33 commands ..........34 getting your faxes .........35 Remote setup See Software User's Guide. Reports ..........
- Page 84 Visit us on the World Wide Web http://www.brother.com/ These machines are approved for use in the country of purchase only. Local Brother companies or their dealers will only support machines purchased in their own countries. www.brotherearth.com...